PhotoLab 4 with X-rite i1Display Studio display calibrator

That sounds logical to me. I will ignore things for right now, and if I don’t really need it, I’ll delete it from my computer.

The documentation they provided was awful. It doesn’t help any that I don’t understand what I’m doing, or why. I suspect things are working right now??

My device is plugged in now, but if I cover the i1Display Studio window nothing happens on either display.

I certainly agree with simplifying things, and eliminating anything I don’t need.

I’m certain you are right about “ambient light”, but just the screen color around the image makes a difference. PL4 surrounds my image with a very dark gray. My iMac surrounds an image with white. (I wish I had “dark mode” as an option. I know that makes a difference in how I “see” my image. PL4 is better. :slight_smile:

I would have said that is likely to be because the iMac has its own control and the Asus isn’t software controllable.

I guess the ideal lighting conditions for a room for editing pictures should be similar to those you would expect for displaying them when printed. The previous owners of our house chose to line the walls of the majority of this room with pine cladding, which might seem cosy for sitting in but it is far from ideal for viewing prints, for which I have to take them to the end of the room which has wrap around windows.

That might seem fine if all you are doing is sharing on the web but definitely not if you are planning on printing. I have printed several photo club exhibitions and every single image that had been edited on a member’s computer with such settings had to be re-edited to avoid them printing too dark to see shadow detail.

I have said it several times before - 80cd/m2 / 2.2 / 5600k

That’s what I use and, even for web display, I have never had anyone say my images are too bright.

But, if your images are never going to leave the darker recesses of your computer, then by all means use whatever floats your boat :relieved:

Thanks for saving me the effort of replying to him :wink:

1 Like

OK, I’ll take the bait…

I don’t know about the “science based recommendation and iso norm”. All I know is, in the real world, what I do works and has been working for years. But then what does an old woman with over 55 years of photographic experience know?

Actually, I’m the person who doesn’t “belong here” yet, as to me, all that stuff is just numbers, and I can’t relate to those numbers yet - and it doesn’t help that my calibrator stopped working - I need to call and get it corrected or replaced.

To help people who are still unfamiliar with what these terms “mean”, as in what an un-trained person will see when viewing them on his home computer, maybe you and Joanna can attach a sample photograph at your recommended settings, and I will download and view the image on my four Apple computers and on my Lenovo (Windows) laptop? Please (eventually) post the settings, so once I first compare the images, I can then see the settings that were used? It would be better yet if you each used the same image. Since it is a comparison test, I would love it if you both could edit one of my images that I’ve already posted, so I can compare what each of you suggest to what I have been doing.

Hi Mike. You’ve seen plenty of mine in response to your other threads. My screen has always been set to 80cd/m2 / 2.2 / 5600k.

If the “theory” beats my experience, that should mean that anyone looking at them would see them as being too bright and with a slight cold tint. I can look at them on an uncalibrated iPad and see virtually the same rendering as on my other Apple screens.

This will only be true if I’m viewing your images with a calibrated display. I’ve had that for a few days now, and then my i1Display Studio is no longer recognized by my computer. Until then, I won’t be seeing things the way you intend for me to see them.

…which brings up an interesting question. Should I be creating images that YOU will see properly, on your calibrated equipment, or for the great mass of “people” out there using whatever they happen to own, almost certainly not calibrated. My answer, is I should be creating photos that YOU (and others with calibrated equipment) will see correctly, and hopefully everyone else will also get to see a good image, with whatever computer gear they are using.

Do you mean the software or the device? If it’s the device, I have found I sometimes have to unplug it and replug it, sometimes with a restart of my computer in-between.

I think you just about summed that up :stuck_out_tongue_winking_eye: :nerd_face: :sunglasses:

no need to be sarcastic – there is not one solution
Wolfgang

1 Like

You bring up something I didn’t try yet.

The last calibration I did “froze”, and from then on, my computer doesn’t recognize the device when I plug it in.

I installed the i1Display Studio on a different Mac, a MacBook Pro. I downloaded and tried to run the i1Studio diagnostics utility, but it wouldn’t open. I then tried to run the calibration program - nothing happened for a while, but then suddenly the colored squares showed up replacing the message to connect the device, so maybe the device isn’t broken?

Based on what you just wrote, I will re-start my iMac and see if things start working. Maybe the problem is on my computer, and the re-start will fix things. Good idea!

Joanna was right - restarting the computer got my i1Display Studio working again.
I closed the blinds on my windows and doors, to minimize the ambient light.

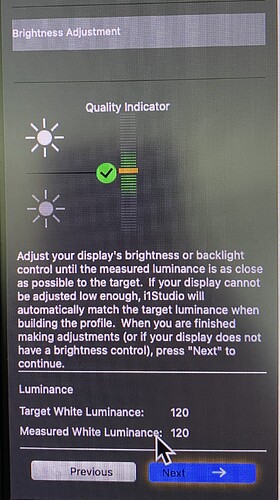
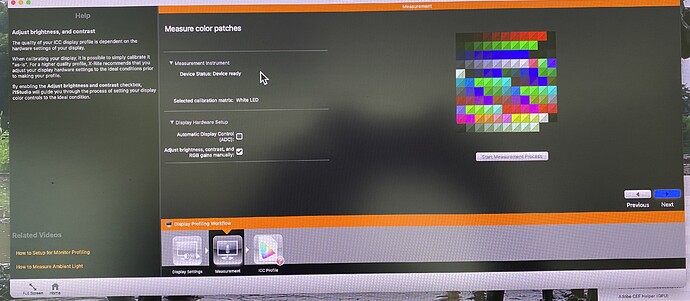
I did a full calibration as before, but this time adjusting my ASUS PB278 monitor brightness so it matched the setting.

That got me to here:

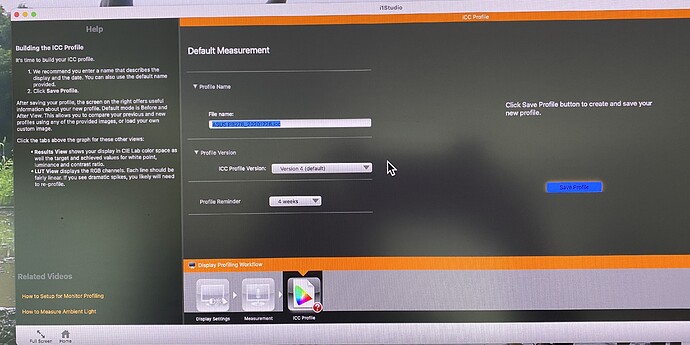
And eventually here:

When I was done, I checked a “before” and “after” photo provided by X-rite. Huge difference in brightness, color - everything. The un-calibrated view looked awful. Really bad.

I closed the screens and brought up PL4 so it overlapped both my screens, the iMac and the ASUS. They were amazingly similar. I couldn’t notice any difference, unless I covered up the ambient lighting sensor on the iMac, making that screen darker.

I then opened up my room blinds. Yikes! The iMac screen adjusted accordingly, getting brighter, and the ASUS remained the same, making it look quite dark. I guess this is the expected result. If I’m editing image in the daytime, I’ll close my blinds, and use the ASUS.

I’m sure I’ll have more questions later, but was it correct to use the default brightness that the software wanted me to match? The “Target White Luminance” was 120. If my main goal is in providing images that will be viewed on the internet, mostly with people’s uncalibrated devices, would a different setting have been more appropriate?

(Thanks to all of you, even the one person who is still upset at me. I may be slow to learn, and slow to do things, but maybe I’m just too old, and I’m slow about just about everything. For better or worse, that’s me. As I learn, I can then apply what I’ve learned for things I do in the future.)

Ok, now send me, via a direct message if you want, a jpeg from a file you have processed, as if you were sending it be printed, as I am interested to see what it looks like on my 80cd/m2 monitor.

Hi Mike (and Joanna of course :),
when doing with pictures, my main goal is printing. – Most of the time my monitor (Eizo CG 2730 // Calibration optimized for greyscale instead of maximum colour space and contrast reduced to 1:400 maximum) is set to 5900 Kelvin, 80 cd/m², AdobeRGB.

Dealing with Internet pictures, not colour compatibel software and special cases, I switch to sRGB colour space. Addionally I chose to calibrate for 6500 and 5000 Kelvin (Adobe + sRGB), but hardly use those settings.

80 cd/m² is less strenuous for my eyes and bright enough to judge the pictures onscreen. BUT worth to note, my viewing conditions are somewhat controlled and stable (horizontal blinds), so there is no need to balance the monitor’s brightness to very bright or even worse changing conditions – impossible to realize with a second screen (I use it for the palettes).

Carry on with Joanna’s ‘Christmas Present’, explaining this stuff so patiently to you!

And before trying out something different, you should understand what you are doing. So, get familiar with it first. – When you want to check your settings, you also might have a look for quality test images

have fun, Wolfgang

1 Like

It’s quite a Christmas Present - what was just mud, floating around in my brain, is starting to make sense. FAR different from even a week ago. I’m beginning to think I understand, but then I find out I didn’t really understand. It’s gradually coming together.

I’ll edit a new image tonight and post here.

I have more questions, but I’ll wait a day or two to ask. The top of my list is “Target White Luminance”, which I have set to 120 as instructed by the software. Had I used 200, the would have made all my photos way to bright, correct? And if I used 100, or 80, that would make for darker images. At some point I want to ask what difference these numbers make, and when to use a different value. If you are mostly printing, and I’m mostly making images to be viewed on-screen, is that how a person would set the value?

Yes, I will download and save the images you suggested. Hope they come with data as to how they were processed.

I’ll post it here in the forum - but I have no idea how I would process an image differently to print, compared with one to be viewed on-screen. I just edit an image, and send it off to be printed - on the rare occasions when I do printing at all… I gave away my color printers long ago. Ink dries out, and laser costs too much. In India, I print things all the time, but they just take my images and do whatever it is they need to do to get good prints.

What exactly does 80cd/m2 mean?

Most screens are (set) too bright, which usually leads to prints being too dark. You might want to create profiles taken at different brightness levels. You can then use these depending on how bright you set your monitor. I find that everything above 100 cd/m² is not comfortable to look at.

https://www.google.com/url?client=internal-element-cse&cx=partner-pub-4727601978582226:gfutcz50vmq&q=http://www.northlight-images.co.uk/why-are-my-prints-too-dark/&sa=U&ved=2ahUKEwikyc-eu-ztAhX5RBUIHVFsB30QFjAAegQIBhAC&usg=AOvVaw0P0t1UiW23eeYXlTE2DL-4

1 Like

You don’t do anything different. The aim of this exercise is to see whether your edit, done on a screen at 120cd/m2, will print or not.

Why I use 80cd/m2 is because I have a completely calibrated workflow from RAW file through to print. My experience is that a brighter screen for editing will produce a darker print than intended. A darker screen produces a file that will print to a calibrated printer without any change at all.

It’s a measure of illumination in Candela per square metre.

I will attach a link to a gallery I made of many of my water photos back in May, this year. These were edited in what was likely a too-bright room, using a display that was also too bright.

Looking at them now on my non-calibrated iMac display, they look good.
Looking at them on my calibrated ASUS, they (and everything else on that screen) looks too dark.
If what you are saying is correct, all of these should look “too dark” to you.

On the other hand, to the rest of the world, for people looking on their non-calibrated every light displays, they will probably look just fine.

If the above is true, photos from my calibrated system should look good to you, but maybe too dark for others. But having been done on a too-bright monitor, the rest of the world, using their too-bright equipment, will see them just fine.

Are you suggesting I change my default setting to something less than 120 as was suggested in the software setup program?

I will do as you suggest, and edit a new photo with my new settings, and post it.

If I’m correct, at some point I will be asking you if I should be creating images that look best to you, on. your calibrated equipment, or to “the rest of the world” who have no idea what calibration is or does, let alone why.

I read the article you linked to, but that is talking mostly about prints. I bet you are right, and if I had some of my images printed, they would come out too dark, unless the printer compensated for this.