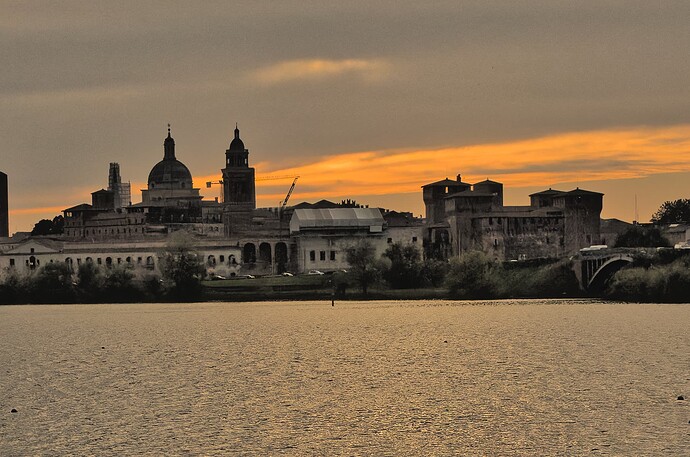
Palazzo Ducale, Mantova rescued thanks to FP

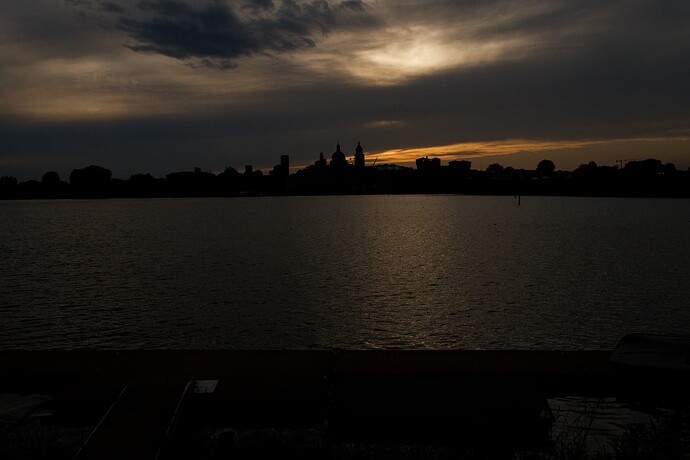
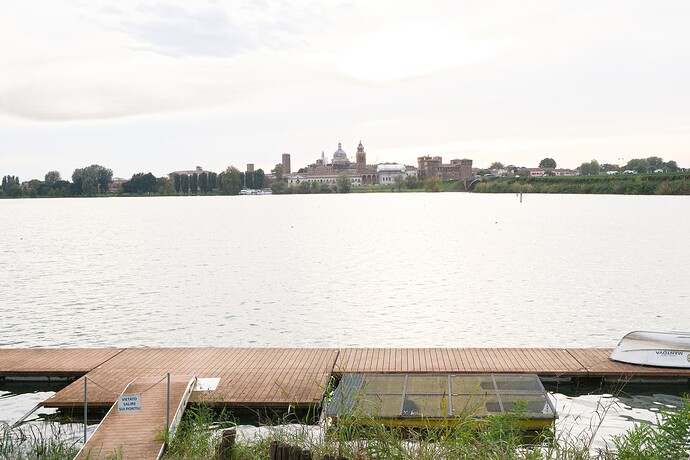
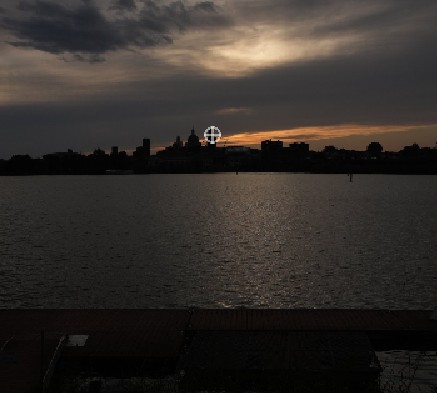
At long last, I have given in to all the advice I found here about needing FP7. Here is my first attempt. Original shot is way too dark (on purpose: I was planning to do an HDR stack).


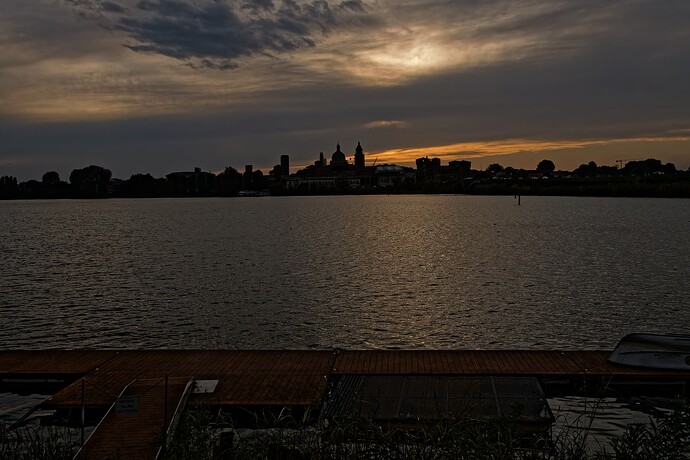
Here was something I could do in PL8 before getting FP as input to the HDR process

Pretty much no joy…
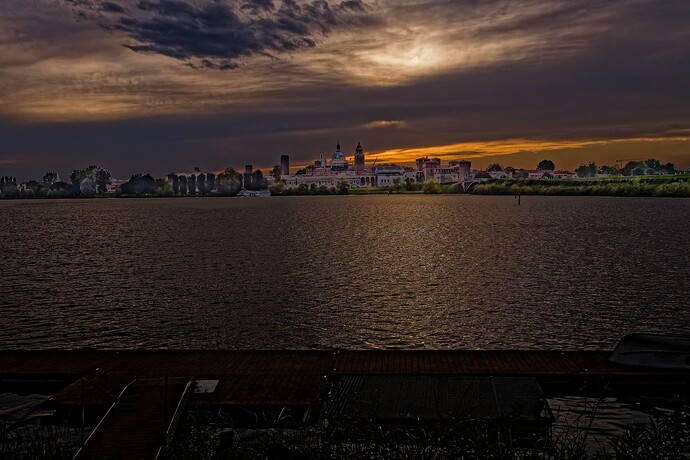
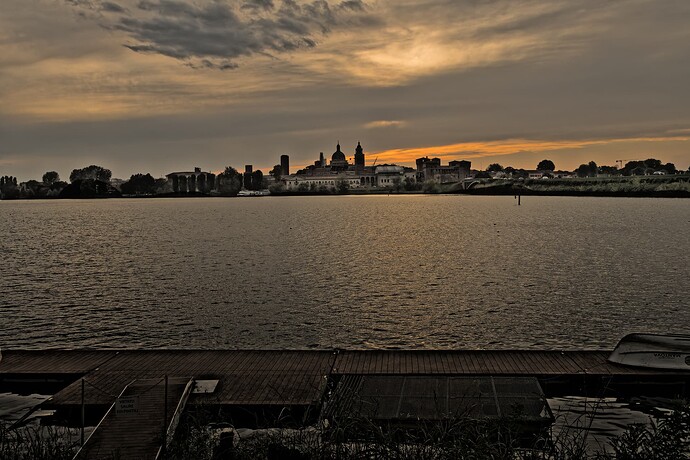
And using the luminosity masking in FP7, finally

I’ve just been through moving from one hosting platform to another, so it will take me time to provide links for the DNG I exported to FP7 (so I wasn’t starting from the original pre-PL8 “negative”) and the associated .DOP file.

As per, C&C welcome.

Interesting. Would you be so kind to as make the RAW available? By DM if you don’t want the world to have it

Gladly, @Joanna
D6700595.ARW (31.8 MB)
Now I have to say I am unsure whether this file is the genuine original. It’s the one I can find in the directory where I process my RAW files. But I had to reverse some of the tweaks I’d made on my way to the starting DNG - they may be in the attached DOP file
D6700595.ARW.dop (20.0 KB).
Now another trick you taught me - alas too late for this case - was about making virtual copies, so I made a virtual copy BEFORE I reversed the tweaks. I can see two icons in the Photo Collection window, but only one in Windows Explorer. I can only hope that this leads back to the yesterday’s starting DNG - which I still have, but will need some free time (Sunday v busy with Mass and long distance family liaison) before I can organise a DL site.
Cheers
Mike

OK, Cracked it. You can download the .DNG intermediate here

Well, I’m not sure why you needed an intermediate DNG. And I really don’t like the over-corrected buildings on the far shore.

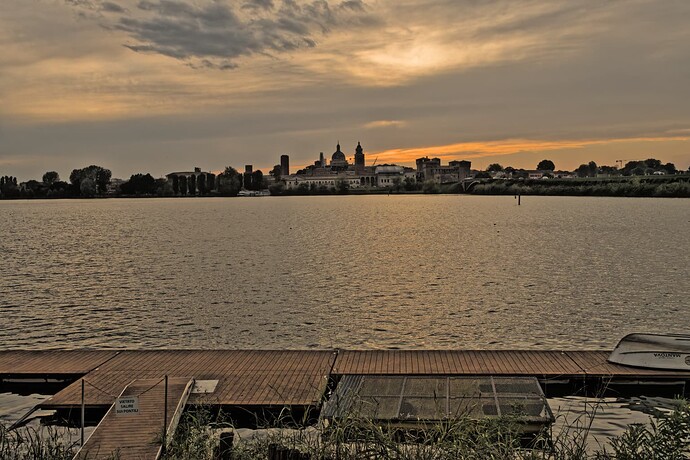
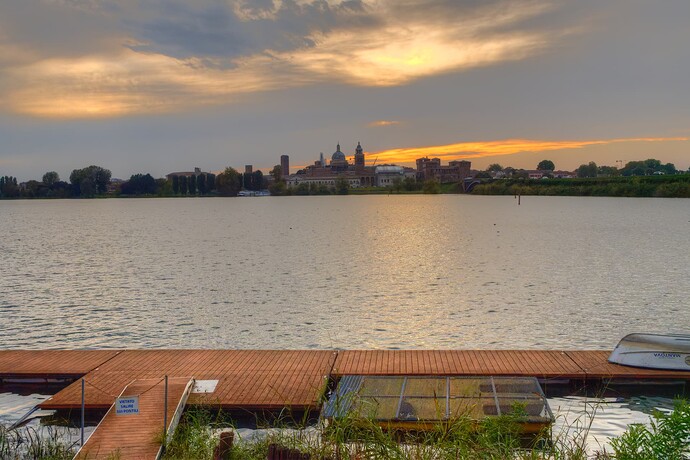
Here’s my version, straight from PL8, with FP7 integrated…

And here is the DOP with my version added…

D6700595.ARW.dop (40,4 Ko)

Actually, no. You just about nailed the exposure for avoiding blowing the sun through the clouds and you didn’t need an HDR stack.

1 Like

But then why use ISO 640 with 1/8000s? You would get more DR at base ISO and the wind isn’t that strong to be afraid of 1/1000s on 24mm.

EDIT: BTW, in the raw data, there are only about 10 pixels above 5600 (14 bits per pixel encoding). So there was still room for making exposure higher by 1 stop, without any meaningful blowups.

1 Like

Indeed. To get the same exposure, with -2EV compensation; you could have used 1/320s @ f/10, ISO 100.

This would not only increase the dynamic range, by using the hyperfocal distance at f/10, you would have got everything from 2.5m to infinity much sharper.

@Joanna, I would be more careful with f/10 - this is APS-C camera. I would use f/5 (probably optimal for this lens/camera), 1/640s, ISO 100, to get one more stop of light, but probably I would also take a shot at 1/1000s.

In such high contrast situations I don’t trust camera metering too much and take 2-3 shots with different exposure in 2/3-1 EV steps, to check at home. You may also use spot-metering or expose for highlights preservation to check what camera thinks. My Z8 tends to expose less than old D4, leaving sometimes too much headroom in the raw data for highlights, so I had to re-learn the gear.

EDIT: The buildings are lit with what I call “dirty light”, so it is rather hopeless to restore colors there. Maybe just concentrate on the mood, leave the horizon as a silhouette, e.g. go down with blacks and go up slightly with shadows and midtones?

Maybe LSC would do well with f/8? Maybe sometimes it’s more important to get equal level of sharpness, rather than to hunt for best details? With CoC=0.020mm, exiftool shows hyperfocal distance 5.75m and focus distance was 13.65m. Probably I would have used similar aperture and focus distance.

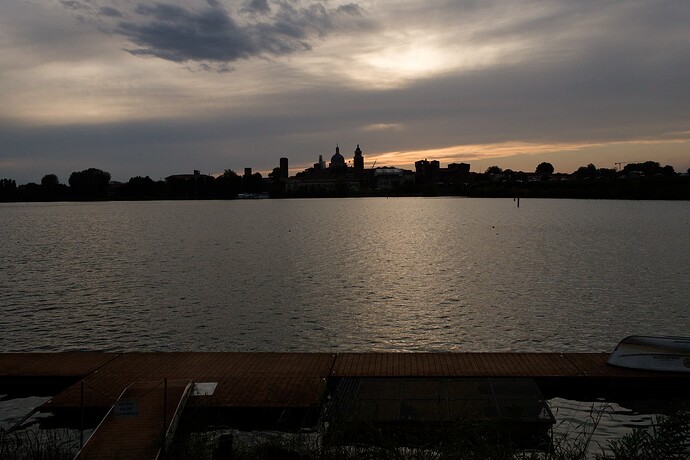
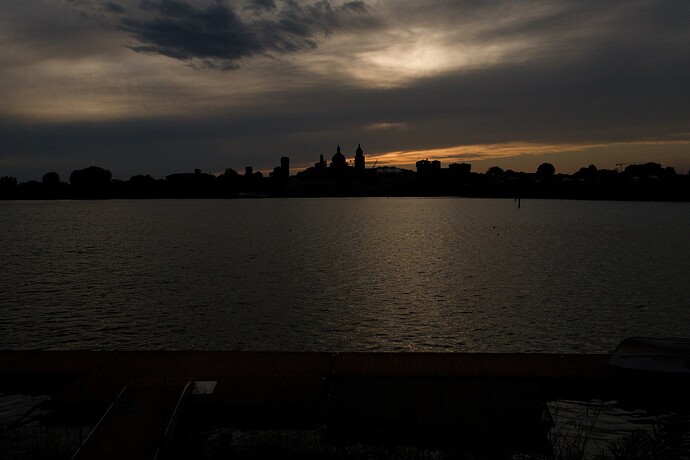
Thanks all for the input. To explain, first: the artistic intent. I wanted a sequence in which the buildings would be exposed correctly (well, +2EV so we could see something of them).


But the sunset would be dramatic. (EV 0)

Or, better still (EV-2 or more - this is -3)

Next:
Some poltergeist (although: the good thing about absentmindedness is that you can’t remember for very long what you are annoyed about forgetting to bring) had removed the tripod mounting plate from my camera, so I had to take all the shots handheld. And the same poltergeist had put the wrong adapter ring for my graduated filters in my bag. So all hand held and all done “au pif” (by instinct is the nearest English I can find) for the output values.
So, Joanna’s version has the buildings the way I wanted them (and I shall dig into how to read .DOP files to understand exactly what happened). On the other hand I would have have wanted to de-emphasise the landing stage and the lake. I think I know how to do that with a graduated filter.
To the discussion about ISO, I didn’t want the foreground in focus. I was hoping that it woulc/could be de-emphasised during the HDR process. And I wanted the sky dark enough to be dramatic…
Not likely to go back to Mantova (unless on the way somewhere else) because 'Er Indoors got food poisoning in the only restaurant certified to be safe for coeliacs, But should it happen, I shall take the shooting tips to heart.

Now, back to the forge to understand Joanna’s advice!
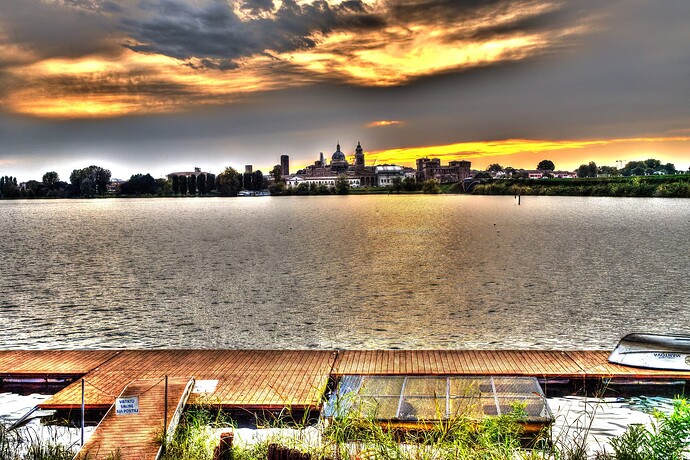
One more try at showing what I intended, starting from Joanna’s DOP

Thanks again
Mike

You are right in thinking of f/5 for the absolute optimum aperture, avoiding diffraction, but… that then limits the available depth of field. Which is why I tend to use f/10, which seems to work as an ideal compromise.

The idea that optimum aperture depends on sensor size is actually an outdated concept and derives from calculating pixel pitch from that size, usually based on 30µm (for full frame) or 30µm (for APS-C) circle of confusion. But both these are based more on film grain size rather than pixel pitch.

Now diffraction on a sensor is dependent on pixel pitch, so whether it is with an APS-C or a full frame sensor, there can be no, or little, difference. The Sony A6700 has a pitch of just under 4µm and my Nikon D850 has a pitch of just over 4µm - so, virtually the same.

With Mike’s image, the focusing distance is recorded in the Exif as 13.65m. So, at f/5, that gives a DoF of 109.8m, from 7.26m to 117m - not enough to reach the horizon without incurring some diffraction.

Whereas, allowing for minor diffraction, using f/10 gives a hyperfocal distance of 3.88m and a DoF from 1.94m to infinity.

I would argue that, since the buildings on the far shore are more important, it is better to go for hyperfocal distance focusing than using the auto-focus.

According to Google Maps, the distance from your viewing point to the palace is around 800m, so DoF is always going to be enormous with a 24mm focal length and, frankly, f/10 or f/5 is fairly irrelevant :stuck_out_tongue_winking_eye:

Ahah! the old “hit and hope” school of metering :wink:

By far the better. The first thing I do with any camera is to run a series of tests to determine how much above 0EV I can expose without losing highlight detail. With my Nikon D850, that works out at an absoute +3EV or a more realistic +2EV for a white highlight - +1EV for a cream highlight. In this image, I would have placed the veiled sun at +2EV.

Now, the Sony A6700 claims a dynamic range of 14 stops, but that is at 100 ISO. I can’t find the DxOMark chart for the Sony but, for my Nikon, at 640 ISO, it drops by 2 stops.


@Mike_Murphy_1948, no matter how you arrived at it, your OOC exposure is as good as it’s going to get. Well done!

In principal, my method for this kind of shot would have been to…

  • set metering to manual
  • turn off the exposure compensation
  • set the aperture to f/10
  • set the shutter speed to as near to 1/100sec as you can manage
  • set the ISO to 100
  • spot read for the brightest part of the sky on the +2EV marker on the meter scale
  • juggle the ISO and speed to avoid camera shake.

Here’s a screenshot of a crop of your image, at 400%, showing the detail on the far shore, exported with DeepPRIME…

Not bad at all :clap:

Wow! @Joanna, what a lot to digest!
First off (and I am literally working downwards from the top, ATM), thanks for the info about diffraction and sensor size. I was way too busy, a million years ago at school, learning about the imperfect subjunctive and agreement of ‘compléments d’objet directe’ to take any notice of science lessons. I shall feel free to ignore that risk and use the tables in PhotoPills more agressively.
Secondly, my own investigation of Sony EXIFs casts a shadow of polite scepticism on their observations about focus distance. Imagine if a certain recent Prime Minister were to announce he had been a castrato since the age of 14 and therefore all his “children” had actually been engendered by … Margaret Beckett. According to A7info (OK, not official Sony issue, but often right on the button with my swallows), the Focus Point is above and slightly to the right of the Duomo’s cupola.
Msntua-A7FP
The circled + sign is where A7info thinks I was focused. And I think in fact I focused manually (though the RAW is in the public domain to challenge my ageing memory). I normally try to use manual focus when setting up panoramas, and - before I realised what bits of kit were AWOL - that had been in my mental image of the scene.
Certainly, 800m is much more plausible than 14-ish or any declarations from that gentleman.
WRT the metering point, from what I remember of the (now receding summer) my spot metering is set to AF point. That is (for non members of the Sony tribe) the automatic metering is only of that sensor area where the camera thinks it has focus. I think this is what @wlodek is recommending - you can imagine how necessary it is for swallows against a blown out sky! I do remember turning it to “average” in the autumn, but I think this was after the visit to Mantua. When shooting panoramas, I normally put the camera in full manual, and rely on what the Sony display is showing about exposure levels - obv. because this means that the occasional white building in the middle of the pines is tonally compatible with the other frames,
Any credit for the - pre-compensation - metering goes to the camera. I only point it.
And lastly, for the detail, well, ditto. It’s a Rolls Royce driven by … Steptoe senior.
PS, my first couple of tries at luminosity masking in PL8/FP7 were handicapped by halos. When you turn down the appropriate combination of highlights, mid-tones, shadows, or blacks, well: Wow!
Thanks to all, and “La lutte continue!”

deleted by me

@Mike_Murphy_1948
I’m not sure if I’ve understood the challenge correctly. For HDR stacking I use Photomatix, I’ve had good experiences with it.

or surreal?

Photomatix can do this easily and is giving a lot of options.
Regards HG

Thanks for commenting, @HGF!

I shall have a look at Photomatix (sounds like a character from Astérix). I must however point out that there is a distinct halo effect around the cathedral cupola. Can I ask whether you started out with the original raw frame?

Kind regards

MM

Your RAW image in DxO
Export to tif (no change in exposure)
RAW exposure -3 and export to tif.
RAW exposure +3 and exported to tif.
Loaded all 3 tifs into Photomatix and created HDR outputs.

The HDR workflow suggested by @HGF would work equally well using Affinity Photo in place of Photomatix. Today (06 Dec 2024) Affinity Photo is cheaper than Photomatix (£33.99 vs £59.25) and AFP is a full blown pixel editor as well.

I couldn’t make Affinity produce the tones I wanted, despite viewing several of Robin Whalley’s u-tube videos and having followed a couple of his courses. I happily accept this is the result of one or more deficiencies on my part rather than Affinity or Robin’s. I am nowhere as far along with my Affinity journey as I am with PL… but I ended up with a tolerable result once I got FP.

FWIW, I am not feeling the love with photomatix yet, but I shall persevere for a few more hours…

@stuck , Thank you for your investigation and for sharing the results.

@Mike_Murphy_1948 , Asterix is small but powerful, maybe Photomatix is similar. :wink:, Would be great if you could share your experiences with Photomatix. However, it would be great if we could cover all the requirements and functions in just ONE tool. (DxO)

Thanks and regards HG

I’m sure I shall get better with it - my second attempt was a serious improvement on the first. And sorry for the Asterix joke, but I couldn’t resist. Had been an Astérix fan since before I started taking photos …

Can’t agree on the idea that we need a single, “supergun” solution… been there in my days as a computer auditor… and I believe in the value of specialisation (and practice!). I’m happy with DxO + photo AI for 95% or more of my work. When I need a pixel editor, Affinity is my goto solution - albeit in a way reminiscent of Thomas pulling some recalcitrant trucks up a long incline (“I think I can! I think I can!”). As an example of which, the latest state of my gradual restoration in Ferrara:


This is the before. And now (drum roll :stuck_out_tongue_winking_eye:), the so far: