Your comment sounds like you’re not expecting a satisfactory answer – and you’re right: PhotoLab is not LightRoom.
.
I still have LR 5.7, which offers three export sharpening modes: low, standard, and high. PL 9, on the other hand, offers bilinear, bicubic, and bicubic-sharper.
To enable a fair comparison:
In PL I exported two different RAW files as full-size TIFFs,
- 1x from a Lumix LX100, 12 MPx, shot indoors at high ISO 1600
- 1x from a Nikon D800, 36 MPx, shot in bright daylight
which I then exported in LR as JPEGs (1024 px long side) with its 3 sharpening modes.
In PL, I used the RAW files from the same source and exported them as JPEGs (1024 px long side) with its 3 sharpening modes.
In short:
The results of the two software sharpening modes were not close. – As it turned out, the most suitable sharpening method depends heavily on the image (megapixels, lighting, image content, etc.), and LR’s standard sharpening did not always deliver the best result.
.
A long time ago, when I was managing a photography club’s website, I received all sorts of images to upload – from razor-sharp to slightly blurry or grainy, and in various color spaces. Back then, I used Photoshop to check and scale the images, and sharpened them in Nik Output Sharpener with the “Display / Adaptive Sharpening” option.
To repeat the process now with Nik 8:
In PL, I used the RAW files from the same source and exported them as TIFFs (as well as JPEGs, both 1024 px long side). – The optimal sharpening could easily be determined based on the final image size. Additionally, a 200% view can be tested, for example, when the presentation gets enlarged (of course not recommended).
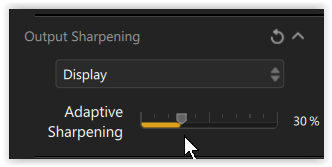
Nik 8 Output Sharpener
Although using one of the preset sharpening modes is convenient (fast), I personally prefer to export the image to the Nik Output Sharpener, which I am familiar with, and adjust the sharpness in the image individually.
![]()