Hy Mike,
There where just phone photo’s of the status of my rebuilding a house interieur.
The old sand box is a fusebox but with the old fuses: porcelain case filled with sand and a silver wire and a spring with a cap wich smelt if the current is to high. And if it’s fused the wire is snapped the spring is released so the cap is nolonger seated in it’s cavity so you know it’s blown.
A slow has a slightly thicker wire and a fast acslightly thinner wire then the normal one.
Biggest problem with these where the smelting speed. Not fast enough to prevent all damage on the circuit with over current.
And an other big issue is when the current is near max of the fuse specifics for a time the wire is still getting hot and get fluid, soft, and the spring which is for indicator of broken wire to release, stretch that hot wire so it gets thinner and thinner wire has a lower fusing current. So your 16 ampere fuse gets a 14A over time.
So i decided to replace that for the one in the image.
This has full protection for gear and people.
Fast re-useable overcurrent protection, human protection bij 30mA currentleakage detection. 3fase power 3x16A for in the future to be placed electrical heating when gas is nolonger available.
Sunpanels provide up to 12A “free” electric.
The hal image are demolision states. I take them so i document for later how it was and how it wil get.
In the inbetween states with rebuilding i can review how i construct something.So i know for instance where my electrical wireing is hidden behind the wall.
Or where a stut is so i can drive a screw in that to get enough grip.
My photographic hobby as getting images of things i stumble in to wile walking around is idle for now due lack of time.
That same lack of time is preventing me from developing images new or old.
Awell when winter is comming i have more time to play with my computer.
For now it’s just reading forums for short moments to keep up and relaxing.
Today i reconstruct the ventialtiontubes, then refitt the beams on the walls 10cm higher then they where😁, then reconstruct the electrical wireing of the hallway.
Create two new light points.
Tomorrow or later if the above isn’t ready, i start with isolation and covering the pipes with drywall plate’s. So my mind and focus is on this. In PL as subject i can Inimitable for you but i think i lost you complete in explaining tech. 
No worries back to images.
exactly that @mwsilvers, what you said.
I use micro contrast often as a form of saturation, dehaze.
Global or local but with care.
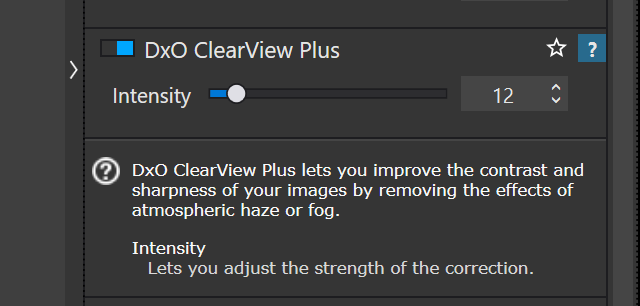
As explained before clearview plus is abit like dehaze, dropping blacklevel dots around in a smarter way then microcontrast dots are. So the sharpening is more selective.
The other type of getting a dull image vibrant, colorfull is using “clarity”. Often confused with the term dehaze.
Dehaze(microcontrast) has sharpening effects so it looks more clear but it can give unreal looks on people and dark/light edges.
Clarity, is a artificial kind of saturation of colors by dropping slightly bigger dots of black around so the plains of colors are less bleeched. In PL it’s fine contrast which does that trick.
Like making a stone wet to see it’s real colors. You darken the stonecolors due the fact there is more sunlight reflected instead of absorped/scatterd around, which bring out the colors.(reflection of a certain part of the hue means you see it as a color.)
Clearview is more like polishing the stone, you polish the stone so the kristals are getting flattend to one plain surface so the different colors are more in line. (less difraction of sunbeams due flatter surface means more visual colors.)
But when there arn’t any details to polish you just sand it down and make it less interesting as a flat piece of cement.
I hope i clarified the difference between fine contrast and microcontrast and the smart cousin clearview plus.
Owh and an other quick clearview/clarity/dehaze action is using the tonecurve.
Drag the bottom of the line a bit down so blacklevel is more present in more pixels.
I use often all three to see which does the job best.