By including the word effectively, I am not wrong. I see things in my photo that are really much lower.
But I’m waiting for you to give me a short explanation that others will understand.
What you and Joanna wrote is mostly technical, and most people wouldn’t have a clue as to what you’re saying. Please give me a single, simple sentence that explains this to the average person with a camera.
To me, “effectively” takes care of that. If you have a better word, please tell me. Preferably one word, in simple English.
Except it doesn’t. It simply moves the image frame within the image circle.
Except you are not looking up or down. You are looking straight and level, just at a different part of the subject. The camera stays at the same height and the focal plane stays level. What you are seeing is the outer part of a much larger image.
I’m sorry but this is best described as “bovine excrement” What you were doing was looking at the lower part of a much larger image.
If you bothered to examine them properly, you would see that they were nine parts of the same picture, which I showed as the last image.
So how is that different from simply lowering or raising the camera with a standard lens?
No you are wrong, indisputably wrong.
Not even “effectively”. You are wrong.
So far, the only person in this discussion that is confused is you.
But this is factually incorrect. You are looking straight ahead but at a lower height - which you could achieve without the palaver of a shift lens.
Then you are talking to the wrong people.
But it can’t. The lens stays in the middle of the front of your camera.
And that is where you should leave it. I watched another video on why you shouldn’t buy one. Basically because a lot of folks think they sound like a good idea, can’t work out how or why to use them and then sell them second-hand, thus losing money and gaining grey hairs in the process.
Being highly experienced in tilt/shift work with my LF camera, I can assure you, in the past 20 years, I have never needed to use one with my digital cameras because I can do the exact same perspective correction in post-processing for €2000 less.
The use of that word doesn’t change the fact that you are wrong.
The average sensible person has absolutely no need to buy or even know about shift lens.
Well, I really like his demonstration of simplifying panoramic shooting and had never thought of shifting the camera instead of the lens. Neat but quite difficult unless you have a sliding rail mount. But then you wouldn’t need the shift lens
One very important thing he said was that these are essentially medium format lenses fitted on the front of a smaller format sensor.
You are all discussing what the CAMERA is seeing, knowing that it is aimed straight ahead, and by selectively cropping, the image can show the tops of buildings, or a pair of shoes in front of a closet.
Our eyes see what they expect to see. Tops of buildings = looking up. Shoe on floor = looking down.
Have any of you read about the “Ames Chair Experiment”?
Technically, you are all correct, and the 9 possible views are ALL shooting straight ahead.
But just as in the above video, if I see the tops of buildings, I feel I am looking upward, and if I see a pair of shoes on the floor, I feel I am looking downward.
The “reality” of the image, as you are all discussing, is all true, and I accept it. But when only see one small section of the full image, THAT suggests to me if I’m looking “up”, or “ahead”, or “down”.
Both the Ames test, and the above video, show how “suggestible” images can be. Of course, none of this matters, once you see the whole picture (instead of the single segment that comes from a shift lens").
Knowing all the above, we can create pictures that appear perfectly normal to the viewer, but it’s all a “trick” - like the chair and the room. Twisting and moving the camera’s lens can create pictures that fool people. Or in my case, seeing things below, which I mistakenly assume were taken with the camera aimed down.
I was thinking of all this for the past few days, and using the PC lens on my Nikon D780 works fine (better than with the D3), but I can only shoot with the Live View turned on - it’s not compatible with the viewfinder (obviously), and the viewfinder just shows “black” when I look through it with the lens adjusted for PC.
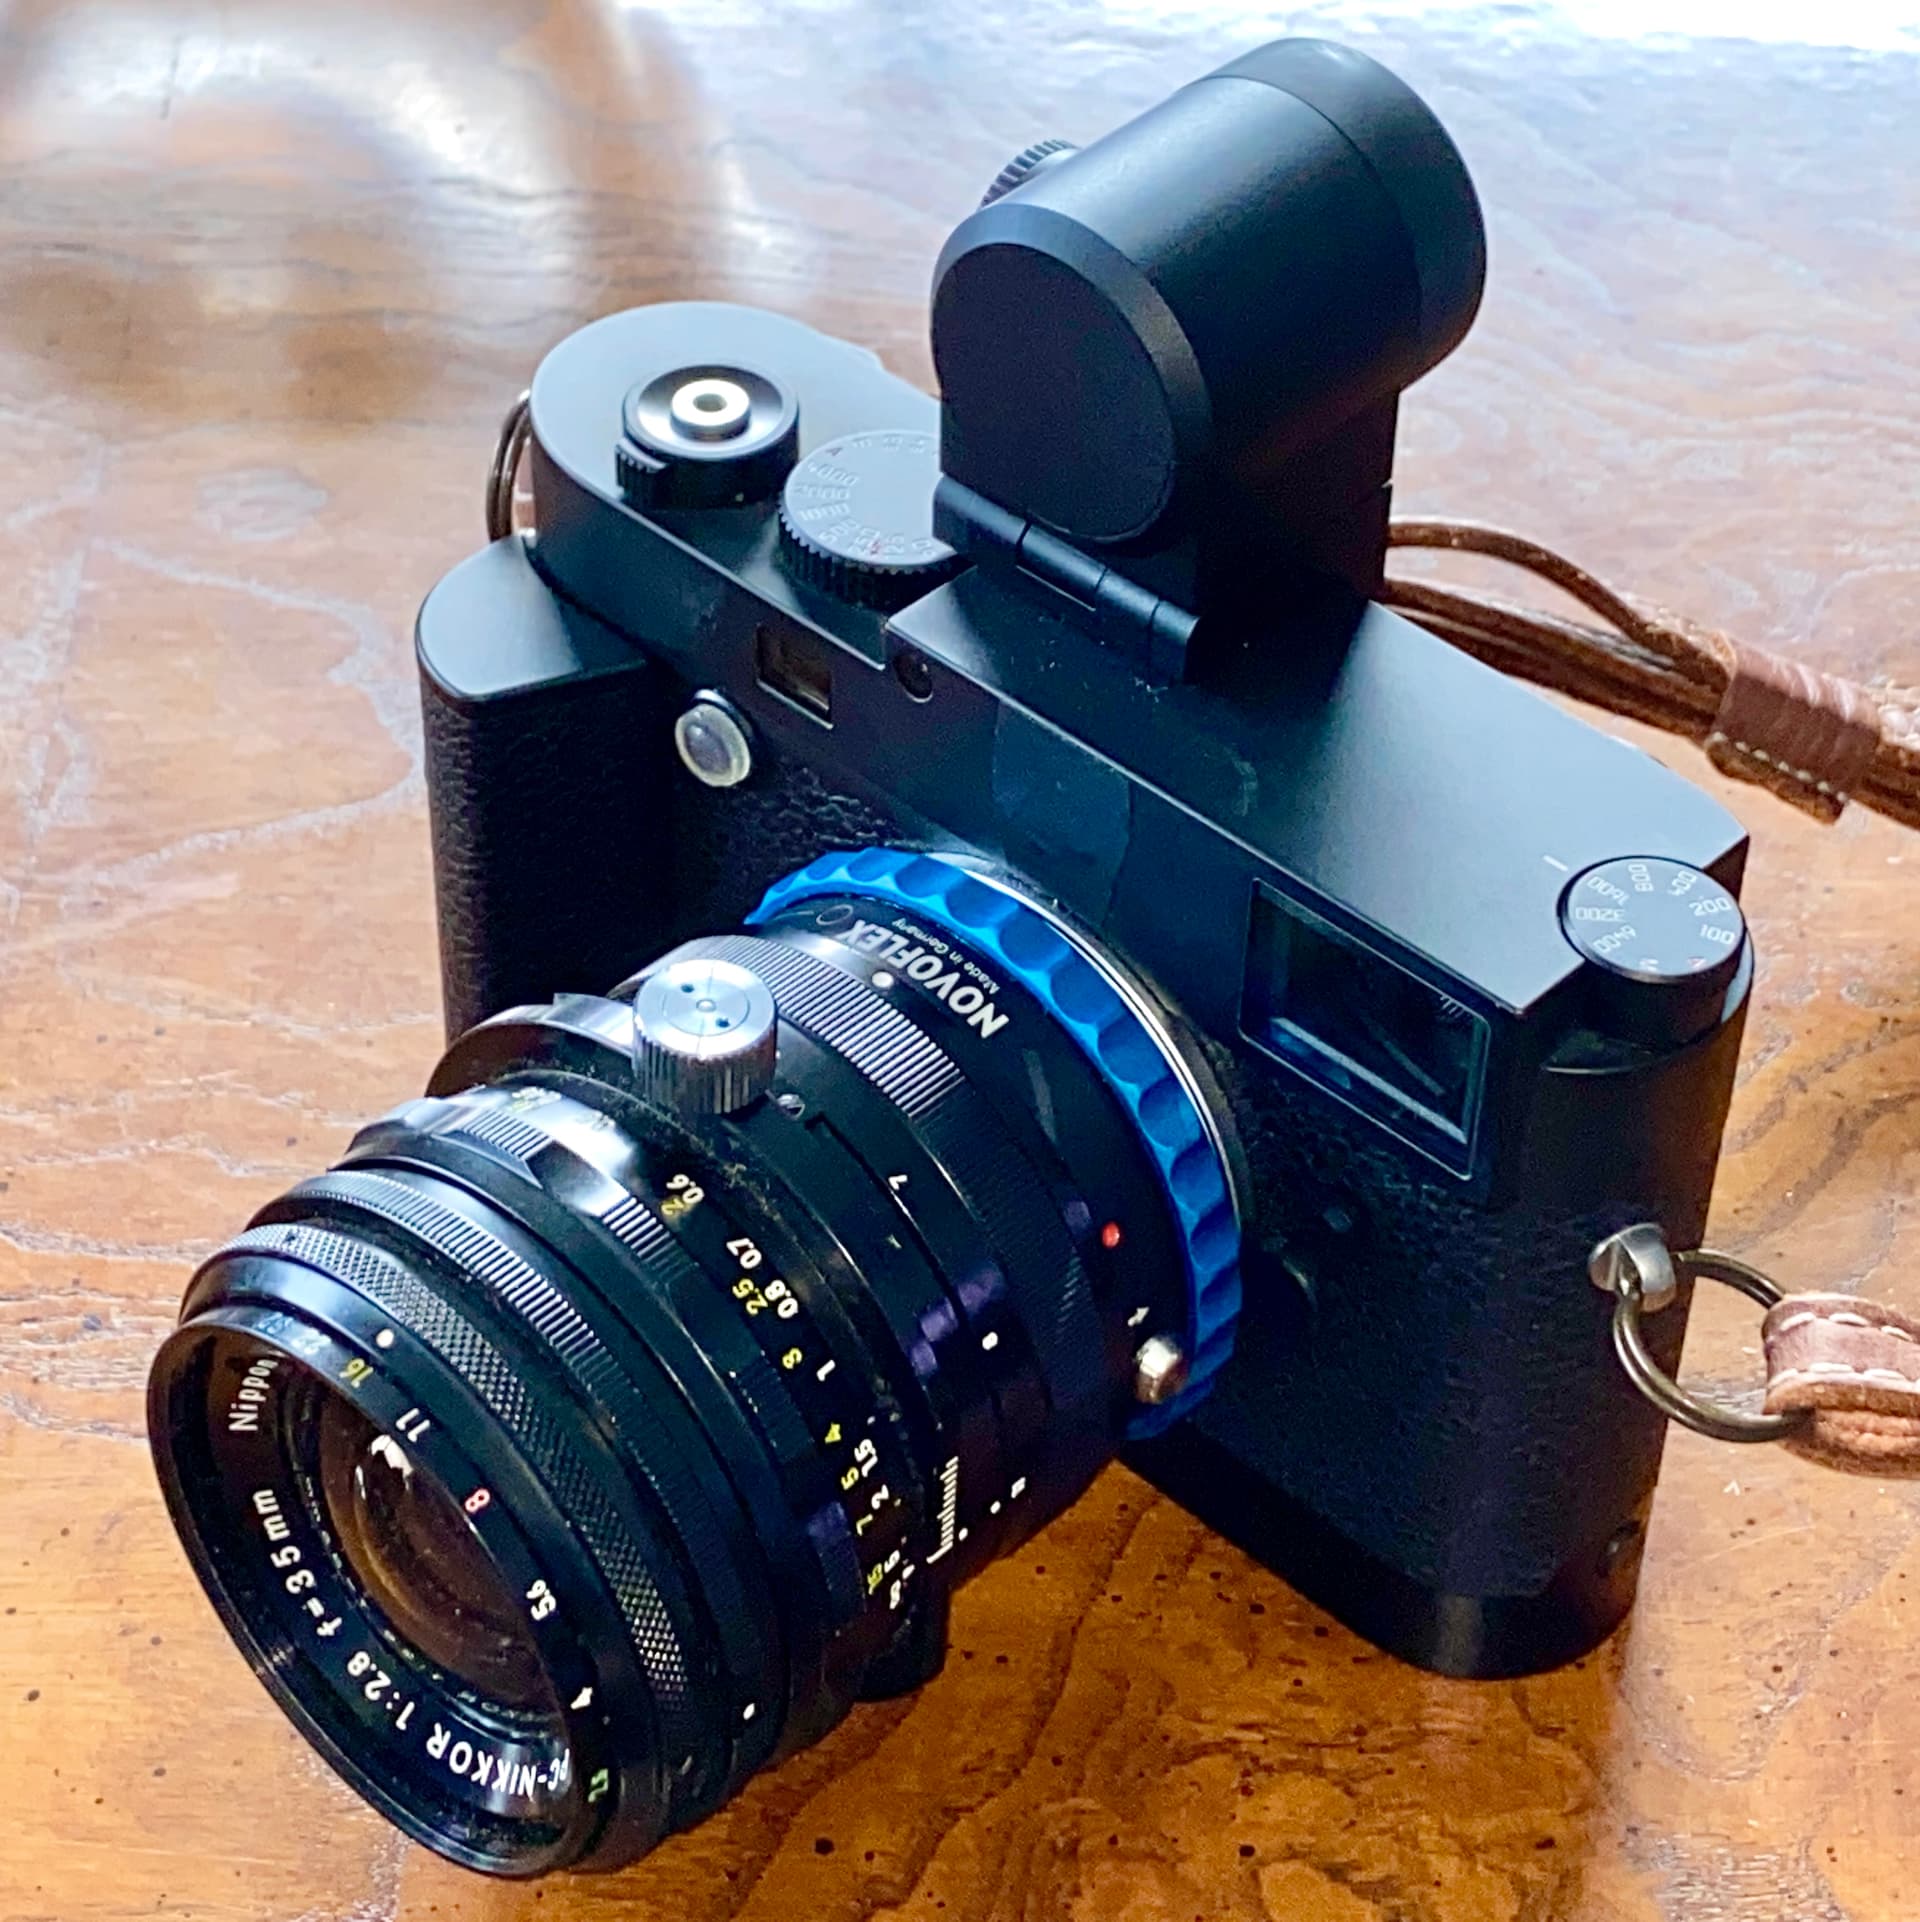
Five or six years ago, I bought an adapter from B&H Photo for my Leica M10 that allows Nikon lenses to be mounted. I didn’t think it fitted properly, so I moved it off to the side to fix “eventually”. Today became “eventually”, and now I know how to mount and unmount the lens, and it is happily mounted on my M10, along with the Visoflex. Here’s a photo:
This coming week I’ll find out how well it works - but instead of having to stare at the rear screen, I can look forward, or above, or anything in-between using the Visoflex. I have yet to find out if metering works like it should on the M10, and the Visoflex has a built in “enlarge” function to help in focusing, and the “color areas” on edges to show that focus is correct. Over the next few days, I’ll check this out. I can turn the Visoflex on/off at will, and ditto for the GPS.
Maybe all this will turn out to be a waste of time, but it will be fun trying it out anyway.
(My other project is to set up my “lighting detector” and try it out in the next big storm, but that’s another story.)
Of course the viewfinder will show dark - because, presumably you have stopped down before framing the shot. Just as with LF shooting, we would never dream of closing the aperture until everything else is set up. And don’t rely on automatic exposure - this is a manual lens.
Measure the exposure with the aperture wide open and then calculate how many stops there are between f/2.8 and (e.g.) f/10 and reduce the shutter speed by that much.
For example…
Measured at f/2.8, 400 ISO, you get 1/1000sec.
Stopping down from f/2.8 to f/10 is 3⅔ stops.
Deducting 3⅔ stops from 1/1000sec gives 1/80sec
So, set your framing and focus at f/2.8, and then set the shutter speed to the slower setting and then, just before pressing the shutter, stop down to f/10.
You definitely can use the PC lens on your D780, with all its benefits. Just put that damn Leica away and get the exposure calculator out.
No, it’s “black” even when the lens is wide open. I believe it had something to do with the mirror being in the way. So, I moved the lens back to the middle, set my exposure, then re-lowered the lens.
I had no such issues in Live View, other than the image on the rear screen getting very dark, as you suggest.
But your LF camera doesn’t have a mirror in the way.
It wasn’t an issue, I just used Live View, which was rather inconvenient, something that I solved by placing the lens on my Leica, and seeing the image on the rear sensor and therefore also on my Visoflex.
I got my meter reading by aiming the camera at the area I cared about, with the lens centered, then made the adjustments knowing the image would come out correct. I also dug out my Sekonic hand-held meter, but haven’t tried it yet.
Other people tell me to put my DSLR away, and use my Leica for that applications at which it is best. Me, I love both cameras, and if I dust it off, I also love my Fuji X100F. …looking over my recently recovered photos from my ancient Nikon D70, looking at them on my computer, they look just as good as my modern cameras. As I tell many, many people, most of the time it’s not the camera, it’s the photographer. Every type of camera has things it is best/better at. My D780 is the easiest and most versatile camera, but if I had to sell one, and keep the other, I’d be keeping my Leica. Perhaps not a very rational decision, but so be it.
Sorry for the diversion, but after reading this:
…I’d rather just meter with my Sekonic.
I haven’t used my PC lens in at least over 15 years, probably a lot longer, and I doubt I’ll be using it very much in the future. It’s so effortless to get essentially the same result using PhotoLab’s perspective tools.
But what you wrote above, is essentially what I did on the D780, getting a good exposure with the lens wide open, aiming my camera down, then leveling the camera, lowering the lens, setting the exposure I already measured, and everything just worked.
I think that since the M10 measures light that bounces off the shutter components before the shutter is actuated to calculate the exposure, there is no mirror in the way confusing things.
…and I suspect that this is a wonderful selling point for Live View cameras, that measure light reaching the sensor directly. Some of my friends sound like some people in this forum, urging me to wake up to the new reality, and buy a new Mirrorless Camera.
That is not possible. I checked with my favourite Nikon specialist in London and he confirmed that your PC lens should work perfectly on your D780 (or any other DSLR) through the viewfinder.
So, what exactly are you doing to mount the lens? Somehow, you are doing something wrong.
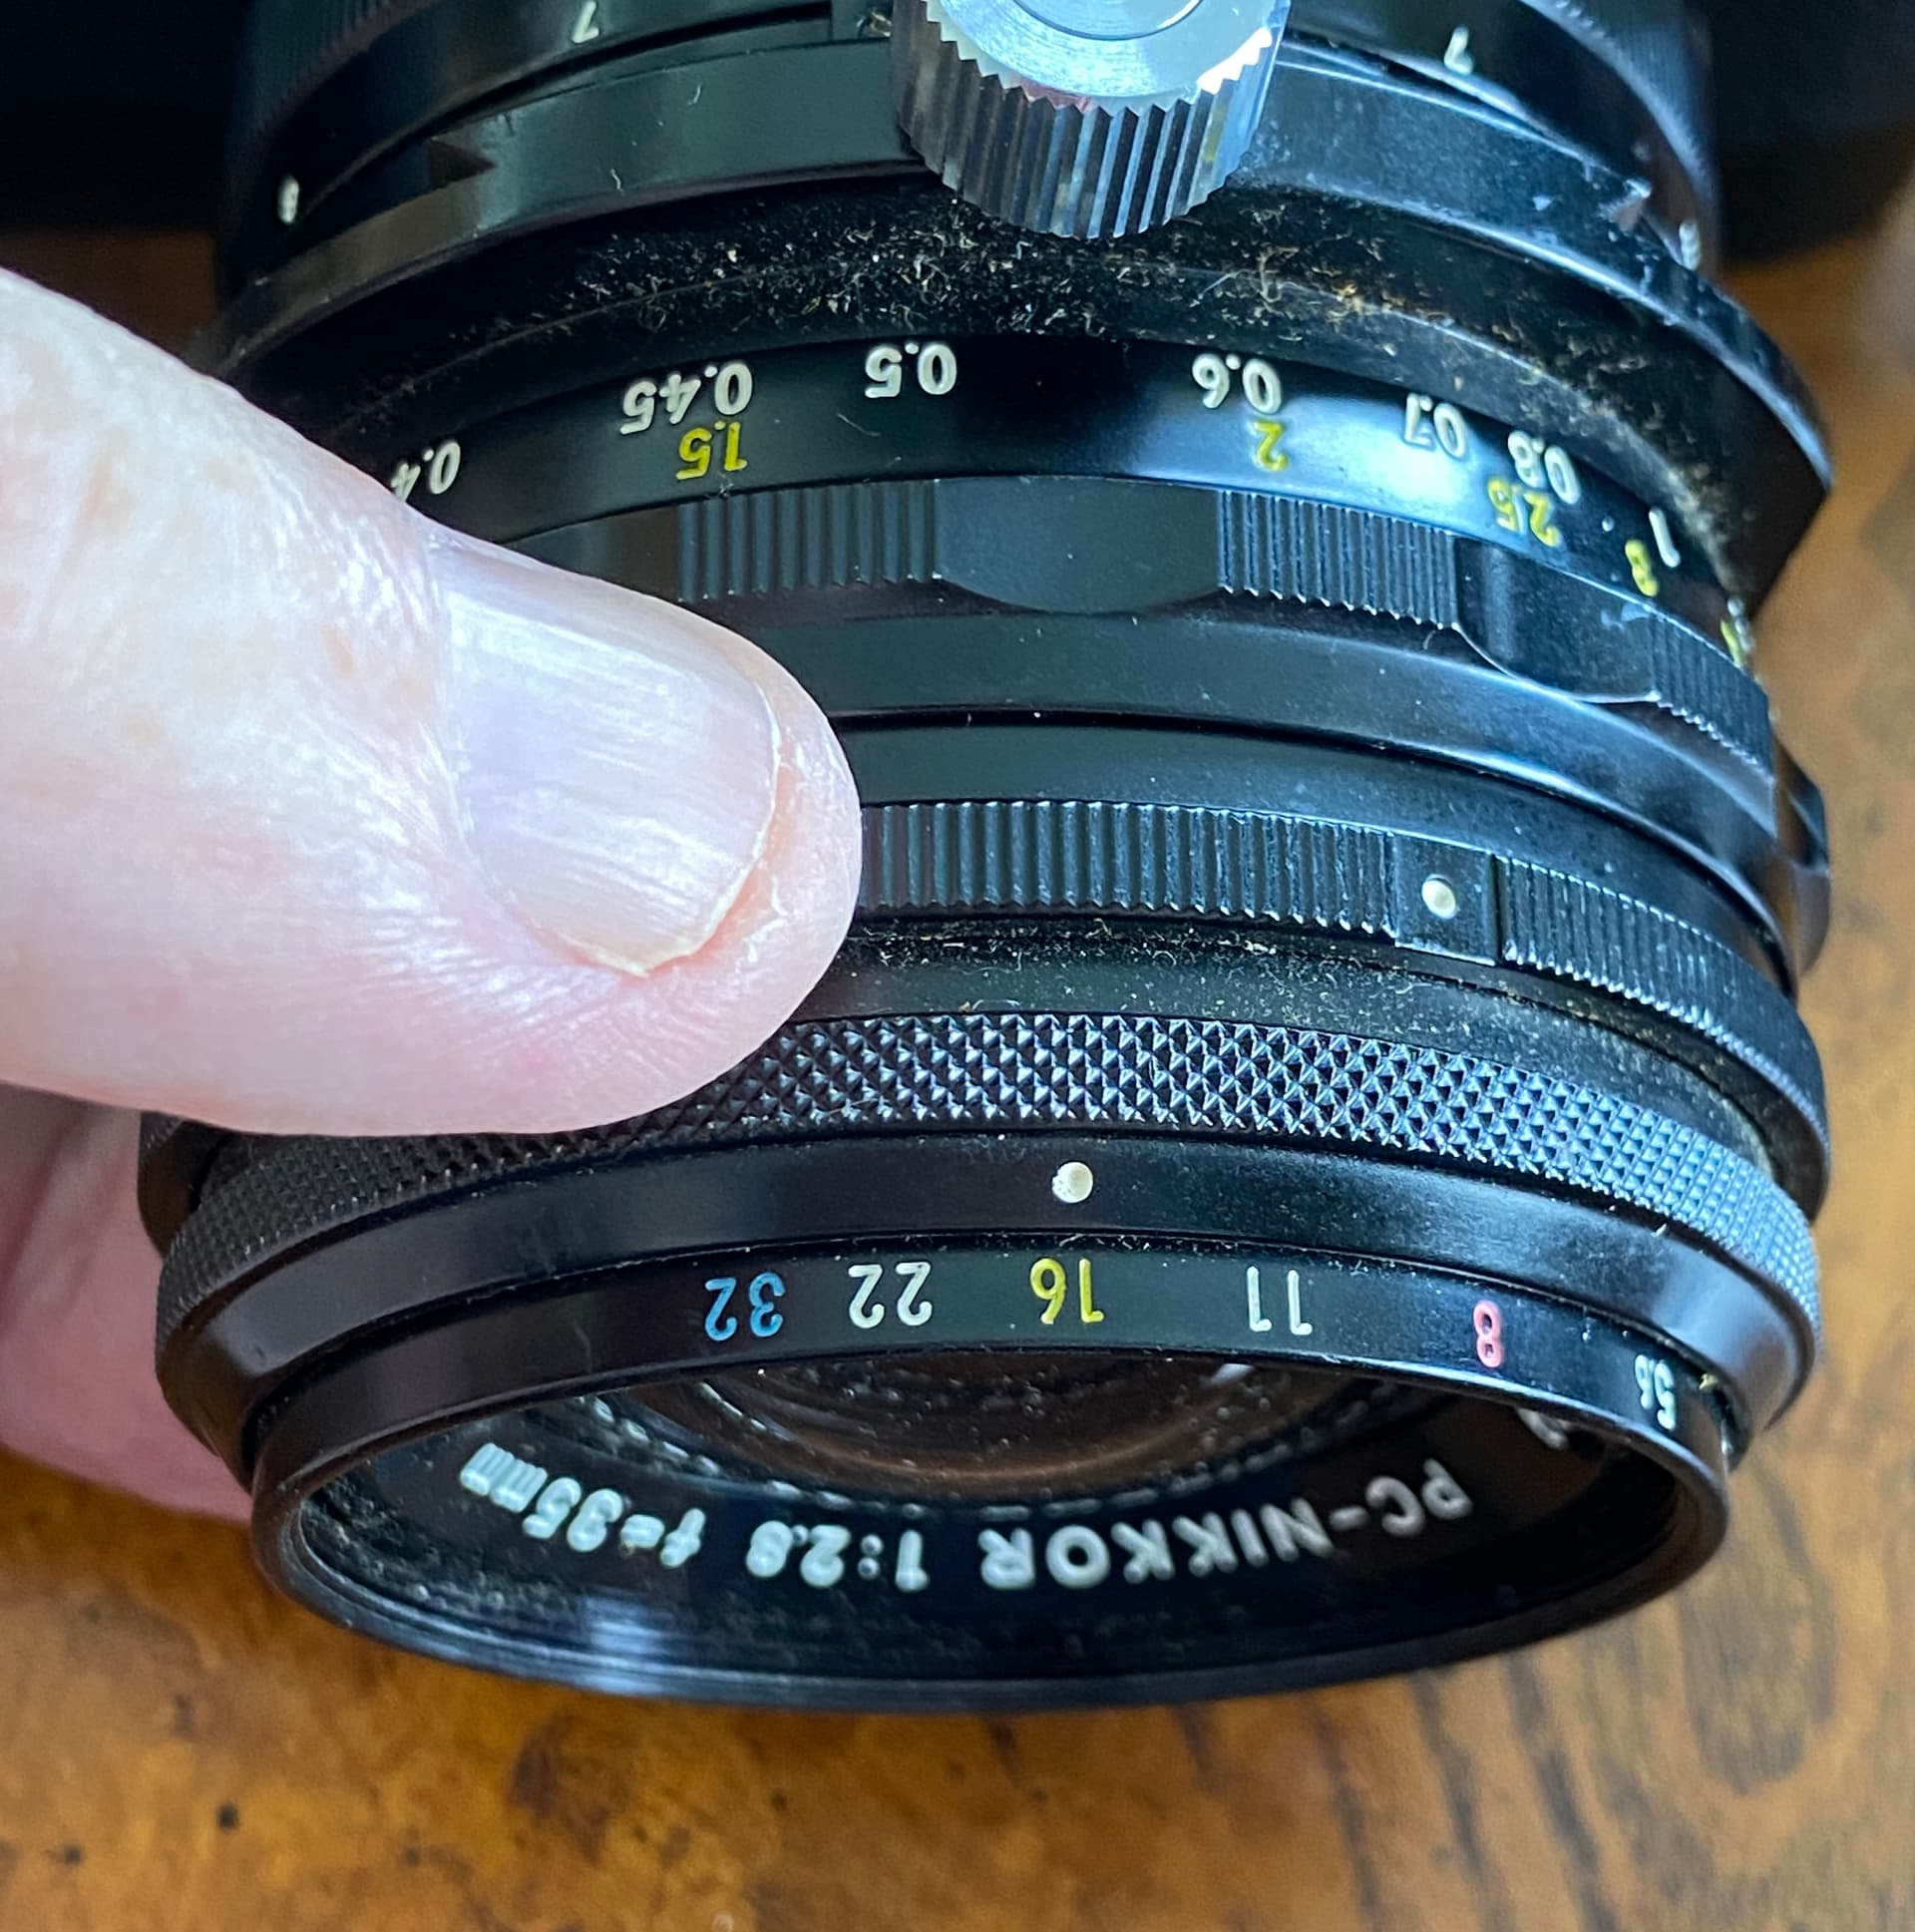
Which aperture ring are you turning? Can you take a snap of the two rings?
The aperture ring furthest from the camera can be pushed “in”, and rotated to the aperture I plan to shoot with. Then I release that ring.
The ring behind it is what actually sets the aperture on the lens - I set it to f/2.8.
When I’m ready to capture the image, I rotate the “inner” ring until it stops, in this case it will stop at f/16.
That’s how the aperture setting is used.
Last time I used it, I did all of this, looking through the viewfinder, and as I lowered the lens, the image in my viewfinder got very dark, black.
I assumed at the time that the DSLR expects light to come in from the front, hit the mirror, and reflect back upwards into the camera, hitting the mirror from below. So, naturally, the light as it comes off the mirror will no longer be directed up, for me to view it.
Solution - use Live View, where I get to see whatever hits the sensor. The image is very bright at f/2.8 but by the time it gets very dark as the lens opening is closed.
About your test…
I just proved this. I took one of my DSLR’s, removed the lens, camera turned on, and looked through the viewfinder. Then I took a small flashlight, and aimed it directly into the camera - I saw this bright light through the viewfinder, coming from my flashlight, through the mirror - I was looking at the reflection in the mirror. Then, I slowly lowered the flashlight, still aimed at the lens opening, while watching from the viewfinder. I saw the flashlight getting lower and lower, as the light got dimmer.
To me it all makes sense - but you can do the same thing with your D850. Of course, if you put the camera in Live View, the mirror is out of the way, so you will see what is happening at your sensor.
I should add, the reason for the two aperture rings, is you set the outer one to the aperture you plan to shoot at, and when you’re ready to shoot, you just rotate the real aperture ring, without needing to look at it. In my case, it stops at f/16, but it can be set to any aperture.
If you have a better suggestion, I’m all ears. Until then, I will just use “Live View”.
This is to be expected, which is why you should leave the aperture at f/2.8 until the very last moment - especially at extreme shifts. The rule is, if you are expecting to see anything through the viewfinder, the aperture must be wide open. you should never expect to see anything other than darkness in the viewfinder, especially at f/16, which is even too dark on my LF camera to focus and frame with.
Try this sequence (assuming for a tall building)…
neutralise any lens shift and open the aperture to f/2.8 and make sure the knob is pointing downwards.
point the camera at the subject (handheld) and take an exposure reading, setting both the aperture and preset rings to f/10, using the shutter speed and/or ISO only.
rotate just the aperture ring to f/2.8
set the focus to hyperfocal distance (8.23m), to get everything from 4.12m to infinity acceptably sharp (you don’t need any closer because the lens will cause the framing to cut off the foreground)
mount the camera on the tripod, level it and frame the subject, with the shift being the last framing adjustment you do.
rotate the aperture ring until it hits the preset ring stop (at this point, you could be working blind through the viewfinder but ignore that)
I wrote something about testing the camera with no lens, just aiming a flashlight at the camera from in front, and then from lower down. As I started to move the flashlight down, the image got darker and darker.
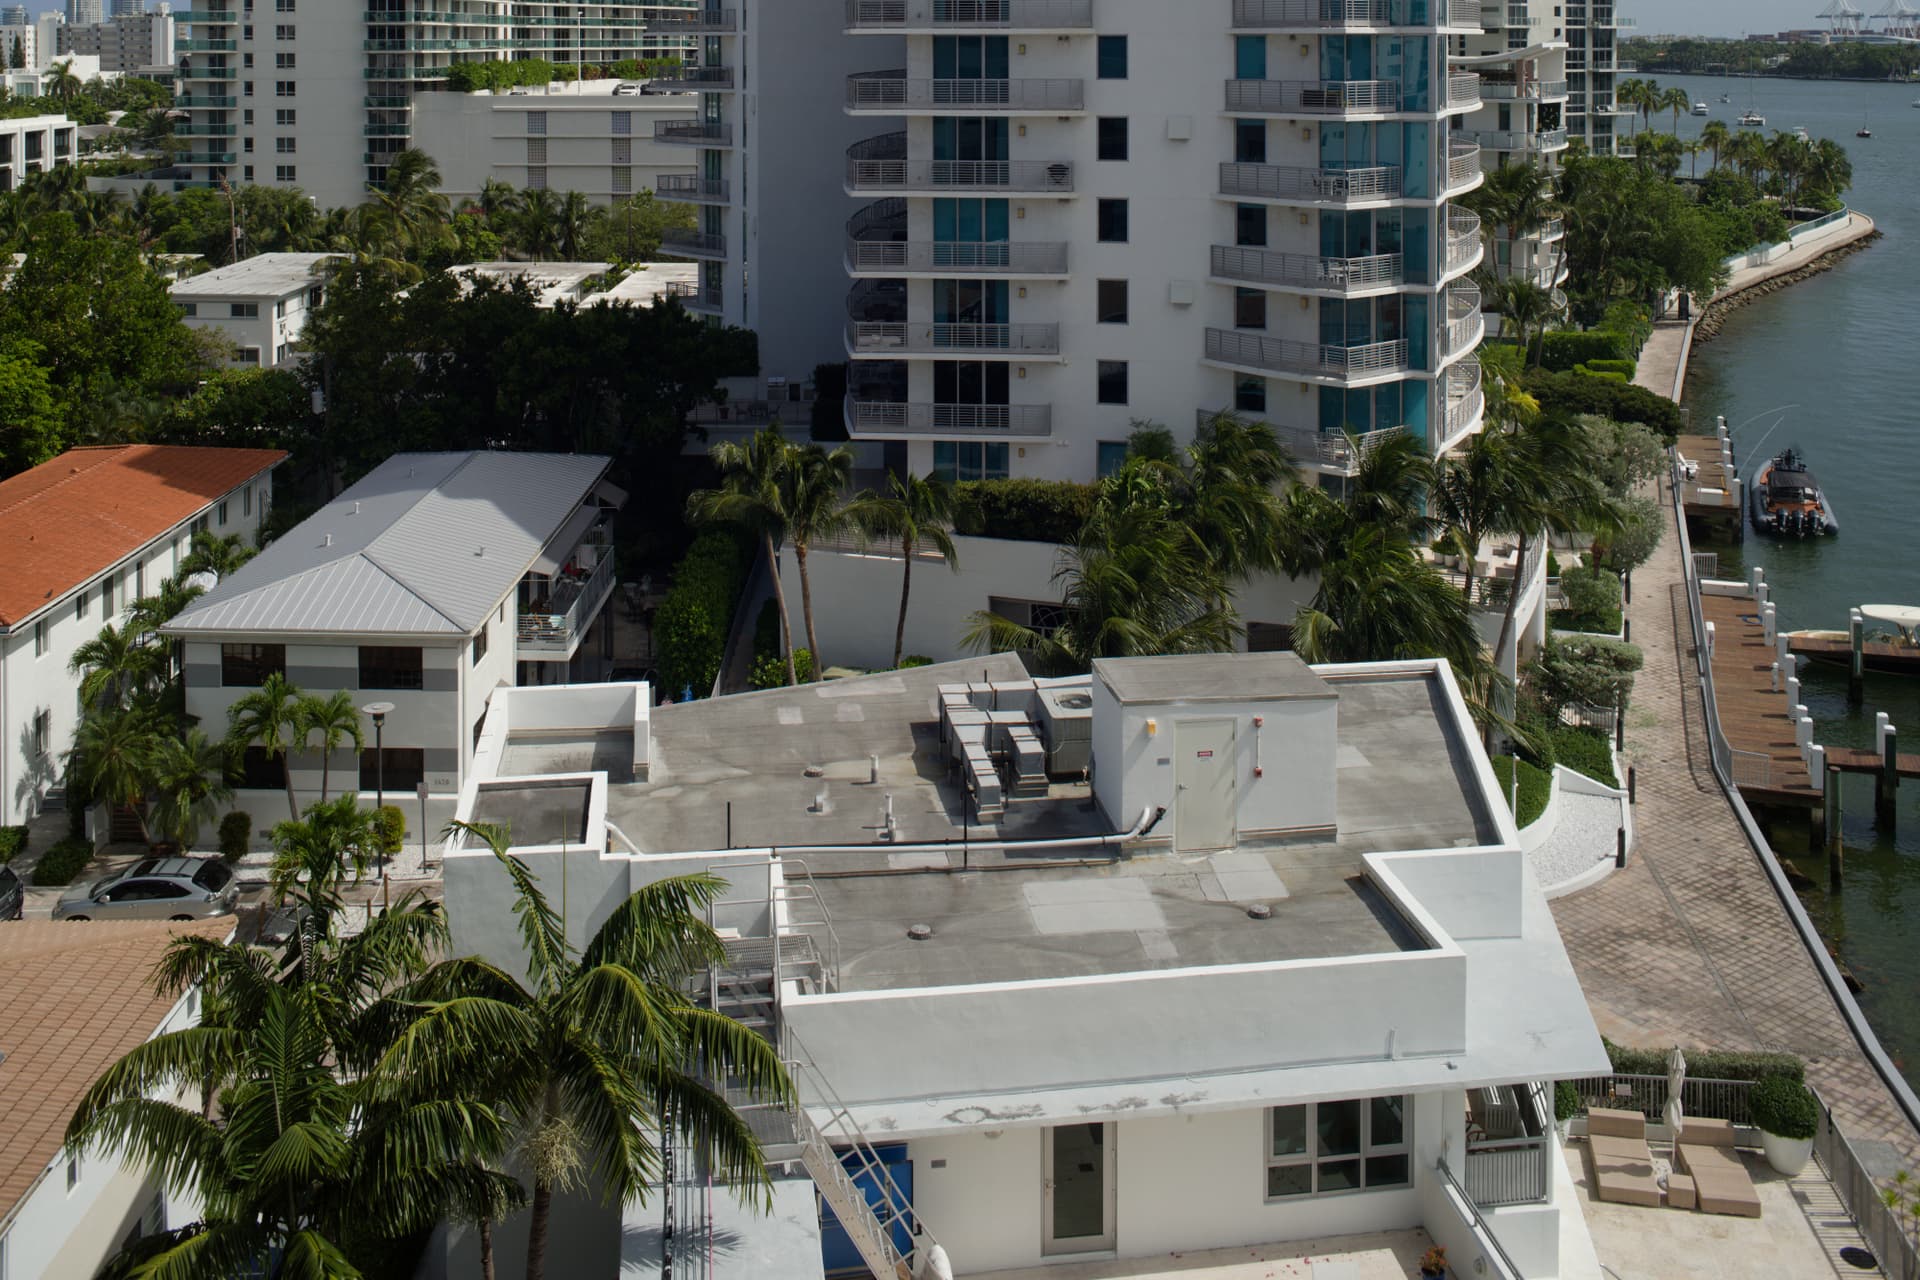
An hour ago, I went out to my balcony, set up the tripod, mounted the M10 with the PC lens, tried to make the camera perfectly level, and then took three photos at the exposure settings as determined by my M10:
From your earlier explanations, what was really happening was the lens was level, with the lens lower, then in the middle, and then higher. Again, the “circle” of what the lens can see is overly large, and all three photos are from within that circle, meaning you were both correct in that the camera was looking straight ahead.
I will leave it to you to find the proper words to describe what I “see”.
Top photo - looking down
Middle photo - looking ahead
bottom photo - looking up
So, as to not upset you and George, how would I describe these three photos to people oblivious to a perspective control lens?
If I say I’m looking down, then straight ahead, and then up - you will argue with me.
So, if you showed these to your next door neighbor, how would either of YOU describe them?
I’ll add that using the PC lens on the M10 was effortless. Just close the aperture ring, then shoot. The Visoflex worked perfectly, and even the GPS was working. No editing done to the three photos, other than what PhotoLab does on its own.
Oh, and I need to find a small “bubble level” that can go on top of my camera body. If you have any suggestions, I plan to buy one soon.
Sounds to me like you used the “shift” capabilities of the lens, not the tilt capabilities.
So, as an outsider, I would suggest:
Top photo - shifted down (x mm)
Mid photo - straight ahead
bottom photo - shifted up (x mm)
To me, looking down implies you actually used the tilt function of the lens, which changes the focus plane angle.
Perhaps, to be clearer in the future, stick with the camera terms - “tilt” and “shift” to clearly explain what you did.
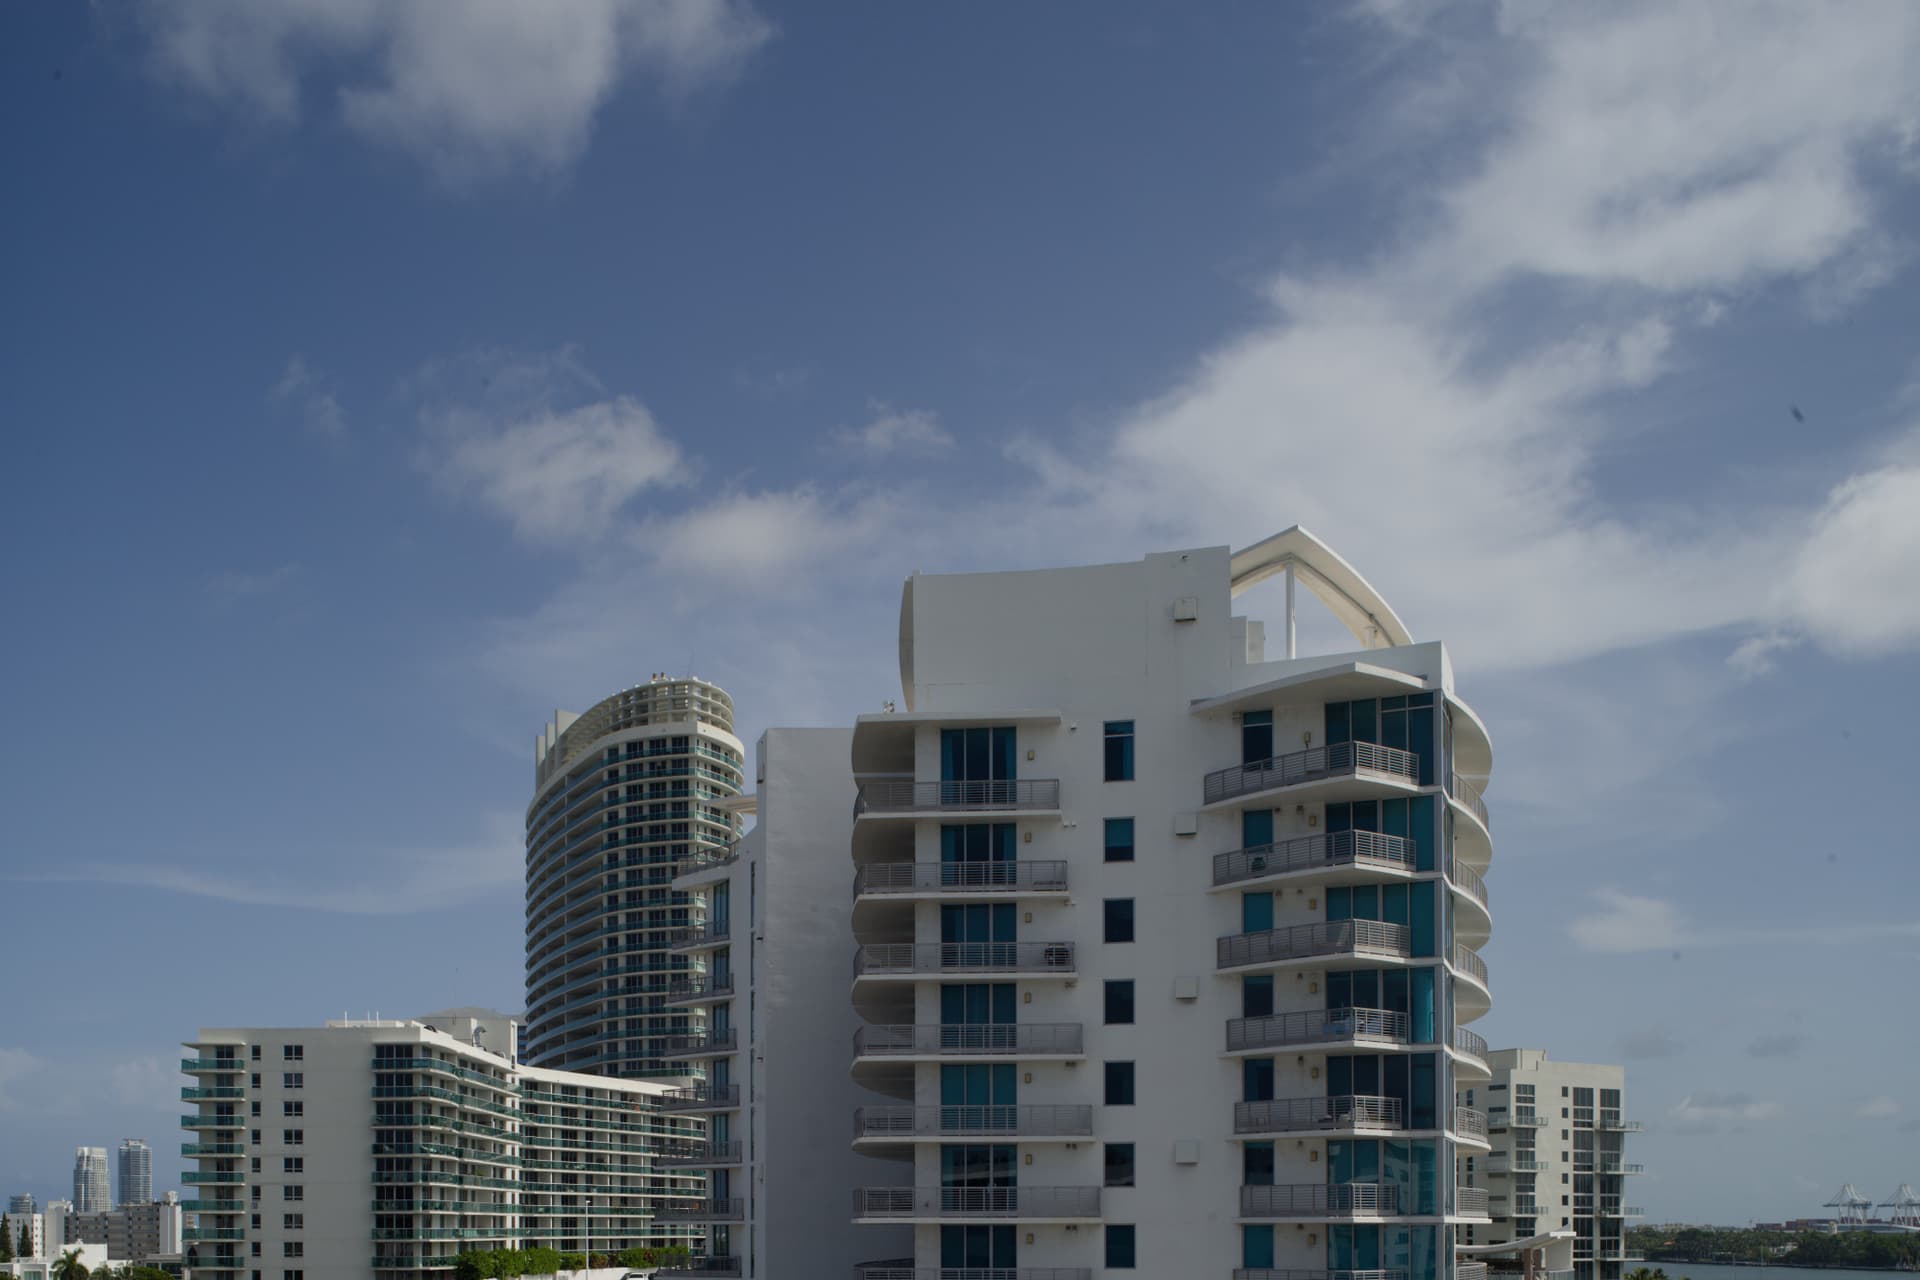
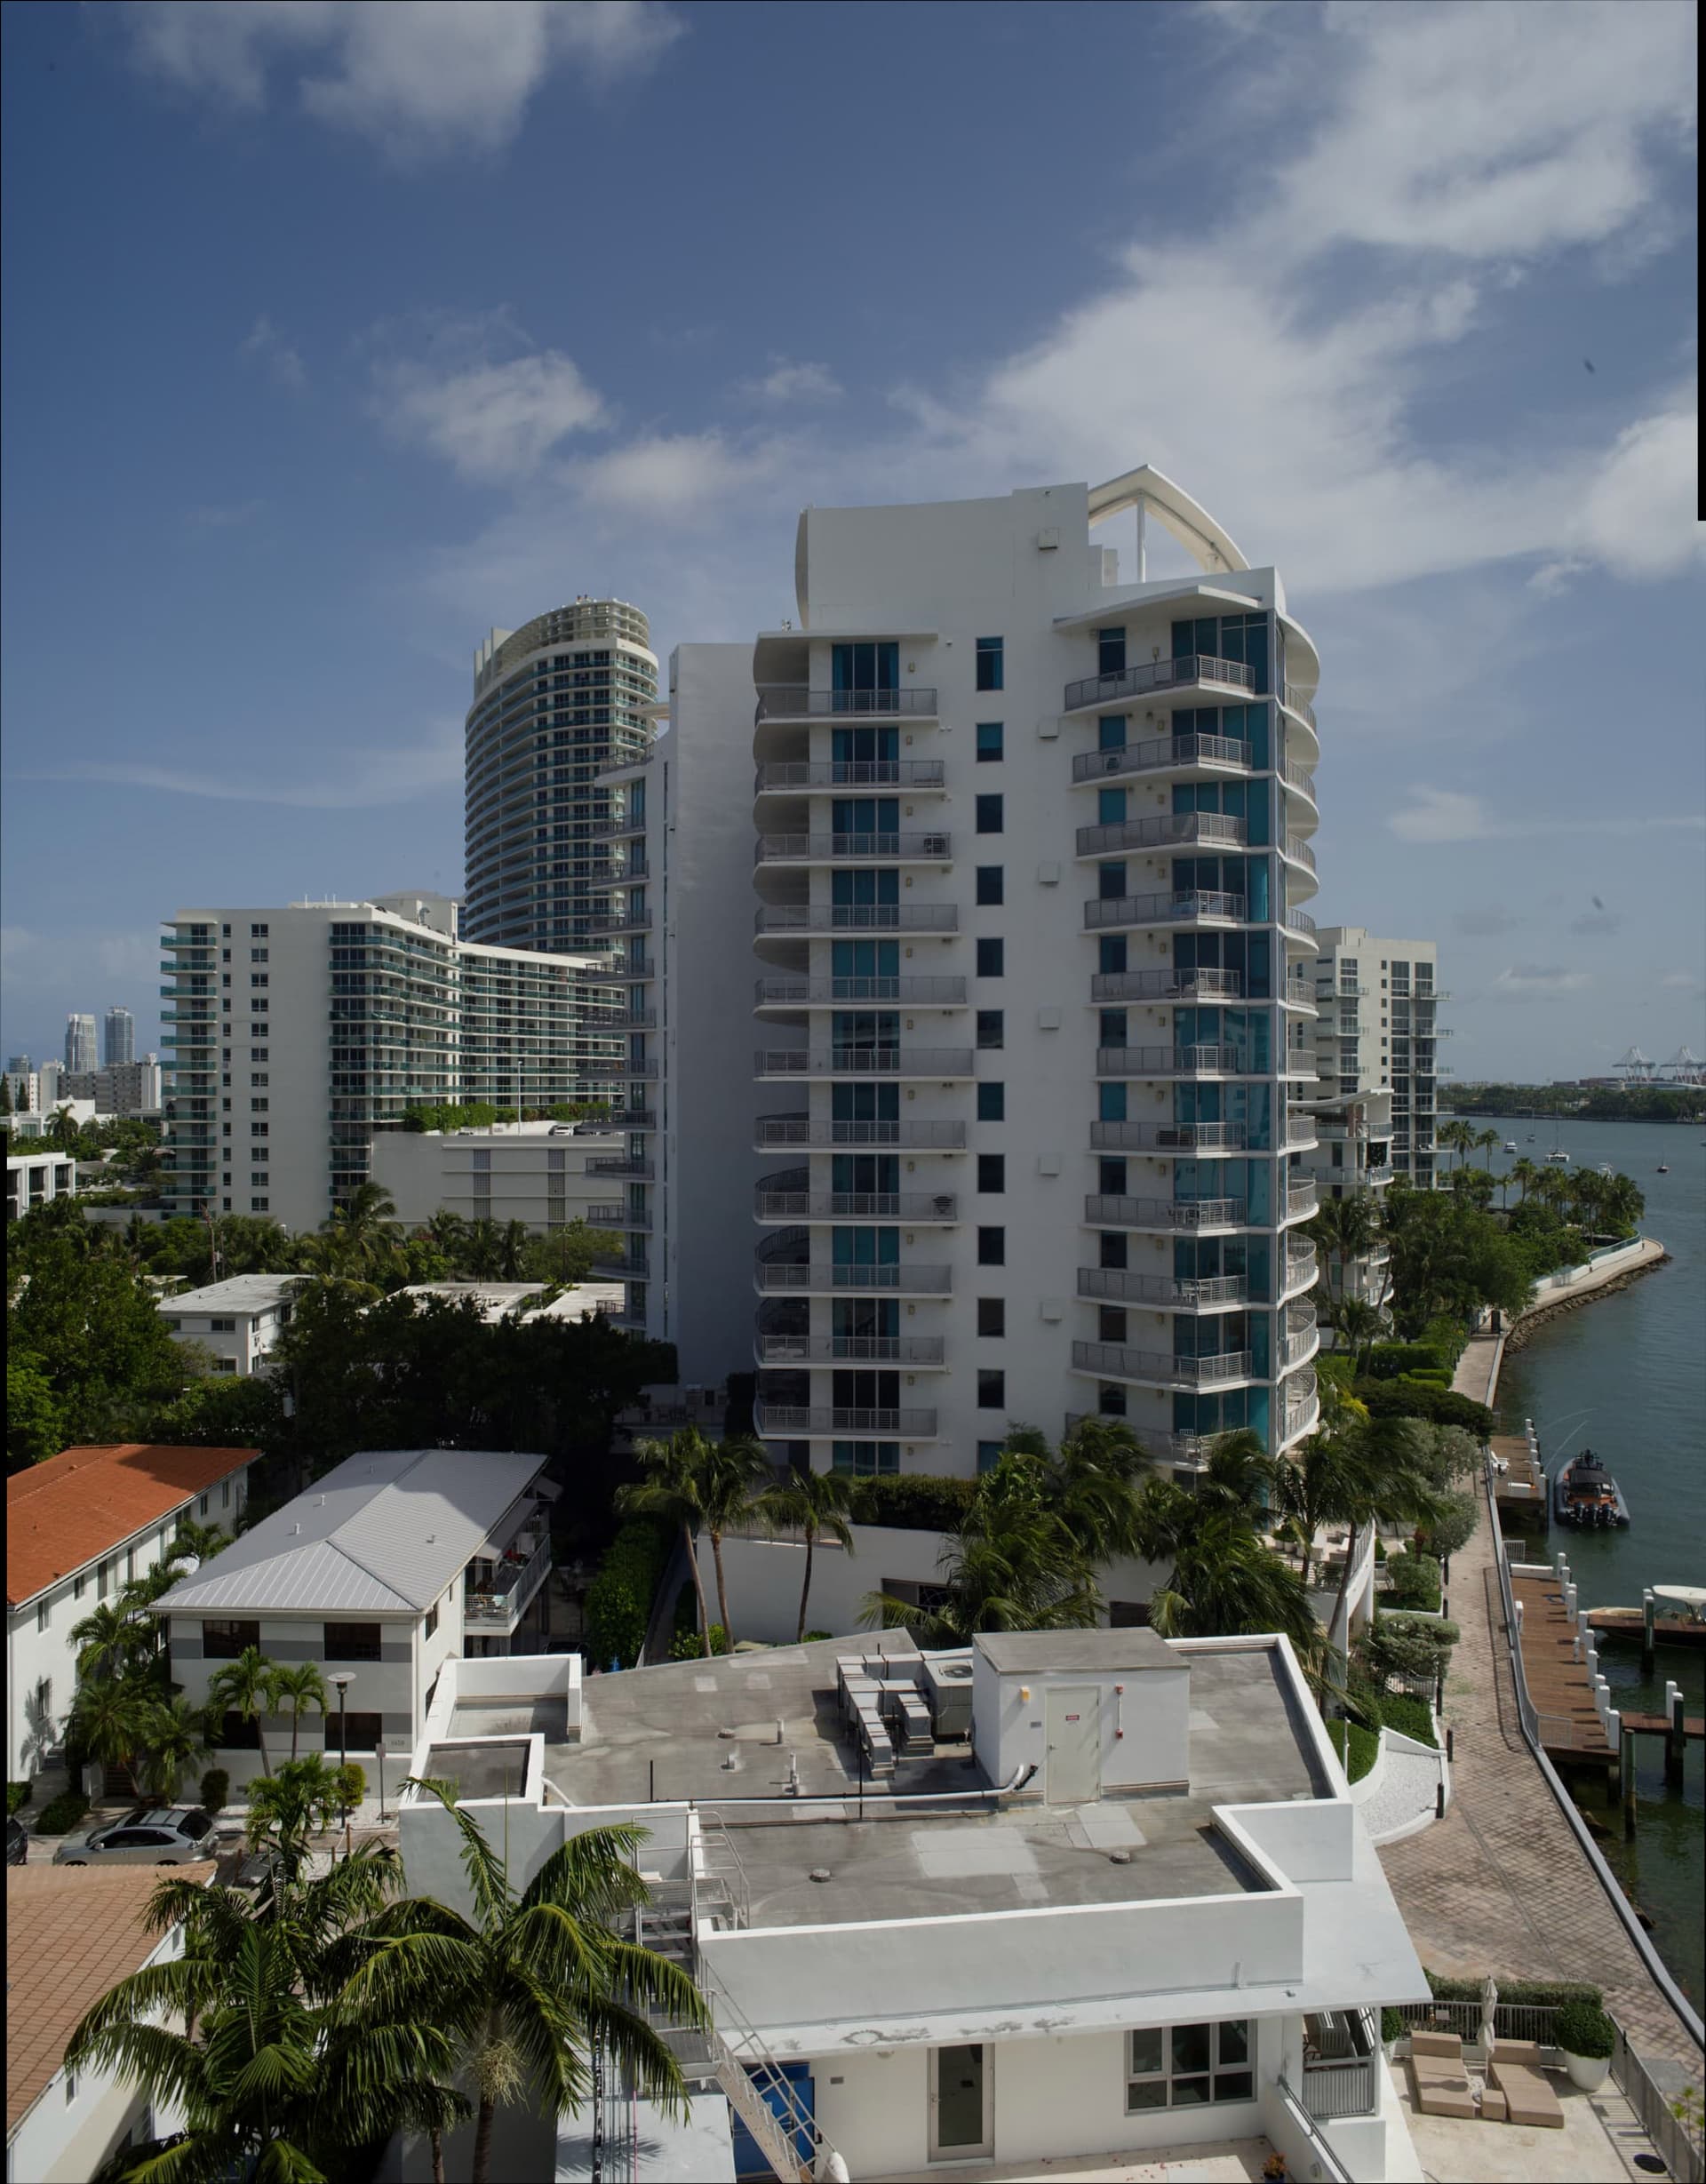
Here’s the simple stitching of your 3-shot vertical panorama.
What’s the big deal?
the framing is showing a lower level
*the framing is straight ahead of you
*the framing is showing a higher level.
In all case the camera is pointing forwards. The height of the camera is about the 6th balcony straight in front of you. It’s a nice example of what the lens is doing. The optical ax is not in the middle in the first and third image.
That is exactly the point I was trying to get across.
That would be my question.
@mikemyers you could have taken this shot with a simple wide angle lens. You really are missing the point of shift lenses.
They are primarily for shifting the image where it would otherwise include something that gets in the way.
There is no point at all in using it to photograph anything that you can normally photograph from the centre of its height, like your hydrant (unless you can explain otherwise without using the phrases “looking down” or “looking up”.
Its primary purpose in the vertical axis is to allow you to take tall subjects, avoiding converging verticals and having yards and yards of foreground in the frame.
Horizontally, it is used for avoiding reflections of the camera when photographing glass or mirrors without incurring converging horizontals.
Apart from that, it can make it easier to create panoramics without having to straighten the constituent parts before stitching.
So, instead of “trying to force a quart into a pint pot”, try producing images that play to the lens’s strengths.