t is really interesting the way the colours are manipulated under a monochrome layer to bring out the very best of a photo. I tried to emulate this with the tools available with DXO Photolab 7 and found it impossible to do. All monochrome tests came out dull or overly black and white and there was no way that I could get a photo that really came alive. It seems to me that when we convert to black and white we lose the colour control.
I am therefore reaching out to anybody here that does black and white conversions and to ask what techniques you follow. Also, if anyone from DXO are reading this are they able to comment on how one can better or improve on the simple steps that are available to us in PL7.
Not totally impossible but not easy with the basic version.
By far the best is to splash out on FilmPack, which integrates with PhotoLab. You don’t need to install it, simply enter the licence into the appropriate dialog under the PhotoLab menu.
This then gives you all sorts of tools, like colour filters and a Channel Mixer, which will vastly improve the quality of your B&W images.
You do not need FilmPack for converting to B&W, all the controls you need are in PL.
First, it depends on how you generate the monochrome image. With PL7, in addition to DXO B&W supplied presets, there are two controls - The Colour/B&W Rendering tab and the Style-Toning tab. The first gives you a couple of pre-defined choices such as Kodak Tri-X while the latter is a blank working area. In both cases, you can make adjustments.
The adjustments depend on what colours were actually in the photo before conversion, if there is no red, then the red slider will have little effect.
In the Style-Toning dialog, adjusting the Intensity slider can give interesting effects.
The HSL panel may or may not have an effect.
The Channel Mixer is the main set of controls. Adjust them till you see what you like.
Other controls to play with are the RAW White Balance; the two Colour/B&W Rendering Intensity controls; all the controls under the Light panel. Other controls to look at are the Lens Softness Corrections where you can make the image as soft or sharp as you like.
Also, take a look at some of the supplied LUTs. These can be applied at various stages.
I also created some presets based on using the HSL to adjust the Sepia setting. This produced a blue effect similar to old photos. However, PL7.6 screwed this up.
Finally, you have the Local Adjustments where you can Burn and Dodge areas of the photo just as you would do in a darkroom.
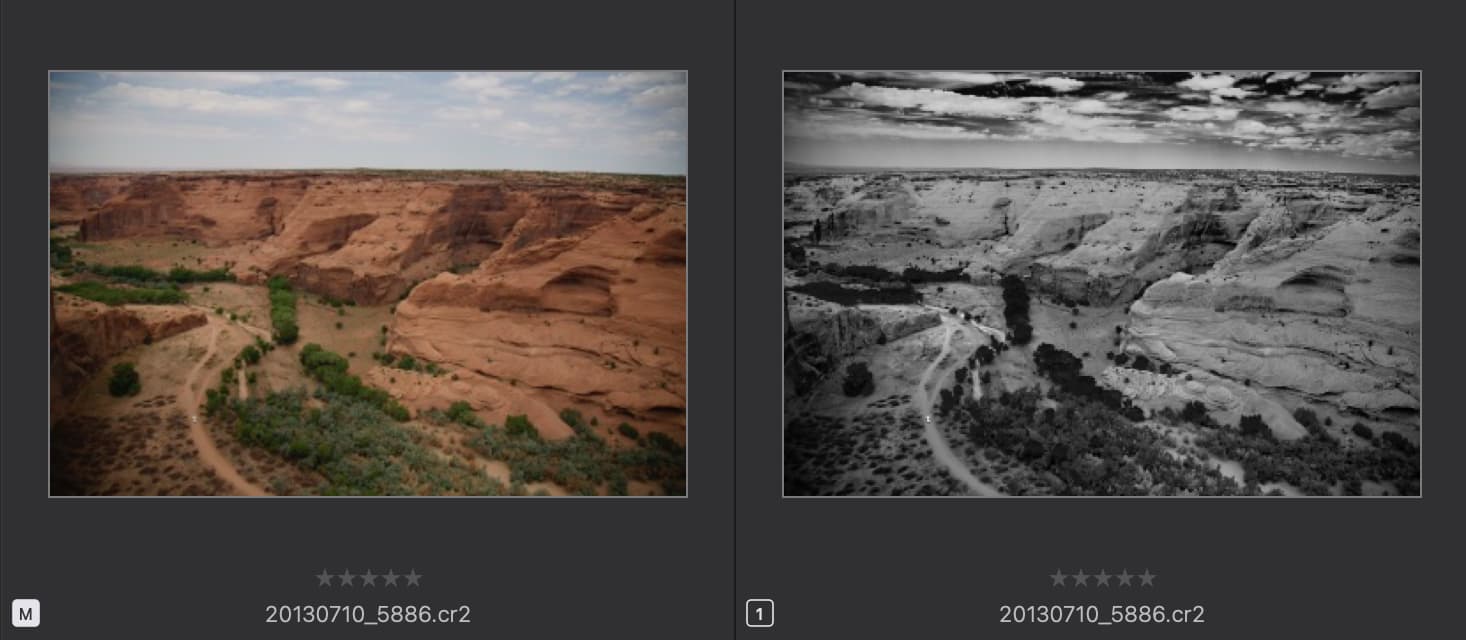
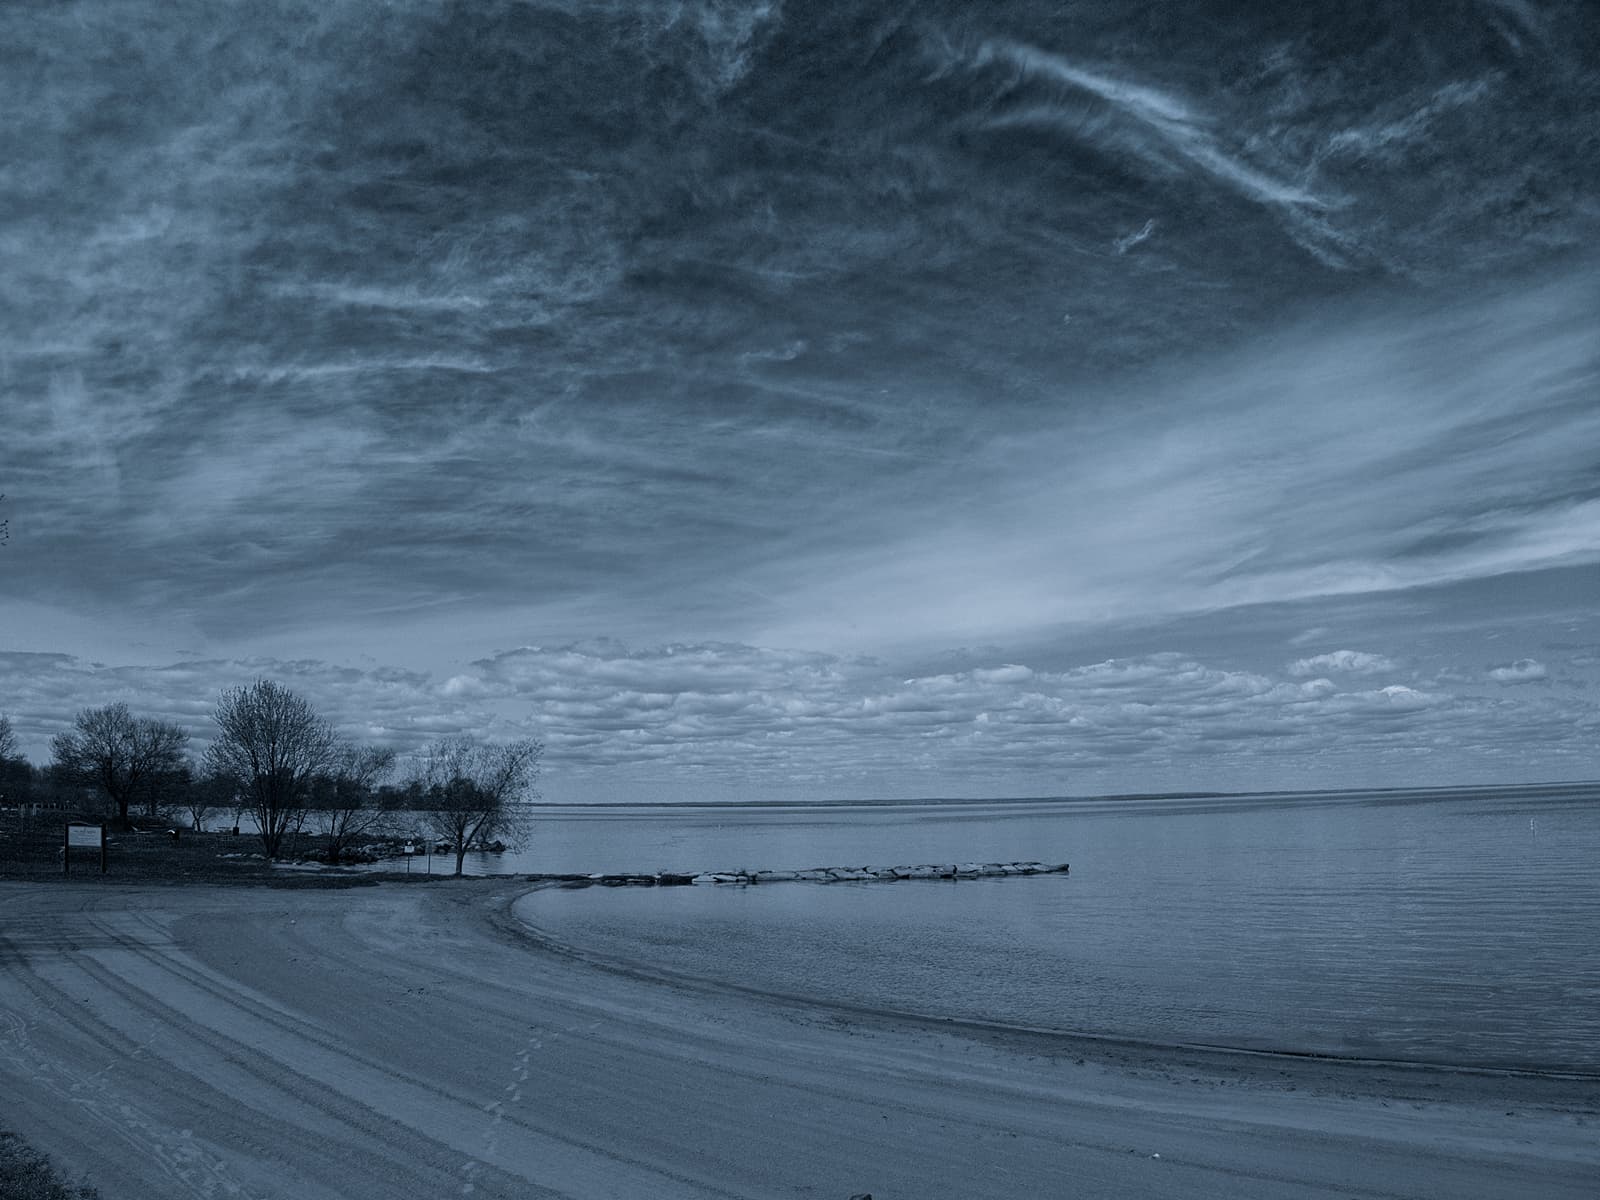
Here is one that I processed in PL7 without FilmPack.
Here’s another enthusiastic vote for Filmpack 7! Not only does it have highly accurate film emulations from the past or present but many added tools and extras to add into PL 7. It’s a great investment!
Thank you @Joanna , @Allan , @mikerofoto for the feedback. I should have mentioned I have filmpak but from what Joanna noted I found I was using the colour wheel instead of the channel mixer. Also didn’t realise the fine contrats made such a difference in B&W. Will spend the day trying this out. Thanks once again.
What I meant with this was that the conversions were mainly grey with very little contrast. It was as if there was no dark black or pure white. Joanna’s comment above has helped me out.
It seems that HSL is applied after rendering, while Channel Mixer before. That’s why HSL does not work with B&W conversions (it does not touch greys). You can also use FP Filters with B&W – they are applied before rendering.
Stenis
(Sten-Åke Sändh (Sony, Win 11, PL 6, CO 16, PM Plus 6, XnView))
10
I totally agree with @Joanna and @mikerofoto and the friends of Joannas that she have referred to earlier that use different fine grained Filmpack film emulations.
For me the same emulations from Fuji, Kodak, Rollei and Ilford have been absolutely crusial to be able to fight the terribly coarse grain I often get when digitizing my old Agfa CT 18 and 21 slides from the seventies. Photolabs sharpening tools are both of them totally useless for these pictures since they leaave them totally indifferent - unlike Capture One. Neither works Deep Prime. So in order tho get any sharpness in these pictures thanks for both these emulations and the Fine Contrast the Film Pack adds too.
OK, but the original question was “I am therefore reaching out to anybody here that does black and white conversions and to ask what techniques you follow. Also, if anyone from DXO are reading this are they able to comment on how one can better or improve on the simple steps that are available to us in PL7.”
No mention of film emulations or FilmPack.
So, as I stated, PL7 has the tools to do the conversion. If you want emulations, then use FilmPack.
Stenis
(Sten-Åke Sändh (Sony, Win 11, PL 6, CO 16, PM Plus 6, XnView))
12
Yes, and I am talking about black and white conversion of color slide film as one example where filmgrain emulation have a very important role to play in order to obtain the results I want to achieve.
1 Like
Stenis
(Sten-Åke Sändh (Sony, Win 11, PL 6, CO 16, PM Plus 6, XnView))
13
Allan, read what Joanna writes once more. My example with color slide conversion just happens to be one extreme where Photolab with Filmpack happens to shine and solve problems my other converters have had hard to help me with.
I haven’t seen any other converter that has three flavours of contrast, Contrast, Microcontrast and Fine Contrast (at least at first a part of Filmpack too). On top of that Fine Contrast comes with three extra sliders to fine tune the images high lights and shadows. Just these tools makes a huge difference and adds fantastic control. Even Clear View Plus is a part of this and can be useful but just in pictures without blue skies.
The trick with color slide film is to get rid of all Micro Contrast (-100) and meet up with Fine Contrast instead and add a fine grain emulation on top of that. It fixes even the ugliest Agfa CT 21 blue sky with its often terrible coarse and clotted blue clusters of grain. Without these tools I’m pretty shore I would never have digitized them at all.
You see, of some reason Photolab Deep Prime and Lens Correction is totally indifferent to color slide film and doesn’t work at all despite using RAW at repro photo.
Now that is what I call useful to know!!! Thank you so much. I shall file that under essential knowledge. Although I usually only scan 5" x 4" Velvia 100 for colour, so that is less of a problem
I never said that FilmPack was not useful. I said that it was not needed for B&W conversion.
I am sure that there are many examples of how PL and FP work well when duplicating old film stock. I use PL, Lightroom and Photoshop for that purpose.
If I understand you correctly, then No, Deep Prime and Lens Correction will not help as those tools are for the copying process and Not the image itself. That is like trying to change the flour type in a cake that is already baked.
Maybe strictly but, from years of experience, my opinion is that it is a fool that tries to rely solely on PhotoLab - even for colour work.
Stenis
(Sten-Åke Sändh (Sony, Win 11, PL 6, CO 16, PM Plus 6, XnView))
17
Well, Capture One’s sharpening is working fine on these images so I just agree with Joanna once more. Sometimes you need more than one tool. It´s just a pity Capture One’s noise reduction is so comparatively poor compared to Deep Prime. I can assure you this has not the slightest to do about baking cakes but DXO Photolab and Filmpack is doing a great job in this respect.
I don´t see any controversies in a question like this really. There are several ways of handling issues like this and use the ones that suits you best. Joanna and I have just written about a few ways we and Joanna´s friends use to handle these issues and if you have found better ways to handle it, please enlighten us if you have some experiences of your own worth sharing. Sharing is learning.
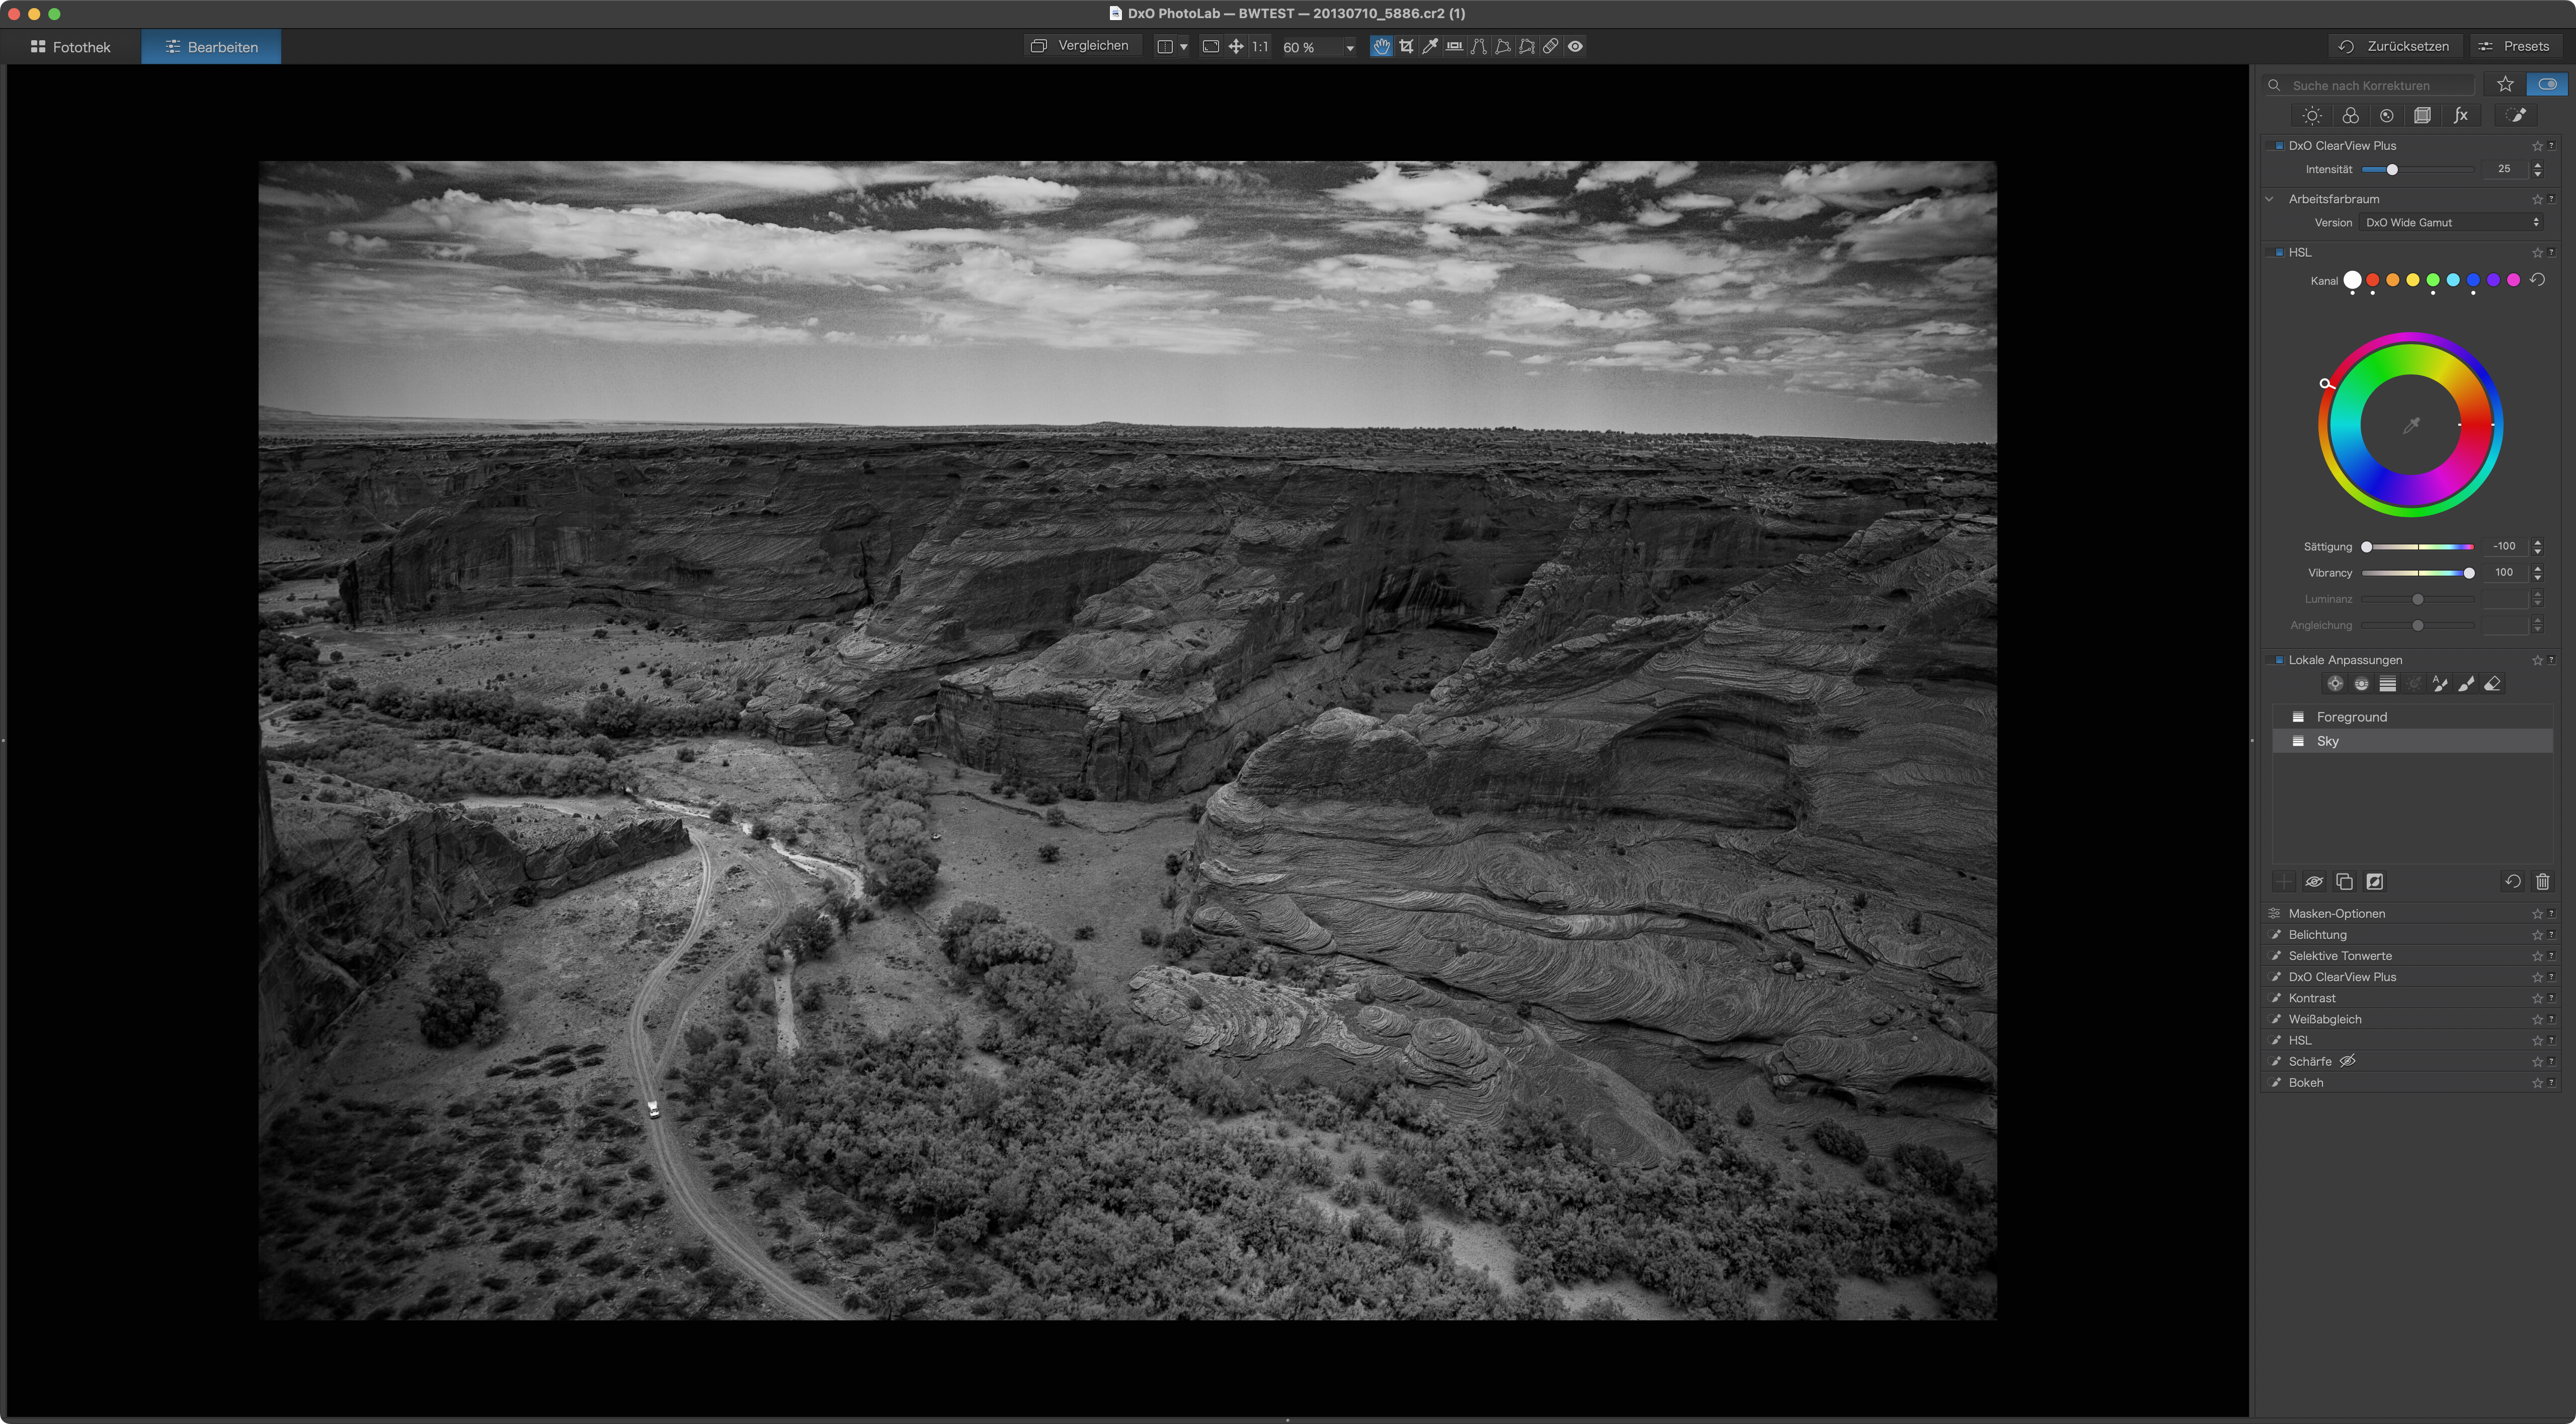
Yep, it would be good if HSL was also before conversion to B&W. Perhaps these things should have some sort of way to change the order, as sometimes you may want to have the colour after, for example when applying a tint. SEE THE VIDEO HERE
If you want a tinted B&W image, you can use the HSL tool to modify the Style-Toning tool.
After adjusting the B&W tonal range in your photo, apply a Sepia tint with the Style-Toning tool. Then adjust the outer ring of the HSL tool to the tint that you want. The Saturation and Luminance give you more control. This can be saved as a preset.