NX Studio uses Nikon’s proprietary rendering and faithfully reproduces what your Nikon camera captured (same colors as in-camera JPEG).
Affinity Photo can preserve this if you use embedded camera profiles.
But PhotoLab 8, by default:
Applies its own interpretation of RAW data
Uses DxO’s camera profiles not Nikon’s
Uses its own default tone curve and color rendering**, which may be flatter or more neutral
What to do:
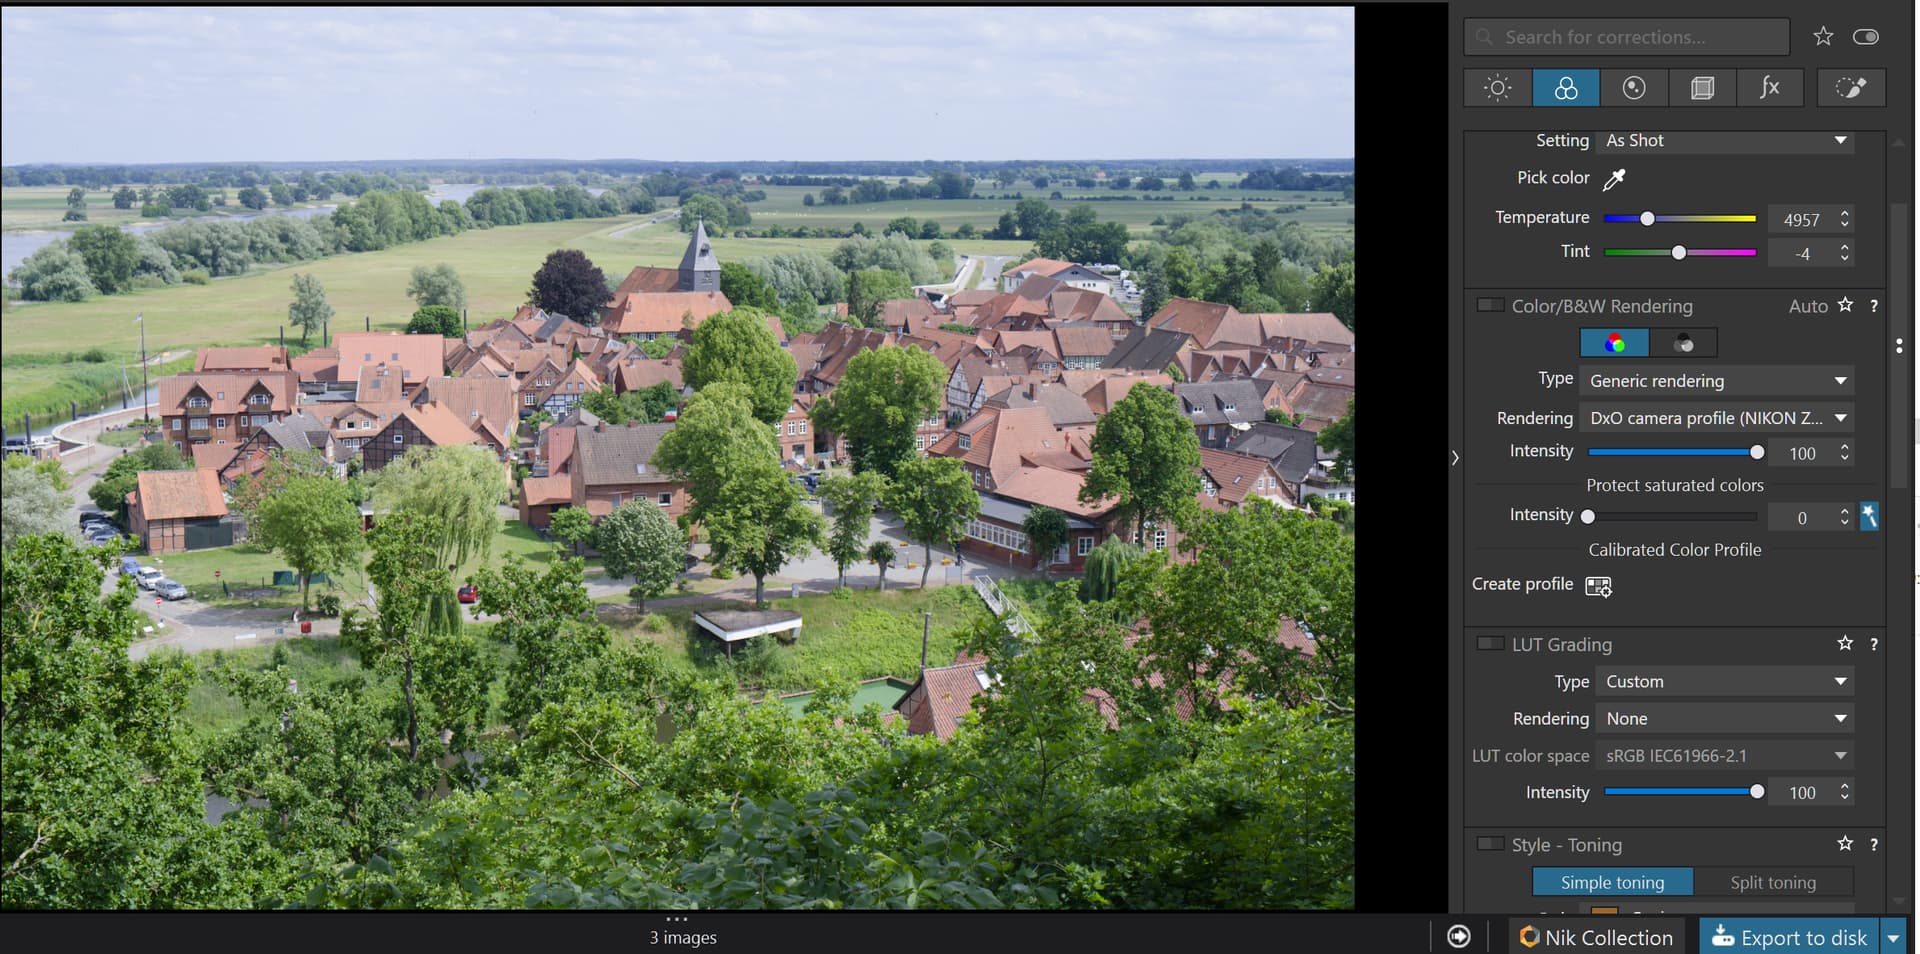
In PhotoLab 8:
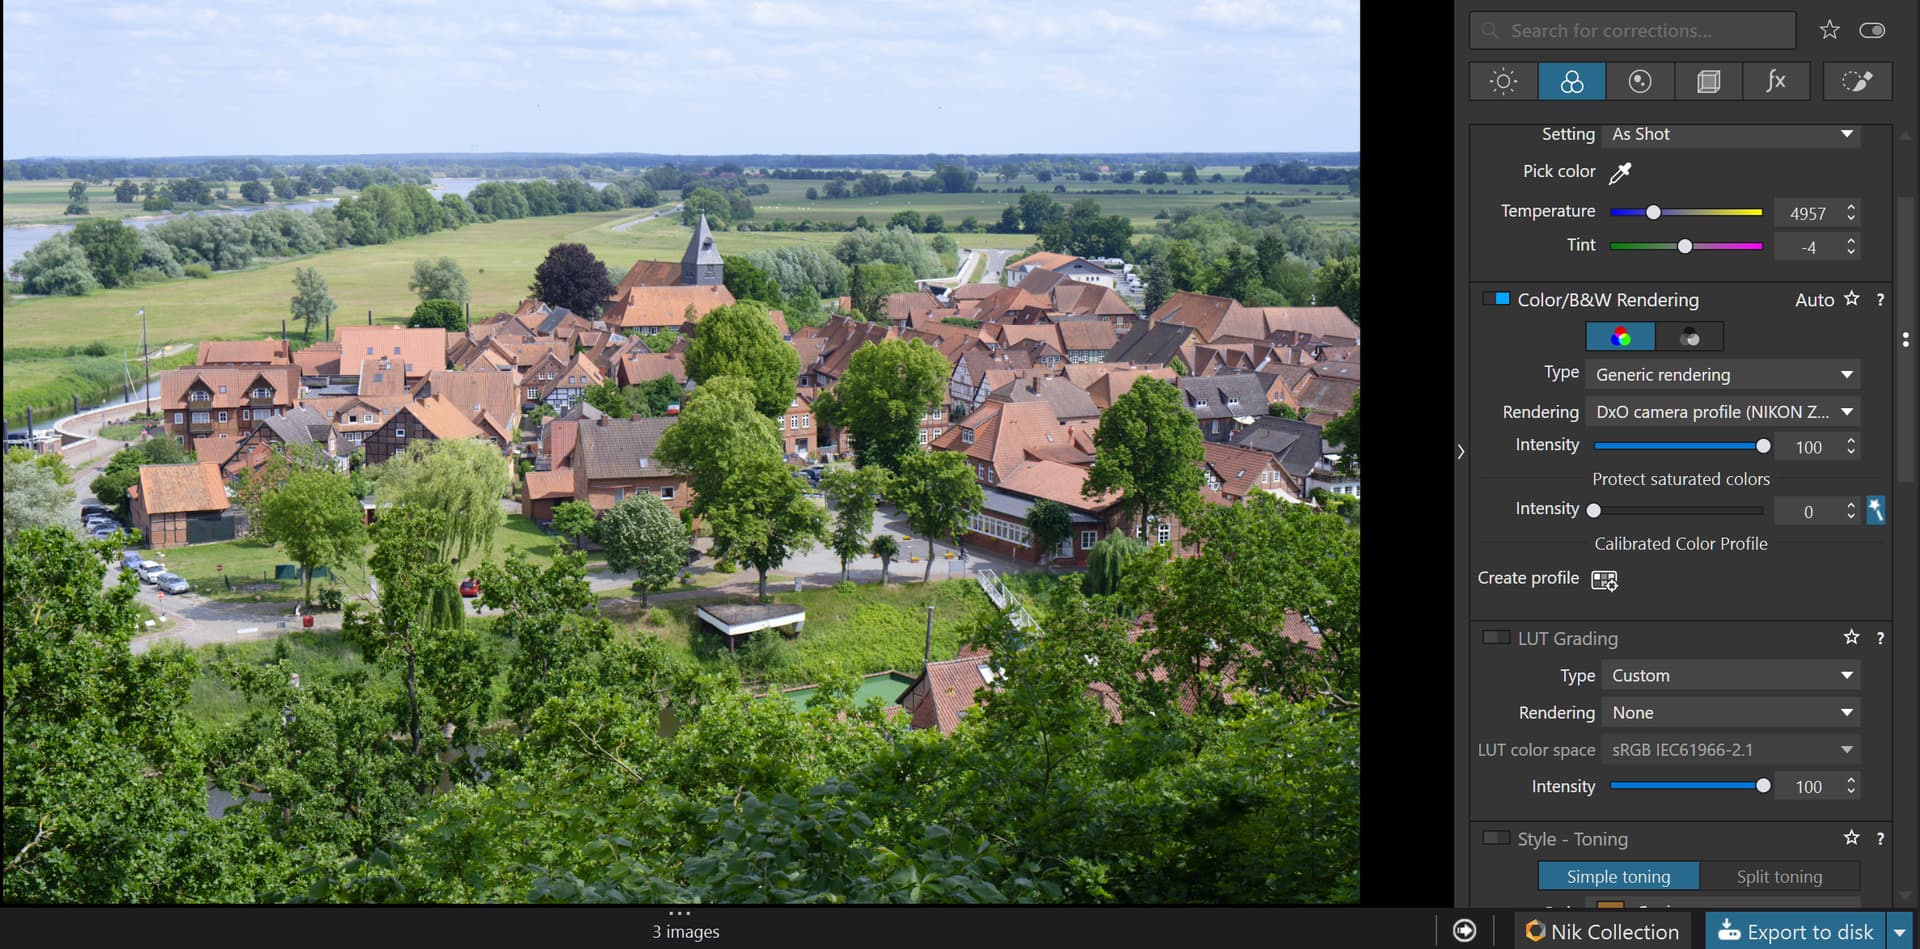
Go to Color Rendering → try Camera Body, Nikon profiles, or DxO Vivid
The NEF (a RAW file) has no colours until it’s been “developed” by a RAW processor.
A RAW file contains an embedded JPG - put there by your camera, reflecting your camera’s settings for sharpness, contrast, saturation, etc
Some RAW-file viewers actually “develop” the RAW file and render their version of the image captured within (such as Fast RAW Viewer). Most others, tho, take the easier/faster shortcut of simply displaying the embedded JPG.
So, when you note that “The NEF and the JPG have identical colors” … it’s likely that you are actually comparing the embedded JPG (not the processed NEF/RAW) with the JPG exported by NXStudio & Affinity.
@Sigi’s post (above) explains how this is different for PhotoLab.
And, try some of the DxO provided Presets to give yourself a starting point for further correction tweaks … See General Purpose Presets after clicking the Presets button.
Also, it’s important to set an appropriate ICC-Profile when exporting from PL.
Typically, for sharing with others and posting on-line, is best exported as sRGB
This is especially important if you have your camera set for the AdobeRGB color-space (not that this will affect the RAW file, but it does record a setting in the RAW file) - AND you export from PL “As shot” … which will result in your JPG being exported with the AdobeRGB color-space … which may result in a flat-look on a screen that’s not capable of properly reflecting the AdobeRGB color-space.
“Flat look” may be due to different color tweaks, but it’s more often due to less contrast, different tone curves used. Maybe you have used Landscape Picture Control setting in the camera, and/or used Neutral rendering in PhotoLab?
It is impossible to give credible answer without knowing what was actually compared. If you can’t supply the NEF file, please specify at least the following settings:
PL: Preferences → General → Automatically use camera rendering if supported
PL: Preferences → General → Auto-apply Presets → For RAW images
PL: Color/B&W Rendering ‘Type’, ‘Rendering’, and ‘Intensity’
PL: Soft Proofing, if enabled
PL: Any other non-defaults used
Camera: Picture Control settings, including possible user tweaks, like increased contrast, saturation, clarity, etc.
Camera: Colorspace (this setting is a hint for RAW processors and it does not affect the actual RAW data)
NX Studio: Edit → Options → NEF (RAW) Processing → Control Reproduction Process (usually causing only minor differences)
The following is more or less what’s in previous responses. RAW data in NEF is in camera’s native colorspace, so you probably mean the JPEG data embedded in NEF. The JPEG embedded in NEF (and separate JPEG file, if present) is generated by the camera according to its settings – Picture Control, White Balance, Distortion, Vignetting, Noise Reduction, plus more for newer Nikons. These settings are also automatically used by NX Studio as a starting point. To control processing of NEF file PhotoLab uses only White Balance coefficients calculated by the camera, recorded in the NEF metadata (plus raw data Black Level of course). Currently, and possibly forever, PL does not use Picture Control settings in NEFs. IMHO (didn’t check it thoroughly), for neutral settings the PL colors and tones look pretty much like in NXS, and they are both quite “flat”.
I know nothing about Affinity Photo raw rendering, as I always feed it with 16-bit RGB TIFFs from PL, which has a way better raw processor. Maybe AP raw processor tries to mimic the ‘Standard’ Picture Control or, less probable, tries to match the embedded jpeg?
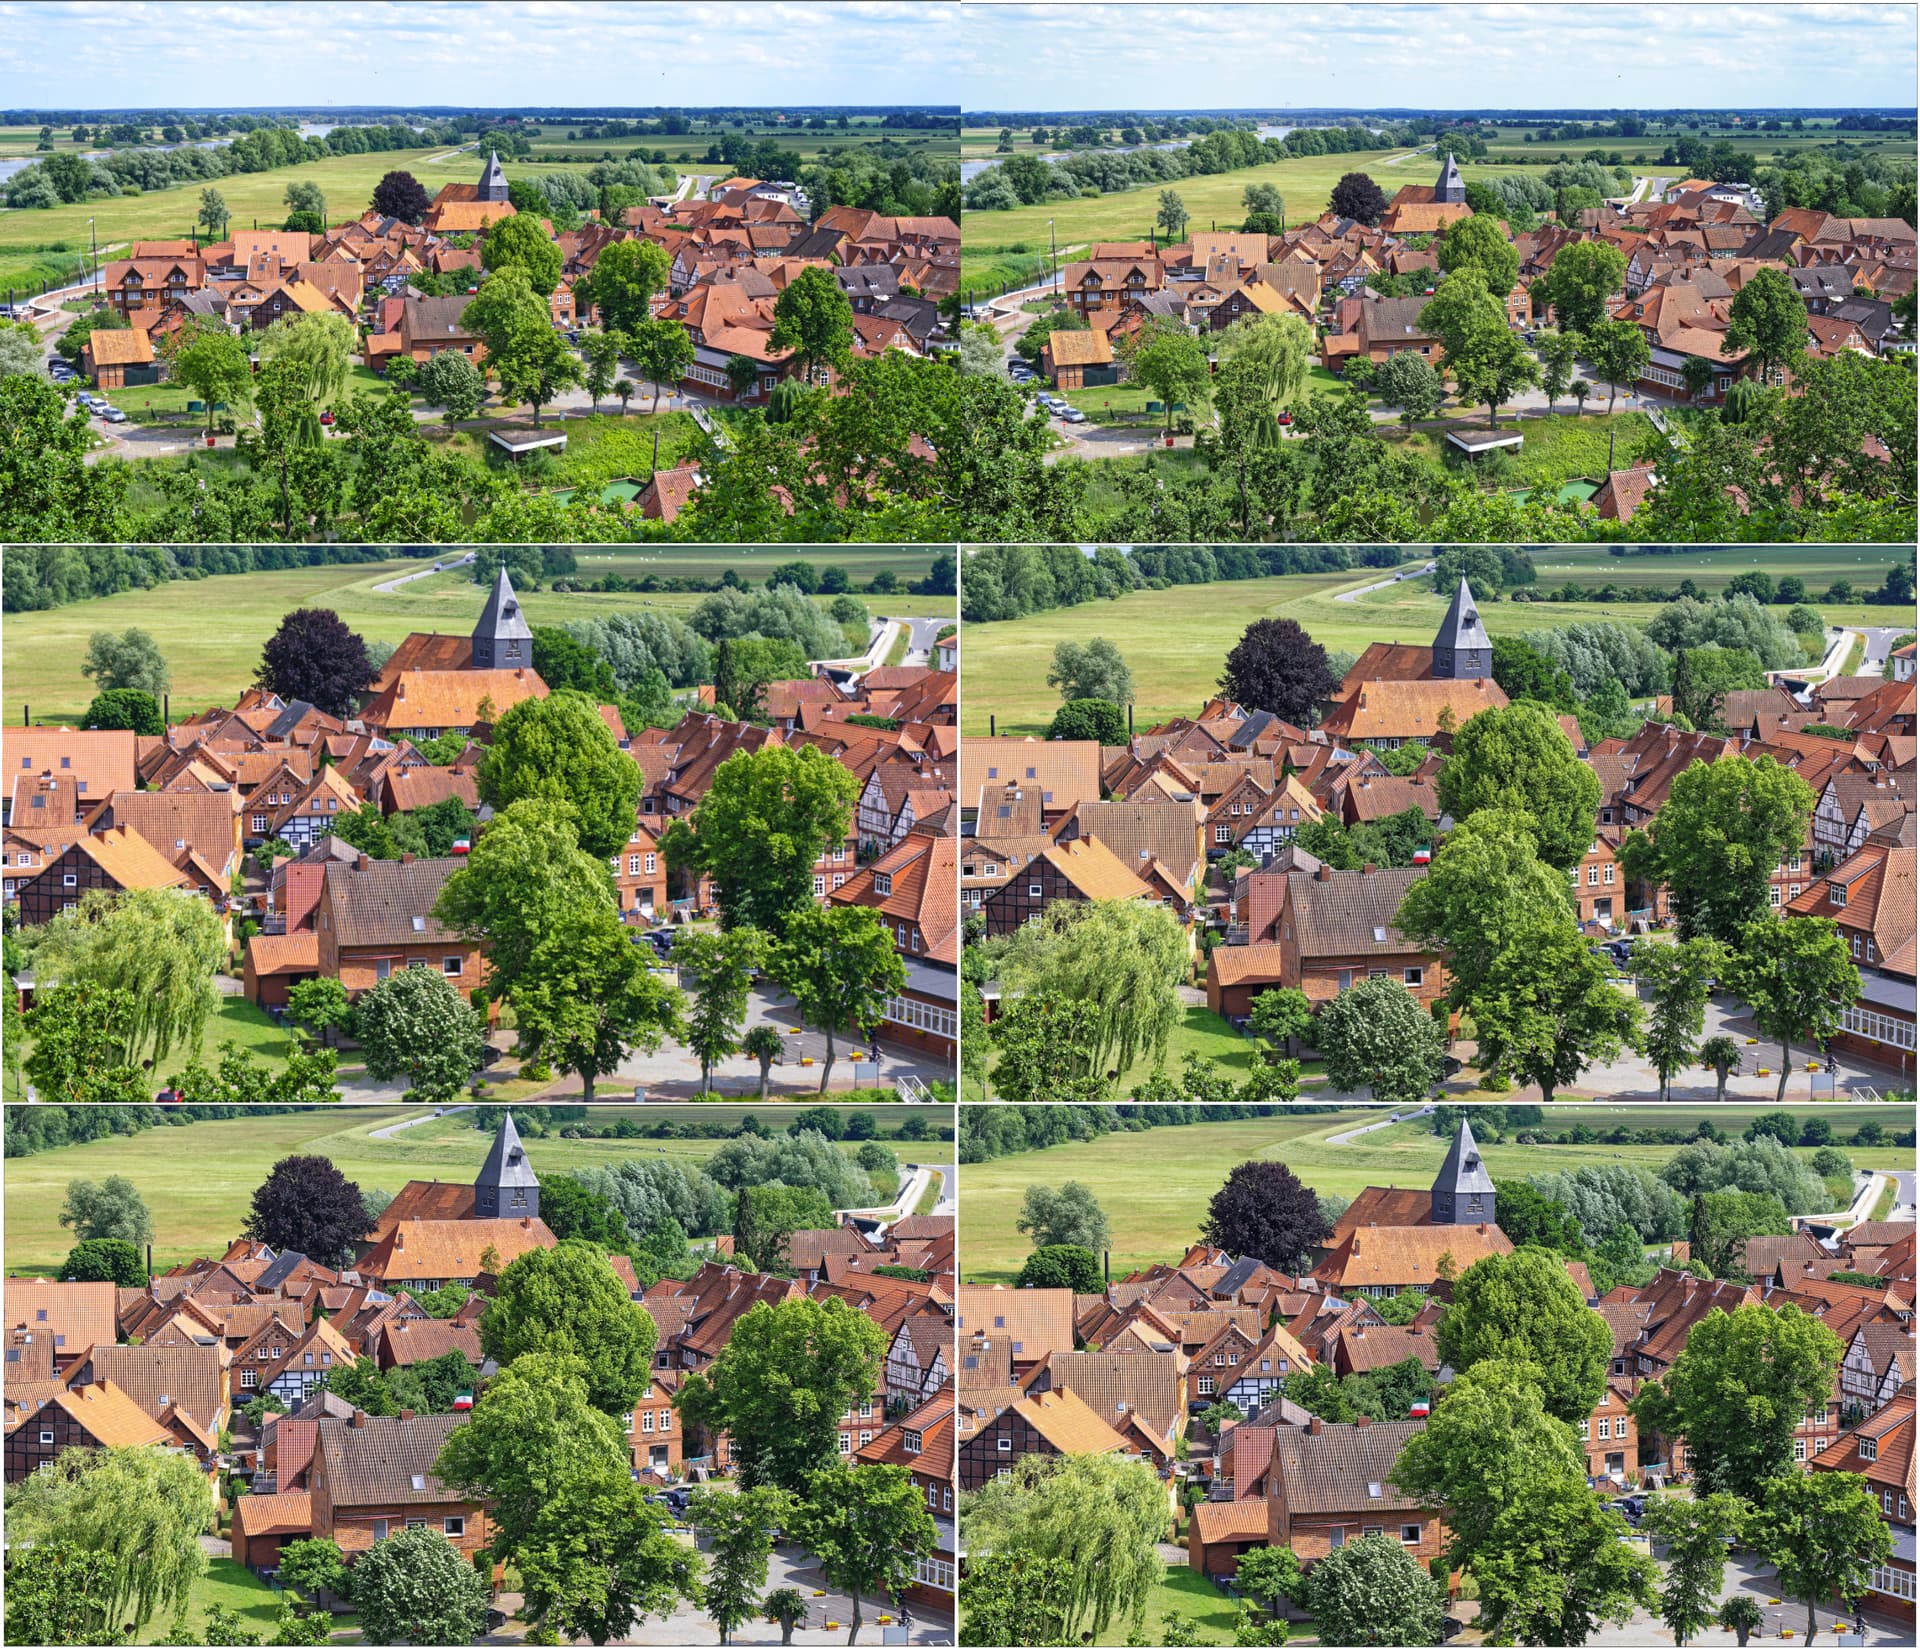
Thanks for the advices.
I have now really tried every setting.
Unfortunately, the exported JPGs remain flat.
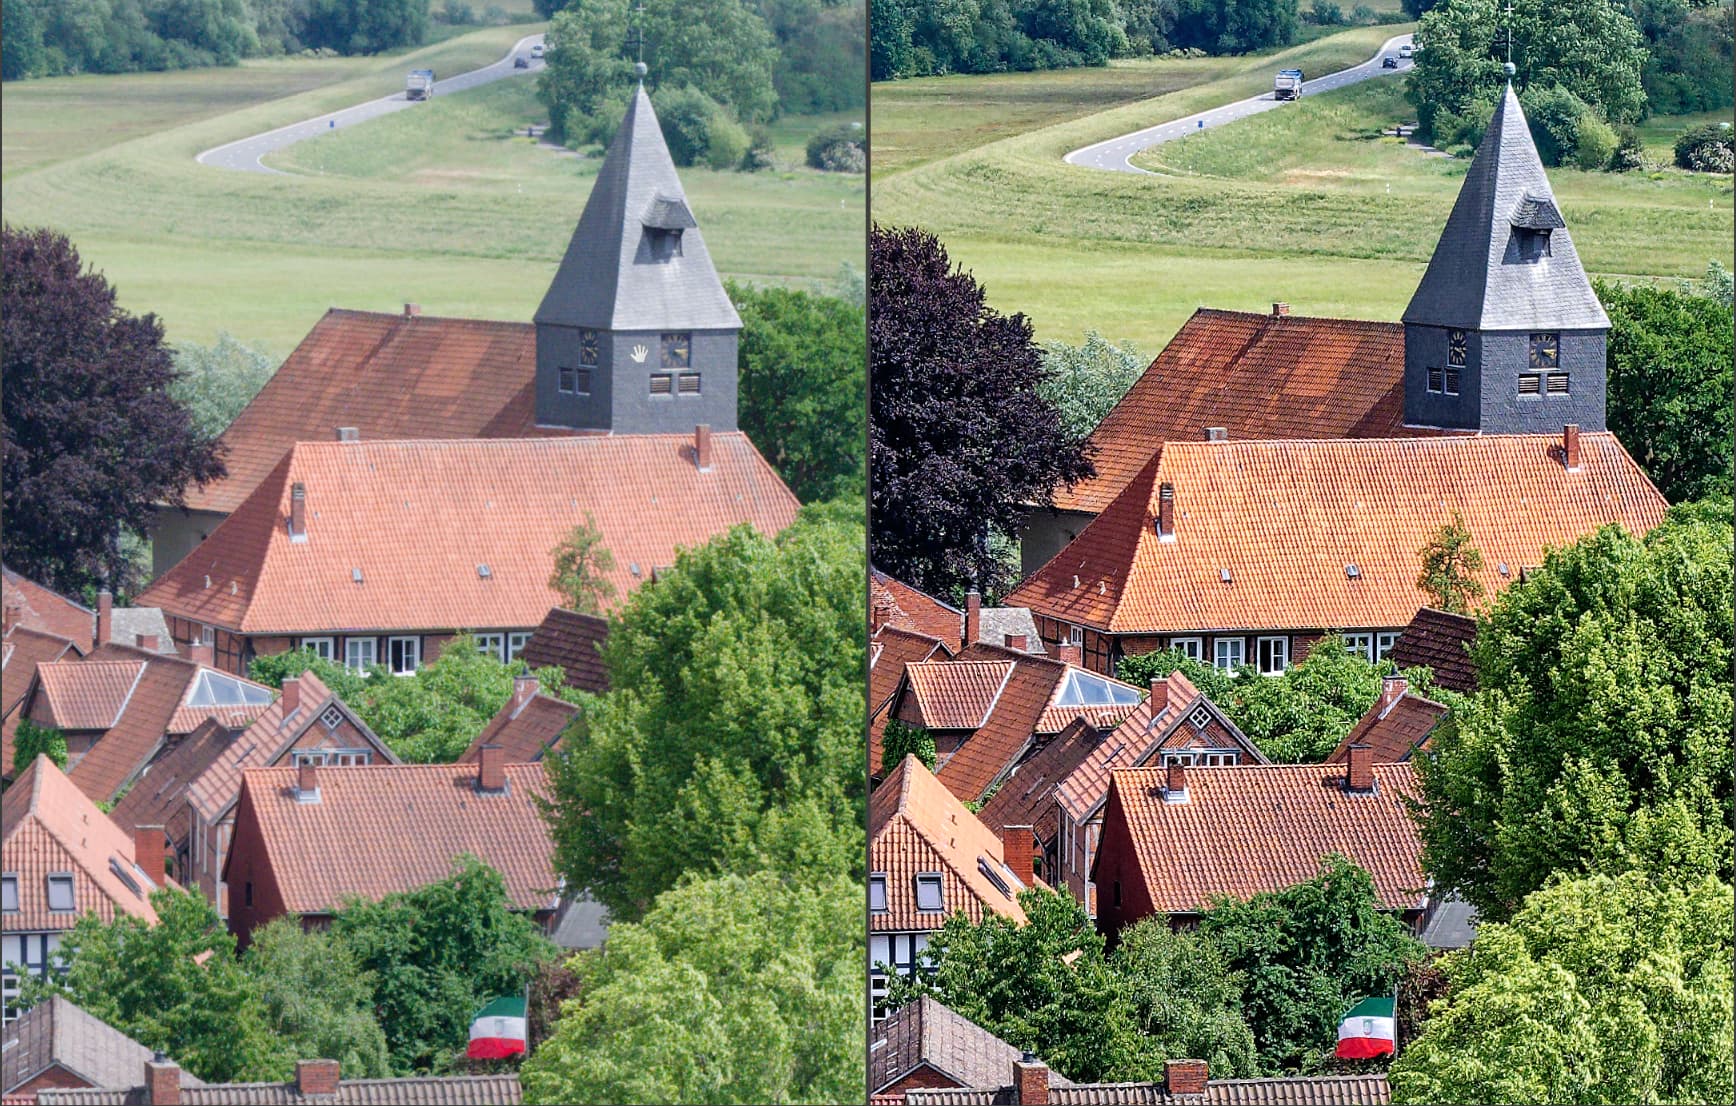
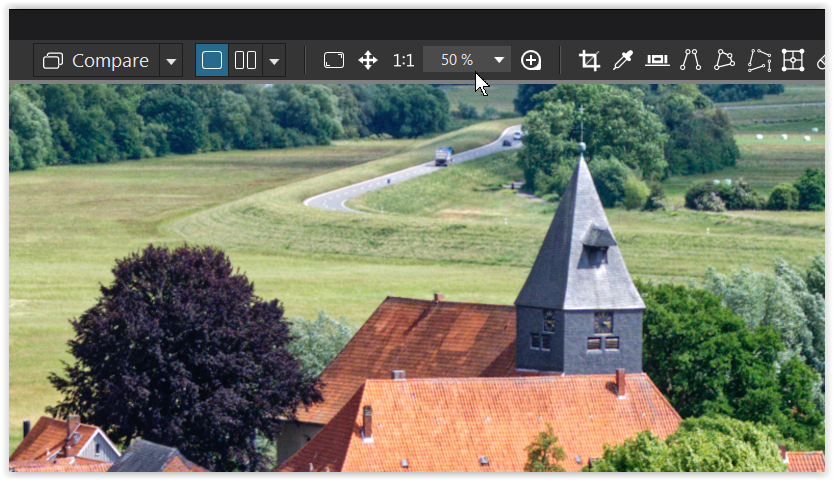
However, it is the case that the saturation is also noticeably greater with the blurred display of Photolab up to 70% than from 75%.
Maybe that’s the reason.
I don’t know what else I could do.
@Walter335 You could help us by showing us what you are seeing and telling us what platform you are using (Win or Mac) and what version of the software you are using (looking at the DOP it is from PL8.6 and on Windows).
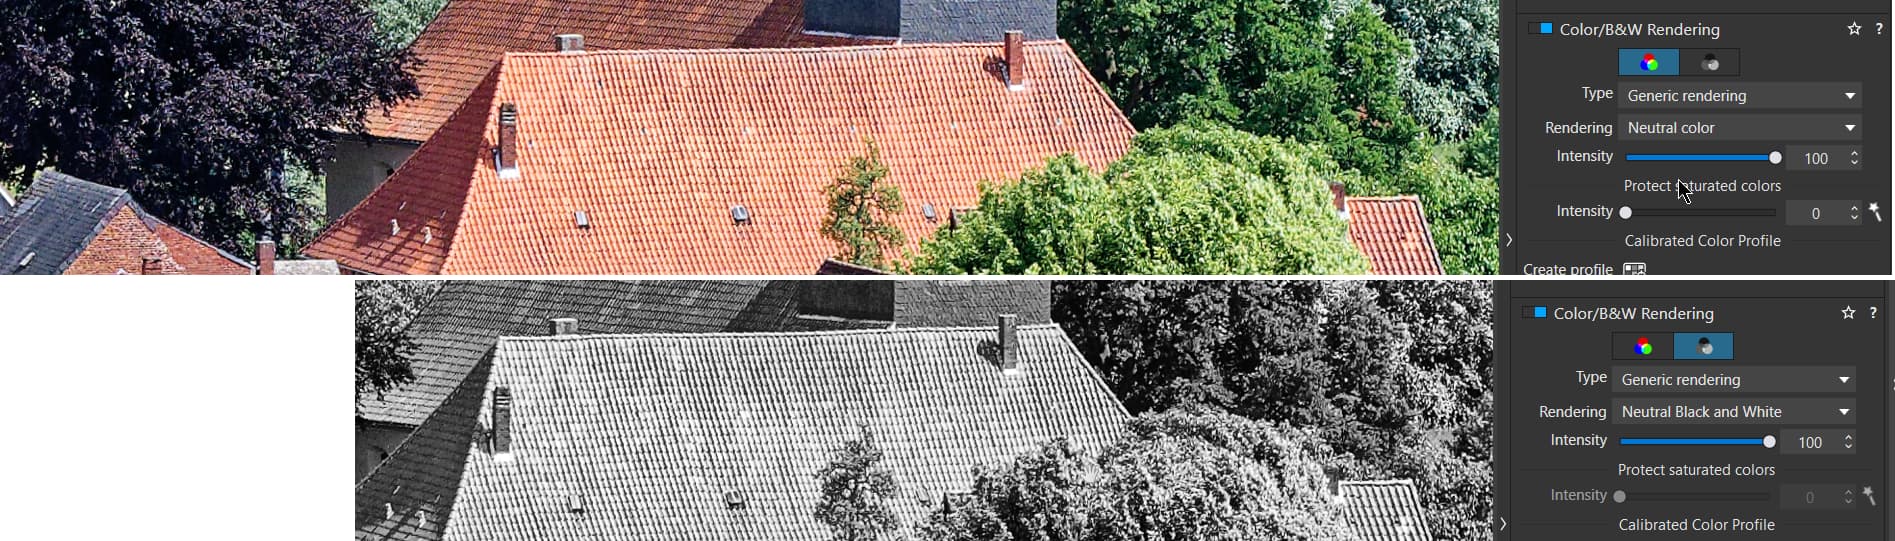
I have failed to grasp why, when reporting issues with a Photo Editing package, many posts use words when the old adage of “a picture is worth a 1,000 words” is actually less than accurate, i.e. they can explain instantly what it takes many words to explain.
I also know some users dislike my use of multiple snapshots because it breaks the flow of the text but the image tells the story better than I can.
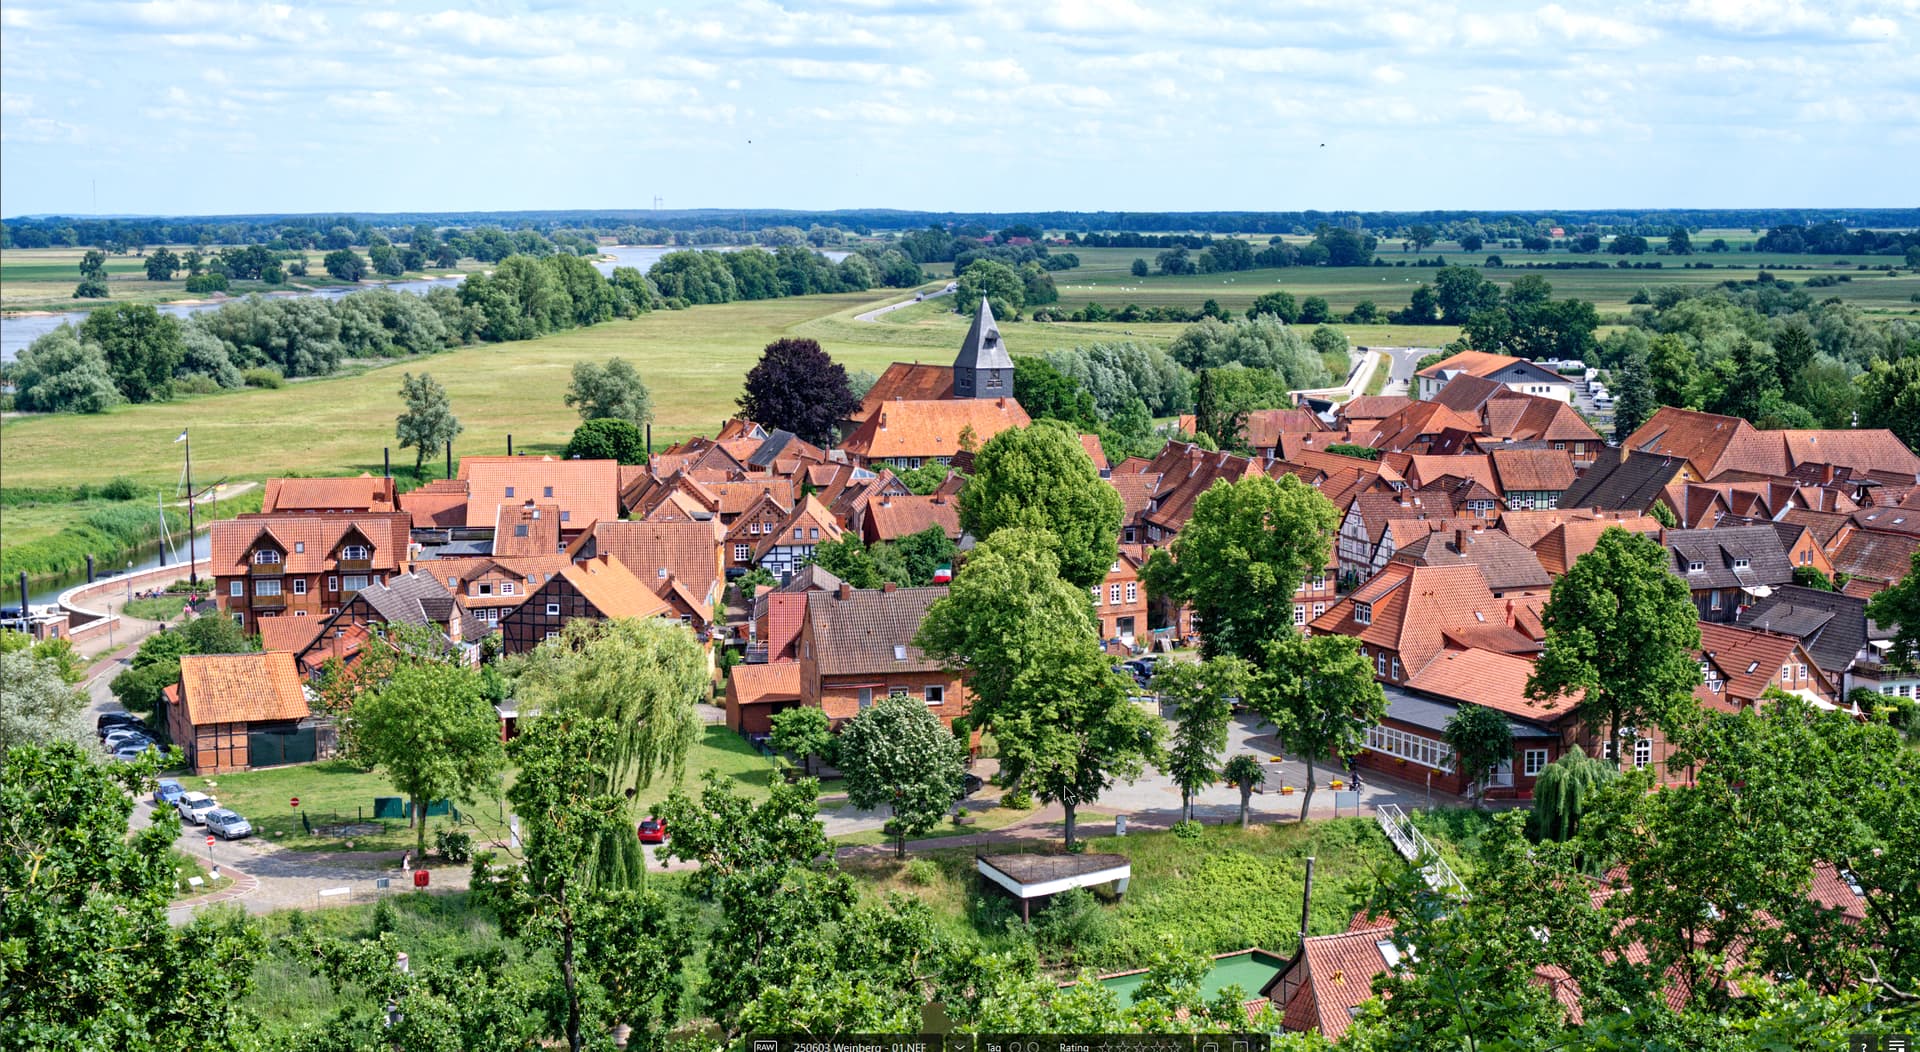
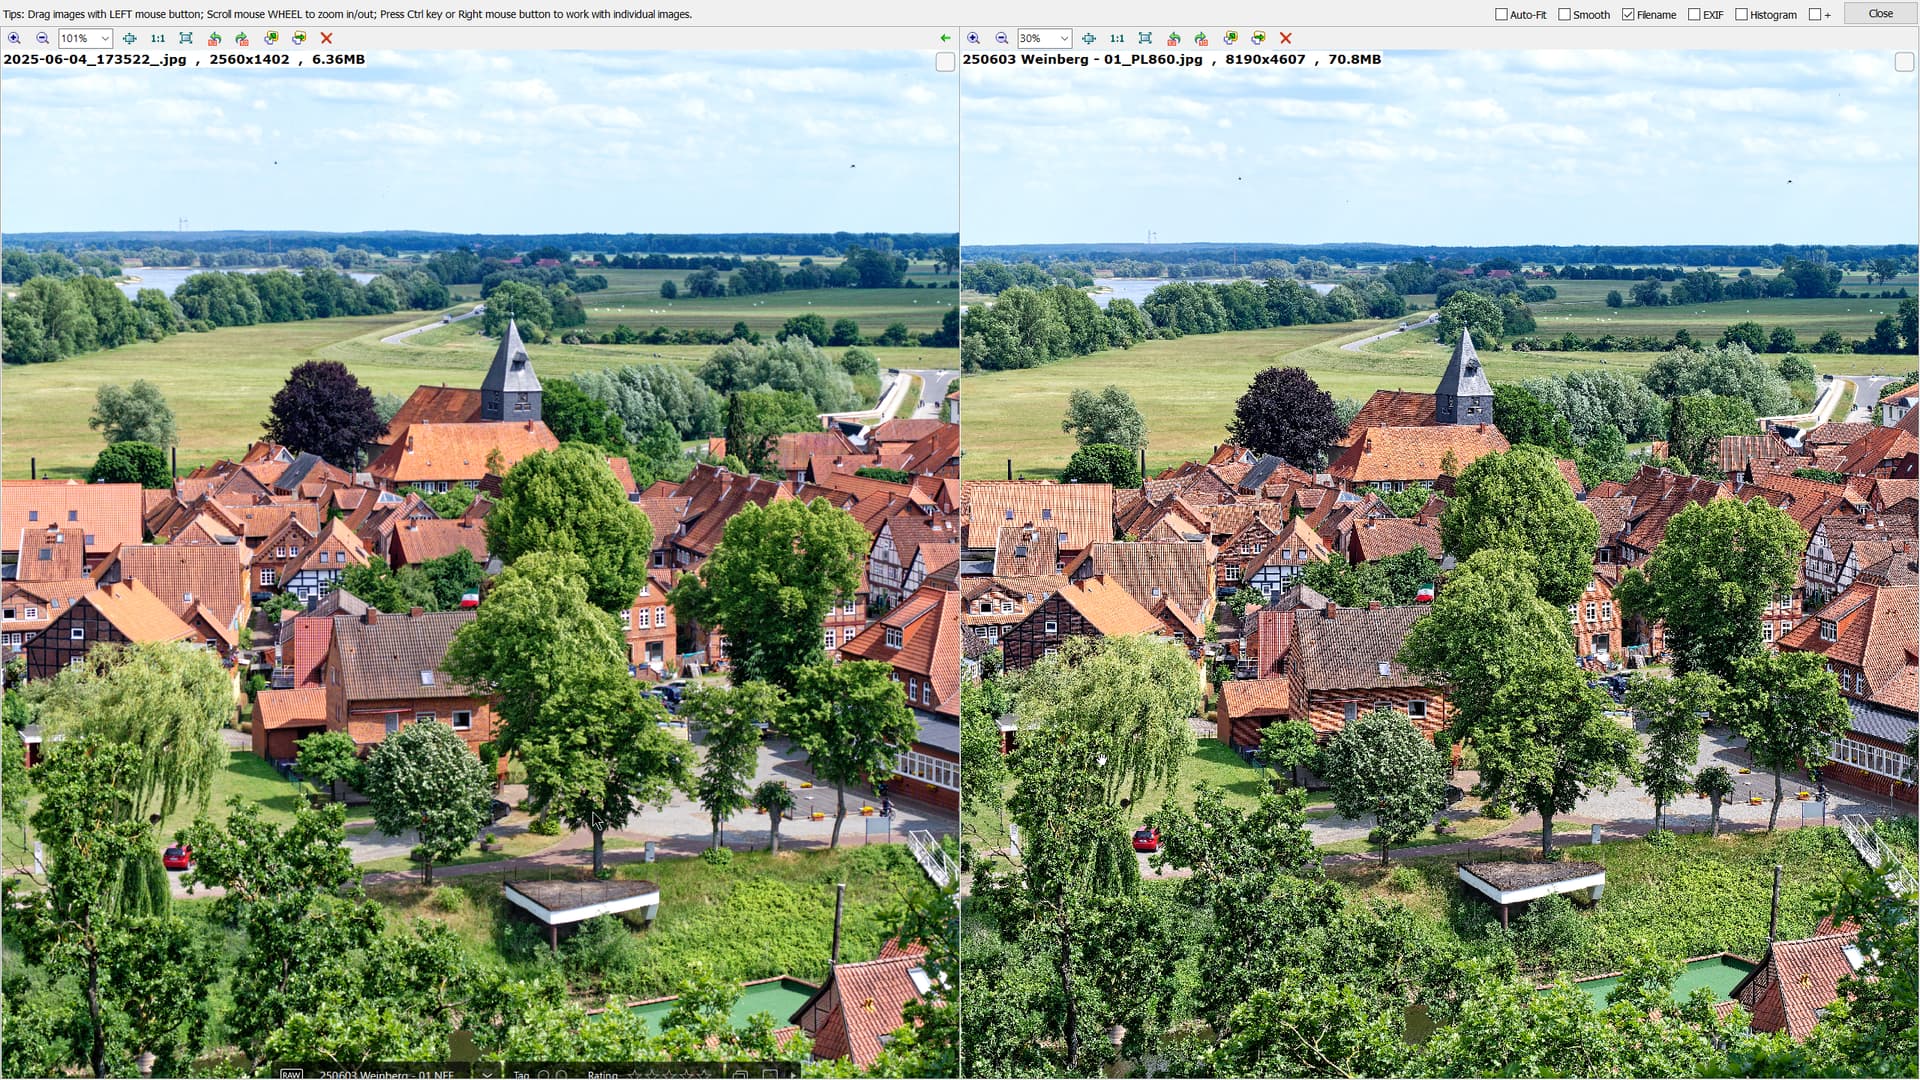
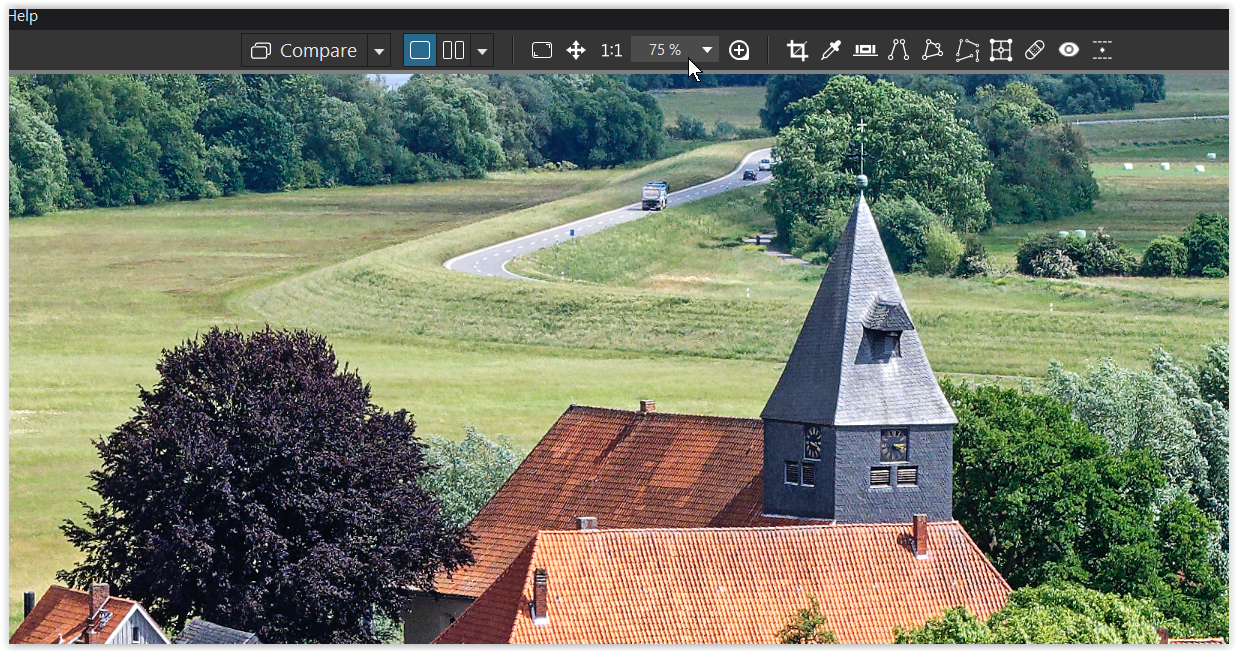
With respect to the PhotoLab image, below 75% it is a bad distortion of reality and over 75% it is still going to be “substandard” for high ISO images hence the introduction of the ‘Loupe’ with PL8 .
However, in the meantime you have uploaded the image and I seem to get this with a full screen (F11) look at the image
PS:- When I first loaded your image (and DOP) PL8.6 started downloading the camera/lens details but never completed but the image was accessible and then I noticed that my memory usage had shot through the roof so I restarted PL8.6 and everything was then O.K.!?
Below 75%, sharpening and color can appear different. I think this is even more noticeable here because you’ve increased some settings (Contrast, Micro Contrast, ClearView+, Unsharp Mask*) plus the Color Enhancements) … but left out Chromatic abberation correction.
As already mentioned, the Loupe we now have in PL8 is the best solution – and necessary to see the result of Denoising.
.
Additionally, your camera was set to sRGB, which only determines the appearance of your OOC JPEG. However, if you convert (export) your raw file to JPEG using the PL setting “As Shot,” your exported JPEG will also “inherit” that color space… which is more limited than AdobeRGB, P3, etc.
greetings, Wolfgang
*) Unsharp Mask is not necessary when you use a camera-lens profile, which makes up sufficiently
How come you can open the dop file and I can’t. The dop file I received is 145kb while a normal dop file, only 1 image, is 11kb. Mine is 7199 line long!!