[Edited to focus on depth mask, not AI mask] I’ve struggled to achieve any usable result for depth masks on complex subjects. I think no such mask can be used on a complex subject without a feathering control. Is there a workaround that provides any diffusing/feathering/fading of the edges of a depth mask? Thanks for any advice.
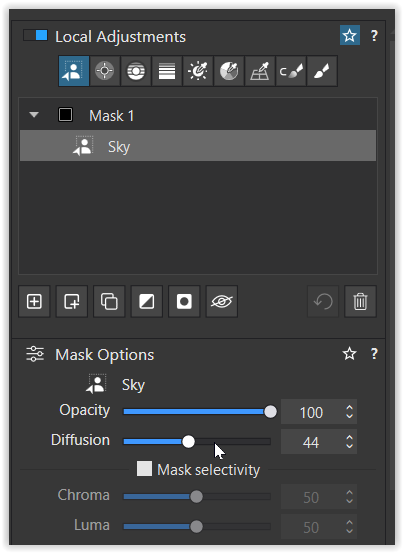
D’oh! Embarrassing for me. I stepped away from PL for a month, and transposed my recollection of which filter(s) I had been having this difficulty with: It is the depth mask, not the AI. With the depth mask, I can’t get a usable result because it swallows up the tip ends of hair, feathers, etc., and it seems like a simple feathering control could solve it, turning it into a favorite tool. Am I right that the depth mask lacks a feathering/diffusion slider? Apologies for the wasted bandwidth. I’ll be more careful.
Maybe you should create a feature request.
Indeed the diffusion parameter as it currently stands is not precise enough to refine the edges of any cache. This applies not only to the depth mask, but also to all masks that use it.
This would be I think the most usefull improvment to masks as they exist now. It has to be improved.
EDIT : Or maybe I didn’t test it the right way (i’m waiting for black friday now) : would a combination of diffusion + luma/chroma do the trick ?
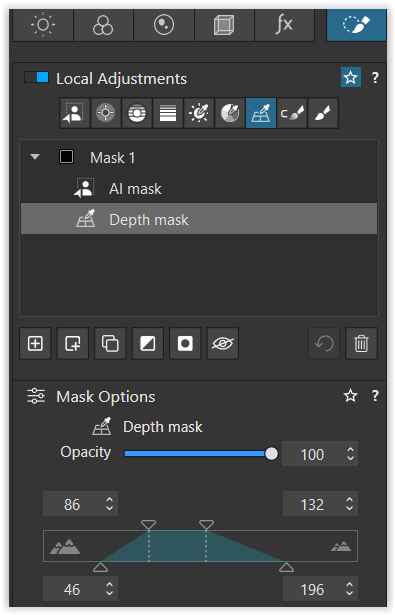
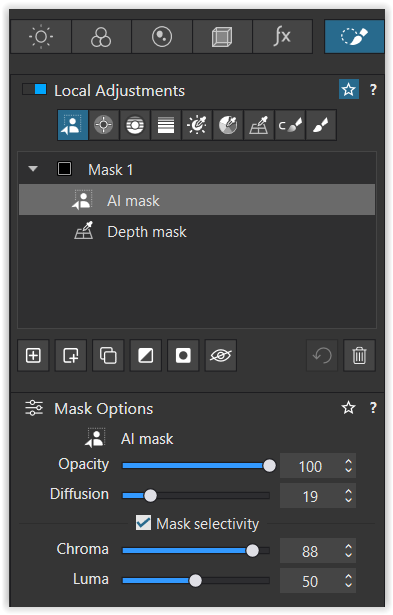
What exactly do you mean by that? Any sample?
Personally, so far I’ve found depth masks surprisingly good for subject separation, but it’s perhaps too early to make a general opinion. In most cases I’ve used the negated depth mask to play with microcontrast, sharpness, LSO, contrast, saturation, or exposure. You can set its “diffusion” by using submask parameters and it works most of the time for me, in fact more frequently than I expected. For example, it has done a good job for my recent “vacation photos” and some concerts. Of course it’s not perfect for everything, but you would have to provide your real world case. Maybe DxO can then make it work for a greater variety of photos, if you care.
Thanks for taking the time to reply, Wlodek and Wolfgang. I don’t have samples easily available where I am, but the core problem has been that the outermost tips of hair, feathers, smallest branches or needles, insect appendages, spiderwebs, flower parts, etc., get swallowed by any depth mask I try to use to add some blur to an image.
I try moving the mask forward, aft, narrowing it, widening it, but nothing restores ‘the lost tips’ while maintaining a useful (intended) zone of blur.
I can restore the edges, but then the blur isn’t in a logical band/zone anymore.
I’m sure it’s less of a problem for ‘light dustings’ of other controls, like just adding a bit more midtones or dropping whites a touch, etc., but if applying blur, it ruins the effect.
I’m intrigued by Wolfgang’s suggestion that the diffusion control can be used on depth masks by only invoking the depth mask as a subroutine of an AI mask (if I understood the idea correctly?). And then Wlodek may have echoed that idea when they wrote: “You can set its “diffusion” by using submask parameters”. I’m not sure how all of that works yet, but I’m glad to experiment.
More generally, I’m curious whether either of you or anybody else has succeeded in getting a depth mask to leave the finest outermost tips of fine details preserved, while continuing to mask the zone you wanted to mask.
Speaking about subject isolation, using LA Blur very rarely works for me because it often destroys the edges important for overall perception. After all, Blur simply blurs everything around, disregarding any edges. Start with negative LA Microcontrast instead. It’s not that strong but it looks more natural, imho.
I’ve seen very few cases where Blur=5 works, i.e. if the edges of the in-focus part are soft enough, e.g. the main subject not fully in focus with its edges already blurred enough in the original. For specific type of public, it may make wonders, though  . Otherwise even Blur=1 is very often too much for me. On the other extreme, I came across cases where setting LA Microcontrast=-30 was OK, while -50 was too much, making the picture look artificial. Obviously it depends on photo. Don’t expect getting spectacular results just by using negative LA Microcontrast, but in most cases you’ll get background less distracting, without any artificial, waxy look.
In “subject separation” cases, I just set LA Microcontrast, Sharpness, and LSO to minumium values as a starting point, with the latter two usually having only subtle effect, if any. For very noisy photos, setting LA Denoising to a high Intensity and/or low Force Details values is another option to use. Sometimes background/foreground isn’t muted enough to meet your goal, but still it’s better than the original. On the other hand, in rare cases things like “swirly bokeh” can add something catchy. Many cases to consider…
No, the Depth mask is not a subroutine of an AI mask …
In this brief example, I started with a depth mask and adjusted its extent using the trapezoid slider. I then added another area to the existing selection by incorporating a sub-mask—in this case, an AI-based mask (by default the sub-mask is positioned on top!). Both the depth mask and the AI mask have their own individual Mask Options*), meaning each selection can be fine-tuned separately. While it may sound complicated at first, it is actually quite straightforward in practice: the Mask Options*) apply only to the specific part being added—they do not “overwrite” one another.
.
Targeted experimentation will take you further than my explanation. 
.
*) edited for clarity
It rarely works for me too, although I have used a LA Blur of value 1 then adjusted the Opacity to further decrease the blur.
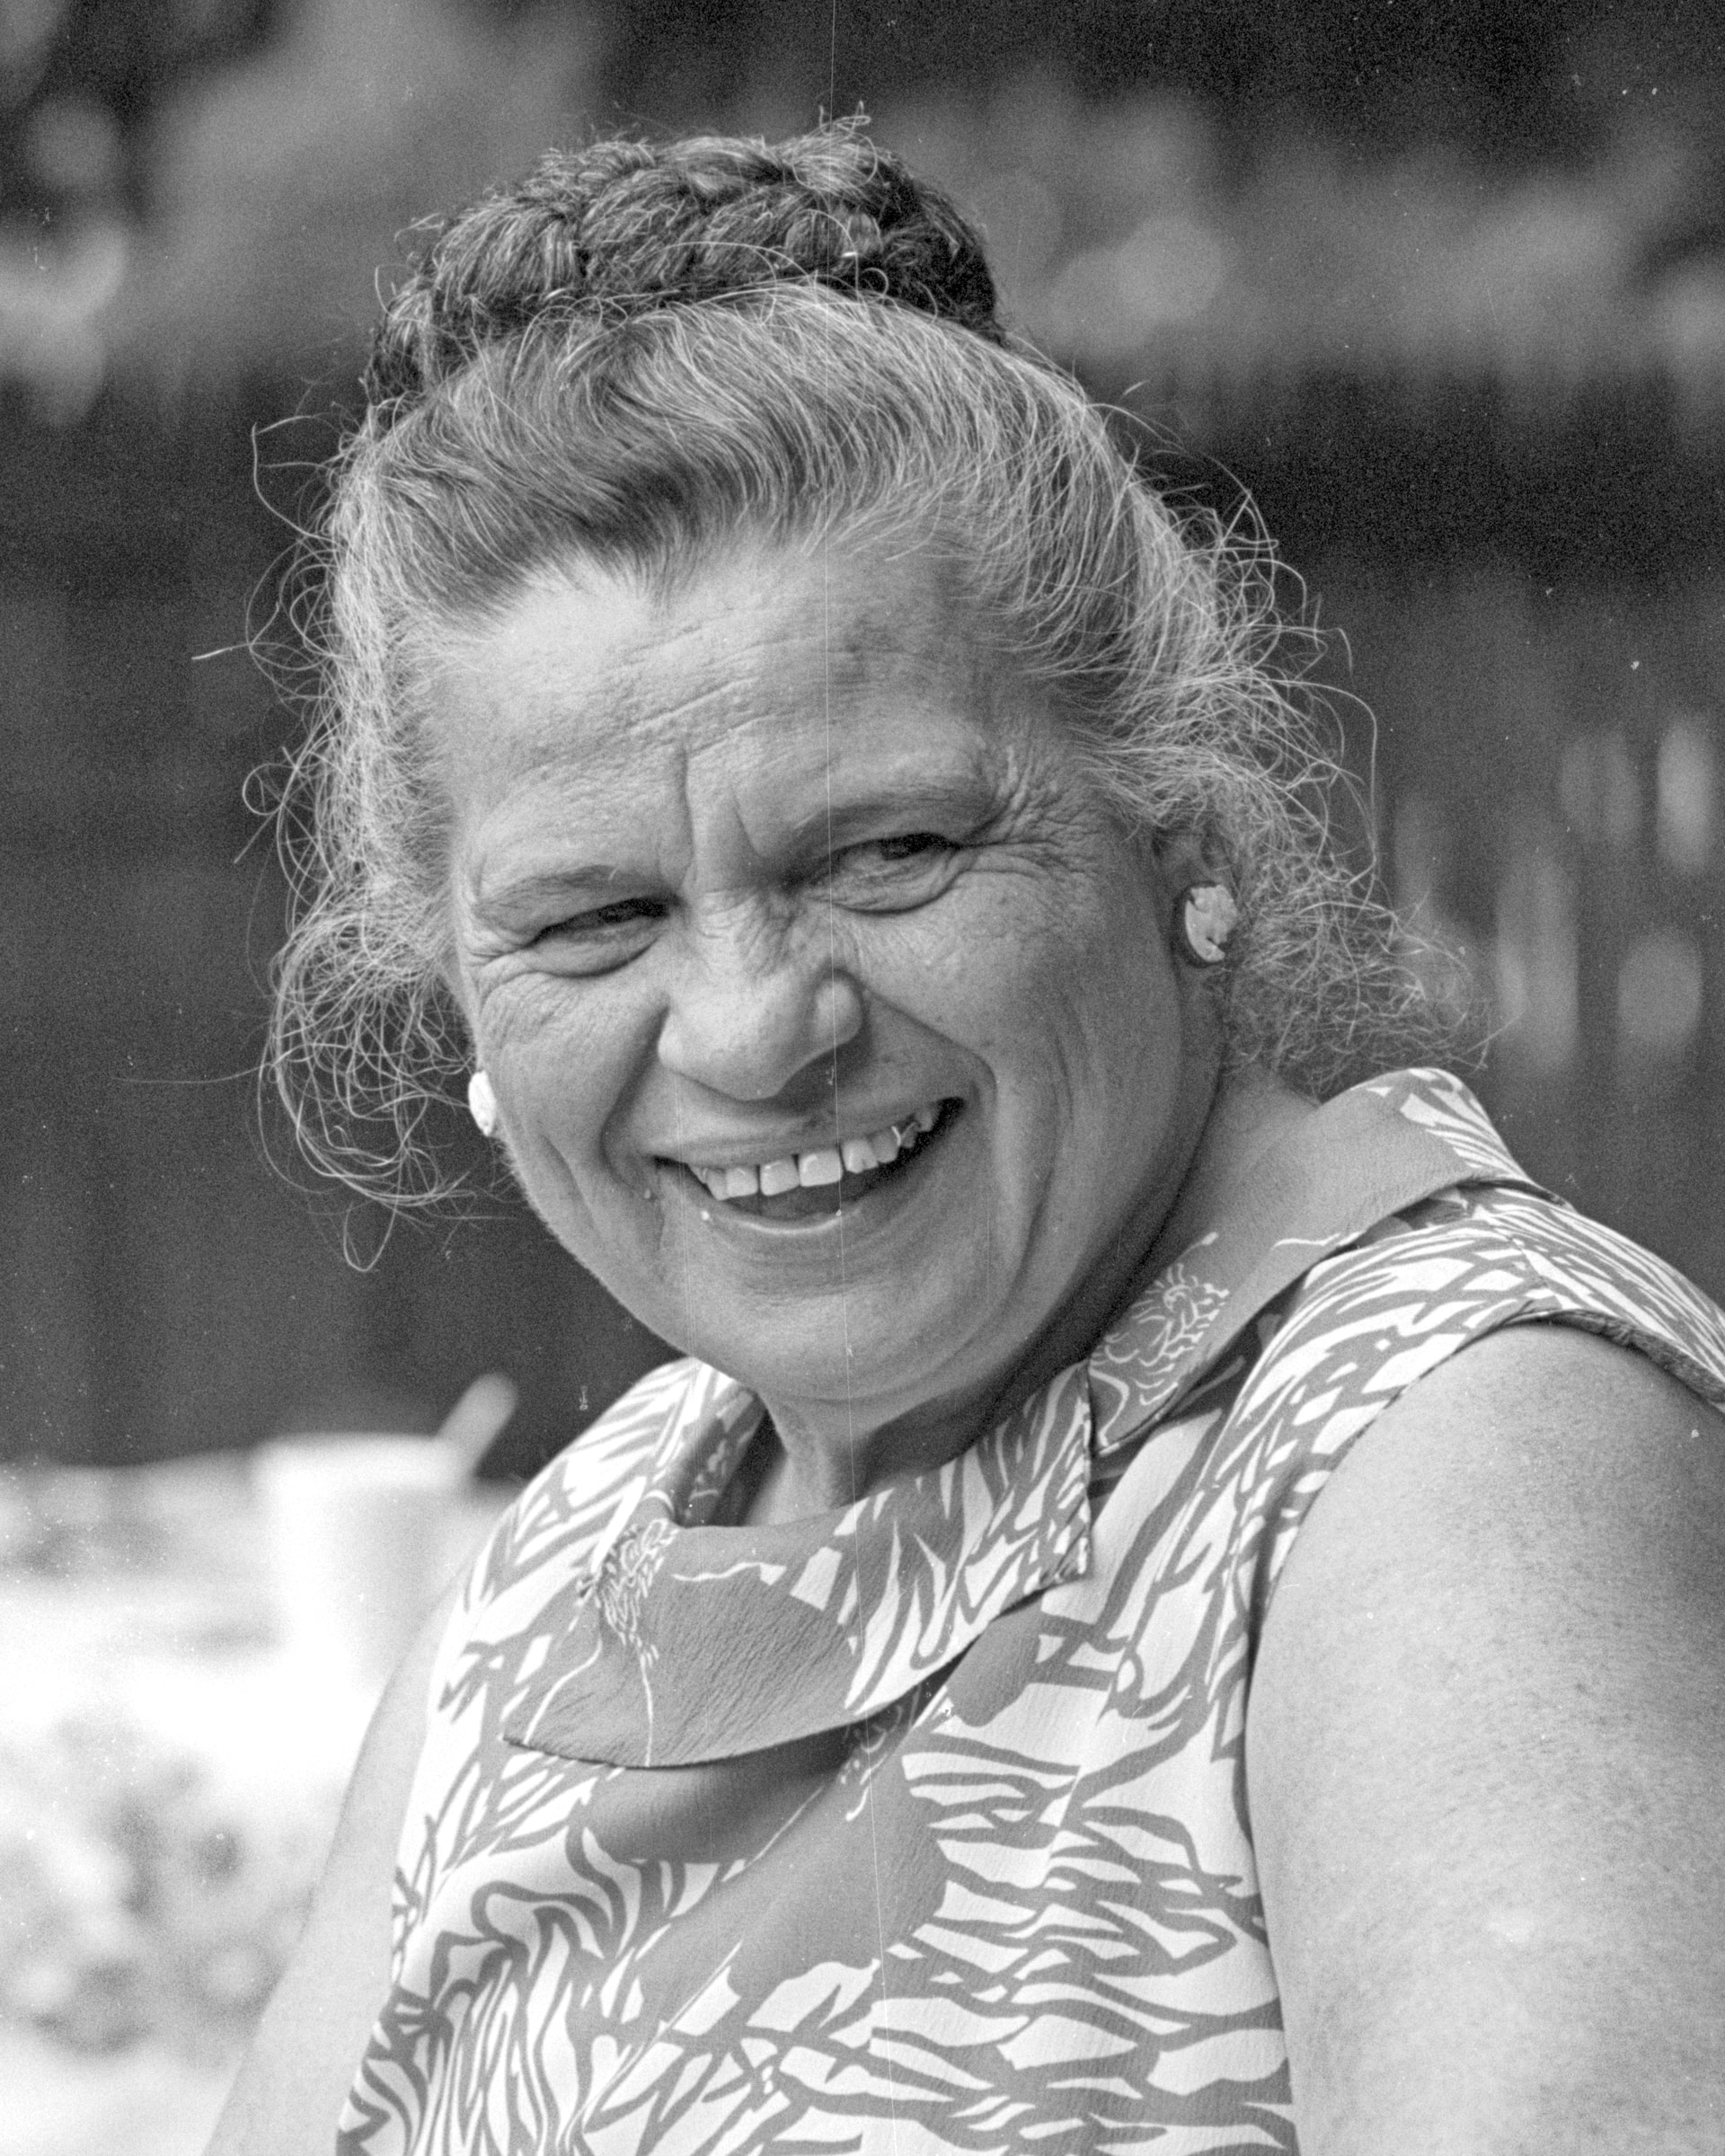
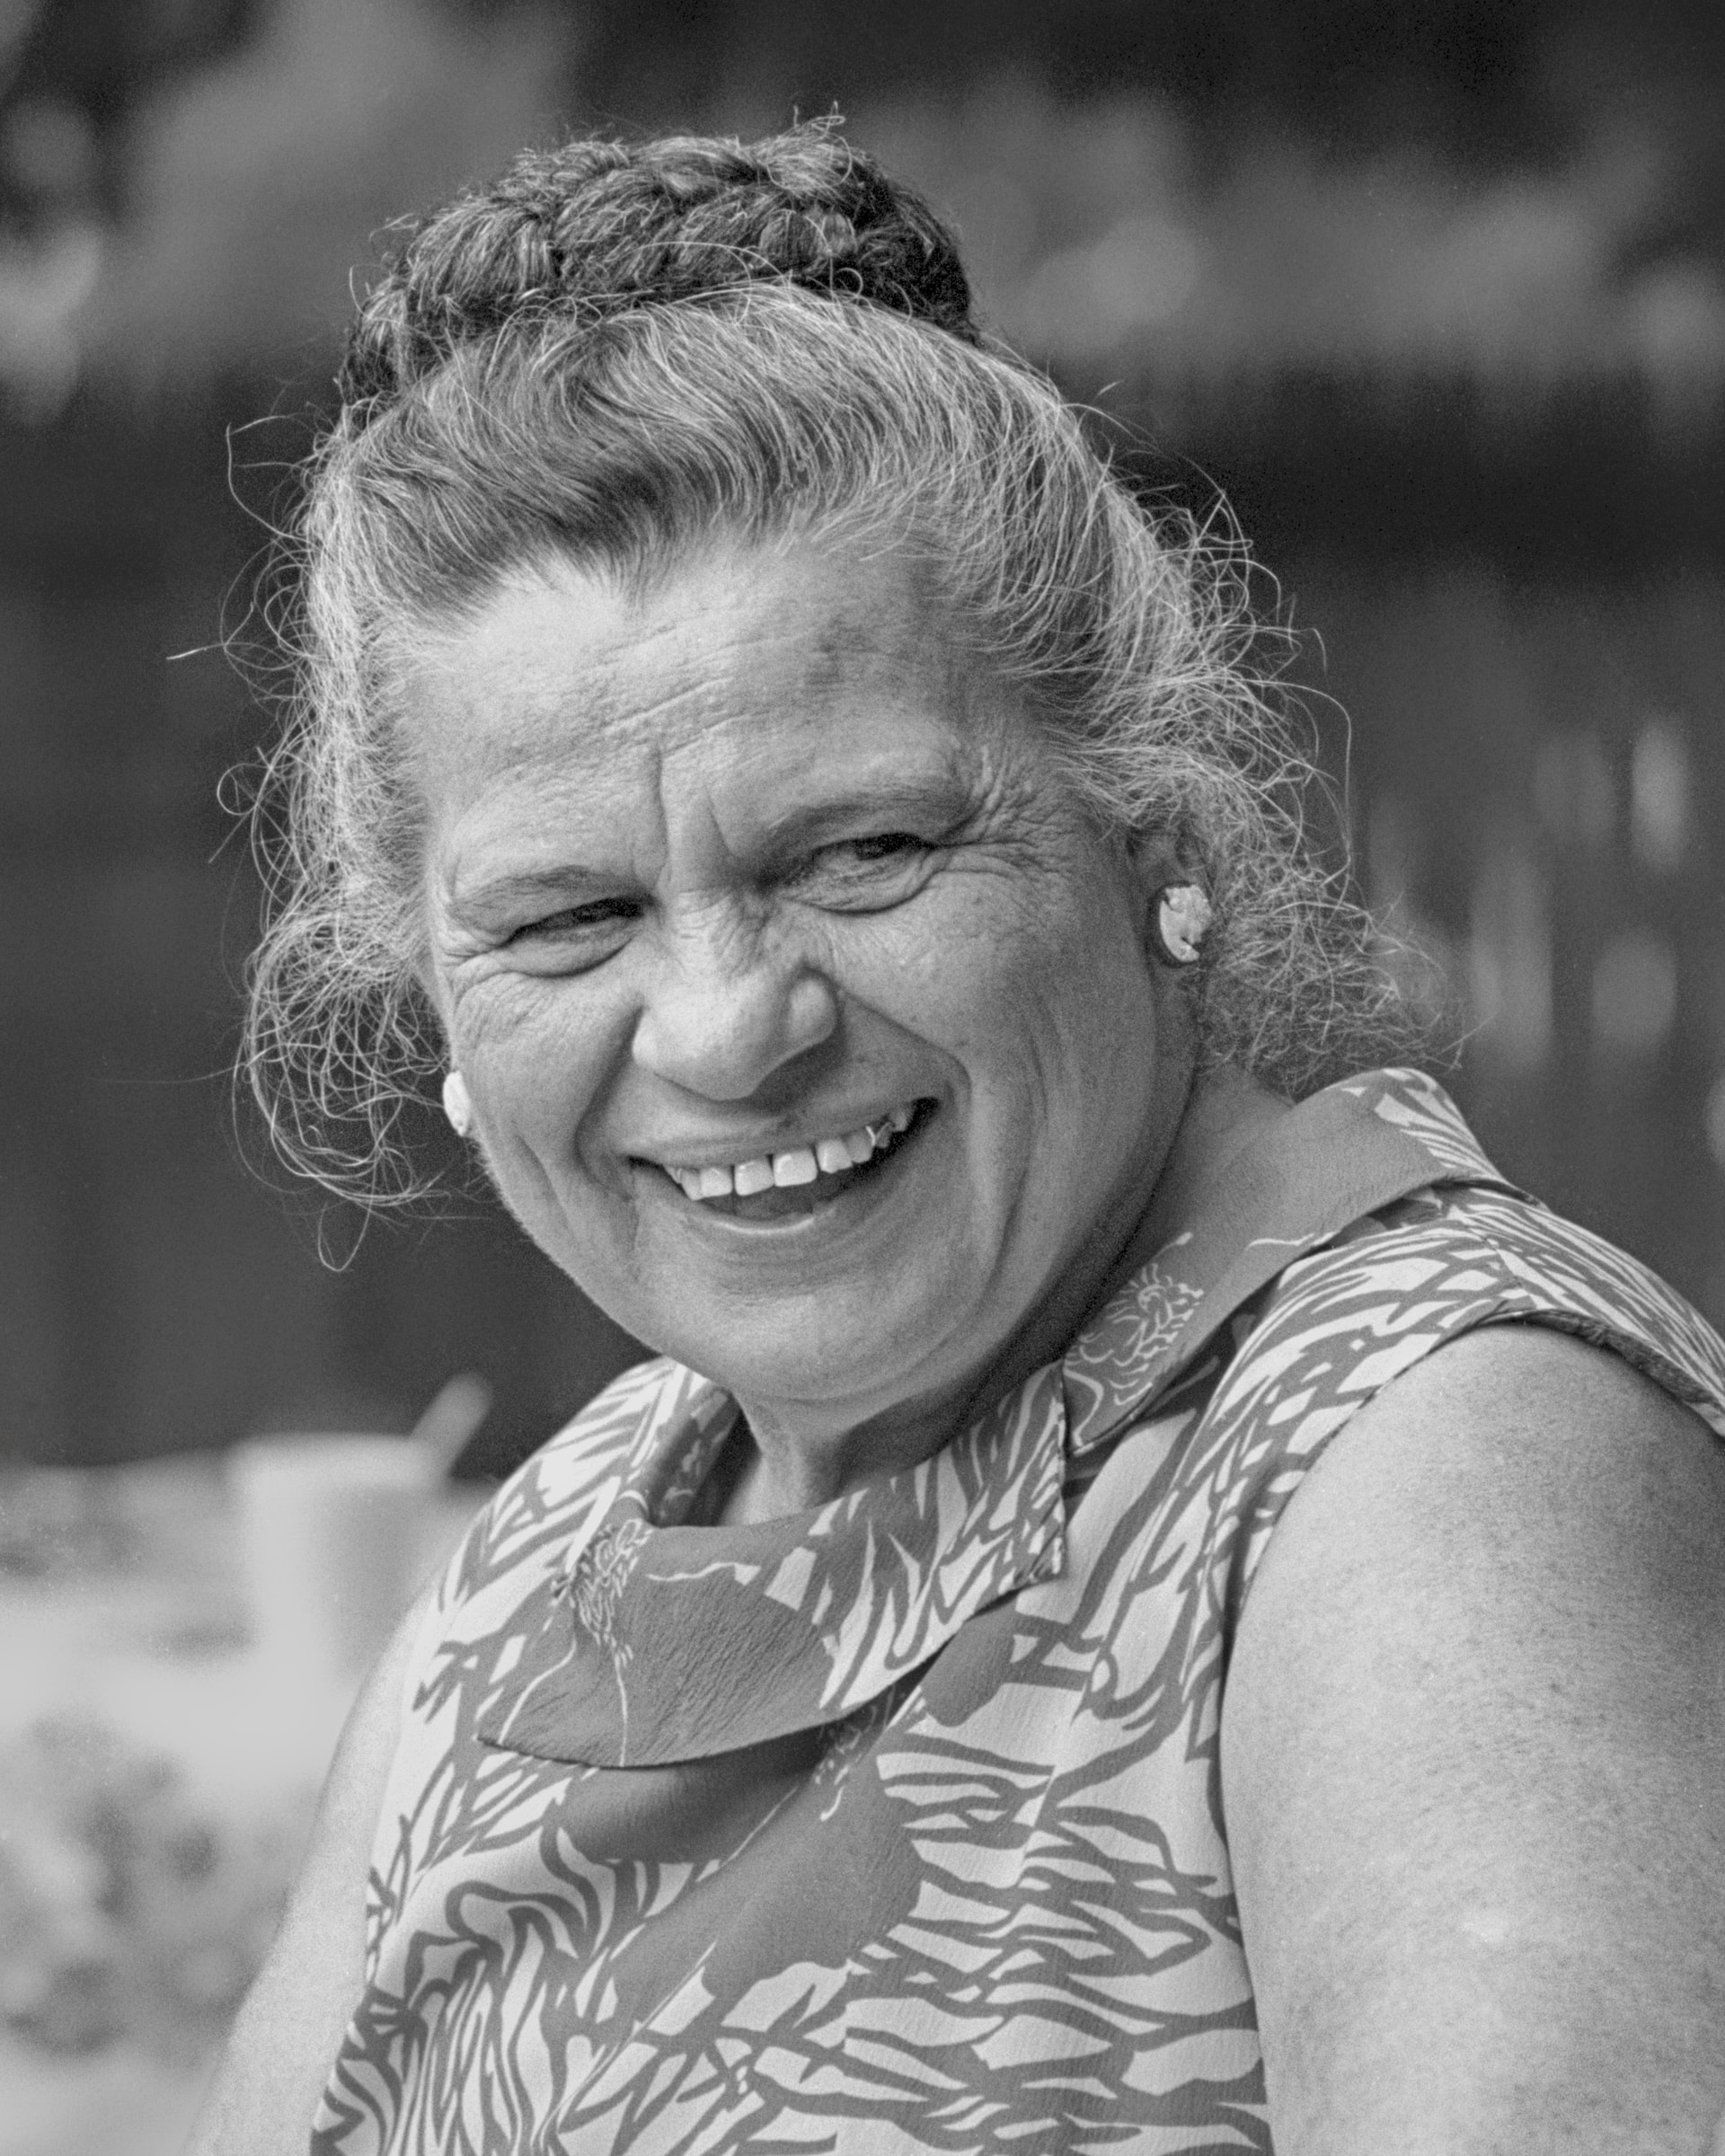
Re negative Microcontrast, I too find it can produce superior results in certain cases. Just yesterday I used it to great effect. Below is the original scan of a Tri-X 35mm I took of my Grandma in 1971. Under it is the final corrected image. To reduce the distracting film grain of the background, I created a Subject mask for grandma and her amazing hair, inverted it, then applied a negative 100 value of Microcontrast.
My pixel-peeping eyes cannot observe any degradation in the detail of the flyway hair. If I’m pleased with the result looking at the image full screen on my 27" Apple Studio Display, my relatives who will probably view the image on a phone or on Facebook definitely will not notice any issues. I am amazed at the quality of the AI Subject mask in capturing every flyaway hair with no further work on my part.
After a bunch of other LAs I output the final edit to Photomator and retouched the dust spots and negative scratches on my iPad with an Apple Pencil. If you haven’t tried correcting such flaws that way, I encourage you to head to an Apple Store and try it out. As an old-timer who used to fix prints with watercolors and a fine brush it seems like magic to me.
A generative healing brush is the one tool PL is sorely lacking and the only reason (other than social sharing) I need to leave the DxO editing environment.
I´m not following you here. A dept mask is not a precision tool in my experience. Wolfgang has pointed out the tools you have to use to handle it already.
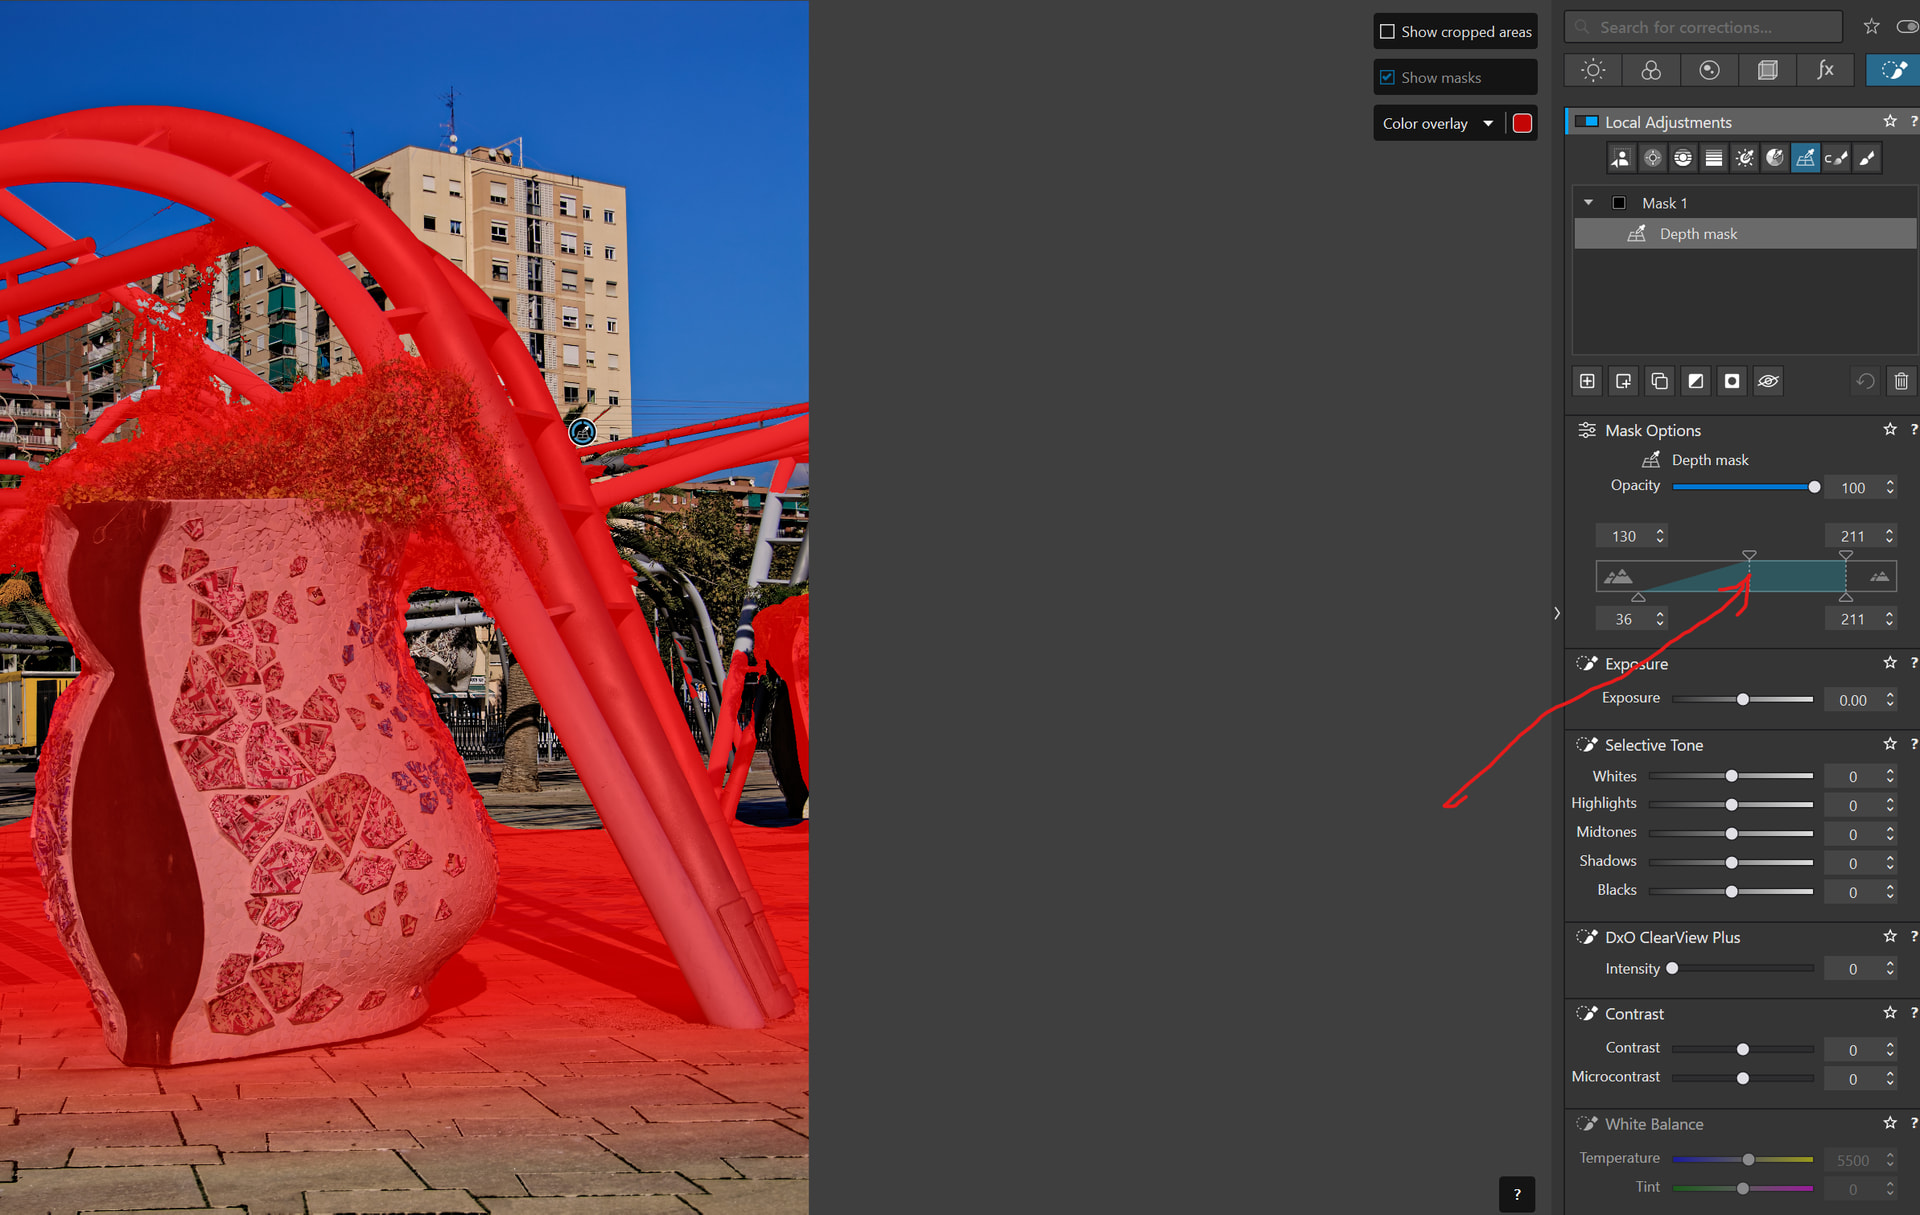
The tool gives you a very good control of where in the depth you want to apply it. I think it is rather lovely and sometimes really useful. It certainly has filled an empty place on the tool board of Photolab.
I’ve found the depth tool to be a little hit and miss.
In some shots it’s excellent - it clearly picks up the area I’m aiming for.
In others it mistakes foreground for background (or visa versa) and just isn’t generally perfect. Sometimes some sub-masks can iron out the issue, but sometimes it makes it unusable.
I’m still glad to have it.
But the tool works with the plane of focus itself, and it’s up to you where you place that. How could it mistake the background for the foreground? This is not AI going wild. It is up to us to pick the right spot and adjust it to our liking.
You’ll probably need to be much more specific for anyone to understand what you mean.
This improvement on your grandmother’s portrait is gorgeous. Just to clarify my goals, if I were able to reliably achieve this kind of result – a subtle increase in background blur without loss of finest in-focus edge details – I’d be thrilled. I have not yet succeeded. I’m still experimenting. And yes, your grandma had amazing hair, every strand of which deserved your care. Beautiful.
I’m not sure we disagree, since you note it’s not a precision tool. Your example is consistent with my experience (so far) of how unsuccessful it often is for isolating complex subjects: It missed about a 4-foot tall section of the ladder at far right of your composition, which logically must have been in the targeted focal zone; and again got confused at upper left, where you can see that the foliage caused it to misinterpret the pipes directly behind the foliage as also not in the focal zone. The more complex the subject, the less capable it seems of differentiating what is in and out of the focal plane. Of course I use the beveling and centering slider, but it often cannot solve this kind of confusion for the algorithm in my experience so far: If I push it far enough to solve the error, I ruin my intended depth mask’s range.
It might be easy to solve the misses in your image’s case (not sure), but it has seemed not simple to me when the errors involve myriad tiny areas of a large subject.
You ask, how could it mistake the background for the foreground. It was a big surprise to me that it routinely confuses them, but it definitely does. My guess is that it is comparing our image to its rules based on analyzing millions of images with in-focus and OOF regions, which leaves it open to confusing one with the other. And the more complex the subject, the more confused it gets. See my response above, noting that it even did this in an image intended to illustrate very good control of depth. To be clear, I don’t expect a perfect depth mask. I only started the thread because I was hoping there was a simple way to correct (or merely soften/blend – no perfectionism here) the depth mask errors, when they are especially extensive and complex.
If it was so easy to get depht from a single image, 3d and sfx would not bother with the heavy deepEXR workflow.
What I can see is a problem when we try ty isolate a part of a landscape at the end of the depth of field but its like that too when photographing. Probably it is working best where there is distinguished objects to click on closer. Maybe it is better when it gets confused to use a Luma mask or something. Every tool has its limitations and strengths.