Initial Camera Settings for PL4, Nikon Df

For a month or two now, I’ve been working with a Leica M10 and PL4. During that time I’ve learned that it might be better to NOT allow the camera to adjust an image, but instead to do it in PL4. For example, White Balance. After fighting that for a few images, I just set the camera to around 5500, allowing PL4 to make any needed changes.

Presumably, my Nikon Df will be creating images in Nikon’s NEF format. My Leica on the other hand creates images in DNG format. I downloaded and installed Adobe’s DNG Converter app. That’s my next question, before I work with any of my images in PL4, or FastRawViewer, should I get into the habit of converting my NEF images to DNG? If I want to allow other people here to work with my images, the conversion should make it easier for others.

Finally, Nikon put a lot of “special stuff” into the Df. It’s not a professional camera, and it’s not a consumer camera. It’s a custom designed DSLR that has full manual controls in addition to the menus, and it “looks” and “feels” more like using a Nikon SLR. I’ve wanted one for many years - I had a choice of buying the Df new many years ago with 16 megapixels, or the D750 with 24 megapixels. Since at the time I was buying something for sports coverage, I went with the D750. Then early this year I searched out a like new Df from B&H, and in its way, it might well be my “favorite” camera. The Leica is much more of a challenge. The Df is capable of doing everything sort of automatically, but you guys (and gals) have taught me that I am better off using standard settings, and ignoring the built-in computer. Accordingly, I set the Df to sRGB, to 5500 white balance, turned off the lens distortion control, and turned off all the automatic functions that might improve my image. I’ll leave that for me to do, using PL4.

Maybe someone here can remind me why I’m leaving all those setting for me to do manually in PL4, when the computer in the Df is capable of creating a “perfect” raw image. Maybe my Leica wasn’t so great at White Balance, but the Df has enough smarts to do things like this better than I.

My goal for tomorrow is to go pelican hunting, with a long lens. The focus in the Df is set to lock onto the bird, and follow focus wherever the bird decides to go. I certainly can’t do that with the manual focus ring on the Leica lens. (The Df even has a built-in image editor - I didn’t know that until I watched the first of the two instruction videos. If anyone is interested:

Part 1, basic:

Part 2, advanced:

It’s probably the last of its kind, and how the enthusiasts at Nikon convinced the factory to make it, I’ll never know.

First, there is no perfect raw image and why would you want to use Nikon’s automated functionality rather than make your images look the way you want them to look. Additionally, why would you feel the need to convert your raw images to DNGs? PL4 and practically every other software program out there is capable of reading raw files and should be able to read your NEFs. I say practically because some proprietary software like Canon’s DPP can’t read NEF files. In the end most of us here are capable of converting a raw file to a DNG if needed. Save yourself the effort. I personally would prefer editing the native raw files.

Mark

3 Likes

If I may add…

Whatever picture controls you set on the camera, they will only apply to jpeg images.

I would suggest you use AdobeRGB, not sRGB which is more limited.

As Mark says, there is no point at all in converting to DNG since NEF files from that camera are supported by PL

This only applies to jpeg files, not RAW files

Yeah, right. Have you ever tried making local adjustment on a 3.2" screen with less than 1Mpx resolution :stuck_out_tongue_winking_eye:

I thought this would make it easier if others want to work on my images. If it makes no difference, I’ll leave them as .NEF images.

Since the image is just a starting point, how does it hurt? You’re right that I’ll be making changes to make the images look good, but in what way will it be bad to allow Nikon software to hep? The other option is to tell the camera to use the default settings. For the images I want to take this weekend of the pelicans, the camera will be following the bird, and I won’t have any time to adjust anything while shooting. I’m also not sure that I can do these things better than the camera. I certainly can’t focus as quickly as the camera. I set the camera to 5500 for color because I expect many of the shots to be in sunlight, but I was very tempted to let the camera decide this - sometimes the birds are in the shadows. I think I’ll try this both ways, and see which gets me better images. Final thought - I’m not sure that I know how I want the images to look. For static shots, I do know, but for action shots, there is no time. The only thing I have time to do is keep the bird somewhat centered in my viewfinder, and try to get shots with interesting things below the birds too, which makes for a nicer composition to me.

This is good. I am shooting only in RAW. I’m not capturing both RAW and JPG, no need to. It also means if I post my original image here in the forum, it may be CR3, or RAF, or NEF, or whatever my camera produces. I will follow your advice here, and leave the images in their original format.

By the way, I thought if my goal is images for screens, not paper, sRGB was preferable? I know Adobe RGB can contain more data than sRGB. If I do shoot in Adobe RGB, won’t my software need to convert it to sRGB when it finally saves the image in JPG format? Maybe I misunderstood a month ago. Maybe I’m mistaken (once again) but I thought that choice had everything to do with the final use of the image.

Because the jpeg you will get from doing that will not contain anywhere near the detail and tonality that a RAW files will.

Nope, that’s no good either because, once again, any default settings only apply to jpeg files.

Here’s what to do…

You are going to photograph moving subjects where, I guess, you are wanting to freeze the movement?

So…

  1. put the camera in shutter priority mode to start with
  2. set the shutter speed to, at least, double the reciprocal of the focal length (e.g. for a 200mm length, use 1/400 sec)
  3. set the ISO to around 400 to 1000 ISO (do a test to see what’s best) not automatic
  4. image quality should be RAW - large files - not compressed - 14 bits
  5. focus mode should ideally be AF-C with 3D tracking

You could also try slower shutter speeds to show the movement of the wings if you want.

You might think you only want to use them on-screen now but, the day may come when you do want to make a print. Use AdobeRGB and then you have the option. You can set the exported jpeg images to sRGB after you’ve done the editing.

Never - the Df has lots of things built-in that I ignore. But, if I was away from my computer, and had to send someone an image, might be tempted to try. I hate images with a tilted horizon, and a few other things I might not have had time to correct. But yeah, never did so, never even thought about it, and I’ve long since forgotten the camera even had those tools.

I think you are telling me that white balance only applies to ‘jpg’, not to ‘raw’. I forgot about that. Thanks for the reminder. In that case, it makes no difference what my white balance is set to?

Like I keep on saying - set the WB to 5600°K and leave it there. Adjust it to suit the mood in PL.

Between the advice here, and the video I watched, and my own feelings about this, what you wrote above is exactly what the camera is set to, ISO at 400, RAW, AF-C with 3D (I forgot how to use this, and had to play it over and over in the video to learn how to get it set right), Shutter priority, 1/500th.

For now, I prefer the entire bird be sharp and in focus, and the background can be blurred.

Hmm, how did you know about AF-C with 3D? I long, long, long since forgot about how to do that, and this was the main reason why I payed the entire video (although the video showed me other things that I forgot…).

Because that’s what I use on my camera for similar subjects

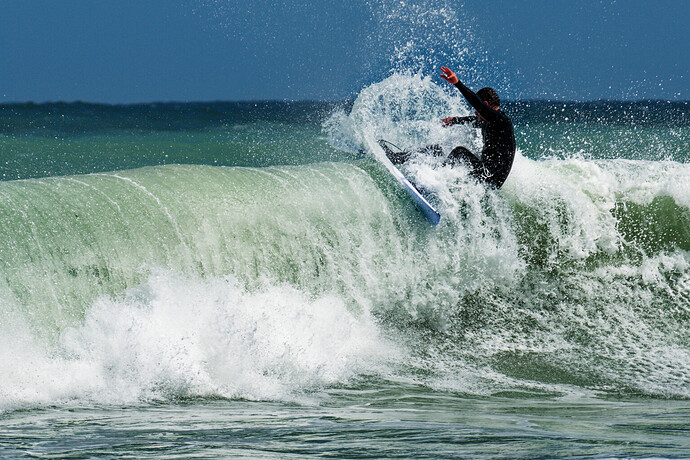
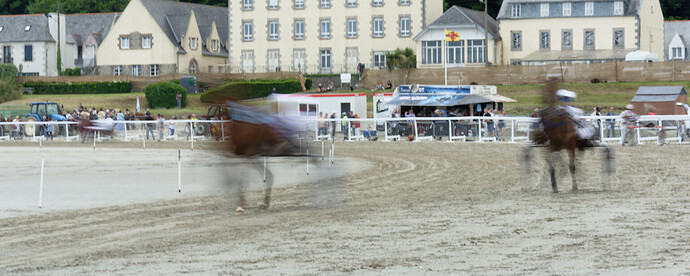
Or, for a bit of fun with a slower shutter speed (1/5 sec)

Nice retro look has that Nikon.
Reading this thread i think you may want include some free play on the camera to get to know it’s quirks and strongholds.
Camera style settings are almost all for out of camera jpegs.
Color contrast saturation sharpening, denoising, WB. That kind of stuff.
I adjust them as good as possible for a general good look.
Why? Embedded jpeg in your raw file is born in those.
In camera panoramastitching, scene specials always fun to play with when the time is fit.
Then the new "enhancing settings " like vignetting correction, longexposure correction, hightone low tone settings, auto dynamicrange correction,… Be reading the manual can help to understand how and if it can drip though a rawfile in your rawdeveloperprogram.

Vignetting correction in panasonic rw2’s seems to be picked up by PL causing lighter corners then needed. Shouldend be effecting but it does.
Highligh protecting tools are often exposure correcting which is effecting rawfile’s exposure.

What i try to tell you is never assume oocjpeg settings have no effect on rawfiles.
Investigate. Read, google, ask.

Don’t be afraid to explore the borders of posibilities of your camera. Auto settings, manual settings, auto iso , smart iso, remote shutter , electronic shutter.
Knowing , experience , what it does helps you choosing. Go manual, half auto , full auto. Just what assist your task at that moment.

Sometimes i just re read my camera’s manual just to refresh my knowledge of what it can do. And how.
:slightly_smiling_face:

1 Like

Joanna,

Would you care to elaborate on that statement? My understanding is that for NEF files the only difference between the AdobeRGB and sRGB setting in the camera is the addition of an underscore to the file name and some metadata to indicate which was selected. The setting does not affect the image data.

Joseph

AdobeRGB is a larger colour space, which will yield finer colour graduations.

My “problem” (or at least one of my problems) is that in my photography classes at the University of Michigan, it was beat into my head that the camera is just a tool, similar to the meaning of a wrench to a mechanic. I was supposed to do all the thinking, then make the camera do what I needed it to do. For the types of photos they needed me to make, this was good advice. I took the course twice, first doing things my way (and getting a D), and then forcing myself to do everything as the instructor told me (and getting an A). My thoughts later - I strived to do as “they” had shown me, and I learned to appreciate how and why my old ideas weren’t as good.

Then I got graduated, and got pushed into the real world. Many of my photos were “sports photos” of radio control car racing. I eventually learned how to take the same kinds of images as the experts, and realized all my earlier stuff was little more than snapshots. Then I also started taking machinery photos for work at my “real job”, using a tripod, lighting, and all the other tools to get a photo good enough for a magazine or an article on how the machine worked.

All this stuff left me without much room for “creativity”, and when I was off on my own, like in India. I decided in my mind what I wanted the photo to look like, then set about making it happen.

I like what you wrote, about experimenting with all the “tools” that the manufacturer has provided with my cameras. I didn’t really have time for that before, but since retiring I have lots of time, and now, with the virus going around, I have all the time in the world. The Nikon Df is a very unusual camera in many ways - it’s more like the original Nikon F than it is to all of Nikon’s newest high-tech designs. But someone at Nikon took all the ideas of what a camera might do, and squeezed them into the Df. It came with the same sensor and processor as the Nikon D4, which at the time was the best they had - but the focusing mechanism was more like the Nikon D610, a much less expensive camera. I guess it’s a nice compromise.

Many (most?) of the image enhancing tools on the Df I ignore. I figure I can do that myself in an image editor, currently PL4.

I had no idea that the “jpg adjustments” might have an affect on the raw images. I never thought about that. Thanks for bringing it up. Actually, until lately, I figured all I needed the camera to do was create an acceptable “image” of what I was photographing, and capture enough data on the sensor that later on, I could make a photo the way I want. All the creative work was to be done in the darkroom (now my computer). This dates back to what I learned back in the 1960’s in college.

What I need to do - include all the elements that I might want in my photo, leaving a little “wiggle room” around the edges for cropping if needed. Then, to make sure I include what I want the photo to be about, and if I have time, to exclude anything else that might be distracting. ISO used to be important, but between the capability of the Df, and the noise reduction of PL4, the ISO no longer seems important to me - it has to be whatever is needed to allow me to use my choice of shutter speed and aperture. I used to love morning and evening best for getting photos I liked, but mid-day is also useful for action photos, even if it’s a bad choice for landscapes. I think my hands used to be more steady - now I need to concentrate on holding the camera in a way that it doesn’t move as I’m shooting.

To be honest, I’ve got a whole list of new things to think about, such as what Joanna was teaching me about exposure. I’m always concerned with blowing out the highlights or shadows, but I used to worry more about the shadows. Now I think I’m paying the most attention to the highlights. Nikon even has a software tool for that, and the camera can select a setting that has the best combination for highlights and shadows, and the software can adjust the sensitivity of the pixels such that I capture the most of everything - but that’s only done for a ‘jpg’ image. The camera has another tool that takes two images at different settings (HDR) and combines them into a single image. …but again, that’s back to JPG.

I will follow your advice, and try out all these new tools and settings. Just like having extra lenses with me, it’s nice to have options. Thanks for the suggestion. More things I can do, now that I have the time.

I’m confused. Since I’m no longer sure about this, I changed the setting on my camera from sRGB to AdobeRGB, but since I am only capturing a RAW image, which really only a copy of the data from the camera sensor, how or why would my camera even know which I selected? Maybe this is for the embedded image, but aren’t embedded images sRGB anyway? The only time AdobeRGB is useful is when images are being printed - or am I missing something here?

I don’t think he said that.

George

Are you sure?
https://www.dpreview.com/articles/1294642686/stark-contrast-how-your-camera-copes-with-dynamic-range-capture

in this article:

Citaat:But it’s probably Nikon’s Active D-Lighting system that does the best job of this. It combines up to a 1EV exposure reduction with an adaptive tone curve to give well balanced JPEGs even in high contrast situations.

this is in my eye’s a rawfile effected action!
:grinning:
(if it’s working fine you can using it as a “automated exposure correction tool” i have it active in idyn.)
it will help to prevent blown highlights if you expose as average.
When you go manual just switch to a other customer preset which has it turned off.
That’s what i ment with explore and test. so you can use it to your benefit.
so test your raw-image outcome whit both: D-lighting on and off. see what it brings you.

Well, that makes sense. So from now on I will leave the camera setting on AdobeRGB, which will make no difference until when/if I, or someone else, tries to print it. Sounds like a win/win situation.

How does printing work? If I want to print a raw image, using my computer and a suitable printer, when or how would I specify ‘sRGB’ or ‘AdobeRGB’ ? Is this something the printer software will ask me?

I just checked some of my NEF files with ExifTool and they all show the colour space as AdobeRGB because that is what I chose.

It’s all about getting and keeping the most information possible and the AdobeRGB colour space keeps more. Trust me. I’m a photographer :sunglasses:

For printing, the printer driver will make use of what the file is marked with. You only really consider different colour spaces if you are using software that manages them and can convert between them - something that PL doesn’t do yet.

1 Like