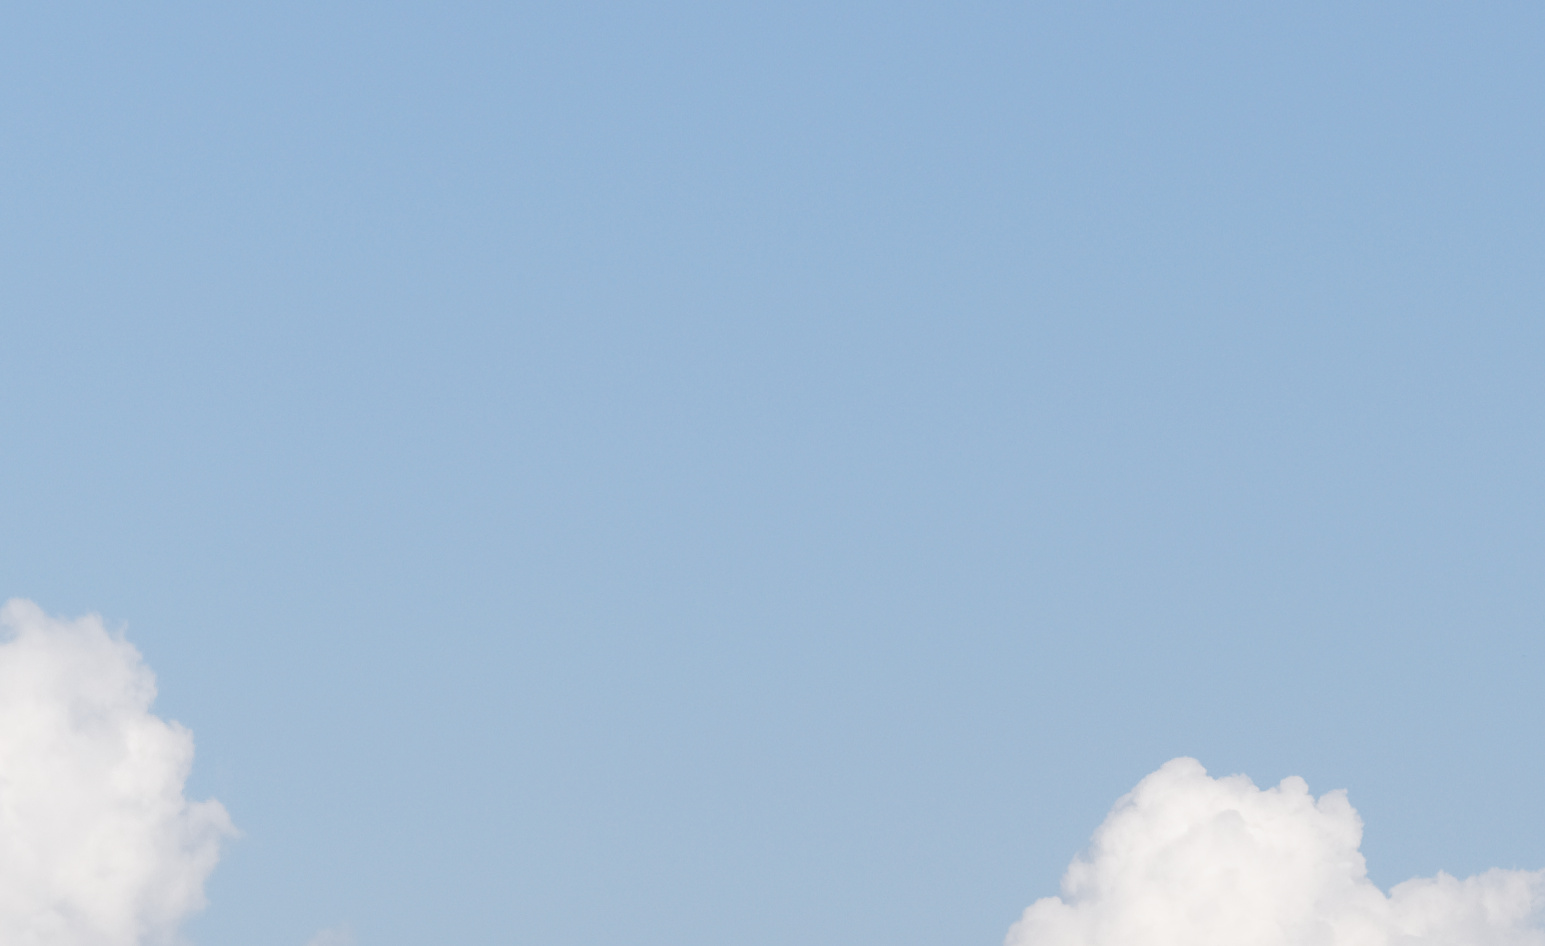
I want to darken the sky in a photo, so I select blue in the HSL tool and lower the Luminance slider. While the sky darkens, it introduces a lot of noise (or what appears to be digital noise). I expand the color range to include more colors, but it doesn’t get rid of the “noise”. I can lower the luiminance of the sky with a control point without introducing noise.
Has anyone else experienced this? Is there a simple answer that I’m missing? The HSL tool isn’t useful if it creates noise.
To blue the sky you can also use the localtools mask or controlpoint and clearview , exposure and vibrance.
About the HSL sliders.
Luminance is lowering the colors brightness which alow the excisting noise beneat the color to pop up.
Maybe the uniformity slider can help to create a more homogene colorplane?
(this slider pickup colors next to the selected color in the hue to edit too.)
Greg, I did expand the blue range, as well as trying cyan alone to see if it was in play, but no difference. Apparently there is no cyan content in that sky.
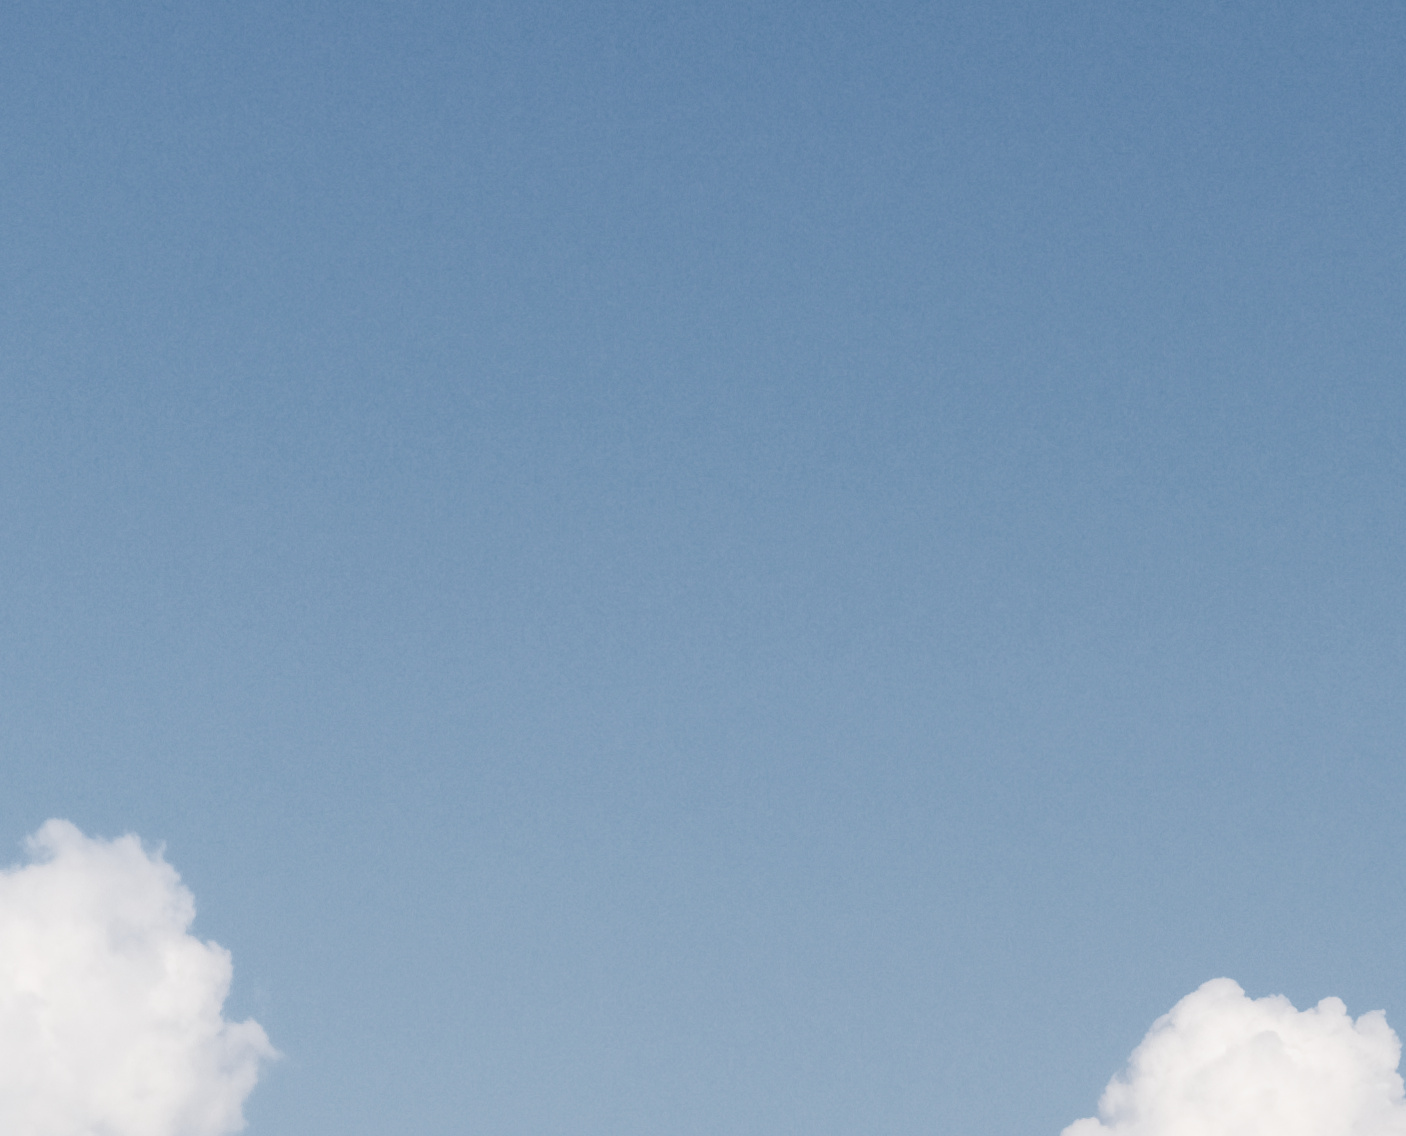
Not sure but image 1 and 2 has the same “noise” but the local adjustment one, image 2, is les visible. It’s random sky blurs, smutches. Admosferic blur.
Al sky shots have them even at base iso.
And pushing saturation in HSL?
Like plus 10 saturation (push the color in.)
-10 luminance (enhance the saturation) and plus something uniformity (to find a comon color)?
Use the pins to feather the selection. (select with saturation to max minus (grey))
Stil the local adjustment vibrance push as main sky adjustment and some clearview to deepen the color works great. Better then adding color in HSL.
I like HSL for it’s color in black and white picture and color change for a other color. Enhanceing color is LA and the colormenu a good start. As end step some HSL color muting and enhanching of the object and image to the enlarge the contrast between the pushed object and the surrounding image
If you look at a sensor, it has two green receptors for every one of red or blue. Depending on the algorithm used by the HSL controls, changes to pure blues and reds may generate more artifacts than for the green channel or when there is more of a mix of signals from different channels. The artifacts come from the demosaicing algorithm. I haven’t studied your image; generally what is see is a sort of “blotchiness” when the color is darkened last a certain limit.
You’re right, it is a blotchiness (I refer to it as “noise” because it looks like high ISO noise) that occurs as the luminance is lowered, but the effect really kicks in at a certain point. I have spent a lot of time working with the HSL tool trying various approaches, but to no avail. I can, however, lower the luminance of the blue sky with control points without creating any blotches. It makes me wonder how useful the HSL tool actually is.
The new HSL tool is certainly very well implemented - and it demos impressively (eg. changing the colour of a car from, say, blue to red) - - but I’ve not yet found a practical use for it either.
I’d be interested in hearing about some good examples of its use.
I can add that I used to work with Adobe Camera RAW CS6, and it was present there as well. Skies tend to be overexposed relative to the rest of the image and skies tend to be blue, so I often tried lowering the blues. This was particularly evident if I worked on B&Ws. The Adobe method was to alter the hues and then convert to B&W, so even in a B&W, one could lower just the blue areas. PL 2 didn’t support this, but with the new HSL tool in PL 3, one can do something similar (start by reducing the global saturation, then work with the individual colors–but don’t change their saturation!).
Here’s my theory of why the HSL tool is blotchy and the exposure tool is not. The exposure tool works on all colors equally; the HSL tool will darken the colors that are closer to blue more. By lowering blues with the HSL tool, you enhance the artifacts created by the demosaicing; in other words, while the color looks uniform at brighter values, the HSL tool sees different blues and darkens them by different amounts. The more you darken the blue, the more you bring out the differences. The exposure tool works on everything the same way–the drawback is if you really only want to darken blues, the exposure tool won’t respect that.
Yes, seem the luminance is too harsh and there’s not much mercy.
To me I like the HSL of Affinity Photo better, same look but better graduation of sliders, and a color picker.