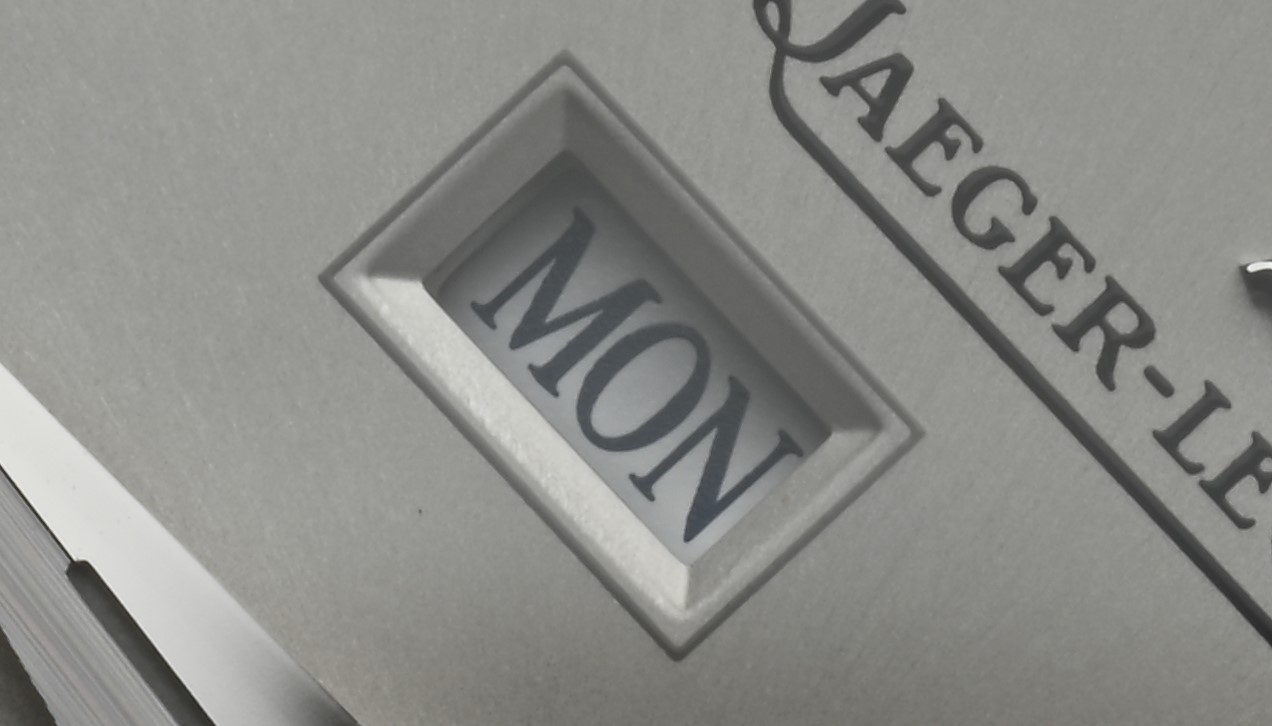
Yesterday when shooting some macro shots of a watch I noticed how much more haze was appearing when bringing a raw file into PL. I don’t normally use NX Studio because it is so slow, but it matches exactly what I was seeing on the screen of the Z8 while shooting. For reference -
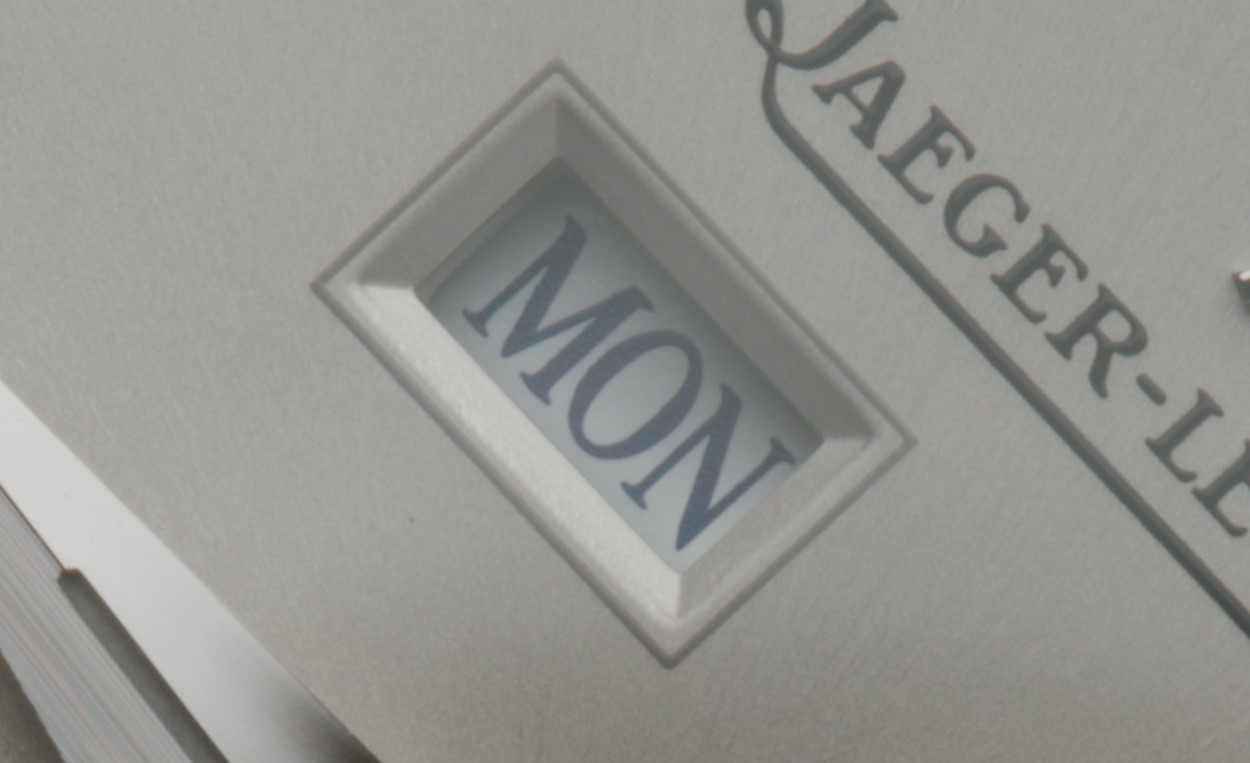
Turning up Clearview does reduce the haze of course, but it still doesn’t sync up with the NX Studio image. The MON text starts looking more navy than black, and the background behind that text looks more blue/dirty as well. The WB is identical on both.
So my question is, have you Nikon shooters found a different approach besides Clearview to reduce haze and get it to more closely match what you saw in camera?
Here is the full NEF if anybody wants to experiment:
ClearView Plus can cause color shifts such as what you’re seeing. Instead of that, try raising the Contrast or creating a tone curve with a slight S-shape. (At work right now, not able to experiment with your image.)
Well, that’s not completely true.
You had Auto setting for Picture Control in camera, so NX Studio applied probably something near Standard (STD) rendering and perhaps raised clarity slightly. In PhotoLab, unless you choose rendering, something similar to Picture Control Neutral is used. So to compare with PL and no corrections, choose NL in NX Studio PC. In PL something similar to PC STD is used if you enable DxO camera profile, it seems. Depends also on your RAW processing option in NX Studio and PL auto-applied settings.
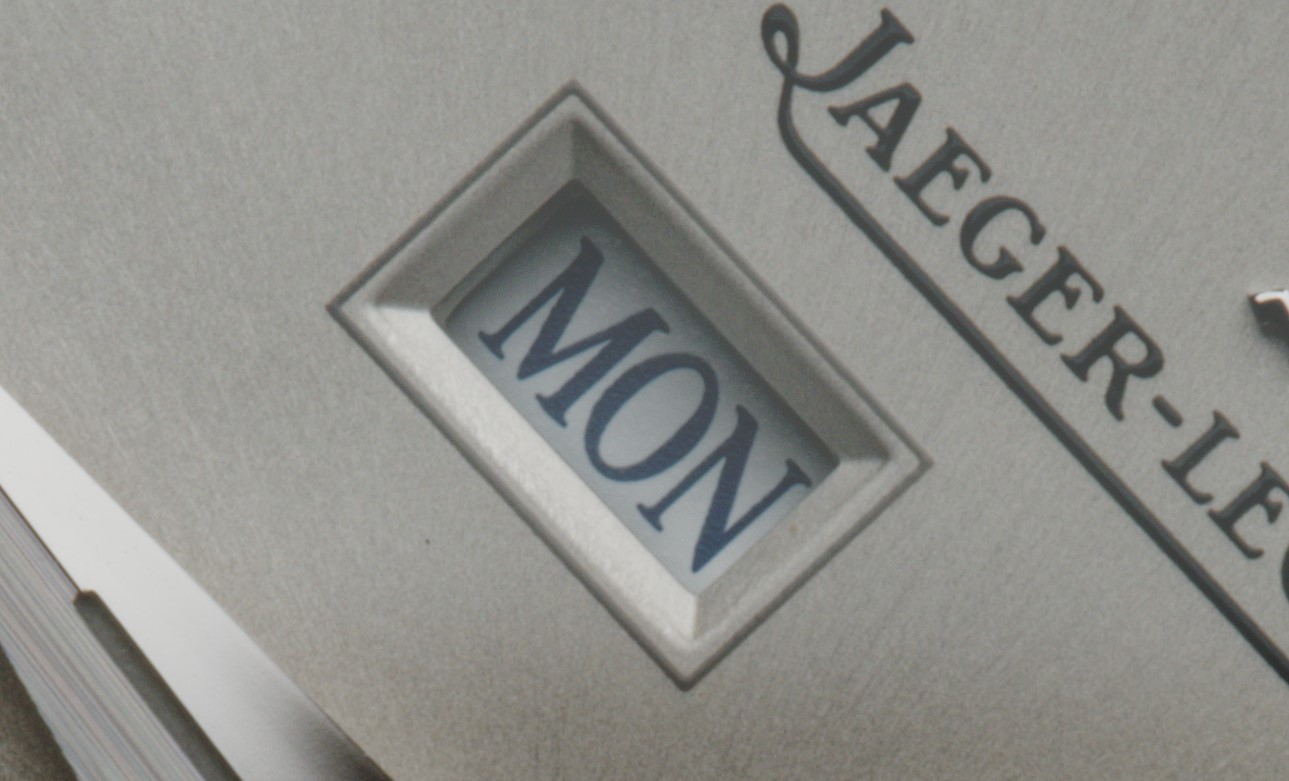
Note that “MAY” month is displayed contrasty, not shown in OP, so only parts of the watch image suffered from the scattered light from the window. You may also try to apply ClearView and/or Microcontrast locally, but that’s something I’ve no experience with.
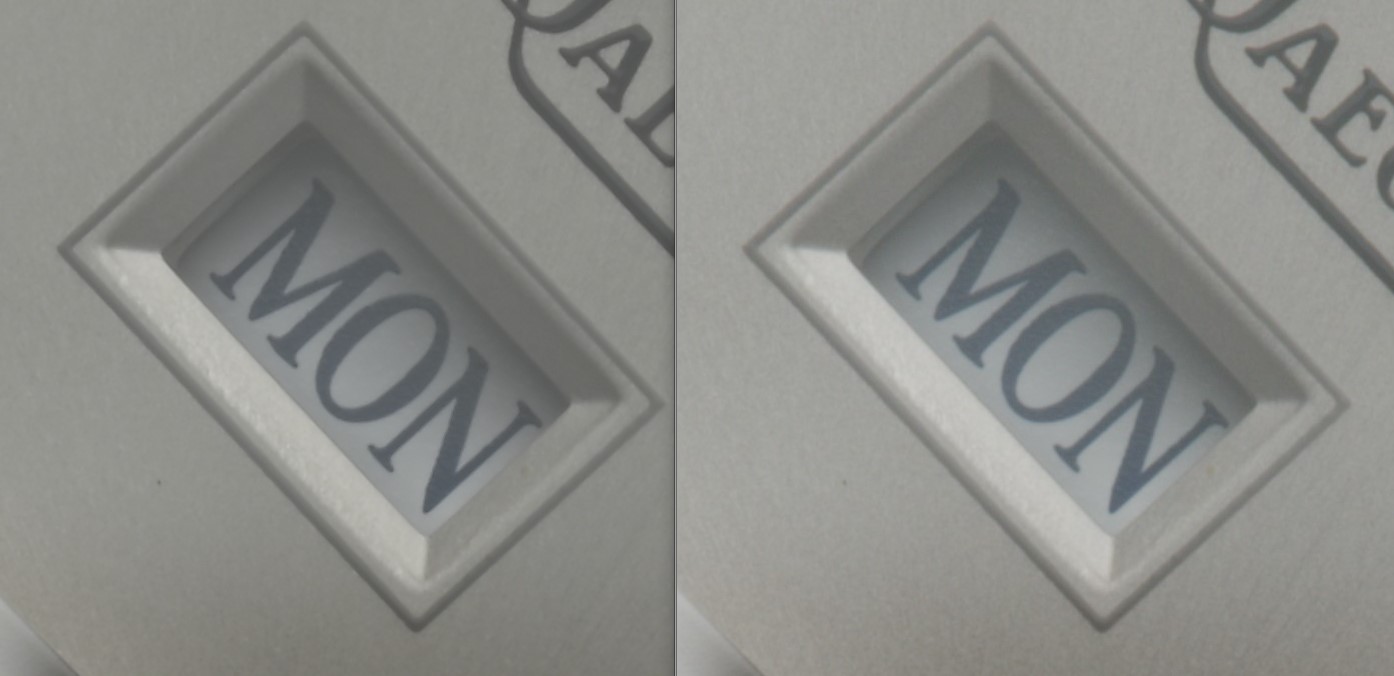
Very true, I missed that. When I set to NL in NX Studio then it does appear closer, though I still feel NX Studio (left) shows a bit more contrast than PL (right).
So to revise my original question, do people have techniques to achieve the equivalent of “standard” (which is what auto seemed to have picked in this case) processing within PL? I see the response from Egregius above and will experiment with that some too.
For color, as a starting point I mostly choose Type=‘Generic rendering’, Rendering=‘DxO camera profile’, Intensity=100 (Intensity=0 corresponds to Neutral, I think). Sometimes I use Rendering=‘Portrait 1’ with Intensity at about 30-60. Some people prefer to start with Neutral. I didn’t check it, but probably Picture Control STD tone curve for Z8 corresponds more or less to ‘DxO camera profile’, perhaps with Contrast=20-30 or so, and Microcontrast at Auto.
You may also try using Adobe DCP profiles, available e.g. in free DNG Converter, but double check you don’t get harsh color transitions, especially in skin tones. I had this problem with Nikon D700 DCPs but Z8 camera profiles (including ‘Standard’, ‘Landscape’, ‘Portrait’…) look OK, at the first glance at least. Personally I stopped using Adobe DCPs, but mostly to keep things simple. Anyway, most of the work is done with other settings, according to your taste, so no general rules here.
For B&W, I’m still learning/experimenting.