Is there a way to collapse individual folders in Pictures in left column - similar to Adobe Photoshop Elements where I can select specific folders I am working with.
UPDATE
As an aside, I recently had to purchase a new computer as my “old” computer could not be upgraded to Windows 11. With Chat GPT as my assistant, we figured out how to collapse my very long-list of folders in PICTURES in DXO. Basically, I opened Windows Libraries, opened a new folder I entitled DXO Work, and then added my 2 folders. Now the left panel is streamlined, and I can quickly access either folder.
What do you mean by collapse individual folders.? You click on a folder and you see the images in it. You click on another and the view changes to the images in that folders. If you click on a folder containing sub folders you will see the sub folders. Click on a sub folder and you will see the images in that folder.
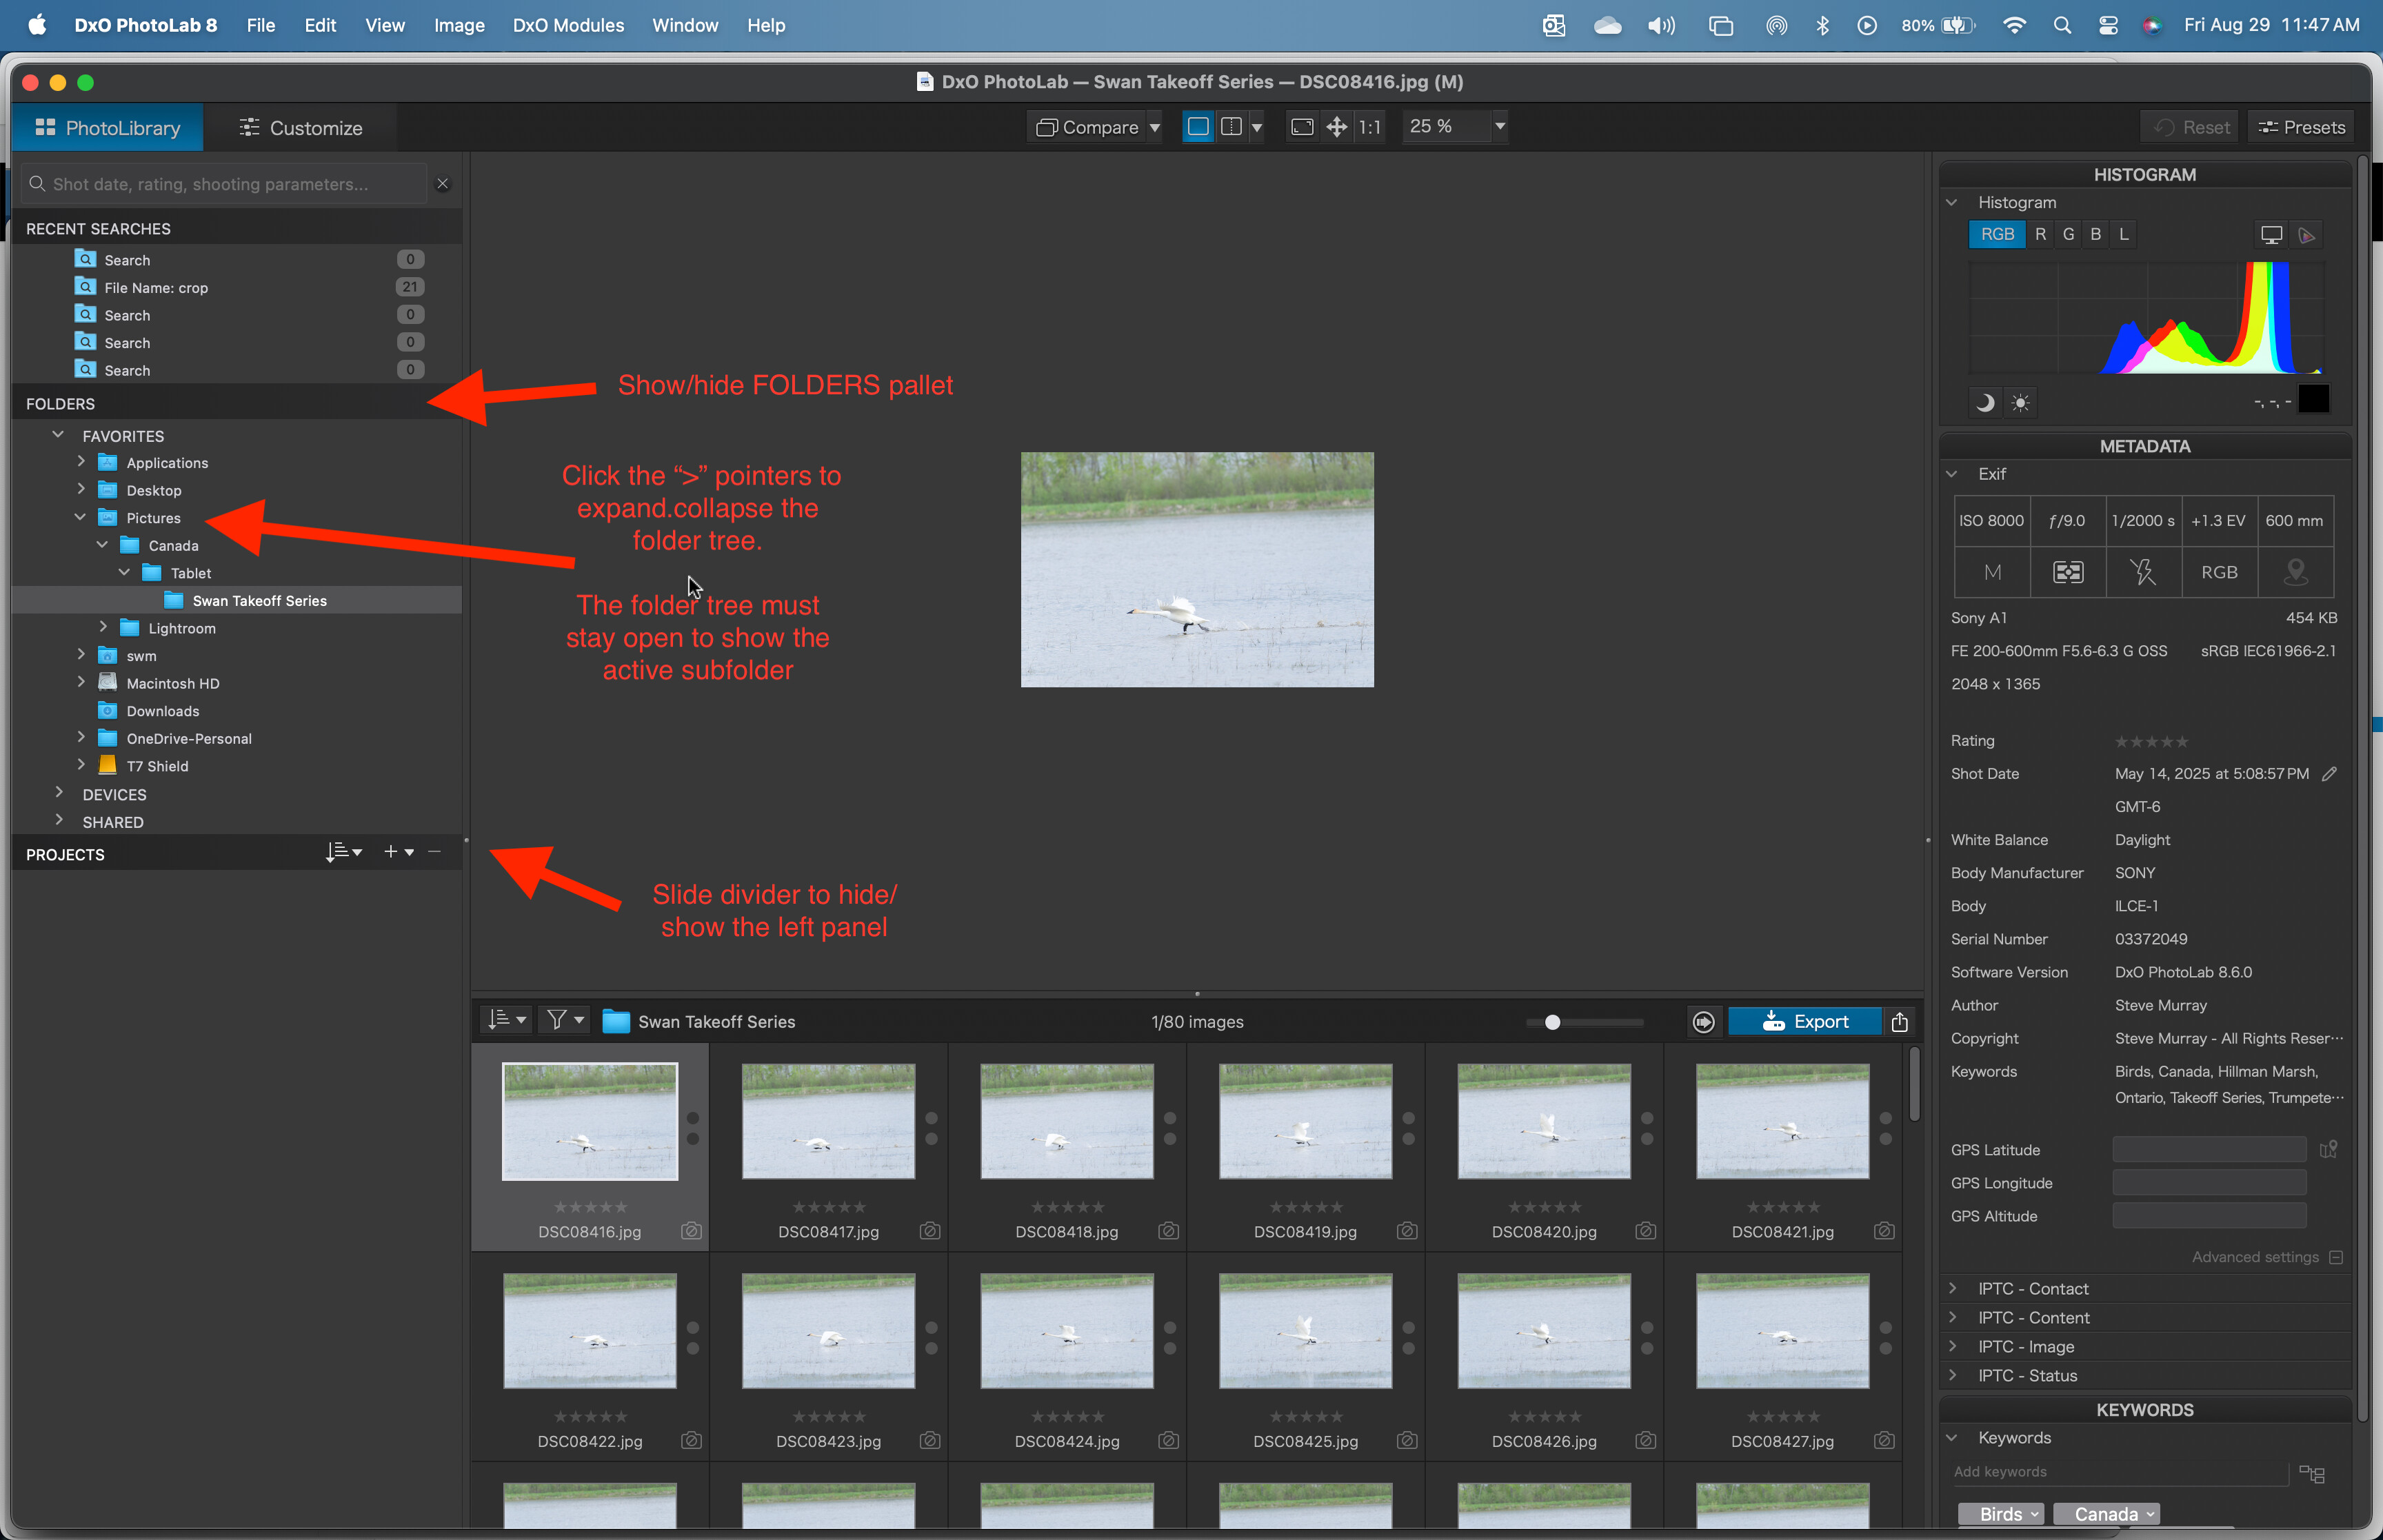
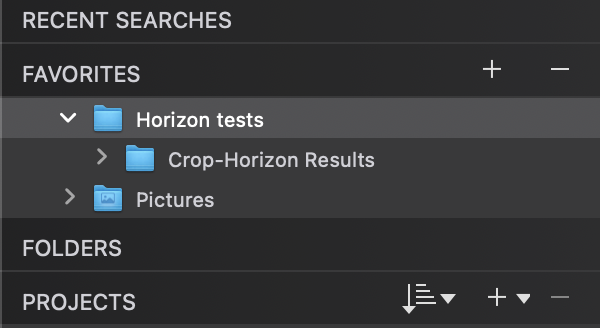
In this case the “Swan Takeoff Series” folder is active so the entire tree shows. Since it is in the Favorites>Pictures>Canada>Tablet> tree all of these tree branches are shown.
You can hide the entire “FOLDERS” pallet or slide the left panel closed to hide these items if you need the space or want to reduce the screen “clutter”.
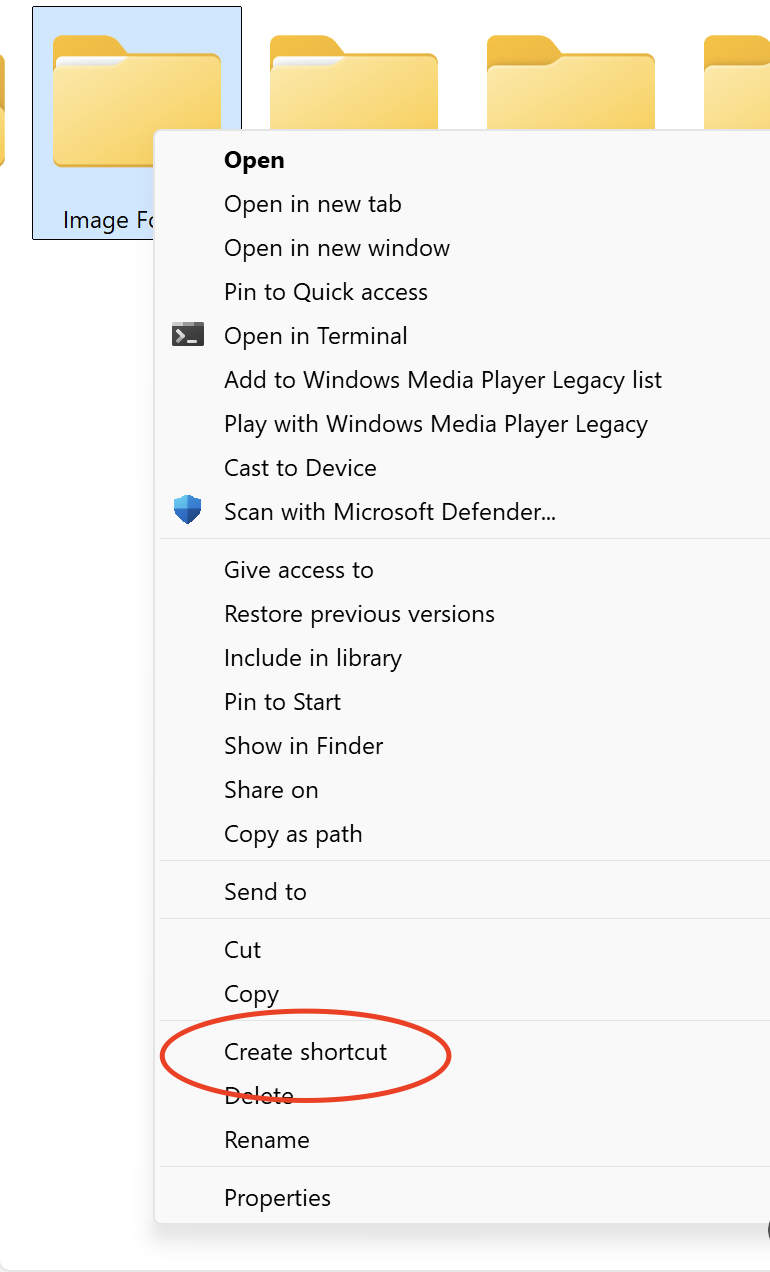
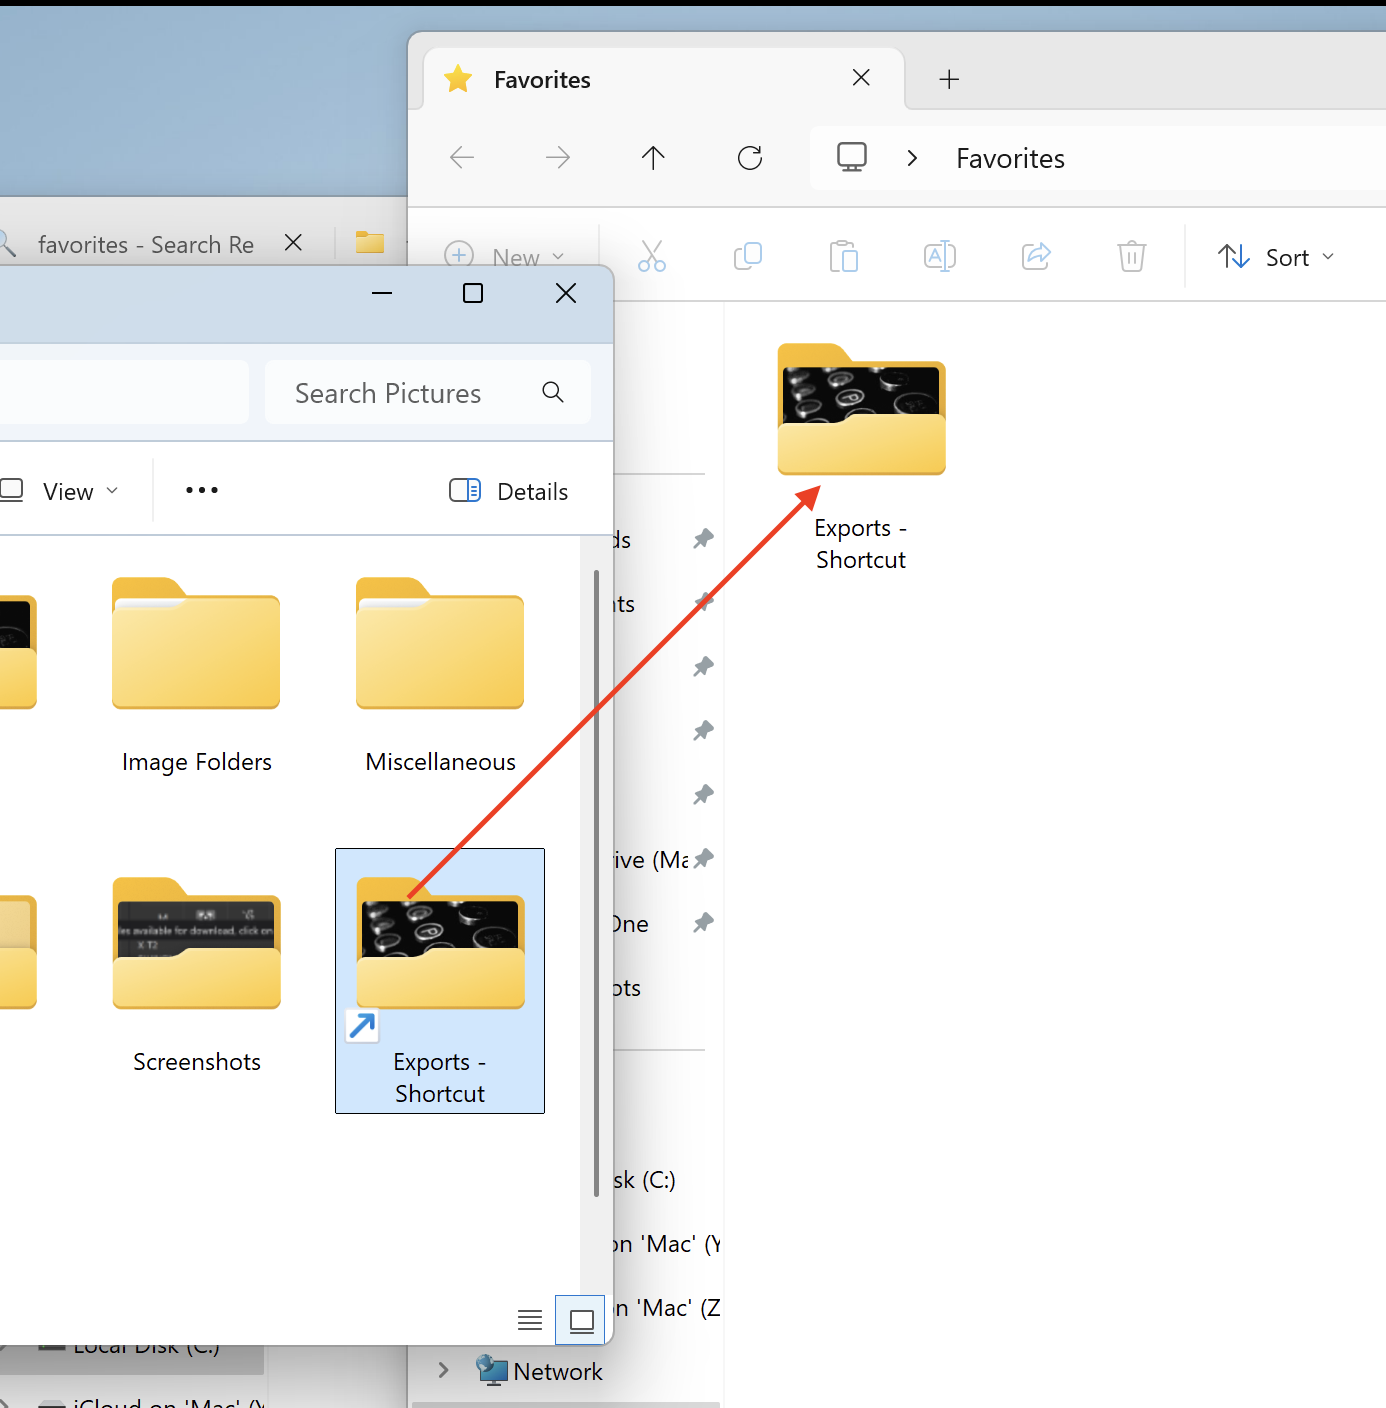
Using your operating system, you could assign a preferred folder or subfolder directly under the “Favorites” to reduce the number of branches displayed. The folder stays in the normal location, but a pointer to the folder shows in the Favorites section of your browser for quick access.
I probably have 40+ folders in Pictures on my computer. Of those 40 folders, I want to edit photos in two of the folders. Let’s call the 2 folders, TRAINS and DOGS. How do I collapse the 48 other folders in the tree with only TRAINS and DOGS visible?
Okay. Not sure how to assign select folders as FAVORITES so I don’t see entire tree. I do know how to collapse all the other folders. Obviously, I can’t collapse PICTURES or I won’t see the 2 folders I am working with.
If you’re using Mac, the Favorites section in the Photo Library sidebar mimics your favorites from the Finder, so if you add a folder there, then it will appear in Photolab as well.
If you’re using Windows, the process is a bit more involved, but it can be accomplished.
Open Photolab
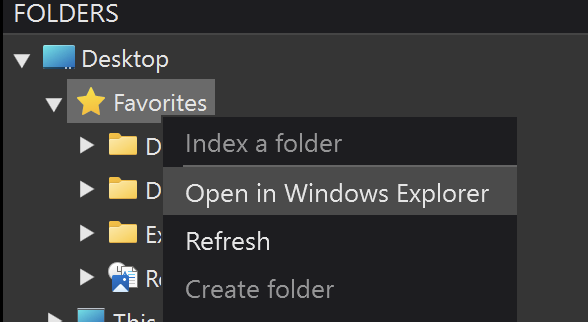
Right-click on the “Favorites” folder/section in the Photo Library sidebar.
Click “Open in Windows Explorer” and then close Photolab.
Well, I missed your update. Looks like you figured out a solution, but if you still want to add folders to “Favorites” you can do it the way I described.
Not sure what AI did, but sounds like you moved your images out of “Pictures” into a “DxO Work” folder. If this works for you, that’s great.
Another DxO option would be to use the “Projects” section. This allows you to work on a collection of images from multiple folder(s) without having to move them from their original subfolders.
See the manual for more details, but highlight the desired images in one of your folders. Then go to the Projects section and click on the “+” sign. Give your project a name then set the checkbox to include these selected images. Your images from folder 1 are now available in the named project. Next go to your folder 2 and select the desired photos. Then drag these photos into your newly created project.
Now click on the named project and all your selected photos should be available for editing together. This Project is just a pointer for editing access, your photos are still on your original folders under “Pictures” folder both in PL and in your file system.
Now, Click on the “FOLDERS” banner to close and hid it from view. All the messy folder tree stuff is hidden. It is still there and can be brought back to view when you click on the “FOLDERS” banner again to toggle it open.
Thank you for the very clear sequence of steps. I wish I were using a Mac. I find the “new and improved” Windows 11 a maze and I have been chipping away on all levels, removing One Drive and CoPilot that pops up at every opportunity to do this and that.
I did look through the DXO PhotoLab manual, searched “favorite” only to read that it mostly applied to Macs. DXO “Learn” website is mostly geared for someone who already knows the language and just needs quick demonstrations. Your reply is very helpful. Thank you.
I understand, I use both systems and I greatly prefer my Mac.
Glad my instructions helped. I actually hadn’t even known about the method I outlined until you asked the question, and I was surprised at how difficult it ended up being!