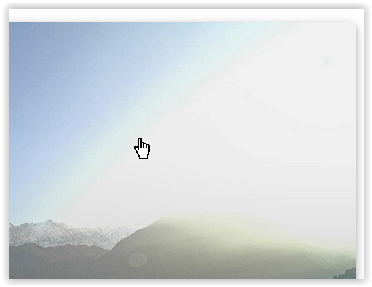
with your manipulation you got → tonal value tearing

and one cannot restore blown out parts
with your manipulation you got → tonal value tearing

and one cannot restore blown out parts
Even without your manipulation, the entire right corner is massively over-exposed and irrecoverable.
See the highlight warnings in PL6…
Even with a RAW file, this image is dead in the water and you should have deleted it from the camera as soon as you saw the blinkies on the back screen.
Gee, picky, picky, picky… ![]()
I’m not sure if my old D70 even had a tool to show blinkies, and if it did, I probably didn’t know about, or use, it. Delete? No way. Cropping out the top of the image sounds like a better idea, as I always did like this scene. But back to reality, I’ll move on, and select a proper image for editing. Maybe I even have better captures from Dharmsala back then.
Or, I can cheat, and replace the sky…
I haven’t used Luminar 4 in many years, but it’s a better solution than my trash can.
…and no, I don’t expect to be doing much with Luminar, or with the new AI version.
Time to move on to a new D780 photo, as soon as I take one…
Just correct the sensor spots and the perspective (house), if you want to publish your pic.
Otherwise I would leave it as was (a bit too strong colour … enhancement). ![]()
Sigh, well, I fixed the sensor dirt problem, and fixed both the perspective errors in the house and the red roof building at the right. I dumped the Luminar change - I’d rather be seen as not recognizing blown-out pixels, than replacing a sky. The first is ignorance or stupidity. The second is hard to defend, unless we’re talking about advertising applications.
I plan to take a D780 photo tomorrow, and hopefully correctly use the control line tool.
I decided to try this again, with a similar image taken on a different day, and one where I wasn’t aiming my camera into the sun.
Original:
Edited:
Some of the positioning and adjustments were not done scientifically - I moved the picker around, and while it didn’t make a big difference, I put it where it worked the best. The mask selectivity was achieved by changing the setting, while looking at the result. The left side o the image was cropped out because the tower seemed to destroy the effect I was trying to show. I also kept changing the cropping, until I had what I liked. I doubt the black speck at the top of the image is sensor dust - I think it was most likely a bird. I thought about removing it, but didn’t. Smart lighting helped, and I didn’t like the effect of Clearview Plus. I like that everything close to the camera is bright and colorful, and the mountains are much less colorful. I thought that showed distance. I suspect I could have used a mask rather than the control line, but I already liked the effect.
Before anyone asks, the reason for the “steps” in the image, is to allow them to farm on a steep slope. Each “step” is a bit higher, but the are all “flat”.
I suspect this is the wrong thread for this post. There wasn’t really any area(s) that needed protection from the control line. I wanted to use the control line though, to get more experience with them. Thanks to all this discussion though, I DO know how to do so when I need to.
I’m sorry to say but this image really doesn’t benefit from a Control Line.
To start with, this is a very small, low resolution, over-compressed, JPEG image, as is witnessed by the haloed black speck in the sky…
The first thing I did was to run it through Topaz Photo AI to give me an image that is three times the size (6000 × 3991) and cleaned, sharpened and, most wonderfully, compression artefacts removed. This gives me the following file…
DSC_4548-topaz.JPG.zip (12,0 Mo)
DSC_4548-topaz.JPG.dop (13,4 Ko)
Then I reworked that in PL by adding a subtle increase in saturation on the sky…
… to give me…
I have just discovered that attaching a JPEG image to a post directly, automatically resizes it smaller. You need to zip the file before attaching it to maintain its original size
Aha! Yes, this became obvious when I tilted and positioned the control point as you did, and then adjusted the “vibrance” tool. With all the sky selected, the vibrance tool will bring up the “blue”. Why do things like this become obvious to me, only after you’ve done them?
In words to myself, in case I get confused next time, make sure the area I want to adjust, in this case the blue sky, it is outside the “solid” line of the control line, and then make sure the pipette is right on top of the “blue-ist” part of my sky, as that is the color I want to enhance using the “vibrance” tool in the control line. Then, angle the control line as needed so just the area I want to enhance, in this case the blue sky, fills the area being corrected - which in this case meant angling the control line as you did.
I know you’re right, but that doesn’t matter right now - I mostly want to learn how to effectively use the control line tool. I’ll probably use it on any image I edit for a while, until I’m using it correctly, and not making mistakes… Quite obviously, I am NOT THERE YET.
Shame on me, for not using my D70 better in 2006. It’s not the camera’s fault, it was my fault. I had the camera set to make “snapshots” at the function I was attending, and never thought to optimize it when I saw a lovely scene. Me bad. Still bad.
At some point in the future, I guess I ought to learn that too, but not now, not today. I will do better in camera settings than I used to, but right now, I’ve got a one-track mind, labeled “PhotoLab”.
Can you see what the original size of the image was before you posted it? See my additional post.
I didn’t know this. So when I copy my original image here, I should not be using the “Upload” tool co capture my original jpg image, and post it here? When I. “Export” an image to then past the image here in the forum, what might the size be set to in the “Export settings” to avoid this?
It’s not the exported image that is the problem, it is when you want to post the original JPEG with its DOP. You need to zip the JPEG like I just did in my latest post. Then it will not suffer from posting shrinkage.
Wow, now it sounds obvious, but I had no idea.
So, once I ‘zip’ the file, I should upload the zip file, not the original jpg?
Do you know at what image size PhotoLab starts to do this?
So from now on, I will plan to create a zip file for most of my older original ‘jpg’ images, along with the .dop file.
Would converting the original ‘jpg’ image to a ‘tiff’ file also be OK?
This is my end result, from following @Joanna’s advice up above:
(control line modified, black spot on image removed, pipette repositioned, mask selectivity adjusted.)
Since I’m cropping off some of the bottom of the image anyway, I wish I had included more sky. Anyone have a Time Machine I can borrow?
DSC_4548.JPG.dop (29.8 KB)
Only for posting here.
It’s got nothing to do with PhotoLab, it’s the forum software.
That’s not necessary and would only result in a larger file.
That’s better.