I might have this wrong, but I thought when using High Quality as the de-noise that the preview image shows in real time the updated de-noised image as it appears upon export. While it does seem to do real time changes, on closer inspection it does not match with what is in the region selected with the ‘Magnifier Tool’ or exported as a final image. Does anyone know if something is wrong here ?
Use case, 30 sec exposures with camera lens on to see what kind of dark frames I have and to test bad/dead-pixel removal using de-noise. So it’s very easy to see pixels still lying around in preview since the image is mostly black. Doubt I would notice with normal photos.
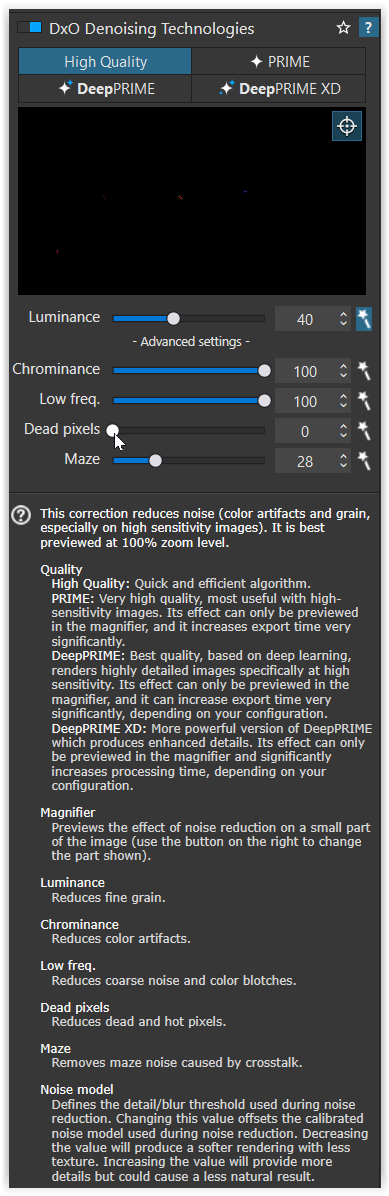
Unless you completely turn off noise reduction, by default the main viewer will preview noise reduction using fast to render High Quality algorithm. The noise reduction small preview or as you called it Magnifier tool will show actual de noising as it will be when exported.
If you choose High Quality model as your de nosier, than both should match, For other Prime, DeepPrime and DeepPrimeXD more processing power is required and for better or worse., DXO only shows you a small preview, but when you export the image how it is in the small preview will be across the entire image.
i just checked myself in the Windows version. I used high quality NR and raised the luminance slider all the way to 100. It seems to me that the section in the preview windows is a bit darker than the selected section in the edit window.
NR usually darkens shadows and I can see this in DPL7 on Mac.
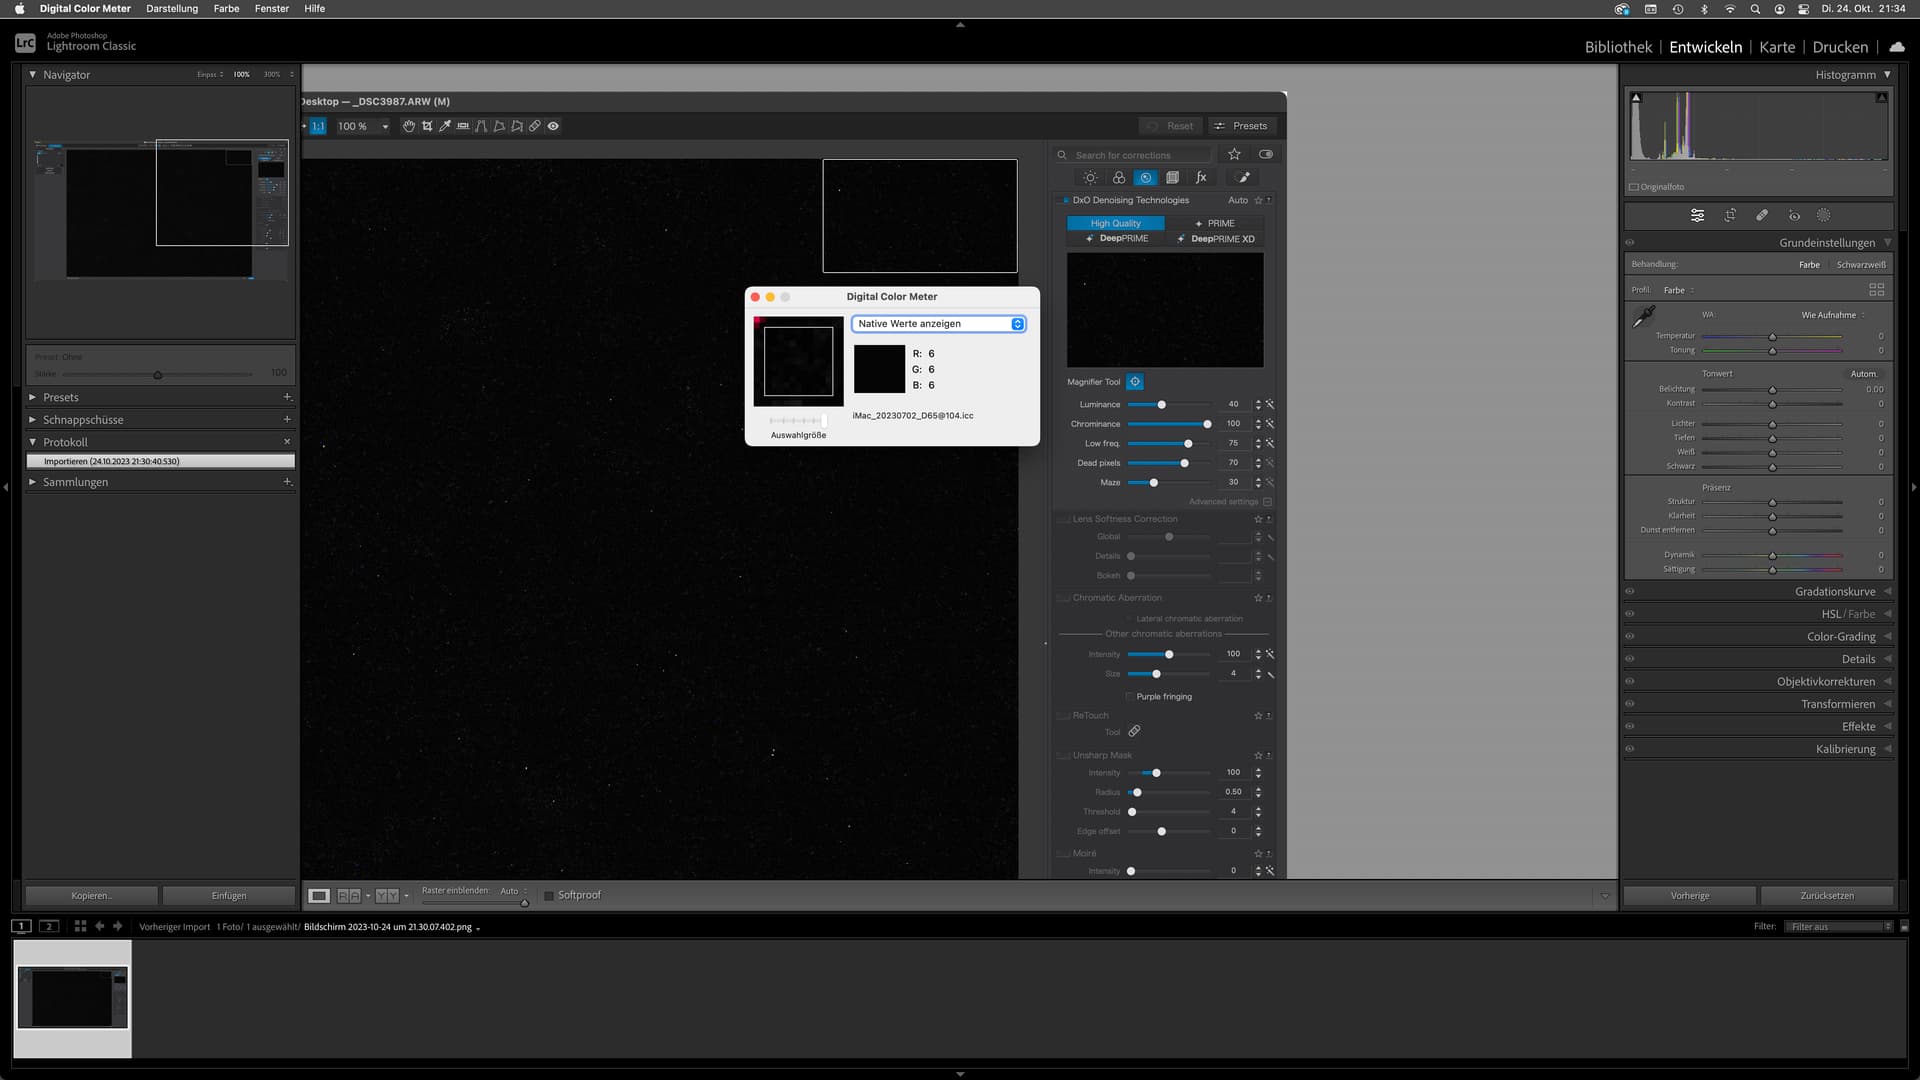
But when I measure a few areas in the viewer and the NR magnifier, the RGB values are the same within the limits of how precisely I can match the position of the sampling area of macOS’s Digital Color Meter application.
I selected “No corrections” as a preset before adding HQ NR. There were no additional edits and I was viewing it at 100%. They should have been identical, but to my eyes the preview looked noticeably different after experimenting with different darker areas in a variety of images. In brighter areas any difference was much harder to see. But in darker areas the difference was much more obvious. I had never noticed that before, and would not have noticed it now if I had not specifically tested for it.
Please be aware that judging differences visually can get fairly unreliable depending on what is around the images. As for noticeable differences in the shadows: We can’t see the stars during the day, can we.
Yes, I am aware of that which is why I experimented with this dozens of times last night, and also used a large high quality magnifying glass to compare the small sections of the image on my 28-in monitor. In brighter areas any differences were much harder to see, but with darker shadow areas, the differences were much more obvious. I do not believe it was an optical illusion.
EDIT: Does anyone know how to upload without screenshot being compressed as all the bad pixels are not showing after upload but clearly visible in my screenshots ?
Apologies for not putting in some screenshots, this is latest v6 running on MacBook Pro M1, MacOS 14.0.
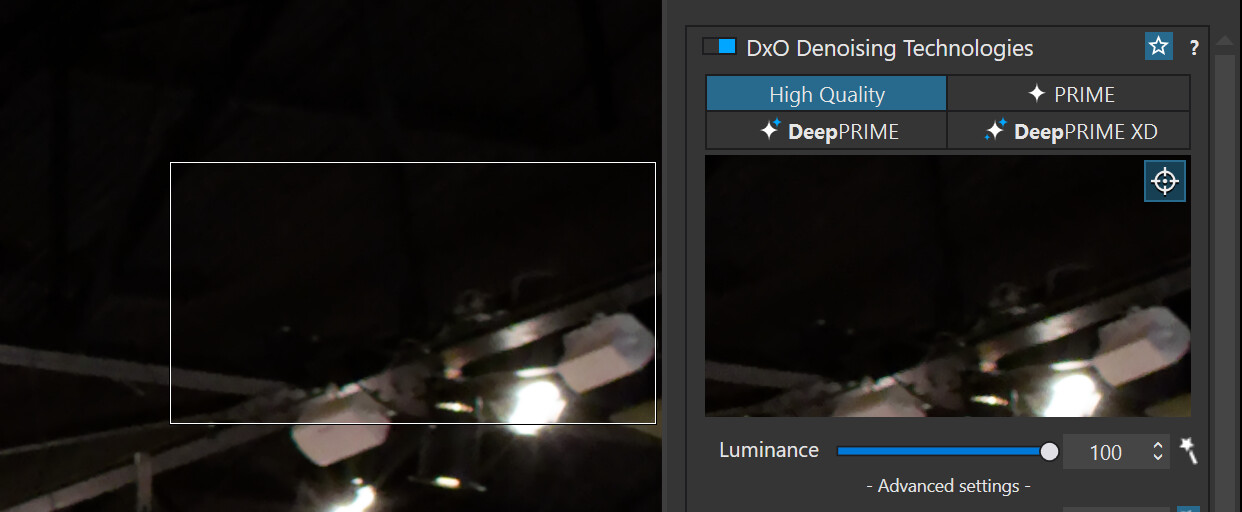
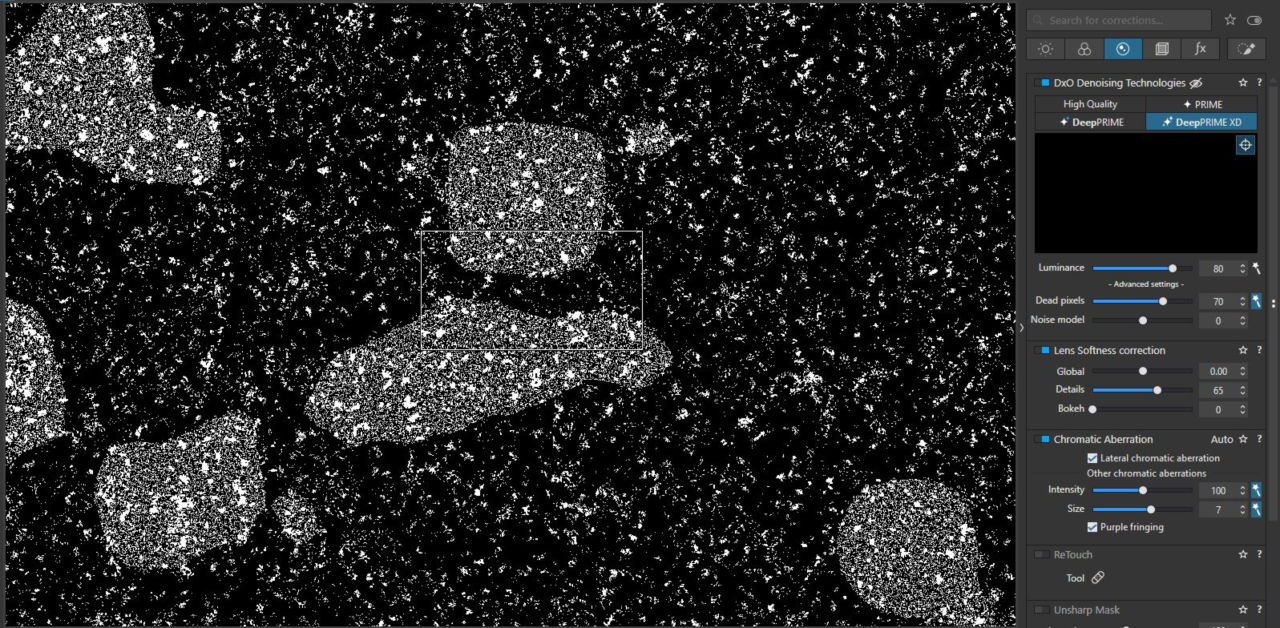
First screenshot shows without any noise removal, and I have smart lighting cranked up just so you can see the bad pixels easier.
Second screenshot shows High Quality, where you can see the selected region with no bad pixels while main preview still shows quite a few. When you export the whole image is literally without bad pixels. So isn’t the exported meant to look like the live preview ? Or is smart lighting messing with what I see ?
Perhaps they measure the same, but looking at a number of shadow examples with the naked eye under high magnification shows them to have some subtle differences. It is not enough to bother me and I wouldn’t have even tested for it if this thread had not been created.
Edited the RAW in DPL7.0.2 on macOS 12.7 and then measured an area again…and found that difference don’t exist or are marginal (± 1/256) See screenshots as shown by Lightroom Classic 12.5.
Note that I selected a corner of the image to be able to select the sampling area more precisely.
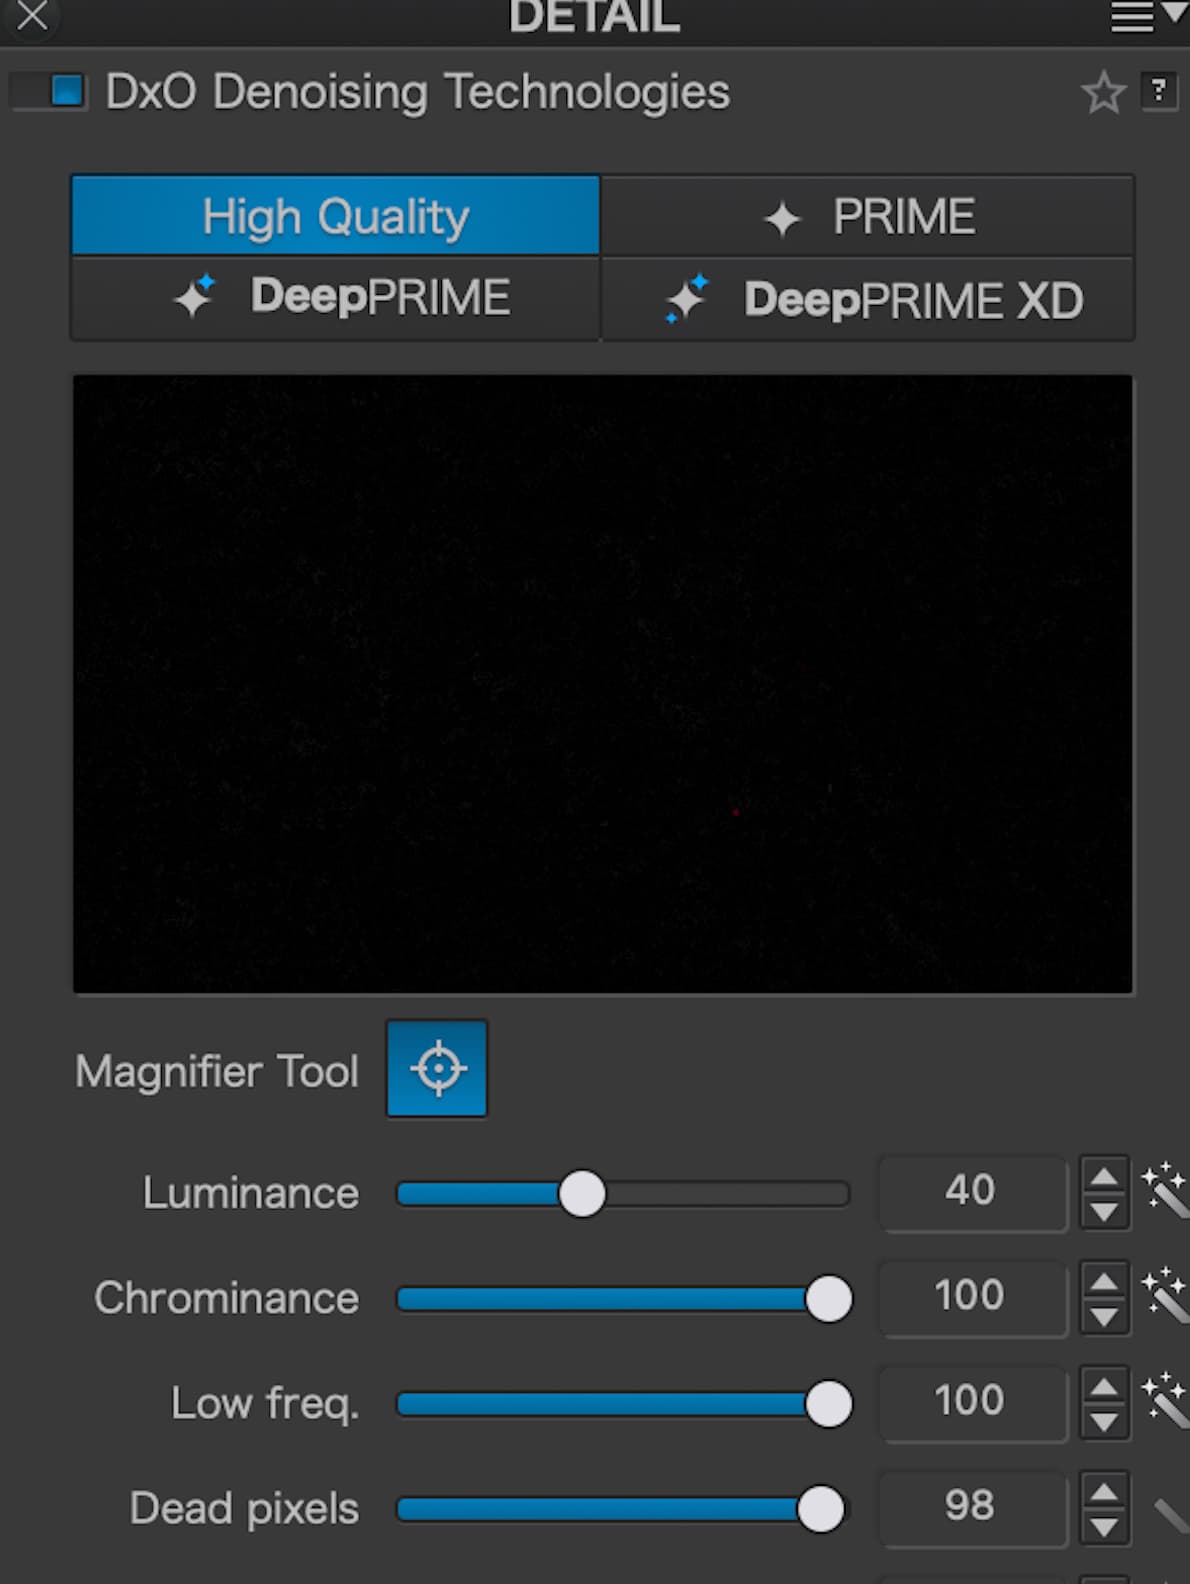
I don’t agree with your assessment, if you set to same settings I have in the uploaded screenshot, the differences are not marginal, you have dead pixel at 70 whereas mine is at 98 for one thing. Also I am on v6 so there is that potential difference as well. I mean my screenshot also shows very clearly it’s not the same at all.
Still you even admit there are differences, but all along I hear that the High Quality is meant to be real-time and reflect the final exported image. It clearly does not.
So the question for DxO folks would be, does High Quality in preview supposed to look like what is in the magnifier tool preview and final export ? I think DxO need to be more clear.
Also why don’t they allow full preview with DeepPrime or Prime selected ? it’s ridiculous. Give us the choice at least. It takes about 2-4 sec to export the image with Deep Prime and lens corrections. I can surely wait that time or slightly less to see it in the preview. How a tiny section in a small magnified section is meant to translate to whole image is not remotely the same thing.
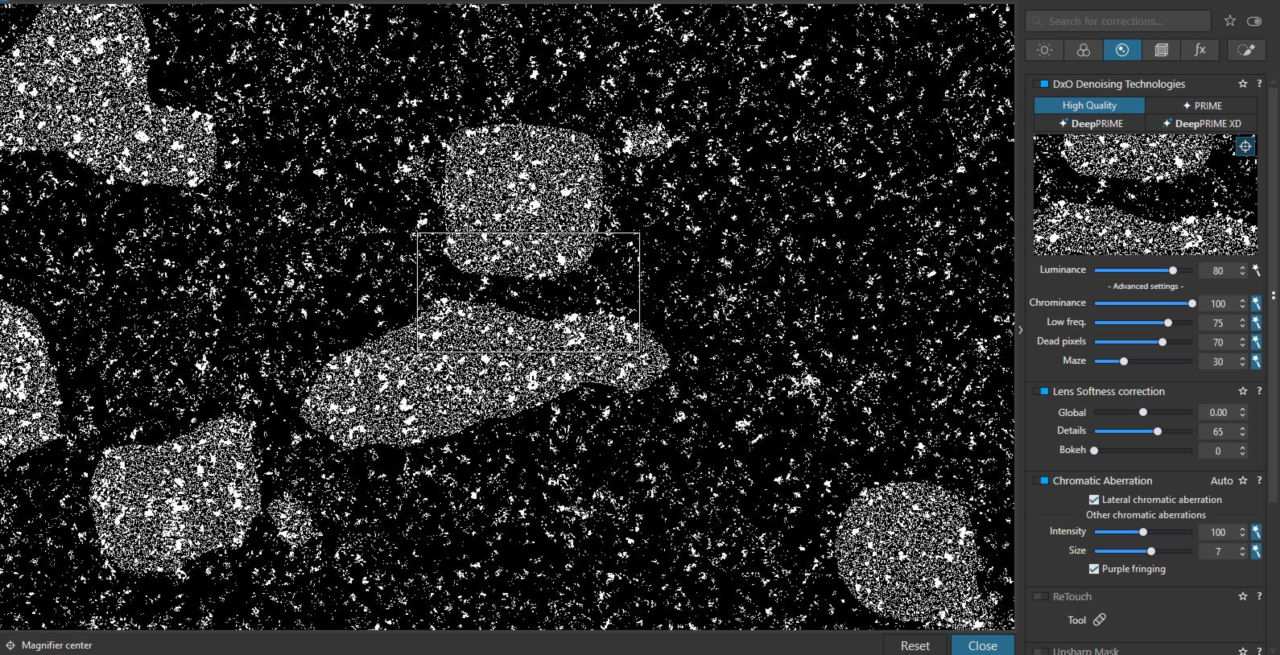
I’ve used your photo and cranked up the gamma with curves to the maximum to get extreme noise showing up. When I see it in main view its clearly High Quality nose reduction, that matches the small preview, and when I use DeepPrimeXD its a different preview as I’ve suspected. Here are screenshots. Also dead pixels are included as extra in noise reduction, but I’m not sure if they show up in the main preview.
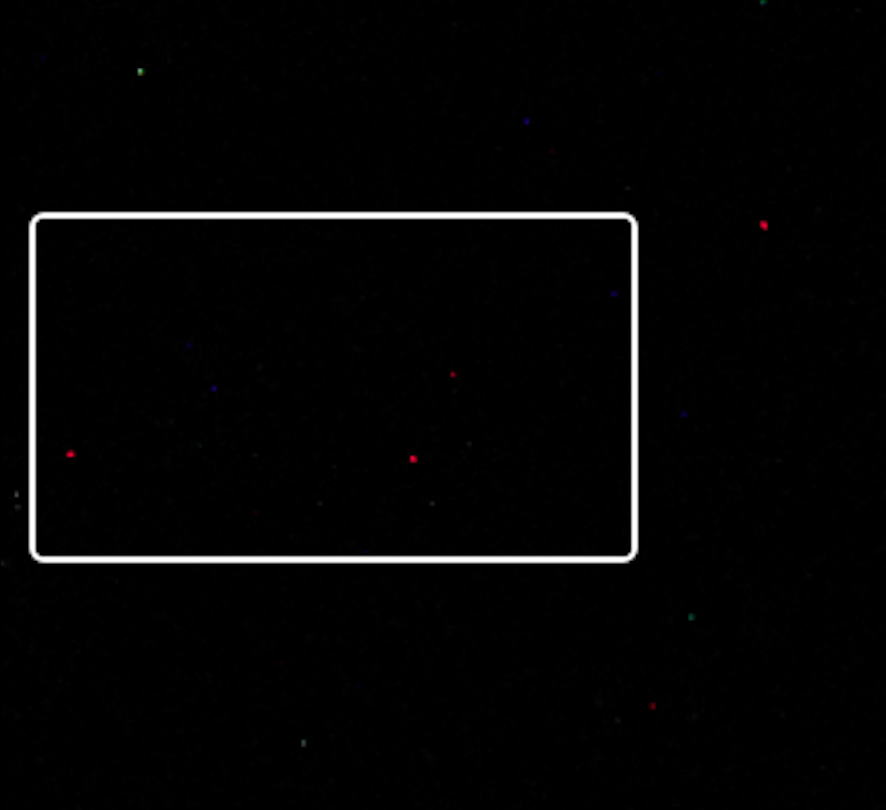
Close up of the region of interest with de-noise, you should be able to see the three main red dots within the white square in the non-de noised image above for comparison. Definitely de-noise doing something, as this has a lot less noise when one expands the images to large size.
So I have to conclude that real-time preview using HQ is not what is shown in the smaller magnifier preview tool, or the exported image. At least under certain conditions.
I don’t want to see if your RAW files treated with your settings will give me the same result. I want to see if there is a fundamental difference with default settings, which seems to be not the case in DPL7. Differences (or errors) of 1/256 (0.4%) are well below what human vision can discern, so I don’t care about them that much.
Sure, PhotoLab 6 and 7 can behave slightly differently, so if you clearly see a difference, you might want to create a ticket here: support.dxo.com.

