From Large Format to Digital

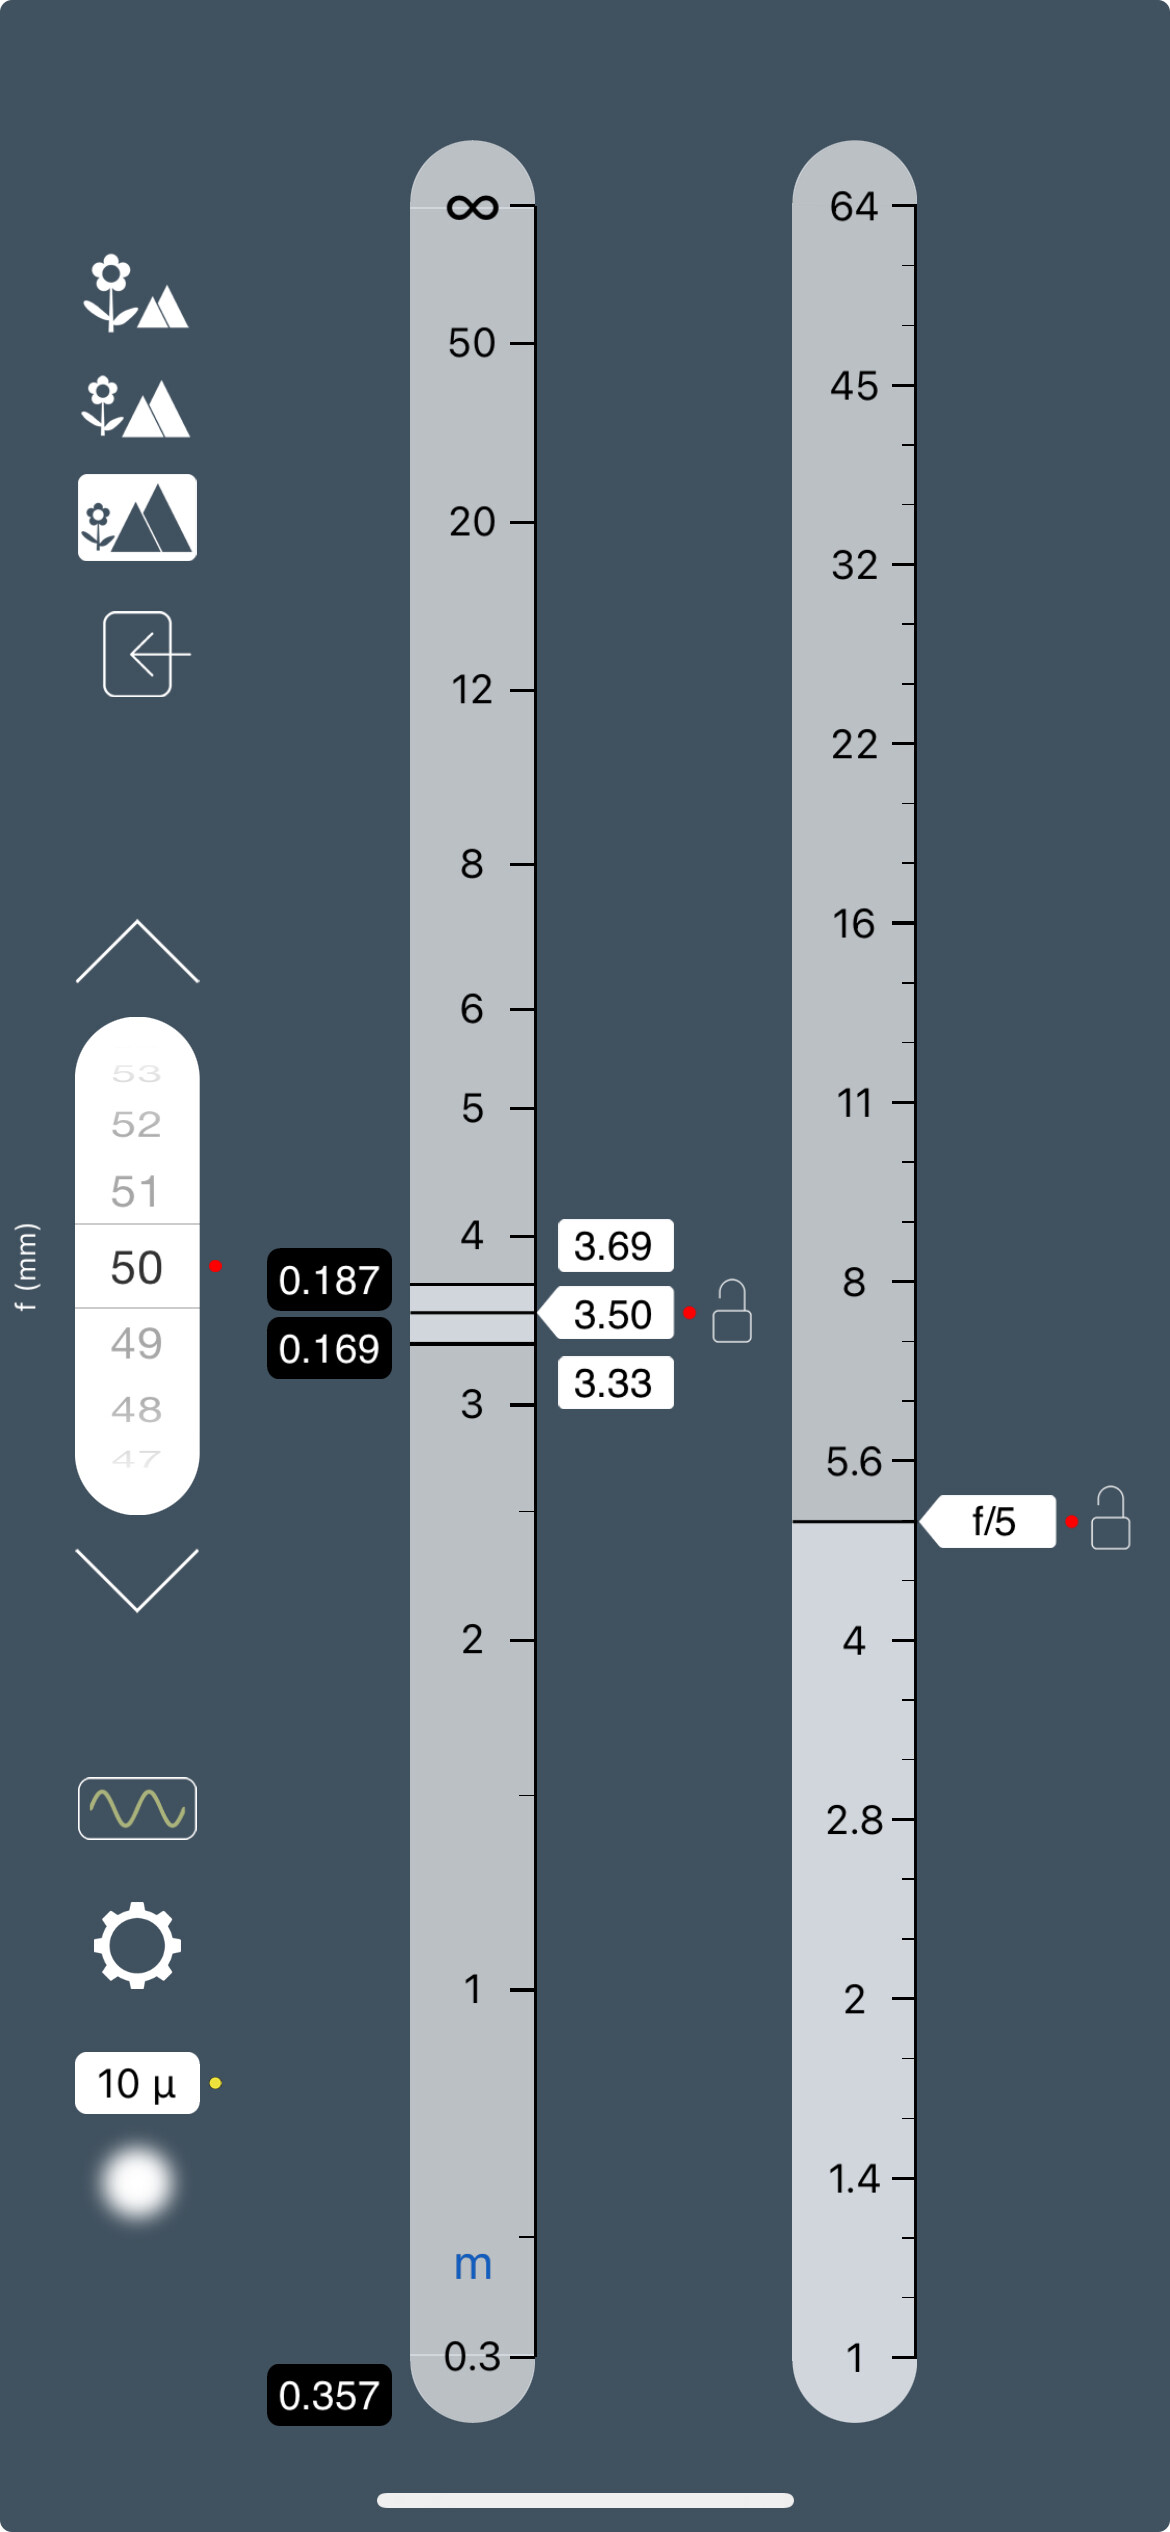
There is no way I can see how to use PhotoPills for large format. I use TrueDoF-Pro, which gives diffraction limits as well as DoF. It can cope with a blur circle of up to 200µm.

If I base the blur circle on the diagonal of a 5" x 4" negative, I get 162/1500 = 108µm.

Using that in TrueDoF-Pro, gives me a diffraction limited aperture of f/57 which, to all practical intents and purposes, means there is no diffraction to worry about, since most LF photographers tend to shoot at f/32.

However, if I want an image taken with a 180mm lens, to be sharp from 2 metres to infinity, the hyperfocal distance distance is 7.32m and the nearest sharp object would be at 3.66m, on the diffraction limit of f/57. Which means I still wouldn’t have sharpness on the near object at 2m.

And, if I want to give myself a margin of safety to make up for lens aberrations, etc, I would use f/32, which then limits the nearest object to 5.08m, which is worse.

And this is why I use tilt on the front standard, because it completely removes that restriction on the nearest object and allows me to project a wedge of sharp focus from under the camera, off into the distance, getting wider as it goes.

This then allows me to do interesting things like this image…

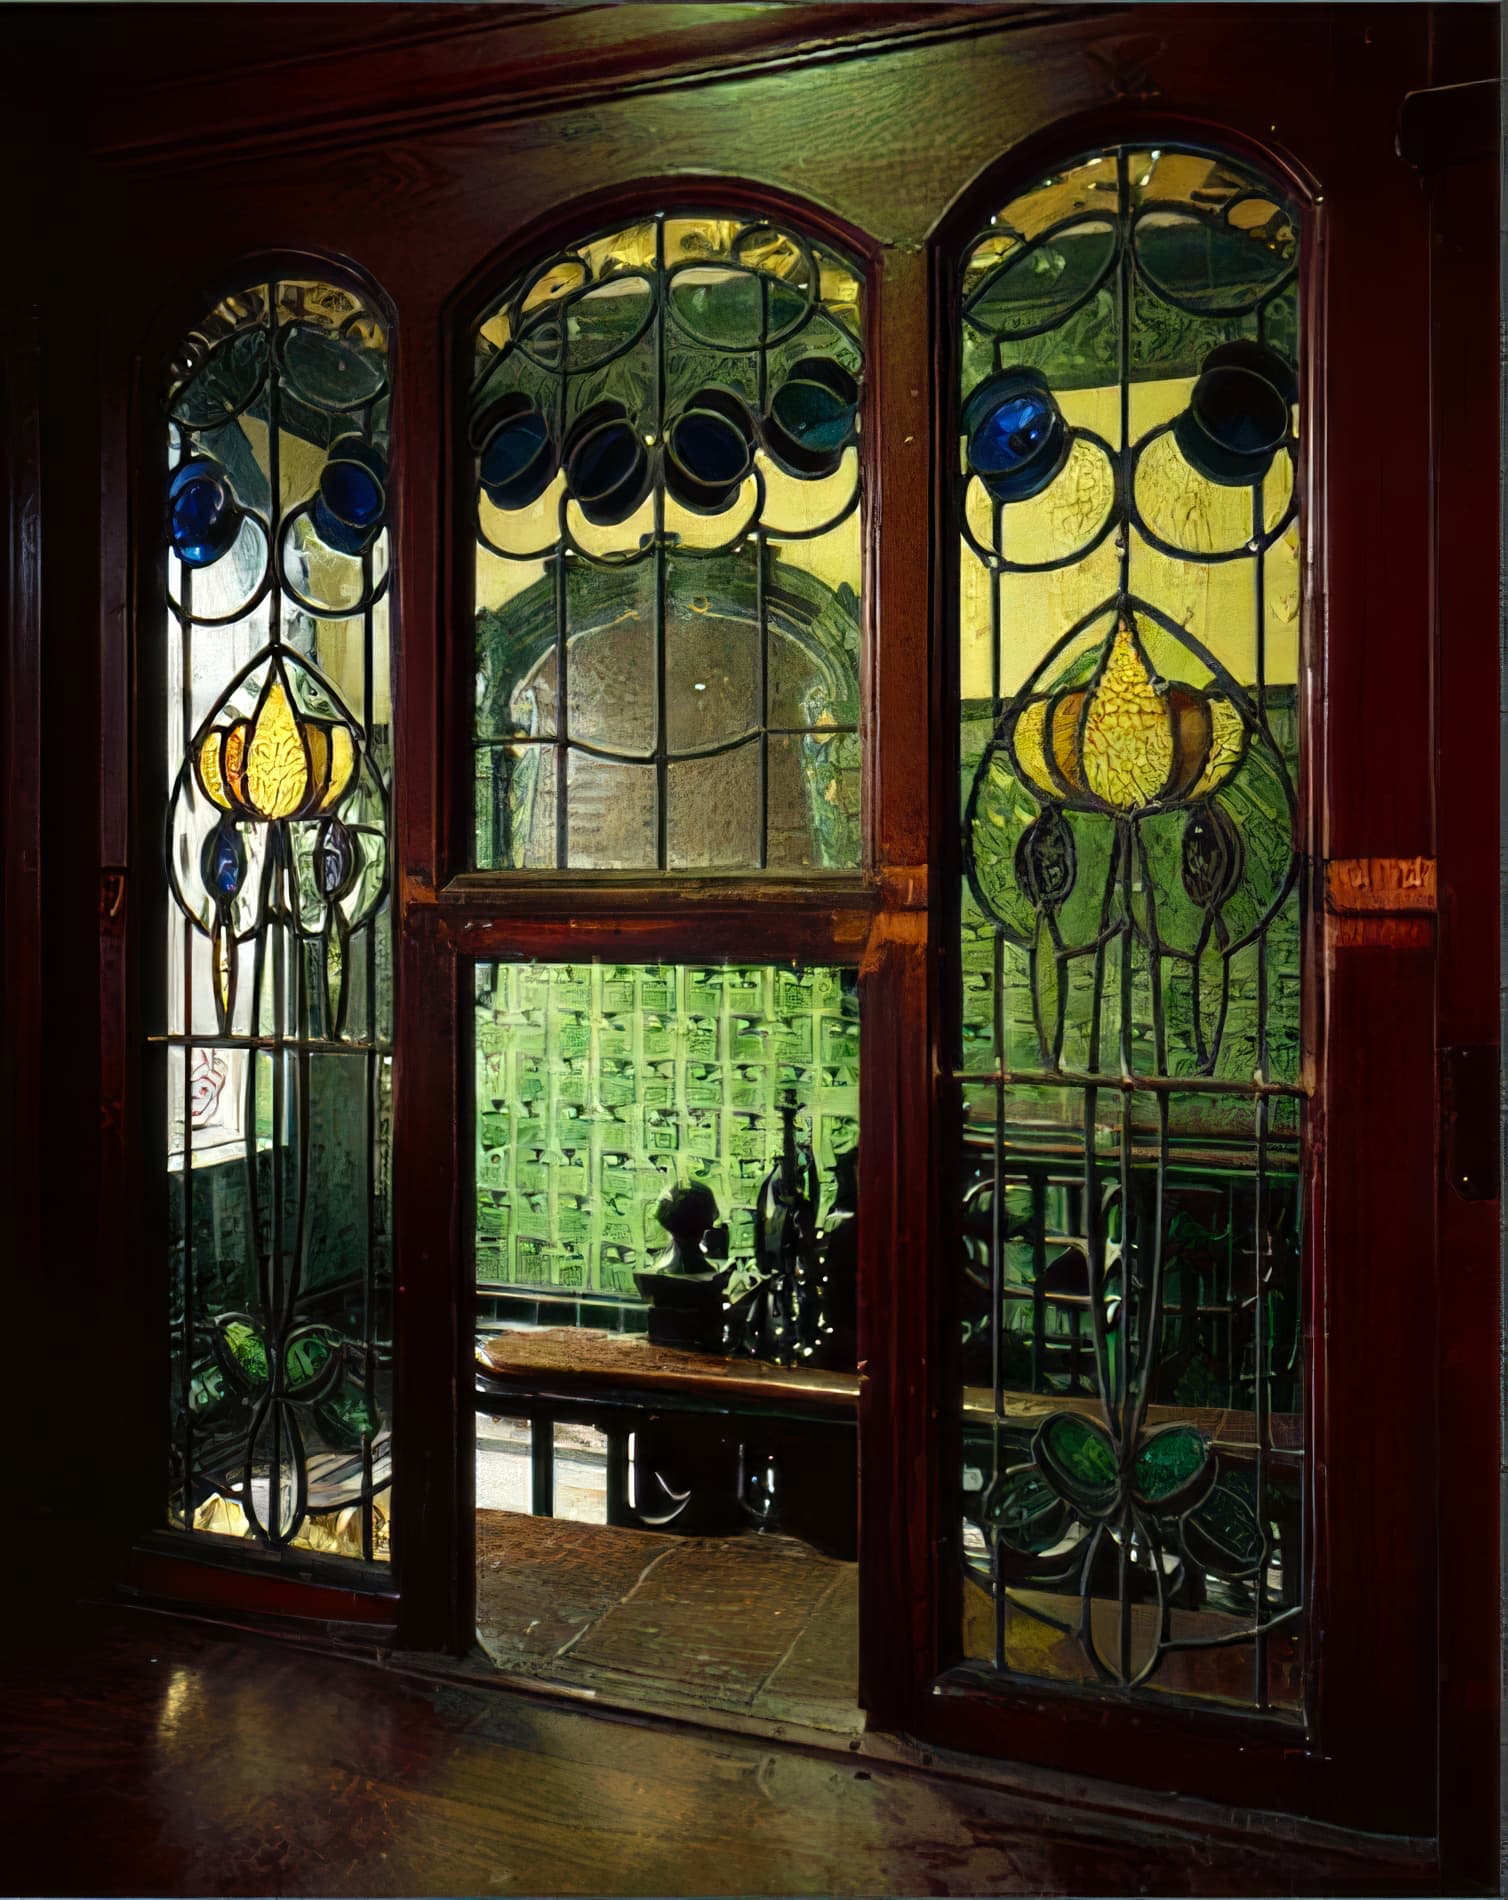
… where everything is in sharp focus from the desk in the foreground, about 1m in front of the camera, to the rear wall and beyond.

Or this image, where I wanted to separate the gargoyle from the rear wall…

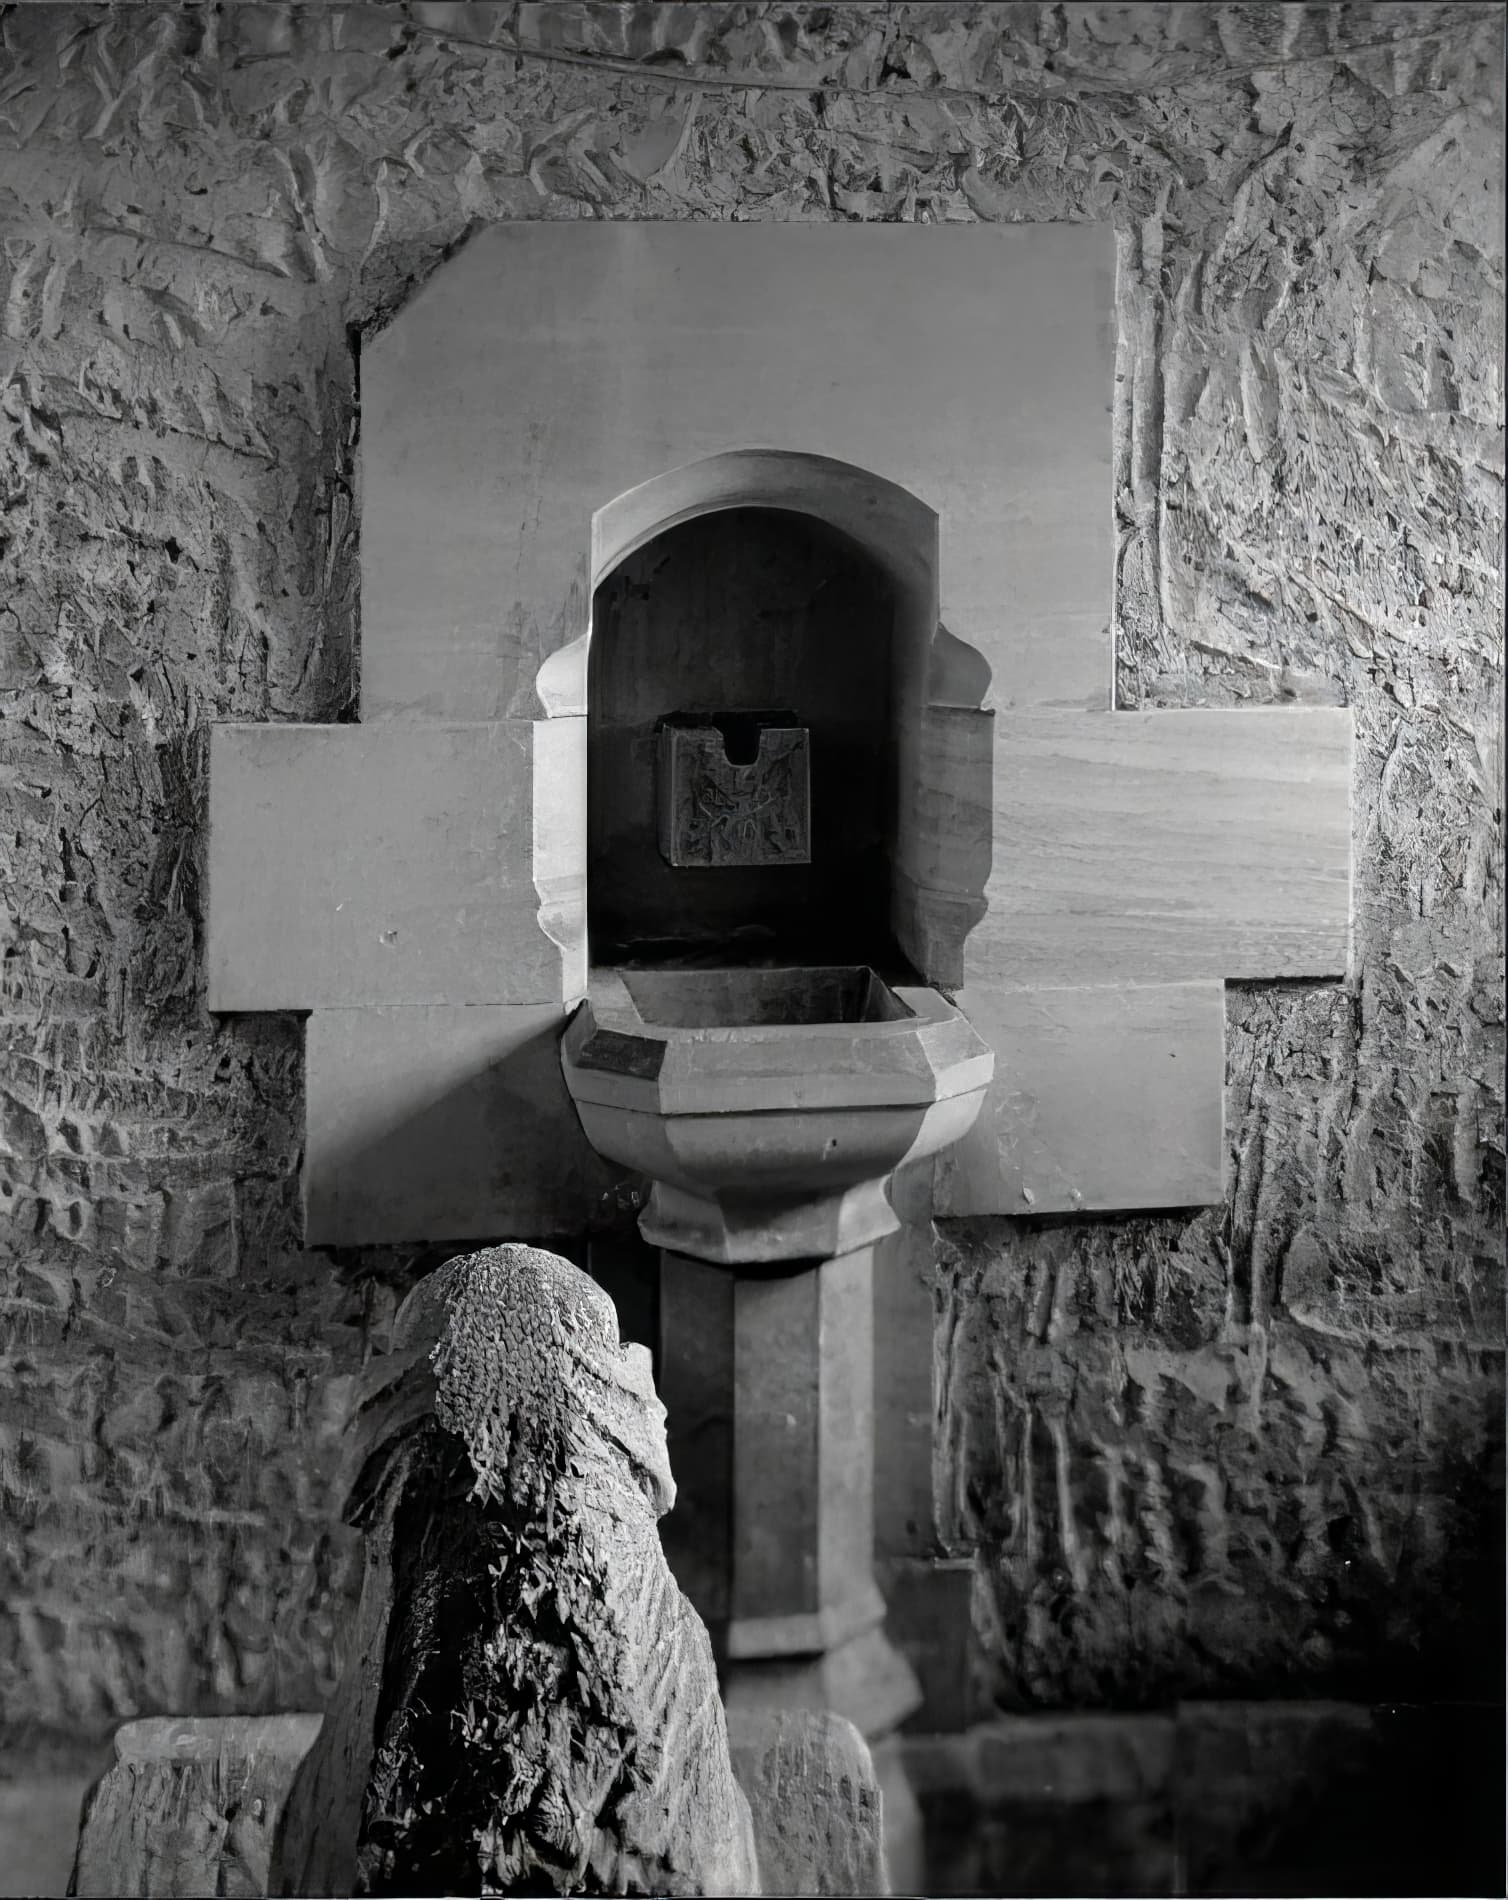
… where the gargoyle is in focus, the water font on the back wall is in focus but, because I deliberately opened the aperture to around f/5.6, the top and bottom of the rear wall are out of focus. Something that can only be done with a tilt lens.

I gave you the diffraction limitation for the D850 for that was what you mentioned.

George

Actually, you only mentioned f/9, but it is really f/5, based on the pixel pitch.


No comments on the LF?

DOF is one of most endlessly discussed subject on photo forums. What is the right size for the CoC? etc. etc.
And this thread is no exception.

Please, see post 48.

The absence of LF in dof calculators is a more practical. When adding LF one has to add MF too. When I’m right at least 6 different sizes. For who??
The point is more you just don’t want to understand that all that dof and coc is just math. You can make your own size if you want. Your dof calculator is going further. Be happy with that. Well, you’re.

If you calculated f/5 for disfraction then there must be something wrong. Let’s find out.

George

That’s certainly not where I hoped this thread would go but some folks seem fairly obsessed by it and, I have to admit, I got sucked in.

The number one advantage of LF cameras is you don’t have to calculate it - you simply look at the ground glass screen with a loupe and twiddle a couple of knobs until everything is sharp.

Can you explain to me how you got f/5?

George

http://www.georgedouvos.com/depth-of-field-and-diffraction-and-high-resolution-sensors.html

The question was how do you get f/5?
There’s a lot of writing in this link I would declare fault. But let that be another discussion. Just how do you get f/5.

George

Let’s look at the two sets when you want to get the best shot for landscape photography (assuming LF is not the best tool for sport or BIF photography).
LF: yes, you can get a very sharp picture with a relatively large aperture, avoiding diffraction, by tilting your lens, and that without the need to calculate because you see the live result on your very large focusing screen. But you need a low speed film, carefully devloped and scanned, to get the best sharpness out of it. So, 100 ASA/ISO is loaded in your camera. Bright sun? Ok, then f:32 so exposure duration is 1/50. Now, bright sun and no wind please, else many leaves, branches, flowers or grass will be blurred, not talking about people or various moving objects (cars, boats etc.).
Digital camera: no need to emphasis. f:32 becomes f:8 or f:9, exposure is now 1/800: everything, even moving, will be sharp. And if you need shorter exposure or you get less light from the sun, 400 ISO is no problem nowadays (Thank you PL). Moreover, you can use a tilt lens on your digital camera if you need more DOF.
Having written that, I’d like to make some pictures with a LF. I’m thinking about making one, 8 x 10" if possible, to use with a pinehole.
Nobody’s perfect.

It’s in the article. Basically, it’s based on a calculation that starts with a blur spot diameter of twice the pixel pitch, since that is what it takes to record a single spot.

As to the actual calculation, there’s an old saying “Why keep a dog and bark yourself?” George Douvos has created an excellent app that does the calculation and that is what I use.

And, to quote another saying “The proof of the pudding is in the eating” which means I used TrueDoF-Pro and it reliably produces superbly sharp prints at previously unthought of sizes, where other photographers have been convinced I must have used an LF camera to get such a print.

I still don’t know where that f/5 is based on. Is it so difficult to explain? It doesn’t come as a constant from that article. It comes from you. But how?

George

The f/5 is based on the calculation made by TrueDoF-Pro. Simply input the blur spot diameter based on twice the pixel pitch and you get the result.

e.g. for the D800, which George mentions in his article, the pixel pitch is 4.87µm, thus a blur spot diameter of (just under) 10µm. I use a D850, which has a pixel pitch of 4.34µm. Hardly any difference, so I stay with 10µm.

Entering that blur spot diameter into TrueDoF-Pro gives me this…

The darker grey on the sliders is diffraction limited.

Having tried to do research on how this formula works, I am very glad that George took the time and effort to do it for me.

The only “shortcut” he gives is…

There’s an easy way to calculate the diameter of that blur spot: Divide the f-number by 0.75. That gives you the blur diameter in microns.

If you don’t have his software, I’m sorry but, you’ll have to look it up yourself.

If you don’t agree with his writings, you’ll have to take that up with him. As for me, all I can say is, I use his calculator and it just works

Not anyone has a LF camera nor tilt-shift lens gear and experience. You pointed out a debatable point at this subject so here we are.

And just remember your first post after the subject “came back on track” :

Lead your topic where you want it to go …

We have been here before. I still think you don’t use the calculator the right way.
Sharpness limitation occurs when 2 to 2.5 times the airy disk exceeds the pixel dimension

So you’ve to find the size of the airy disk and not a fancy CoC.

Your example shows the dof in combination with f/5 and a camera like the Nikon 1.

You’re using the calculator the wrong way. I’ve been saying that several times.

George

D800 has a lowpass filter. D850 has not.
Does this affect the blur spot diameter ?

The CoC is want you want it to be. 1 pixel if you look at your files at 100% zoom, 2 pixels for Joanna because she’s happy with the large prints she obtains with enough details so people can look at them from closer, 30 µm if you stand with looking at pictures taken with a FF as a whole. End of discussion for me, or endless discussion. Then, keep the aperture enough open in order to avoid diffraction, in coherence with the CoC you have chosen.
No?

I have been using TrueDoF-Pro for several years now and it works perfectly.

I found this table from Edmund Optics…

  • f/5.6 gives a disk of 7.11µm. I work with 10µm, so larger than minimum.

  • f/11 gives a disk of 13.96µm. I work with 20µm, so, once again, larger than minimum.

Only if you stick to the old fashioned CoC guesstimations, which are way over for modern high resolution sensors. The calculators you are using are based around old film and print viewing “standards”.

If my way of working is so wrong, how come I am printing A2-sized prints and nobody can tell any difference in sharpness from prints from 5" x 4" negatives?


Not a clue. I certainly can’t discern any difference between prints from my D810 and D850 :grinning:


Absolutely.

Now, there you have put your finger on the button. I can create large prints from a 46Mpx sensor, without any interpolation, up to 87cm x 58cm and with the expectation that they will be viewed from 1m by pixel peepers. I could easily double that size, using Topaz, with no discernible loss of detail.

If I was asked to produce a larger print than that, for a longer viewing distance, I wouldn’t anticipate any problems. But, should a client want ultra large, I can always take it with the Ebony and print up to 1m25 x 1m without interpolation, or larger if required.

And this is where the question - with these dimensions, just how necessary is an LF camera when a hi-res digital can approach the same sizes?

Yes.
So if you want to get a 1 pixel CoC because you want your crop images to be as clean as possible, how do you determine it ? size of photosites (which is not related to sensor size) ? size of photosites combine with kind of sensor you use (bayer CFA 4x4, X-trans CFA 6x6) ? or what else ?

PS : Limitations due to lenses optical quality are deliberately omitted.

That’s what I use. Sharpness has nothing to do with sensor size.

Now, that could have some influence if each “site” is equivalent to one pixel.

Pheww!!! :stuck_out_tongue_winking_eye: