Extracting pop from RAWs - and a quick rough and ready attempt

I did and I get…

… for f/10; but I don’t get any idea of what the DoF is at a given focal length and distance.

Whereas, with TrueDoF-Pro, I set the blur spot to 20µm and, hey presto!

If I don’t want to bother with diffraction and just use CoC for a full frame sensor of 30µm, all I do is turn off the diffraction setting…

… and just get sharpness based solely on DoF without any regard to diffraction.

Now, your diffraction-only calculator lets me know that I am diffraction limited for f/10 but not for f/9. So, if I then reduce the aperture to f/10 on my calculator, because I am prepared to accept slight diffraction…

… I get a DoF that is slightly larger due to the fact that I am prepared to accept that it won’t be as sharp.

So, tell me, why should I bother with two calculators when I already have one that does both jobs at the same time?


And I’ll bet you still haven’t read his papers :pleading_face:

Then you select another sensor. That’s a DX sensor but you have a FF sensor.

.

Now you’re doing right. You selected the right sensor. How do you turn on the diffraction setting??

I did read the papers A normal dof calculator. Only when mentioning to use another blur circle he’s going wrong, or I just don’t understand it. It has a nice interface.

George

Only if I’m happy with loss of sharpness due to diffraction.

Interestingly, if I choose the number of megapixels the type D850’s DX crop, then I get this…

… where diffraction now starts at f/14??? Which is total rubbish because, apart from cropping the image area, nothing else has changed. The sensor resolution remains the same.

Don’t forget diffraction is not caused by the lens, but by the diaphragm.

In the settings tab…

Might I suggest you also look at Depth of Field, Diffraction and High Resolution Sensors, as it explains why the calculator does what it does, especially passages like…

Defocus plus Diffraction

It’s all good and well to discuss defocus and diffraction individually, as we have just done, but when is comes to the blurring of images, what counts is the combination of defocus blur and diffraction blur, since both effects occur simultaneously. When you set the blur spot diameter in TrueDoF-Pro, you’re actually setting the diameter of the actual blur, the blur that’s due to the combined effects of defocus and diffraction (if you have enabled the diffraction option). The pointers that indicate the near and far distance extremes show the positions of objects that have image blurs equal to the diameter you specified on the settings screen (10 microns).

If you start at a low f-number and gradually increase it, you gradually reduce defocus blur, so objects can be be further from the focus distance before they end up appearing blurry. Yes, you’re simultaneously adding some diffraction, but not a terribly significant amount just yet. As you continue to increase the f-number, however, diffraction starts making a significant contribution. From about f/5, you’re in trouble. This is because, as you go to progressively alerger f-numbers above f/5, you are adding more blur via diffraction than you are subracting via decreased defocus. You are, in effect, decreasing your depth of field (i.e. the region between the 10 micron markers). And by the time you get to f/8, there is so much diffraction that no part of the image contains blurs smaller than your specified 10 microns, not even objects at the focus distance, so the region meeting your sharpness criterion collapses to zero. Confused? Take a look at the article Image Sharpness vs Aperture, where this sort of thing is explained with some very helpful graphs.

And don’t forget to read the link article with graphs :slightly_smiling_face:

Without wanting to be the least rude, unfortunately, that seems to be the case. it took me some time to grasp it - optical physics not being my strong point outside of setting the camera up.


I just found this quote from another of his articles…

TrueDoF-Pro is the only depth of field calculator that takes diffraction into account. In a sense, it might be more accurate to refer to it as an “image sharpness calculator.”

He is using a same diagram as I made in my program. :grin:

George

But now it shows another blur circle.

George

Can you show what you are seeing?

I don’t have the calculator. It are your pictures.

From the manual

Of course, the depth of this region also depends on what you define as “acceptable” sharpness. You define this by setting a suitable blur spot diameter (circle of confusion). On the main screen, tap the Blur Spot Diameter Button (it’s the one at bottom left) and then slide the pointer to set your chosen value (the standard values for various film/sensor sizes are shown as a guide).

He just doesn’t work with print output, enlargement of the sensor size. Unless there’s some other setting where you can set the sensor size.

George

There’s always the User Guide

Or here is a screenshot of the blur spot setting screen…

Now you select a sensor with a cropfactor of 1.5, DX. So all info is related to that.
Manual is Users Guide.

George

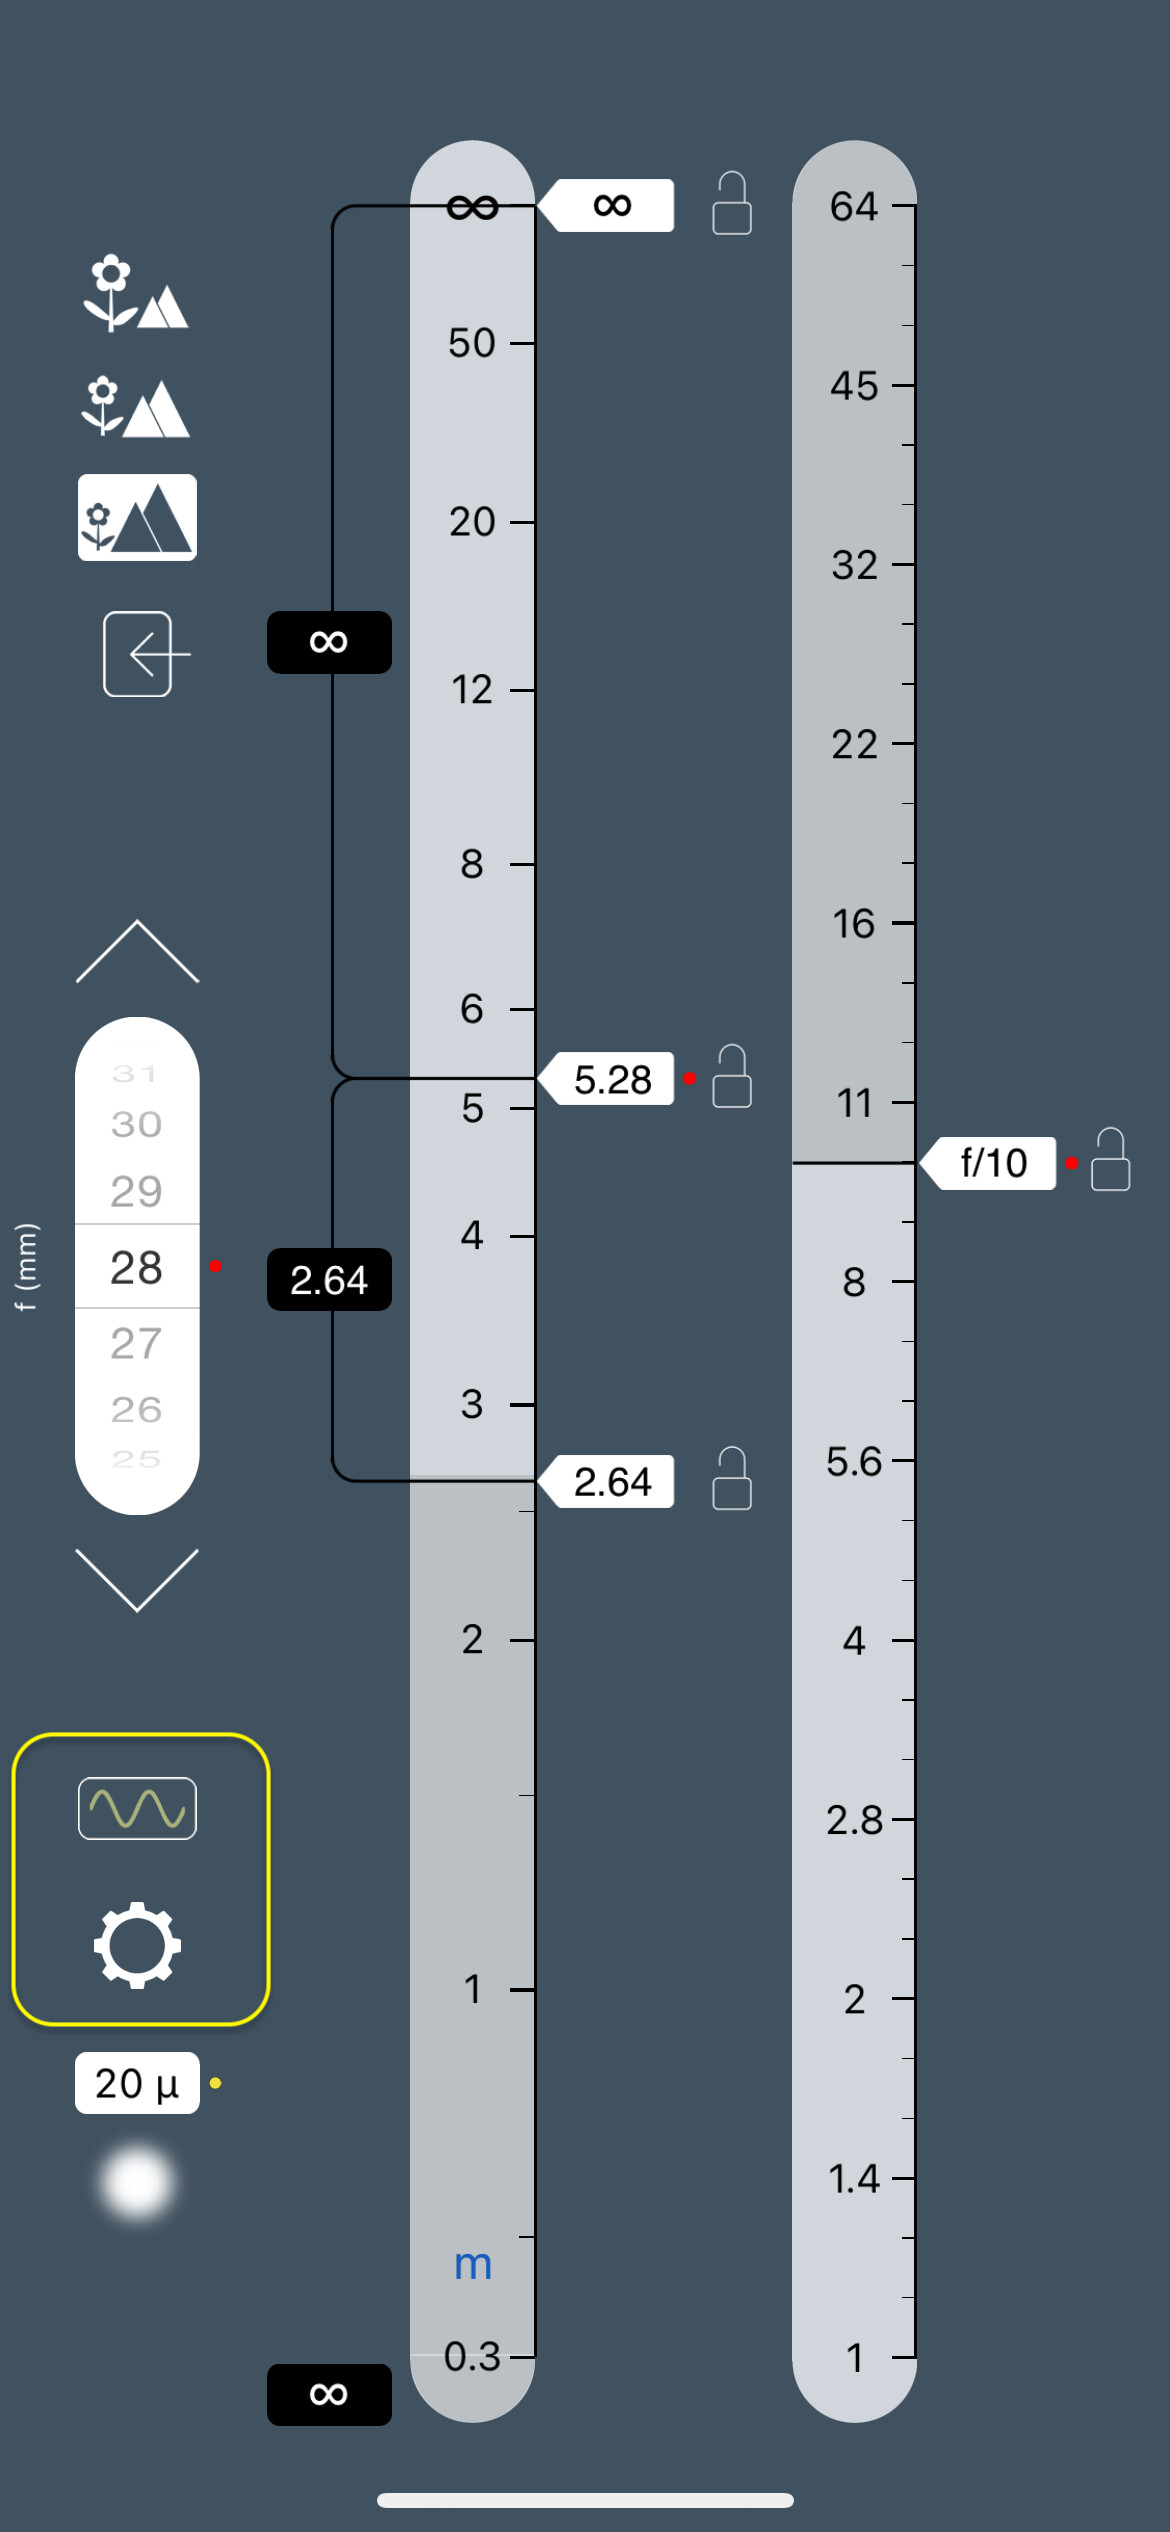
Nope. I pay no attention to sensor size. I set the blur spot to a diameter that will give me the most resolution I can possibly get for my desired DoF without diffraction.

It’s all about how large a blur spot I can tolerate, for a given print size, at the extremities of the DoF.

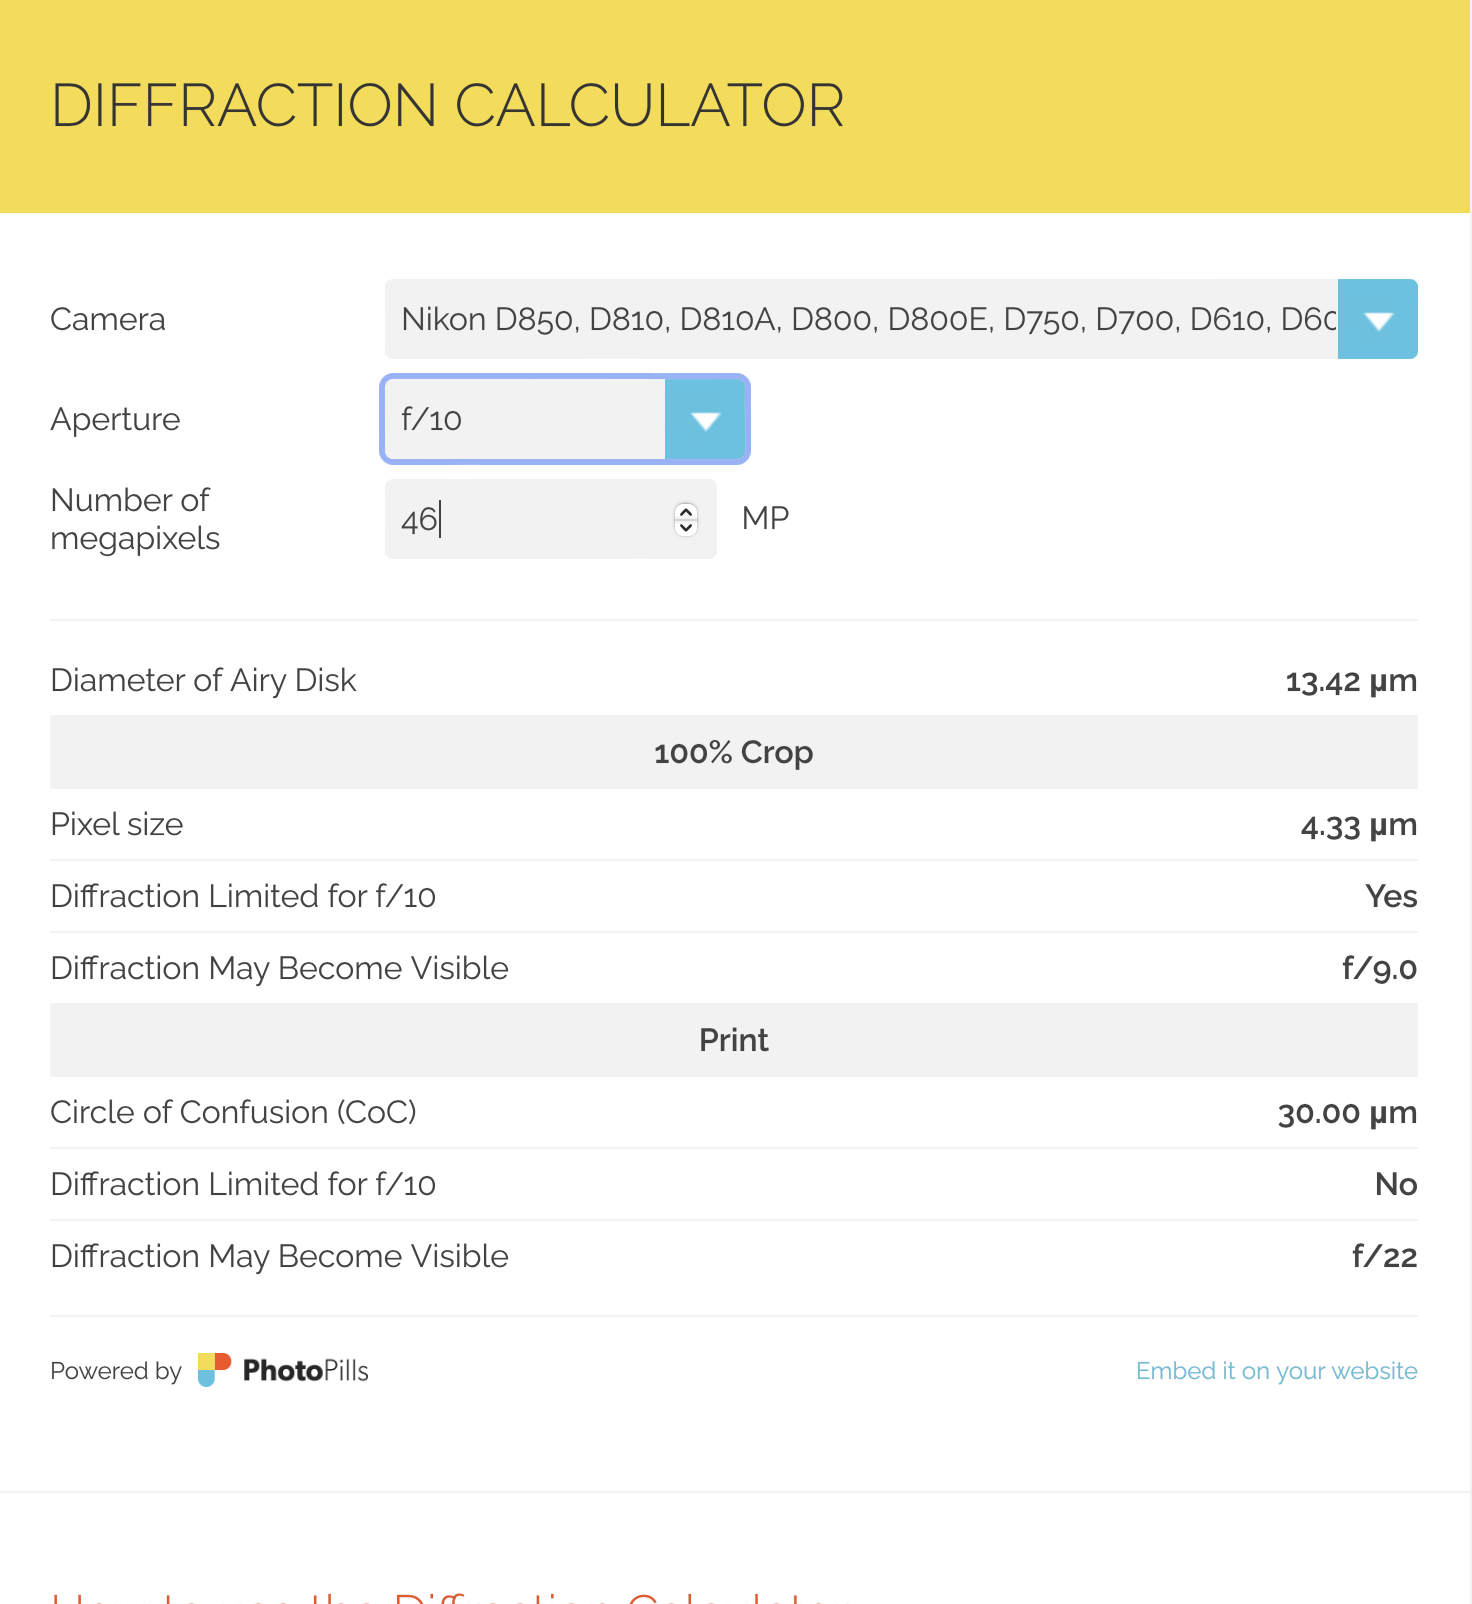
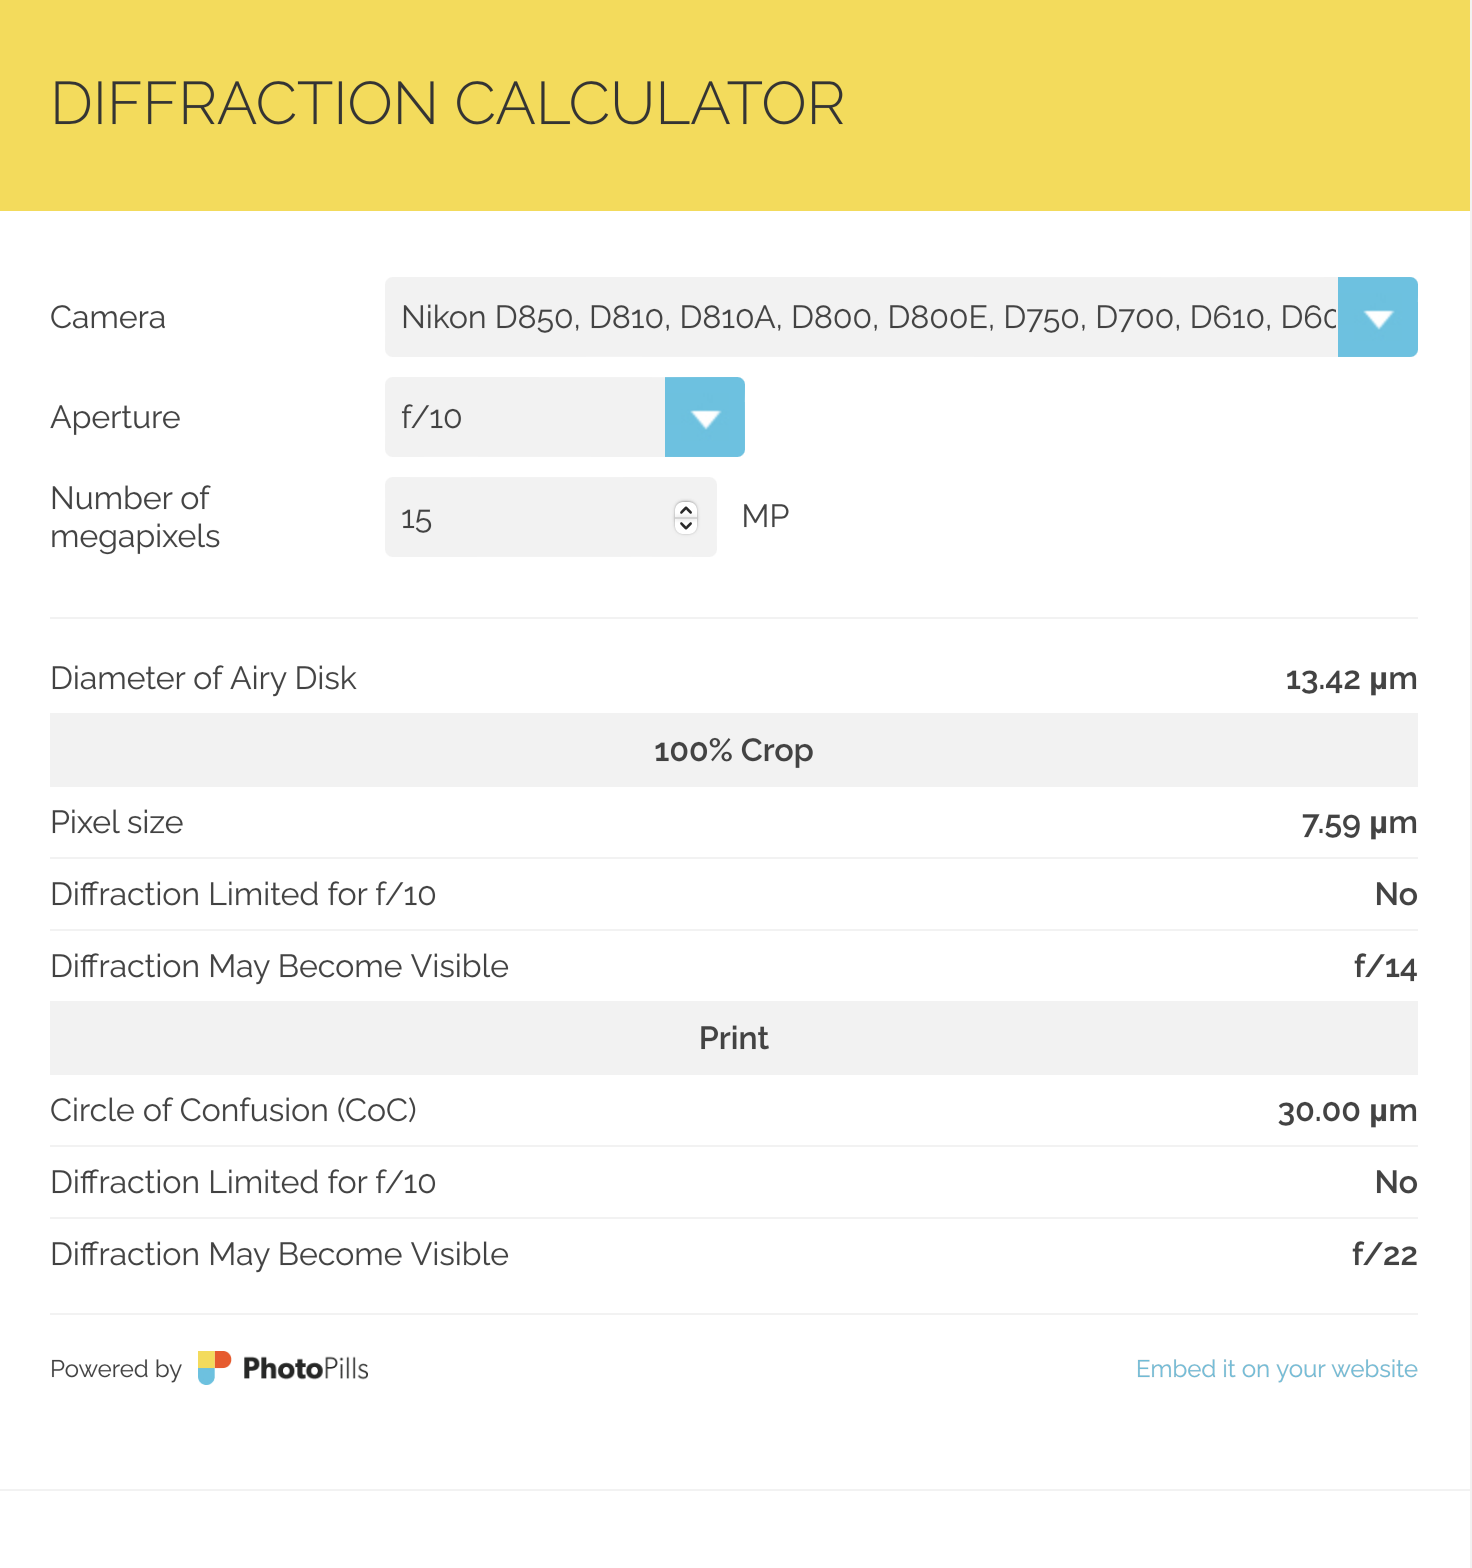
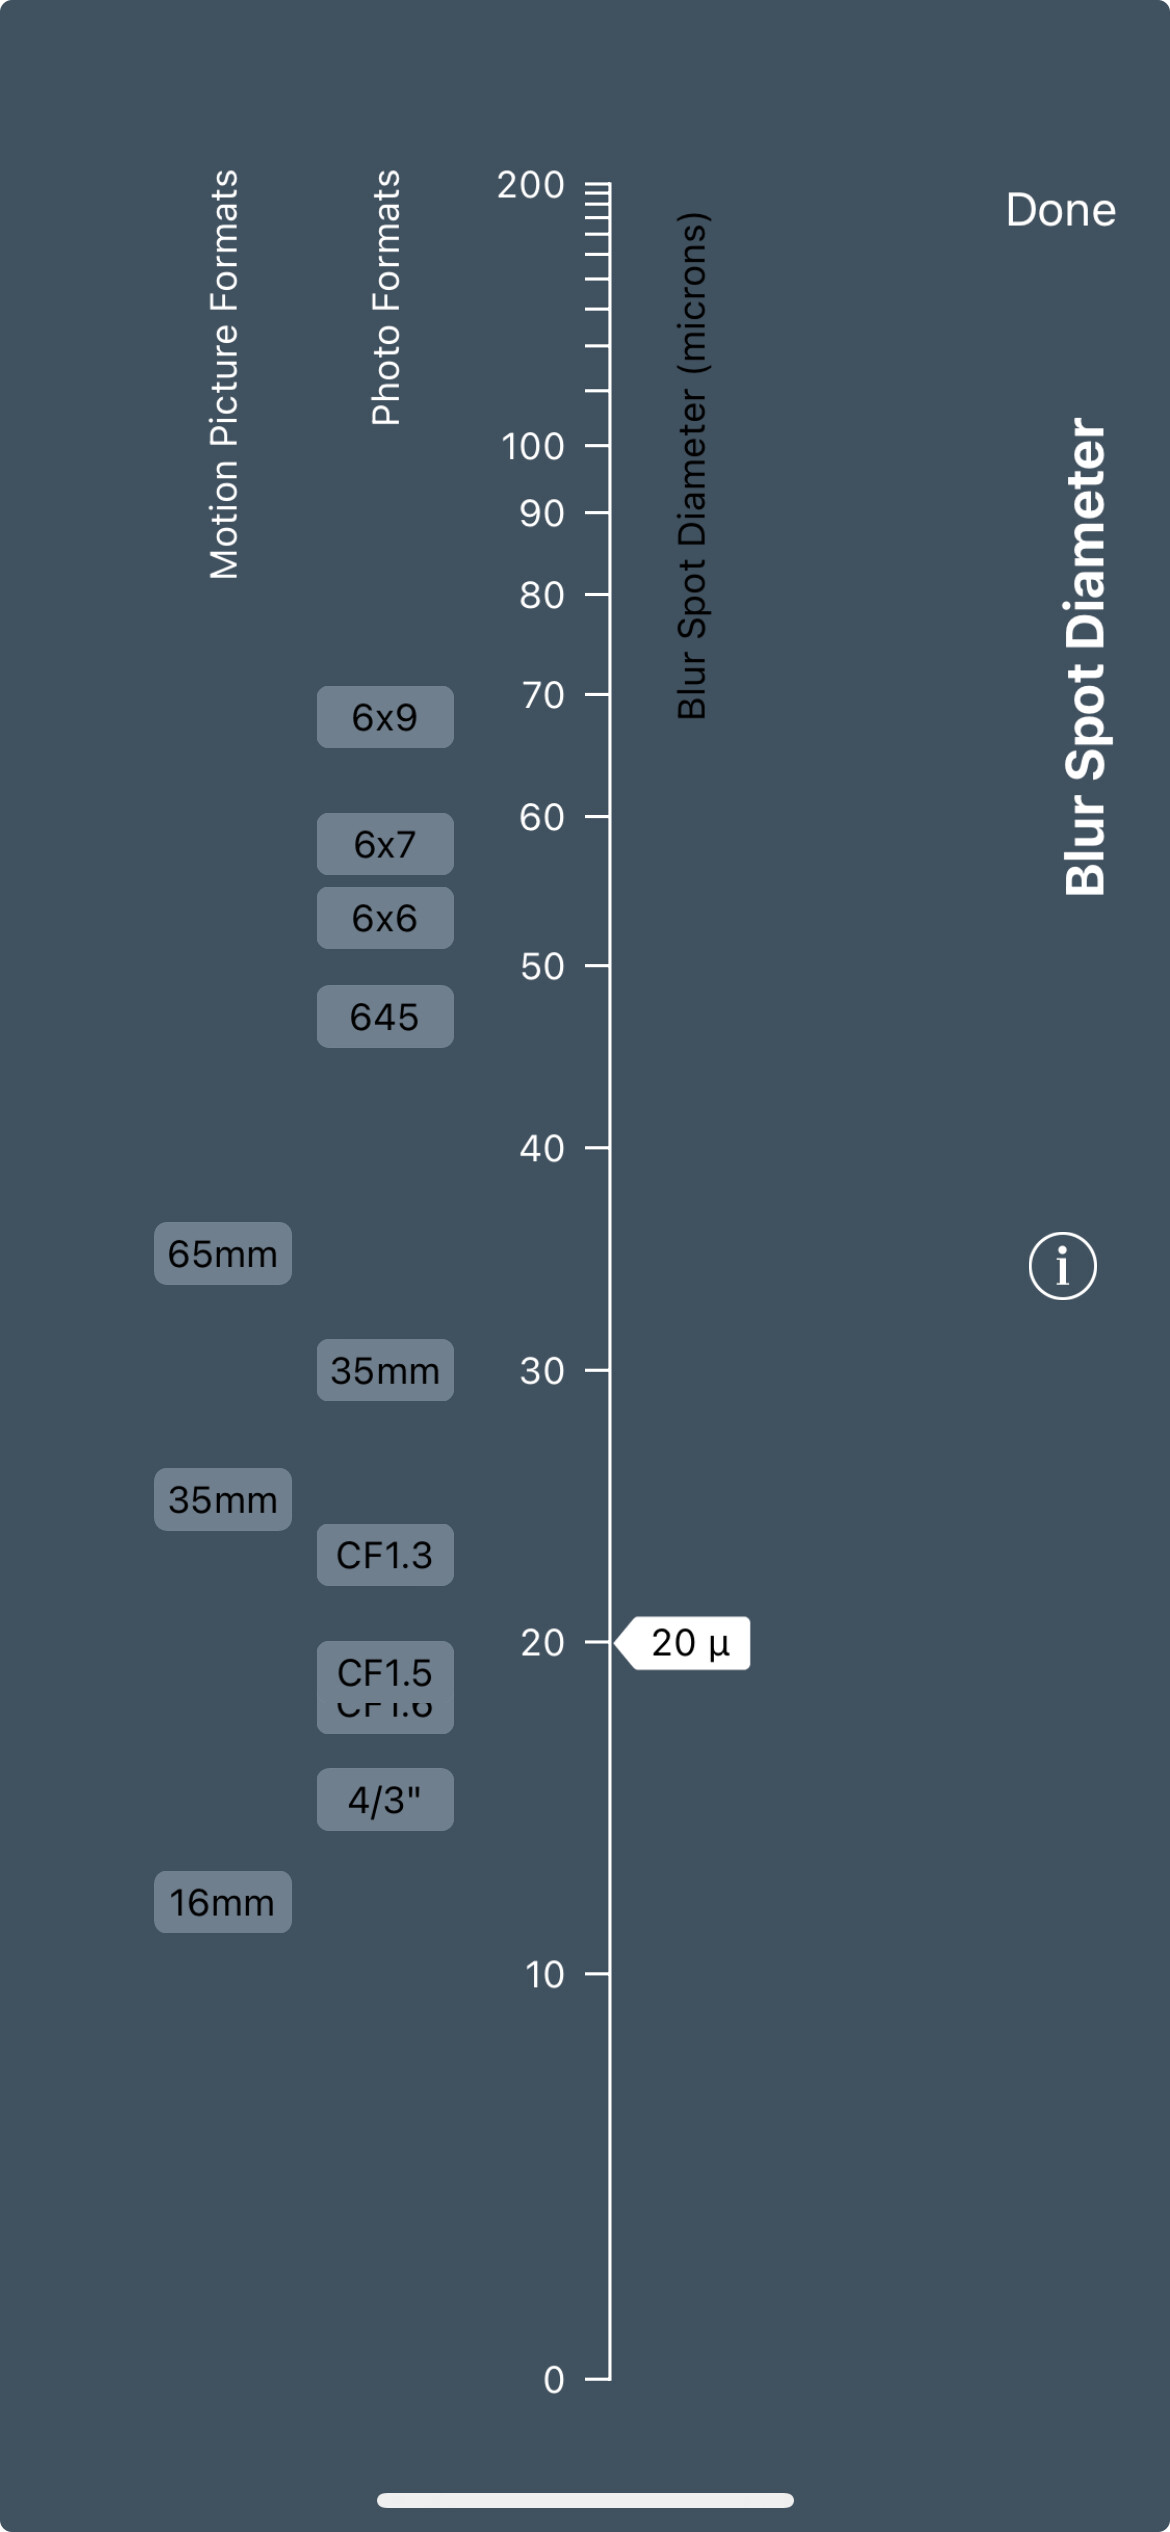
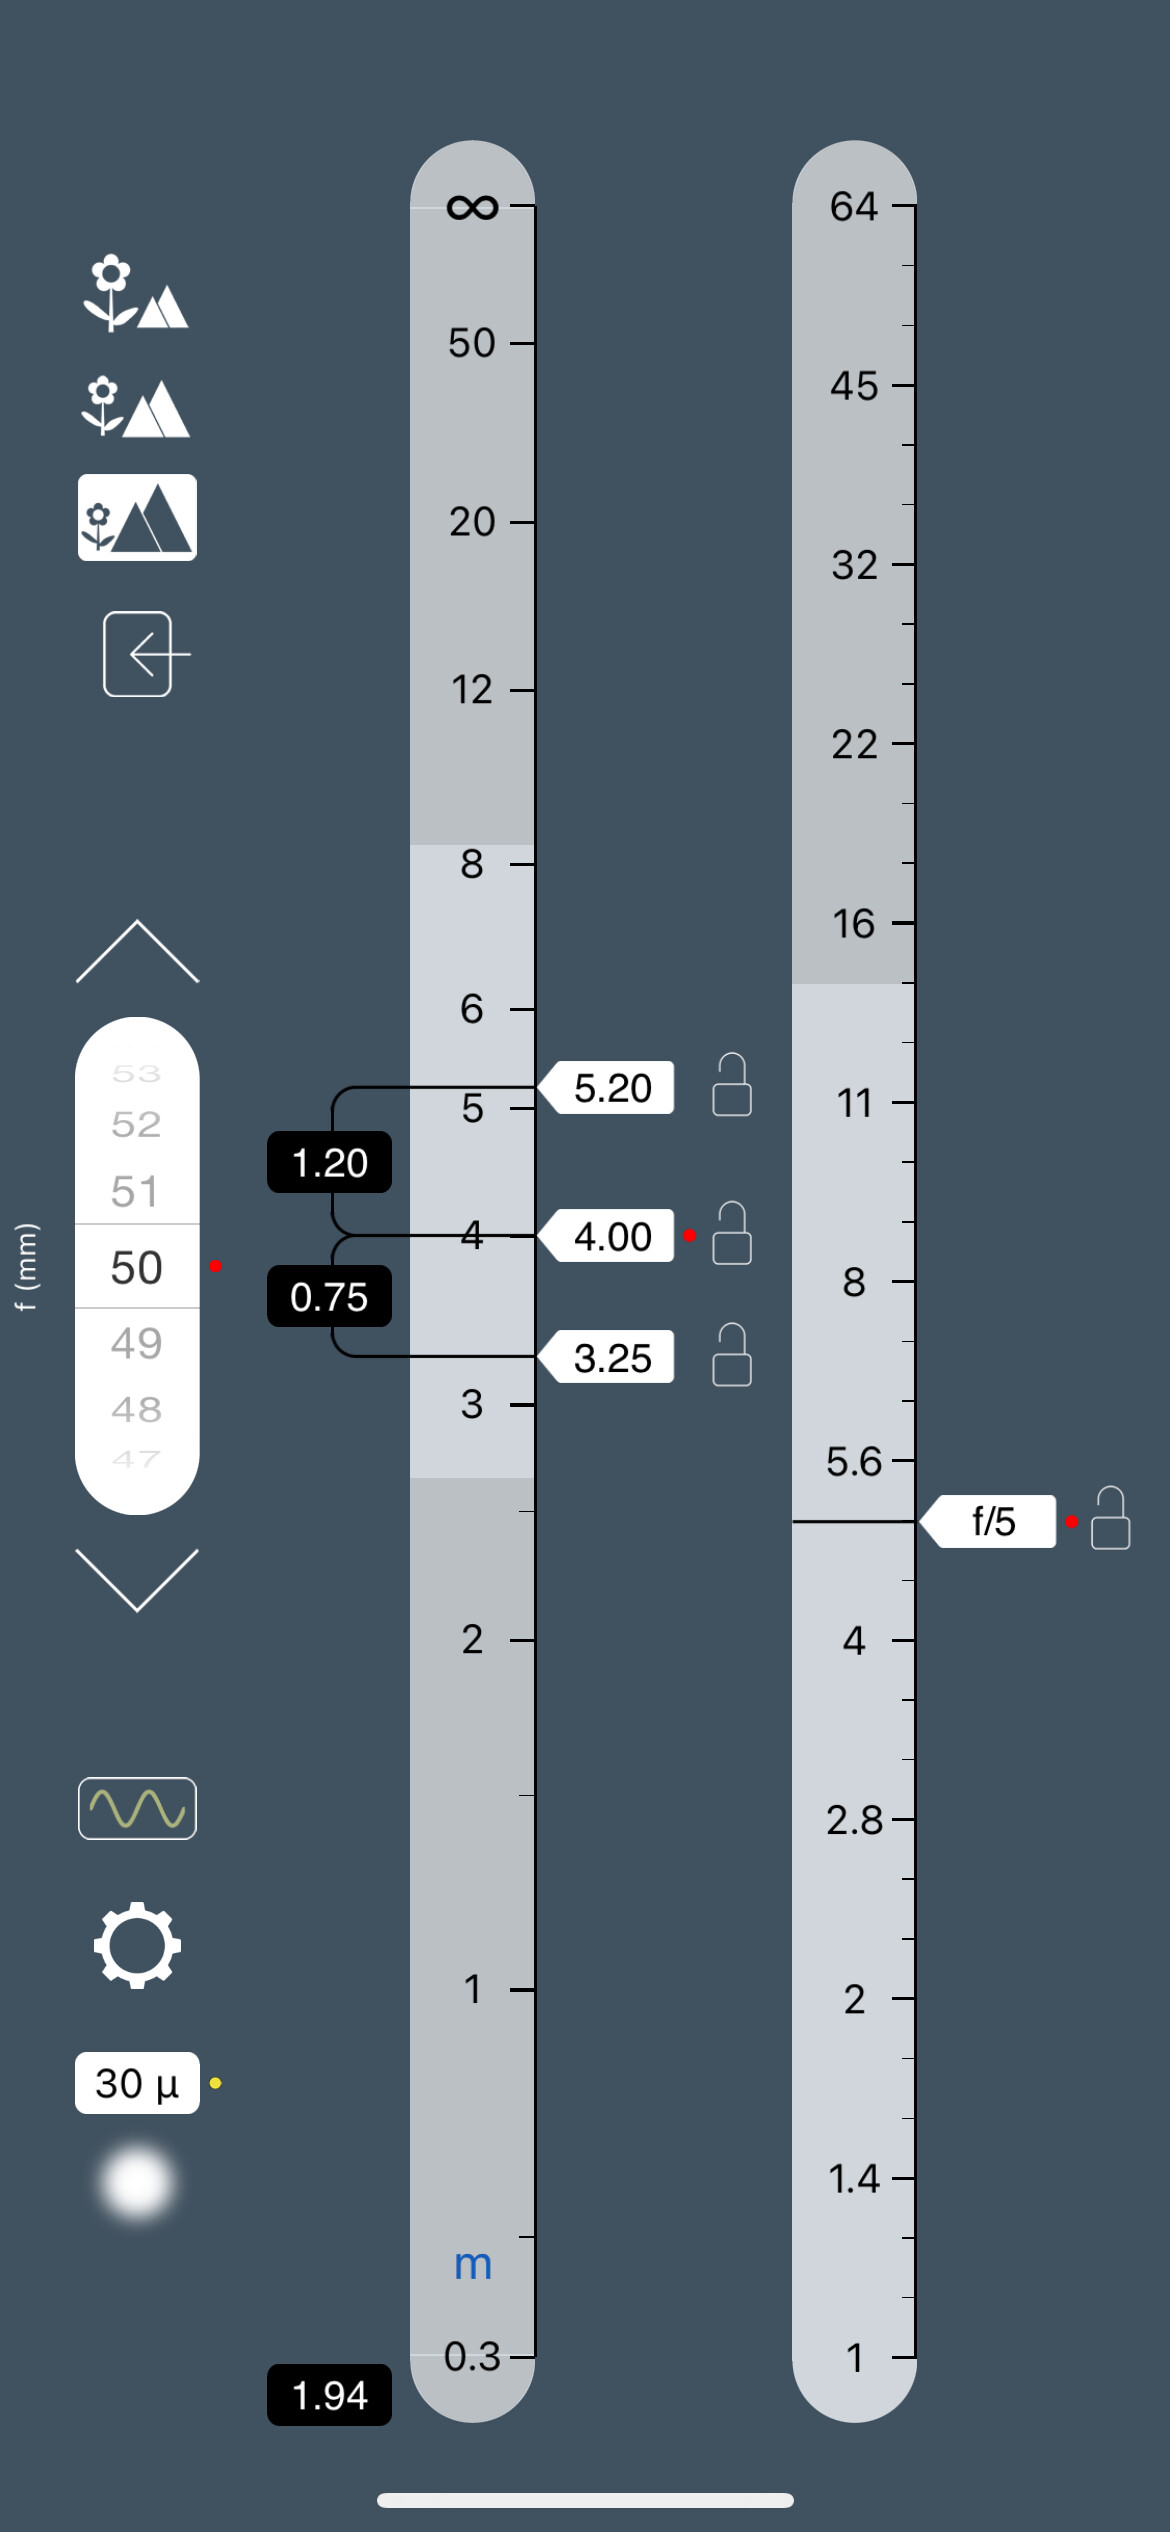
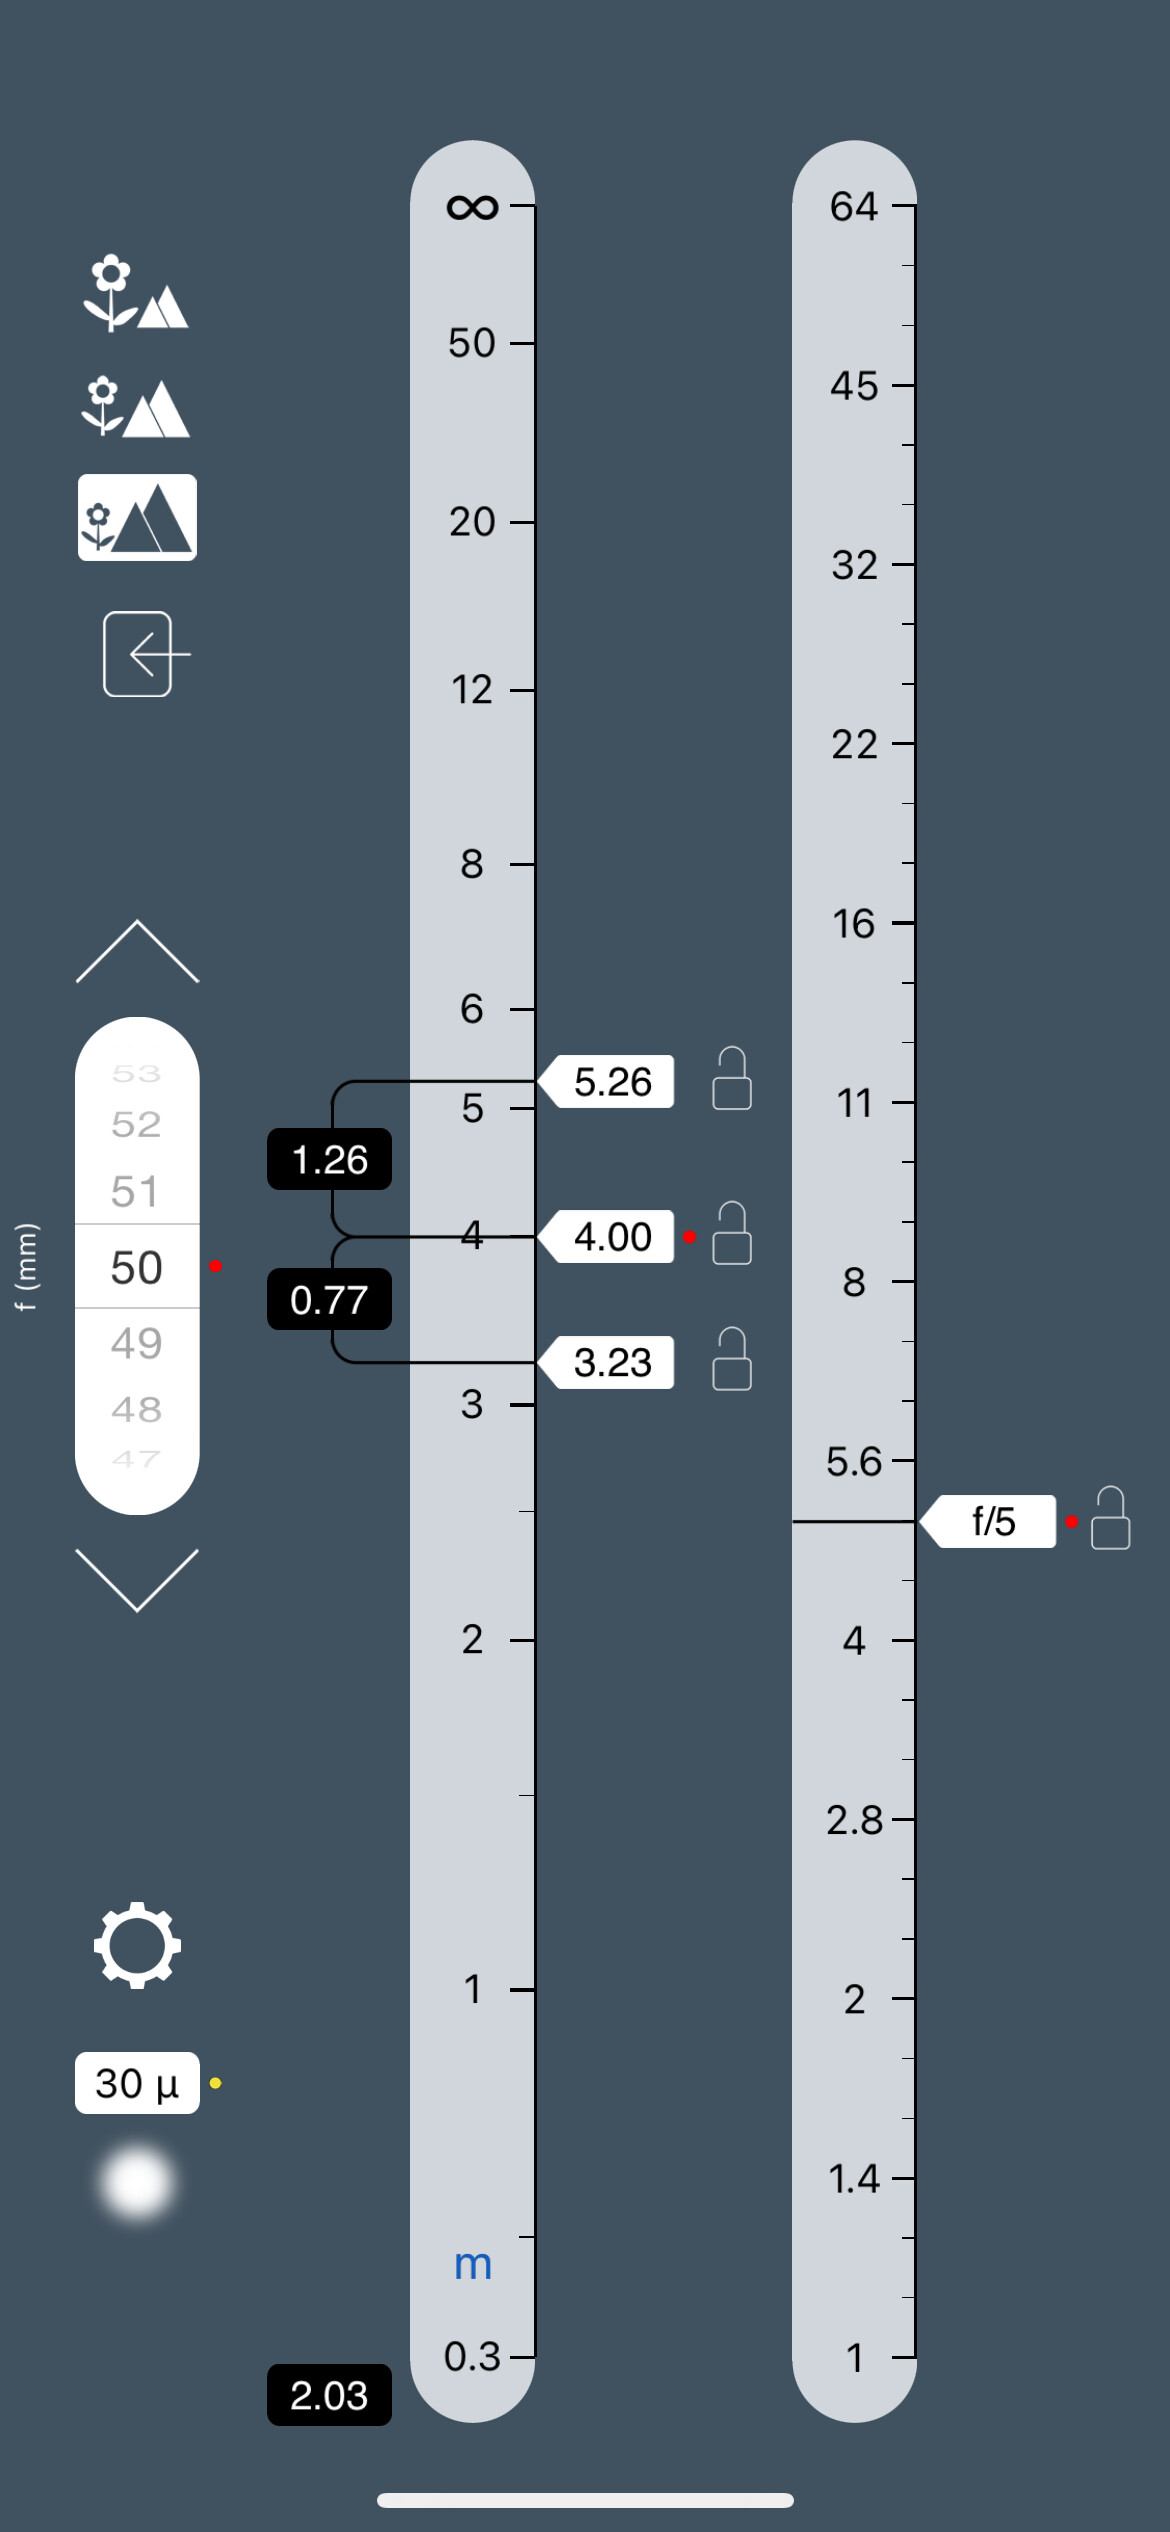
If I am printing to A4, to be viewed at no closer than arm’s length, then I might be happy with 30µm - meaning that I am not bothered if any dot smaller than that on the sensor appears as a blur.

But I am a large format photographer and printer, so I need small dots to remain as dots when they are printed to larger sizes.

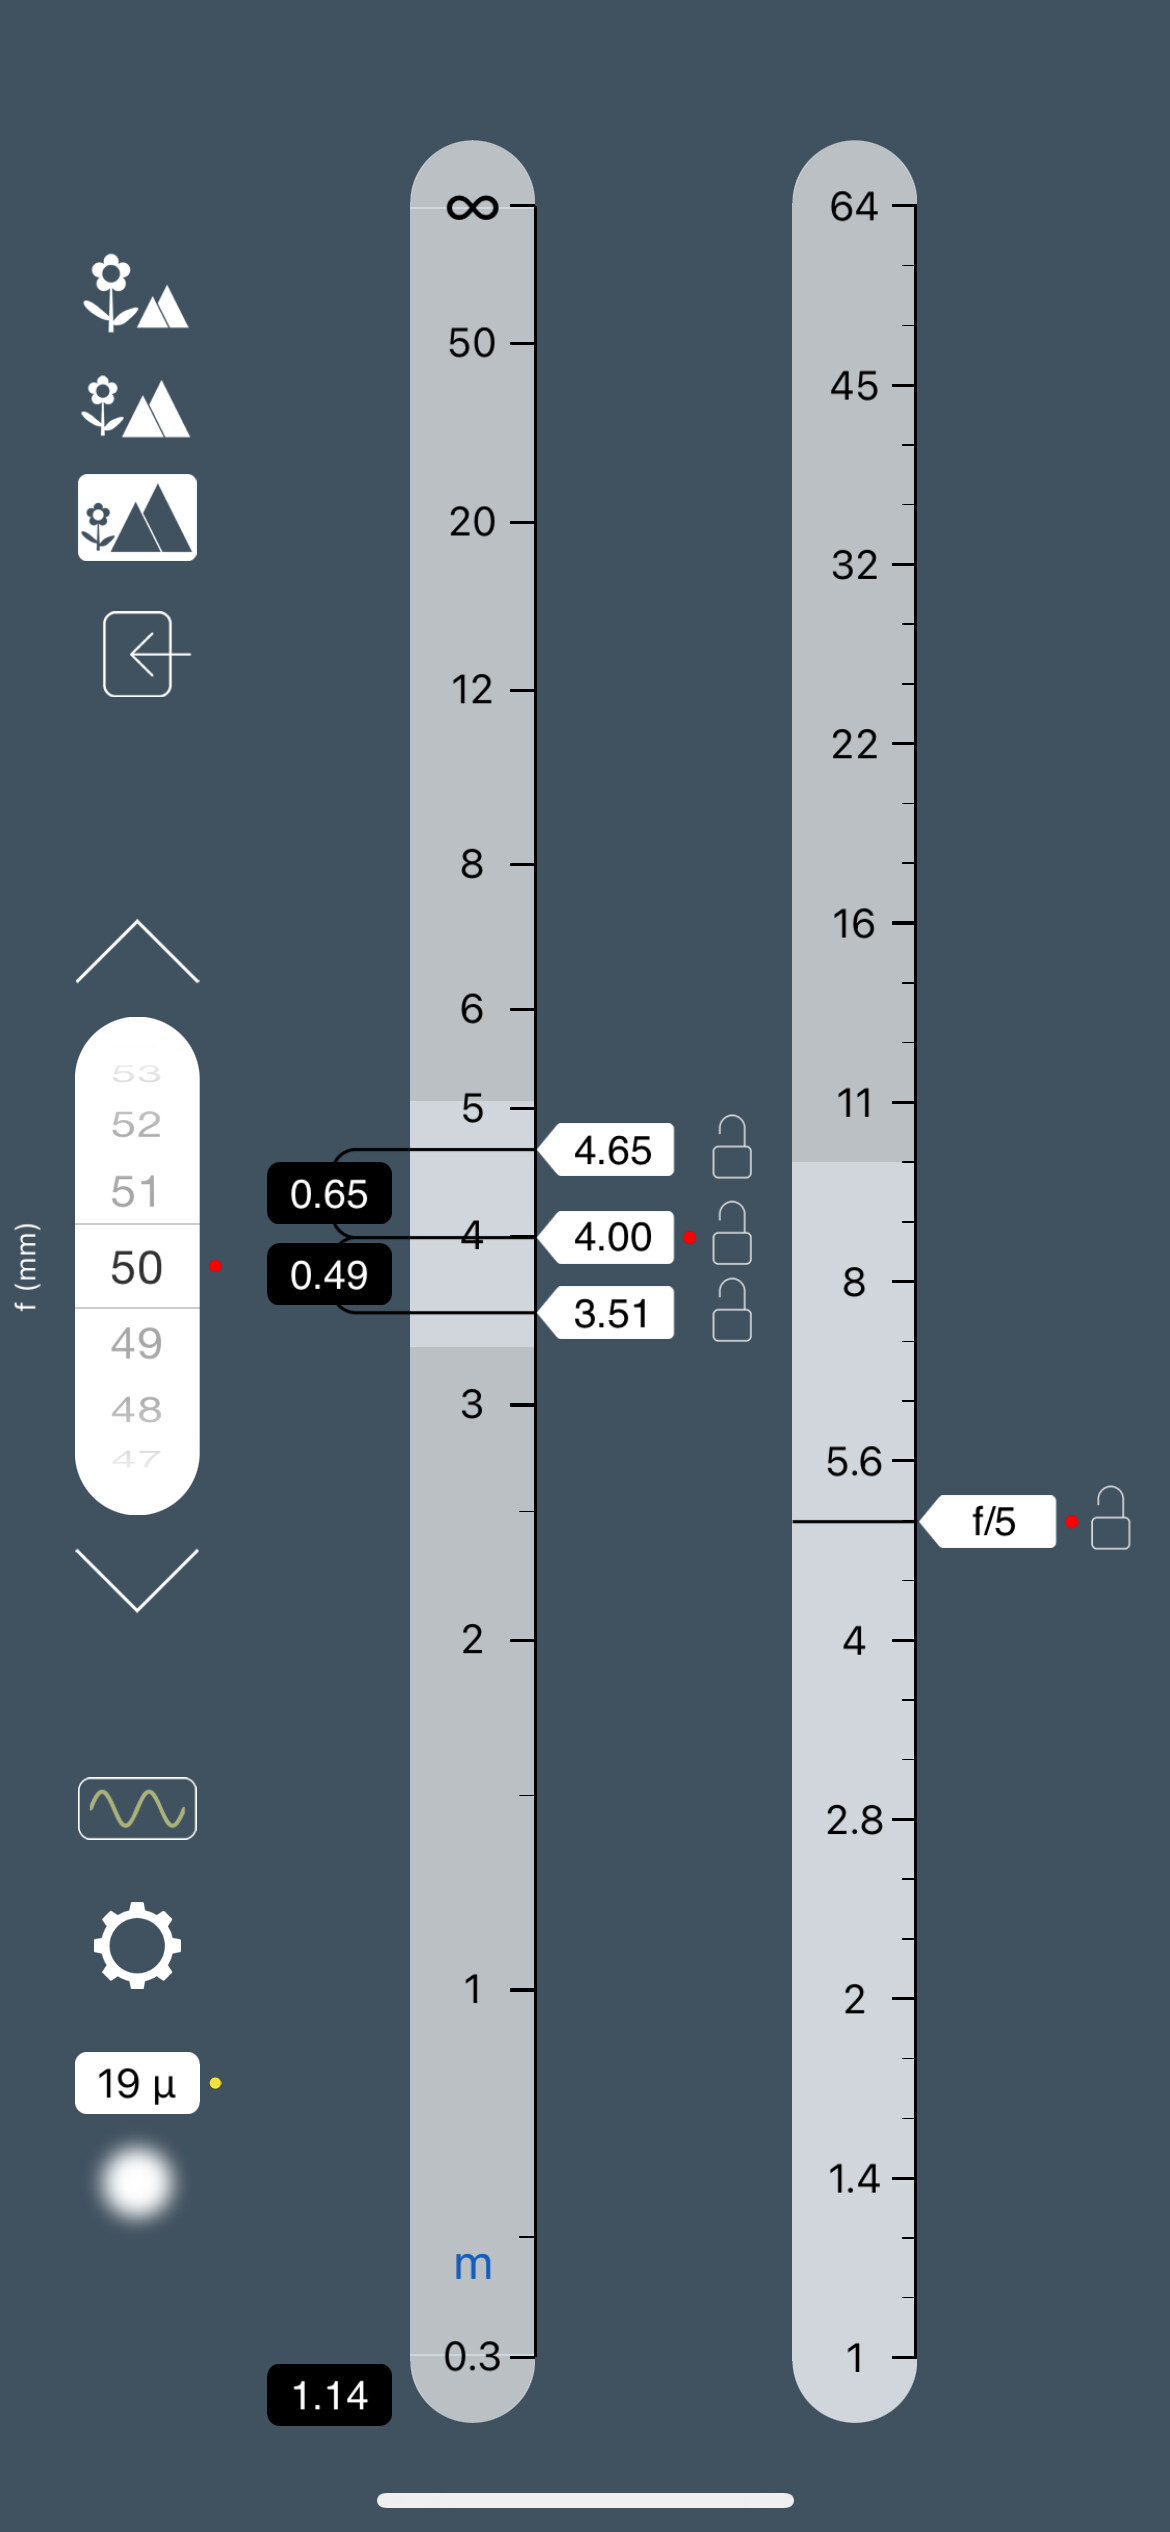
The smallest dot size that I can record as a dot is twice the pixel pitch.

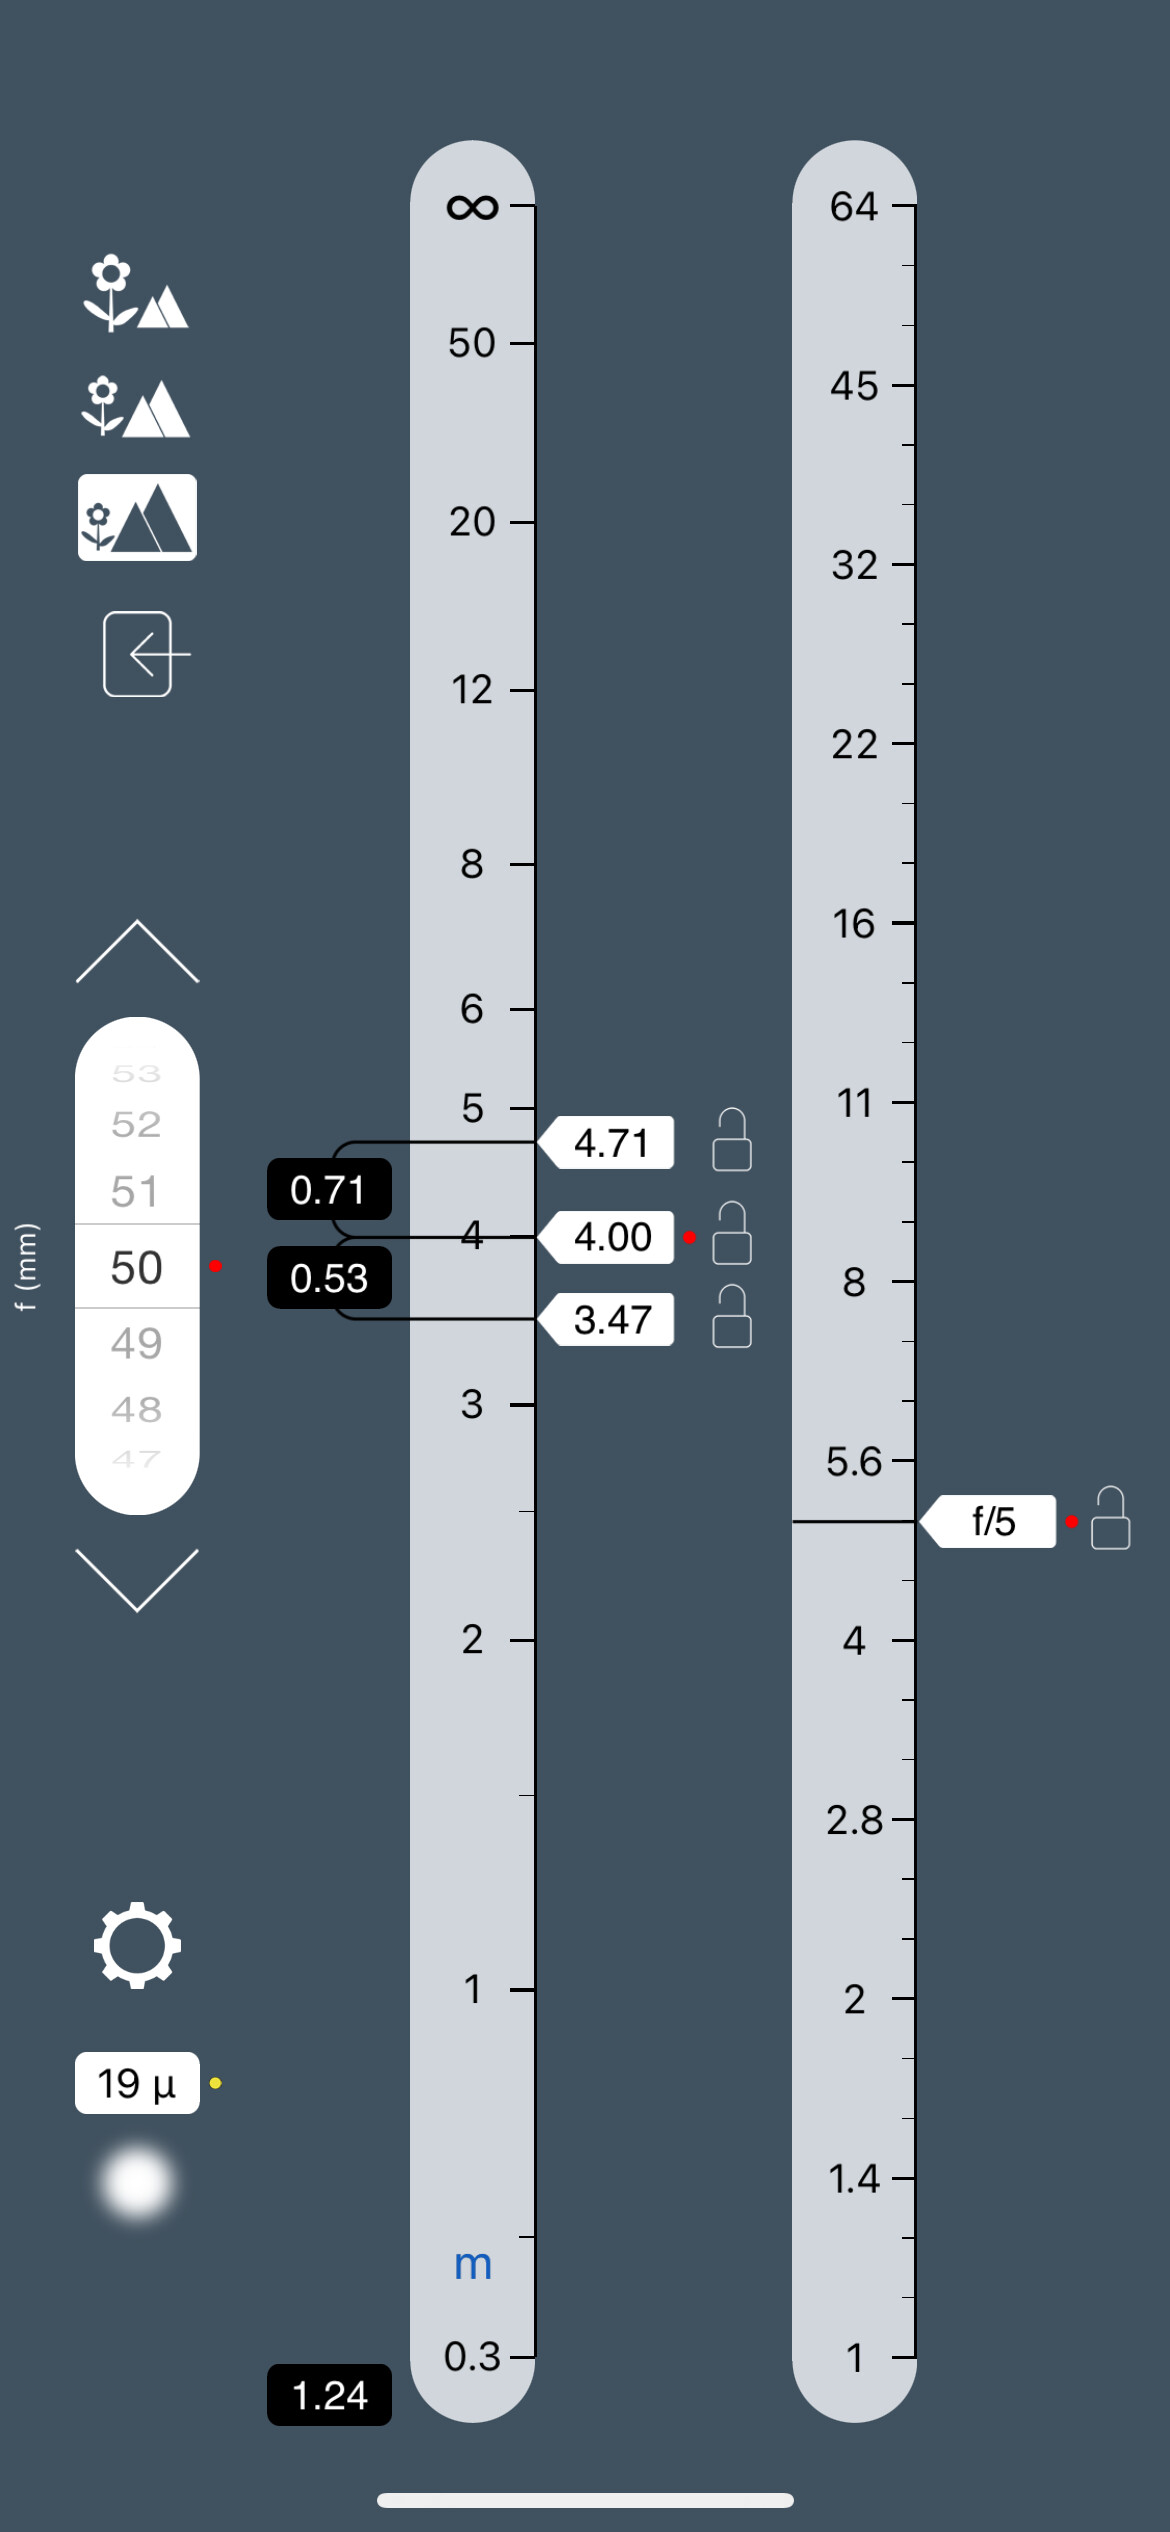
That calculates to a diameter of just under 10µm on the sensor.

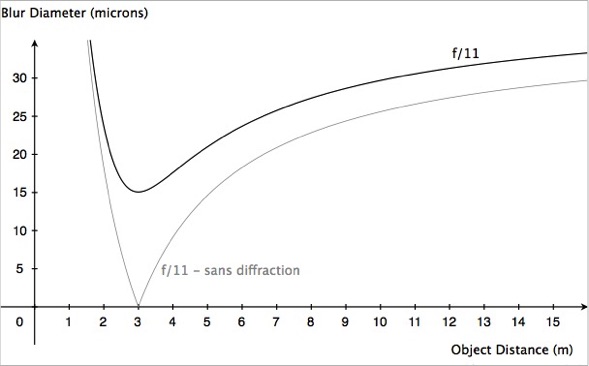
But that only allows for an aperture of f/5 before diffraction kicks in and starts reducing the DoF that increasingly small apertures give.

So, I look at how large I am likely to print an image and set the blur spot to something more suitable, that is going to allow a small enough aperture to give me sufficient DoF without too much diffraction.

It’s a compromise. but it’s better than soft detail on a large print.

And, of course, since I don’t know whether any given image will and up being printed large, I rely on 20µm all the time, so I can print any image large without problems.

If I knew that I was going to take an image with limited DoF, then I would reduce the blur circle even further (down to 10µm) to give me even more sharpness at even larger print sizes.

If you personally don’t have a need for such large prints, then carry on using 30µm but, for my work, I can’t afford to do that, which is why I use smaller blur spot diameters and produce astoundingly sharp large prints.

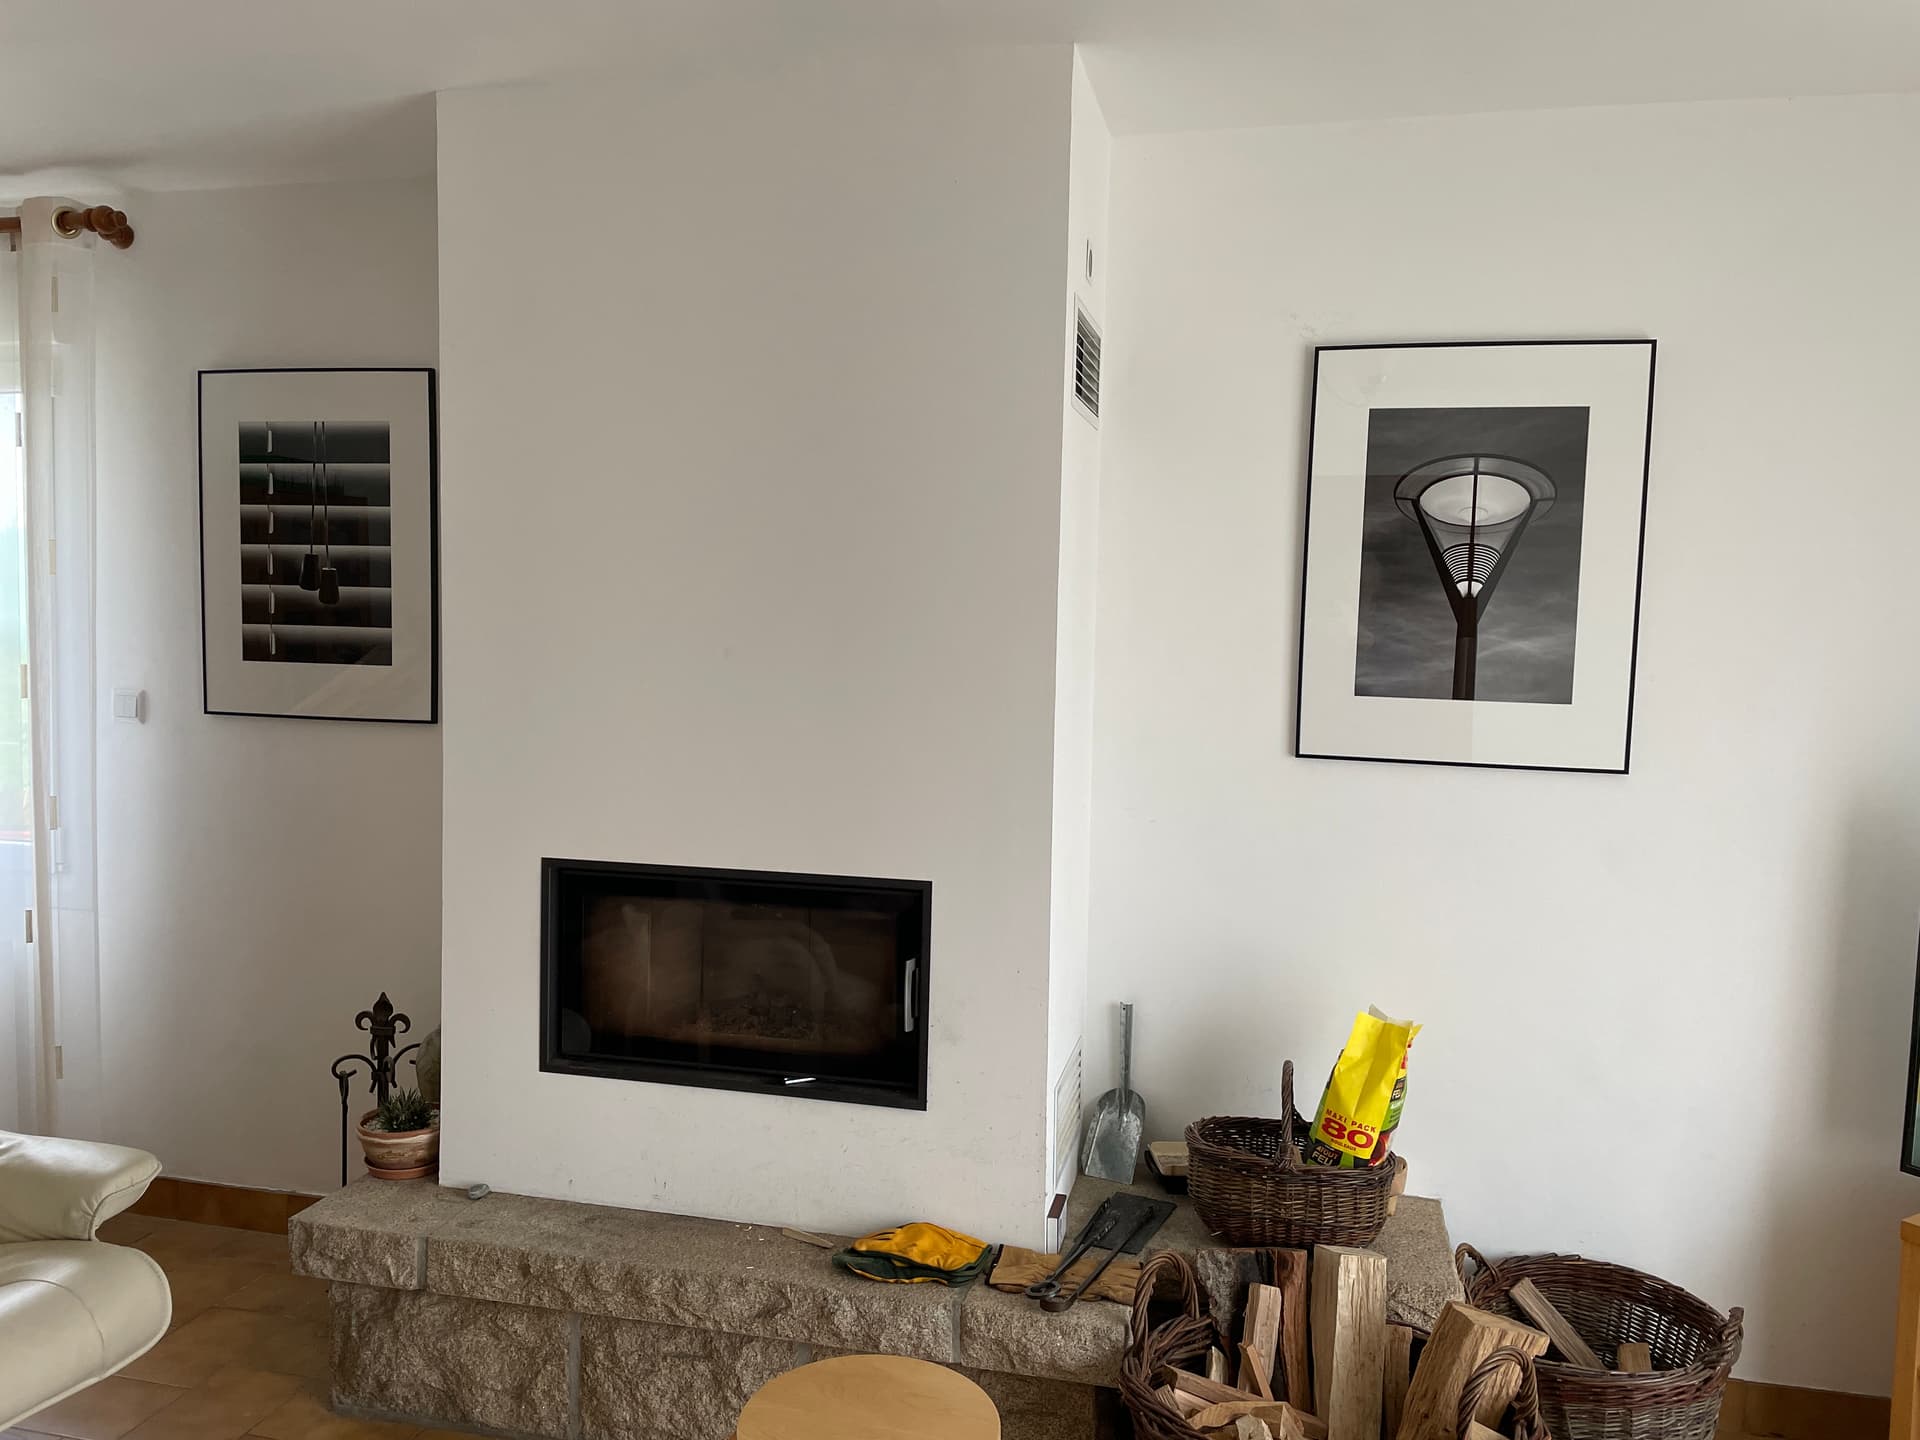
Here is a photo of a couple of our smaller prints on the wall…

… and these can be examined from close up and you will not see any softness.

I’m really sorry you are having such a hard time understanding this but I don’t know how to explain it any better. I fear that, without practical experience, you may never grasp it.

Just use a smaller aperture as the calculator advises.

Can you give me the results of focal length 50mm,f/5.0,distance 4meter for both FF an DX?

George

With or without diffraction?

Give both.

Both with…

Both without…

But, George, @Joanna is aware that she will get a wider DOF by selecting a smaller CoC. That’s where your views diverge. She doesn’t want a specific DOF, she wants as much as possible DOF and sharpness, thus she wants to avoid the diffraction blur. The calculator gives her both. Using that, she can enlarge more than usually and keep as much sharpness as possible.

1 Like

No, she gets a smaller dof. You’re using a CoC from a smaller sensor. When printing the sensor is less enlarged.
Bu there’s something else I don’t understand. Douvos is calculating with diffraction. But he’s adding the blurr of disfraction and out of focus. To my knowledge the diffraction is more a treshold. When diffraction blur circle is 2-2.5 times the pixel size it becomes visible.
From the manual
05

The figures for the setting FF are the same as in other calculators. DX not due to the blurr circle of 0.019 in stead off 0.020.

George

As I have said, now, multiple times, diffraction is not part of DoF, it is a separate phenomenon, created by the diaphragm, not the lens.

I’m sorry but, to quote an infamous Myers, you are still very much confusabobbled :crazy_face:

Diffraction is an extension of the focus point. It has a oppacity fading yo 0.
Dof is the range of defocussing within a limit, Joanna Meyers!

George

Wrong! as you can see from my images of the guitar strings, without changing the focus, diffraction was produced purely by reducing the size of the diaphragm opening.

A pinhole camera produces diffraction with no lens to focus.