Editing high dynamic range images in PhotoLab 5

Yesterday was an especially clear day, and I thought I might get a better sunset photo. I was wrong on all counts, and I certainly did NOT get a perfect exposure.

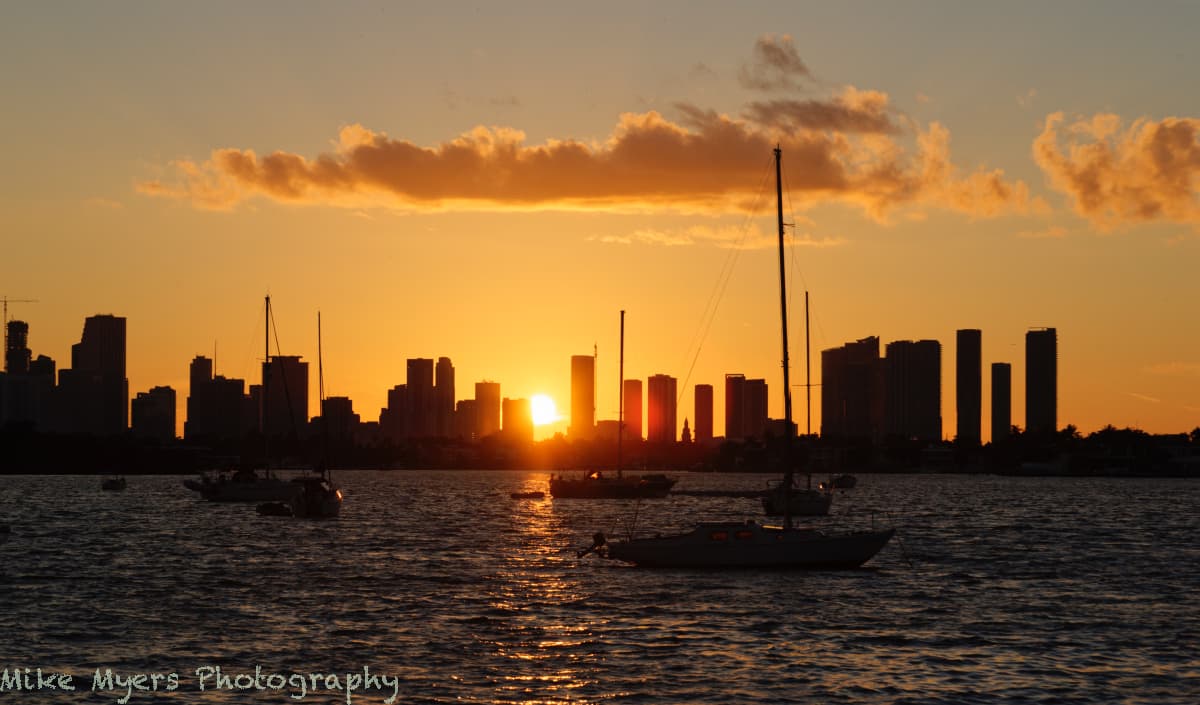
I took 40 or so photos at the suggested settings as the sun was moving down, none of which I both “liked” and which seemed technically satisfactory. I took the spot reading on the sun, but it was so clear, and there were so few clouds, and the “color” I wanted to see never showed up. To be honest, I did like the final editing attempt, but the sun is totally blown out - people here will complain, but anyone else will accept that I was obviously looking into the sun. (No excuse, and overexposing the image by 1.7 stops didn’t help any…) I want to crop out the boring right side, and make the sky brighter as I’ve learned here, but I’m most interested in what I could have done better. One obvious choice would have been to just raise the shutter speed several stops until the sun was no longer burnt out.

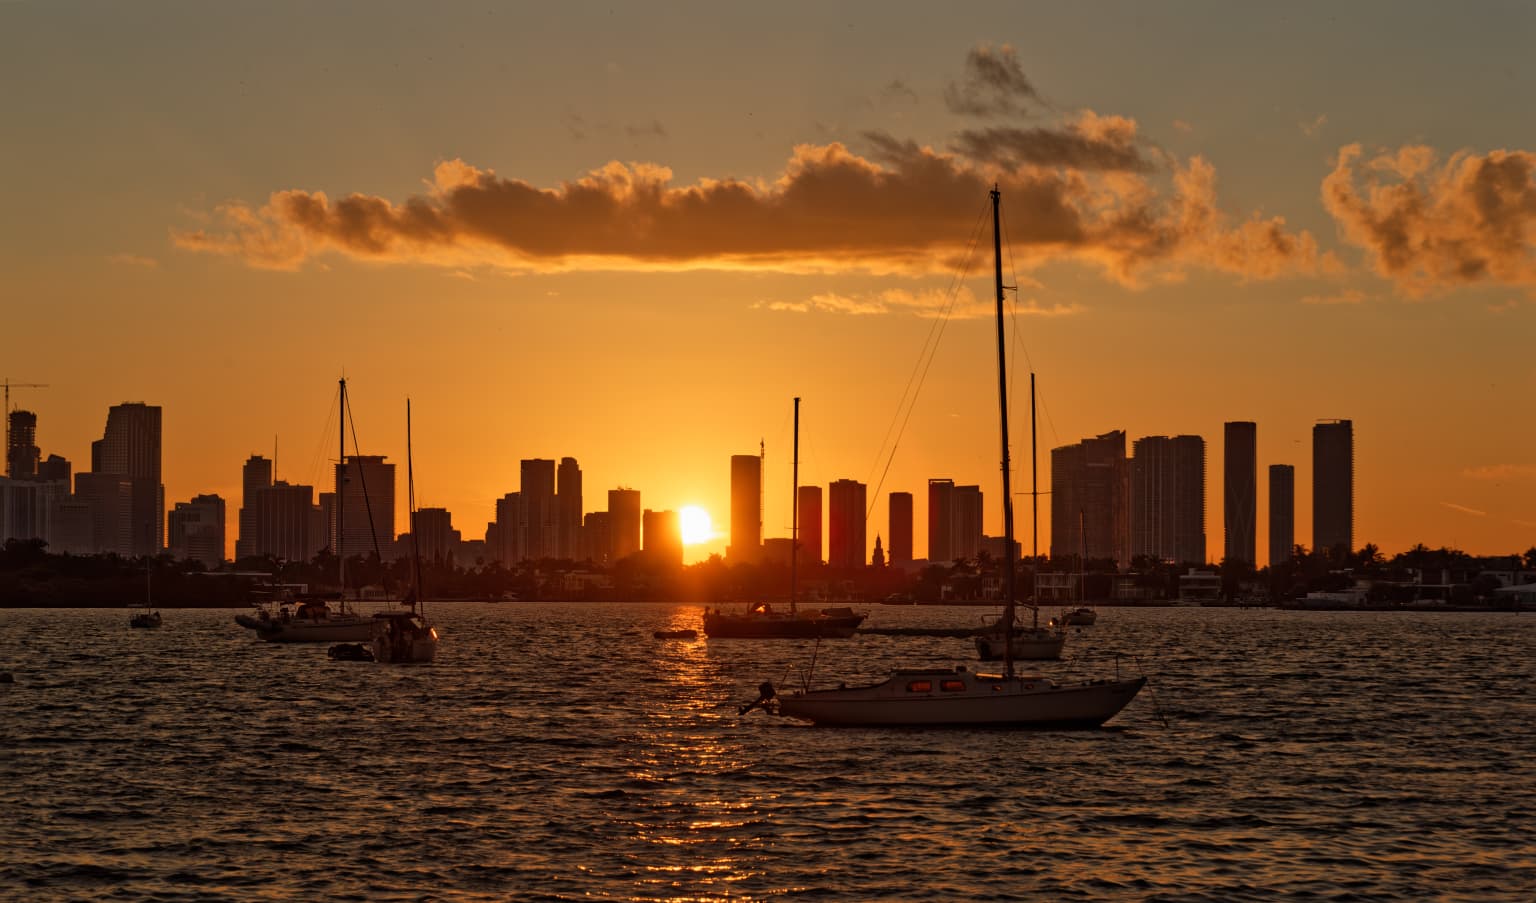
I’ll upload three photos. The first one is slightly edited, but the area near the sun is burnt out. (I like it anyway, but that’s irrelevant…)

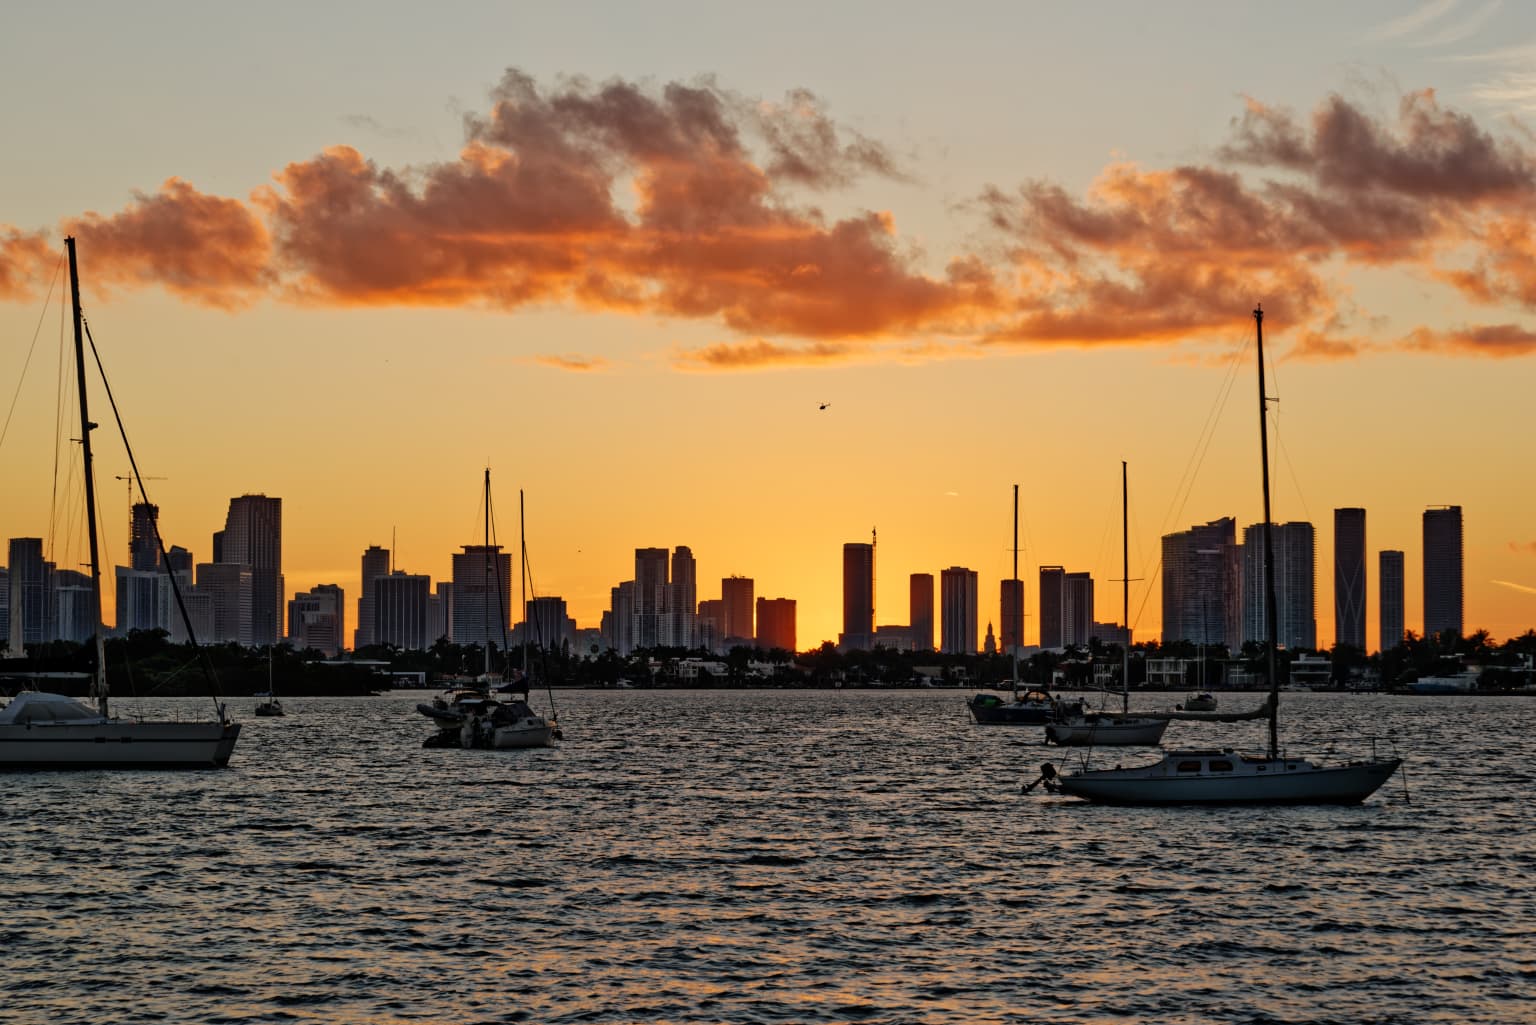
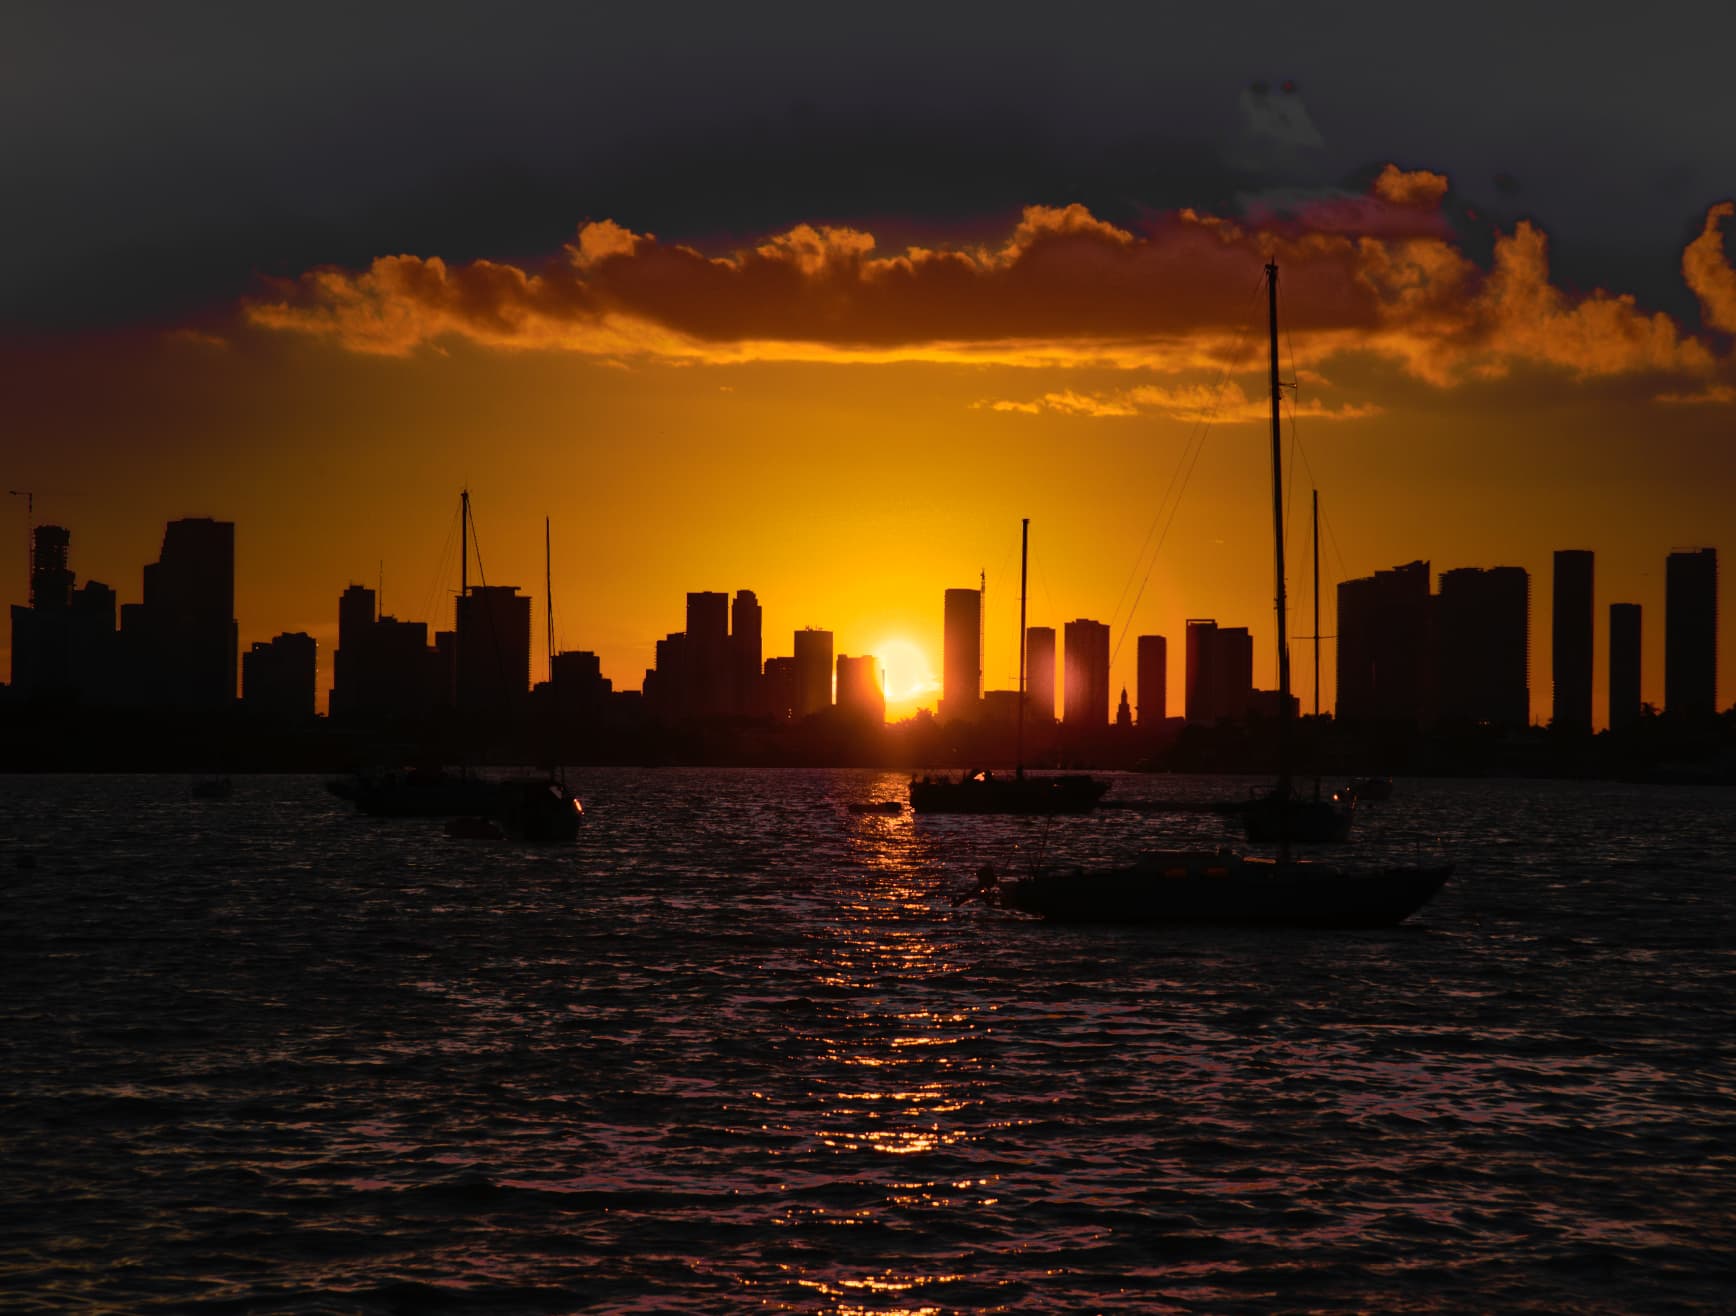
The second shows the sun a little lower, but the reflection in the water which is essential to the photo, is almost gone. I don’t like this image at all, because of the lack of reflection in the water.

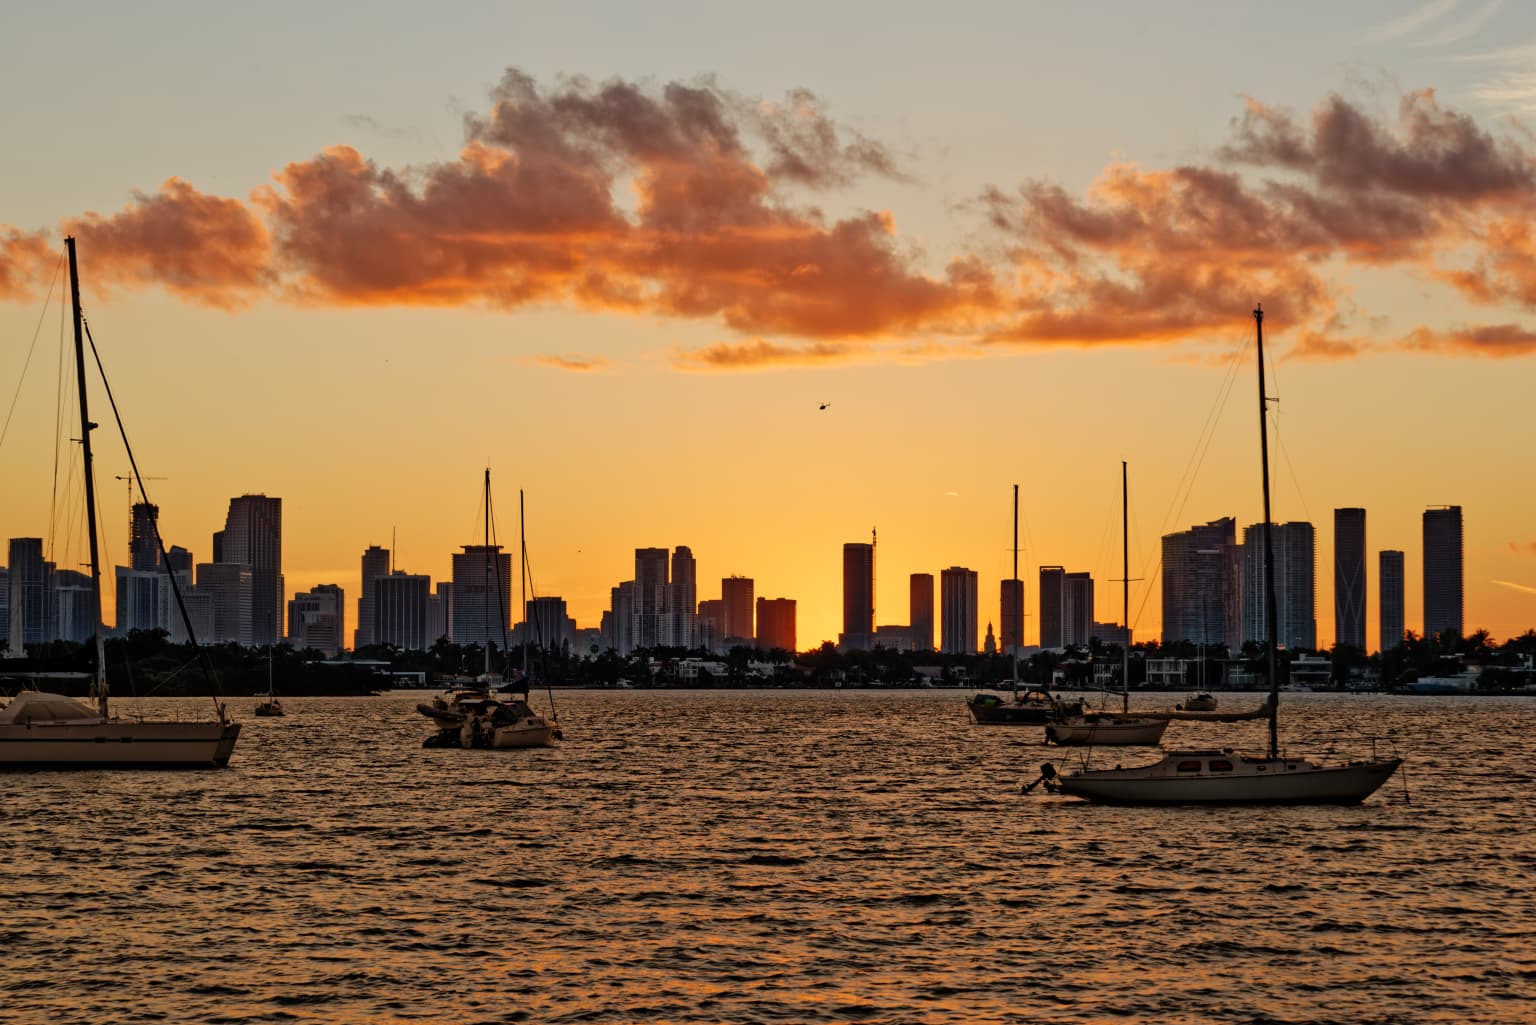
The third is after the sun had set, but there was hardly any color in the sky, and obviously no reflection. I set exposure comp back to 0 for this shot as a test. I’m sure with PL5 I can make it look nicer, but I really wanted the sun and the water reflection in the photo. (I think that had the weather been a little more hazy, that would have reduced the light from the sun, scattering it all over the photo, maybe with a bright orange/red sky, but this wasn’t to be.

It was taken with my 24-85 zoom, at f/11, and I bumped the ISO up to 200 because I was using the zoom hand-held. In retrospect, I wish I had bumped it up to 400, so the shutter would have been around 1/400th - this was just a test, and I didn’t bring my tripod.

_MJM9346 | 2021-10-26.nef (26.0 MB)

_MJM9346 | 2021-10-26.nef.dop (13.5 KB)

_MJM9352 | 2021-10-26.nef (26.6 MB)

_MJM9355 | 2021-10-26.nef (26.3 MB)

Well, actually still PL4 but maybe this is what you wanted to have. Look in PL for detail, I especially reduced the colortemperature by 300 and increased the blue HSL channels as well as setting a local adjustment on the sun. And cut so that the boat in the front is in the golden ratio.
But again, all matter of taste. Pitty is that the water is more blue than the sky…
_MJM9346 _ 2021-10-26.nef.dop (11,7 KB)

I decided to start with the last one first. I see @Fotoguido has looked at the first one already.

The main thing I wanted to try was to use a Control Line to lift only the buildings on the skyline. Here’s the DOP…

_MJM9355 | 2021-10-26.nef.dop (9,2 Ko)

Yes, what distracted me on the last one was the dead foreground, looks almost like “sunset behind a black&white photography” :wink:
On the first one the boats windows attracted me. Having them in the golden ratio is furthermore fortunate.

I deleted my last post because I realised I had applied the grad that was meant to be over the water, to the sky. I wondered why the sky was on fire :roll_eyes:

It’s funny that you should say that because I still wasn’t happy with the foreground, so I tried adding a grad filter to warm up the water and to drop the brightness a bit.

_MJM9355 | 2021-10-26.nef.dop (9,5 Ko)

That’s much better but still not exactly an eyecatcher. No life in the picture except for the helicopter :wink:

1 Like

I didn’t see any future in the third photo, so I never bothered with it, other than to post it here for reference.

The first phot that I posted shows a “sun” that is blindingly bright, and it’s not possible to see the edges. Fotoguido, your interpretation is certainly prettier, but the sun no longer looks “real” to me - it appears to have a black outline. I think all this is because the sun was burnt out. Since there was nothing else exciting going on, I wanted the sun, and the reflection in the water to stand out the most. I like your adding more “gold” to the water, and I like Joanna’s interpretation the most, but in that image there is no sun and no reflection, just “dust on the sensor” that in reality is the helicopter. :slight_smile:

With the clipping, I don’t think the first image can be salvaged (although I can send it to people who won’t even notice the clipping). I guess my real question is what I should have done differently. I suspect that instead of adding +1.7 exposure compensation, maybe I should have added -1.7 and even that might not have been enough to accurately capture the sun.

I don’t like any of these photos, but I need to learn what to do next time. If this happens again, I may set the exposure compensation to zero, and use bracketing to get lots of choices, just to experiment.

On a happier note, earlier in the day I was walking around with my D750 with the same 24-85 lens when I came across two iguanas. By very slowly walking towards them, they first got closer to each other, and at that point I stopped moving, not wanting to scare them off.

Mr. Iguana didn’t seem bothered by me at that distance, and Mrs. Iguana was probably feeling safe next to her buddy, and after a long wait, Mr. Iguana started showing off - during all this time, I was constantly taking photos, and the one I will copy here is the best of the lot - and the best iguana photo I have ever taken, or hope to be able to take.

Advice from this forum on settings, and a lot of patience, and some good luck for the timing - and the sun which had been going back and forth behind clouds went to full brightness. Camera was on aperture priority, with exposure comp set to 0, and the focus was on the heads of one iguana or the other.

I suppose I could have edited this image in any editor, but PhotoLab 5 made the editing so easy. Joanna will probably point out things I could have done better, but as I’m sitting here at the keyboard, I’m not sure about this. Maybe cropping tighter at the right, but then it would look like I cut off the tail of Mrs. Iguana.

A longer focal length lens would have been helpful, but I didn’t have one with me. Interesting that the noise of the D750 didn’t bother them at all after the first exposure.

I tried to edit yesterday, but I was too sleepy.

_MJM9239 | 2021-10-26.nef (30.1 MB)

_MJM9239 | 2021-10-26.nef.dop (13.4 KB)

Hi Mike - My entry level Canon M50 has what they call MyMenu. It is a very easily accessed group of up to 30 settings split between 6 pages. Like you I keep most of the camera’s options off. But I don’t like wading through all of them to get to something I may occasionally want. So I looked through all of my cameras settings and wrote down those that I might want to sometimes use. I then broke those down into logical groups of 5 and entered them into the MyMenu pages. When I do want make a change it is much faster going to MyMenu than scrolling through all of the cameras settings. I would imagine your much more advanced D750 would have something like this, except probably way better.
Rod

I had some time to look at the coc in photopills diffraction calculator. I’s the standard coc based on sensorsize. The coc is changing when you use a camera with another sensorsize.

George

After a refreshing walk, here’s my attempt at the first image…

And the DOP file…

_MJM9346 | 2021-10-26.nef.dop (29,5 Ko)

Mike, you are still making the Smart Lighting zones too small.

As for the local adjustments, See what I have done with the Control Line again to bring out some detail in the buildings, removed the control point from the sun but added one to kill the flare on the buildings just to the right of it. There are also two grad filters: one to blue up the top of the sky and another to warm up the water and sun reflections

If you are not sure about the Control Line, let me know and I will try and take you through it step by step

Indeed but, if you read George Duvos’ writings, you will find it can be affected by pixel pitch

My Nikon D750 has “MY MENU” which I’ve never learned about or used. I will check into this later today.
My Leica M10 has a page for “favorites” which gives me one page on which to list my favorite settings to get to quickly.

They’ve got it backwards - Leica’s way is simple and obvious - check the appropriate items, and they get listed on my “favorites” menu. Nikon… I have no idea what it is for, or how to use it… Hmm, change “have” to “had”. Here’s a YouTube video that explains it, and I guess it potentially is a “time saver”, but part of me wants to do it the old way, and learn where my settings are located.

I guess to me, I want to learn the whole camera, and while this may be a time saver, it may or may not help me. I’ll try it out later today anyway, just to see how it works if for no other reason. Thanks!!

Mike, I’m not going to bother to play with this one because I don’t really think I can do much better :kissing_heart:

Joanna, thanks, but I think this video I watched last night explained it well enough that I caught on. I still haven’t used it yet:
https://www.youtube.com/watch?v=7_GySmcj8GE
If I’m still stuck after watching this again, and trying it myself, I’ll let you know - and PhotoJoseph’s Webinar including Control Lines has been rescheduled to this coming Friday at 1pm my time.

I will try to make my smart lighting zones even larger. I view the image at 100%, and find what I hope are appropriate places to measure. I’m probably better off not using 100% viewing.

I like why you did with the image! Buildings are better, but I’m not so sure about the water. I think the water should be more “blue” at the right and left, away from where the sun is reflecting.

My only comment there is to look very carefully for the pipette tool and to where you place it, and notice that the negative control lines have their own. I miss that to start with because, sometimes, the equaliser can hide it.

In that case, maybe your challenge is to replace the straightforward grad filter with a Control Line that only selects either the non-sun or the sun part :nerd_face:

That’s why I decided for a (used) D810, it is much quieter and handling is almost identical as my D7200. With some (minor) colour-tweeking in DXO they deliver identical looking pictures so I can easily use both cams in combination. I only use primes on full-format and can not be happier.

A last one, this is not the subject.
Photopills calculates the airy disk and compares it with 1)the pixel size for viewing 100% and 2) printing comparing it with the coc, which is sensor size dependent.

From his article
Is the D800 therefore more prone to the effects of diffraction that other cameras? Despite what many people think, the answer is no, not at all. Diffraction is a property of the lens, not the sensor. It doesn’t matter what sensor you use—the amount of diffraction will be exactly the same at any given f-number. With a high pixel density sensor like that in the D800, though, you’re able to detect smaller blur spots that you could with a lesser sensor.

Bold is mine. But it says the D800 is more sensitive to visible diffraction then camera’s with a bigger pixelsize. And according to Photopill visible when viewing at 100%. When printing there is more room.

They both use the same formulas.

George

Having watched that video, I think your doing so would not only help me, but help a lot of other people who are following these discussions.

As of right now, I know nothing about the “pipette tool”.

As usual, once you explain something, it becomes “obvious”. :slight_smile:
It’s anything BUT obvious to me right now. :frowning:

ah, well…


(looks brighter on my screen)

1 Like