I edited a photo in Lightroom Classic then sent it to DXO PR for processing, where I used the default settings. When it returned to Lightroom, the colour of a building had changed significantly - much lighter than the original. I took a screenshot of the 2 images in LRC, but I can’t see a way to attach that to this post. How can I show what the difference in colour actually looks like?
As a new member of the forum, your options are limited. After a while and reading other threads, options will change. Meanwhile, you can try to put the photos on a share (google drive, dropbox, wetransfer.com etc.) and add a link here.
PureRAW always works with the original RAW file. Edits you did in Lightroom will be ignored and output can look different. Moreover, DxO’s and Adobe’s ideas of how colours should be rendered are different…and they use different working colour spaces which can lead to changes, specially of saturated colours.
Imo, the best way to use PR with Lr is, to us PR as standalone app and add the images to Lr in a later step.
It’s interesting that you say “Edits you did in Lightroom will be ignored”. When I returned my photo to Lightroom after processing in DXO PR, all the LR edits are still shown - all the sliders show the same values. So DXO didn’t seem to ignore the edits, it just kept them.
What colour space does DXO PR use? I believe that LR uses ProPhoto RGB.
I will try your suggested method to see if anything changes.
If LrC is set to save edits to XMP, it applies the stored settings to the files returned from PureRAW. A few things need to be taken into account though: Optical corrections will/should not be applied again or falloff, distortions etc. get over-compensated. I had checked the situation looong time ago and I don’t remember if the respective tool’s sliders return to their neutral positions or not. Can’t re-check because I haven’t installed PR at the time being but you could verify that you get no overcompensated images and how the distortion, vignetting and CA sliders are set for files exported by PR.
Working color spaces are different in PR and Lr. Lr calls/called it “Melissa” and whether PureRAW uses AdobeRGB (used in early versions of PhotoLab), DxO’s new Wide Gamut WCS or anything else, I can’t say at the moment. Anyways, the differences can lead to perceivable differences in rendering, specially on not fully colour managed systems.
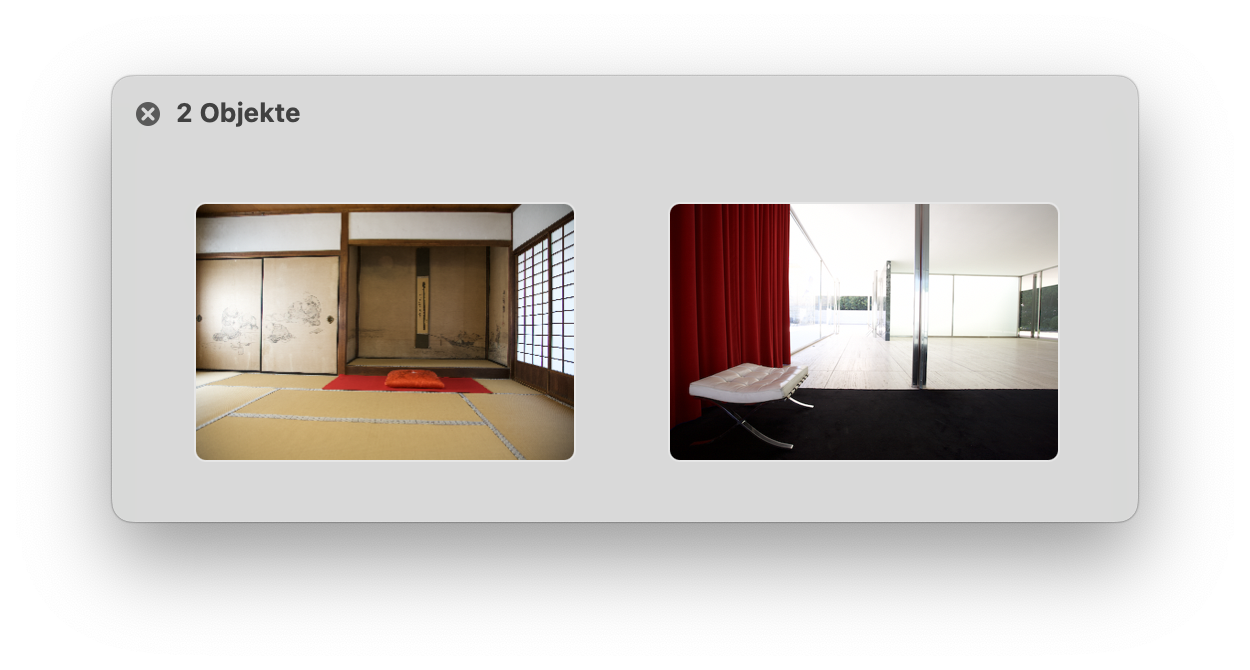
On my Macs, differences are mostly visible with red tones, e.g. in these previews:
The orange-red rug and cushion as well as the deep red curtain adopt a blueish shift as seen in Lr in images exported by PureRAW and PhotoLab. So far, there has been no other way than to correct these shifts to taste in Lightroom.
The “Melissa” colour space is a variety of ProPhoto RGB from what I have read. You are no doubt correct that the different colour spaces contribute to the differences I see.
The specific photo that I was commenting on had been converted from a Fuji .raf file to a .dng file and it is quite likely that, although there was no xmp file, the develop settings had been added to the .dng file.
I still had the original .raf file and used that with the stand alone version of PR, and that worked. The main difference I see is in shrubbery and foliage. Lightroom (and other raw processors) find these difficult and PR definitely does a better job. The rest of the image, although sharper in PR (viewed at 100%) was not significantly different. It probably doesn’t warrant the added expense of another application. I also have Photoshop through my Adobe subscription, and I can get a result when sharpening that is very close to PR.
I’m not usually into pixel peeping and when viewed under “normal” conditions, or when printed, the differences are minimal. So I will stay with what I have.