mwsilvers
(Mark - New Jersey, USA, Win10, RTX 4060, PL9, FP8, VP5, Nikon Zf )
203
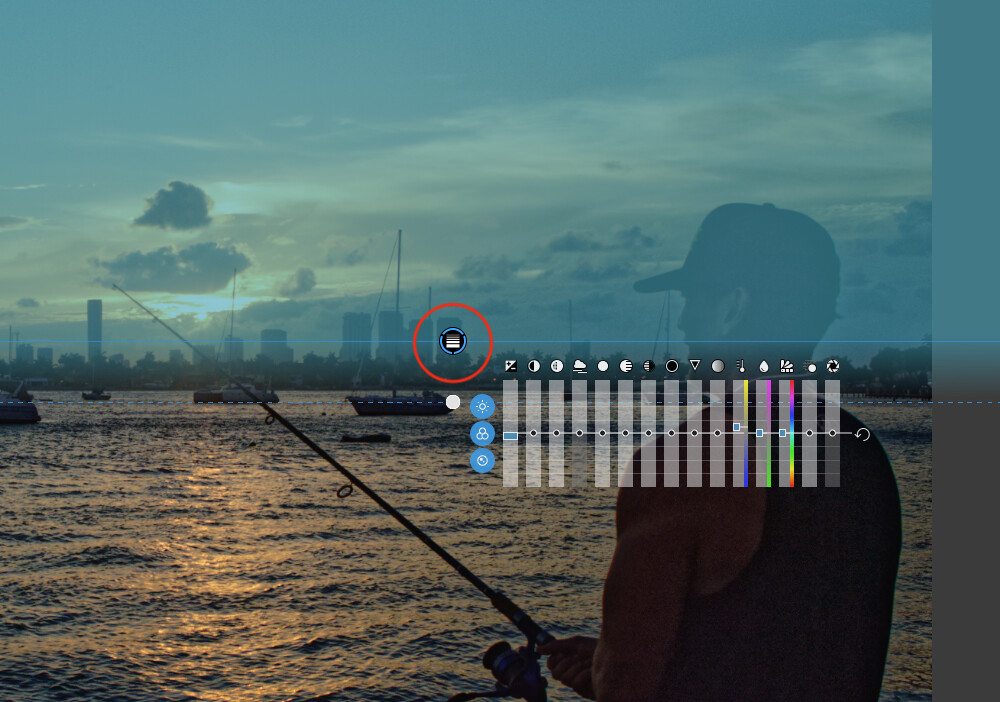
Active Corrections will show you a filtered view of every tool that is currently selected (the square to the left of the tool name is highlighted) Generally a tool is selected with the intent of modifying an image in some way. However, a selected tool will be added to Active Corrections even if the settings have not been modified for the current image. For instance, Local Adjustments will be added to Active Corrections when the square is highlighted even if no adjustment masks have been created yet, and Exposure Compensation will be added if it is selected even though the slider setting is still at zero.
As a result of this, the presence of a tool in the Active Corrections filter (at least in the Windows 10 version) does not necessarily mean the image has been modified by it.
The wb is an exception on this. The ‘as shot’ is used for color temperature, activated or not. But opening the image for the first time it always shows 5400 with ‘no corrections’ as preset.
George
mwsilvers
(Mark - New Jersey, USA, Win10, RTX 4060, PL9, FP8, VP5, Nikon Zf )
205
I’m guessing there may be other exceptions as well, but I did not want to confuse @mikemyers with with more detail so I kept it simple.
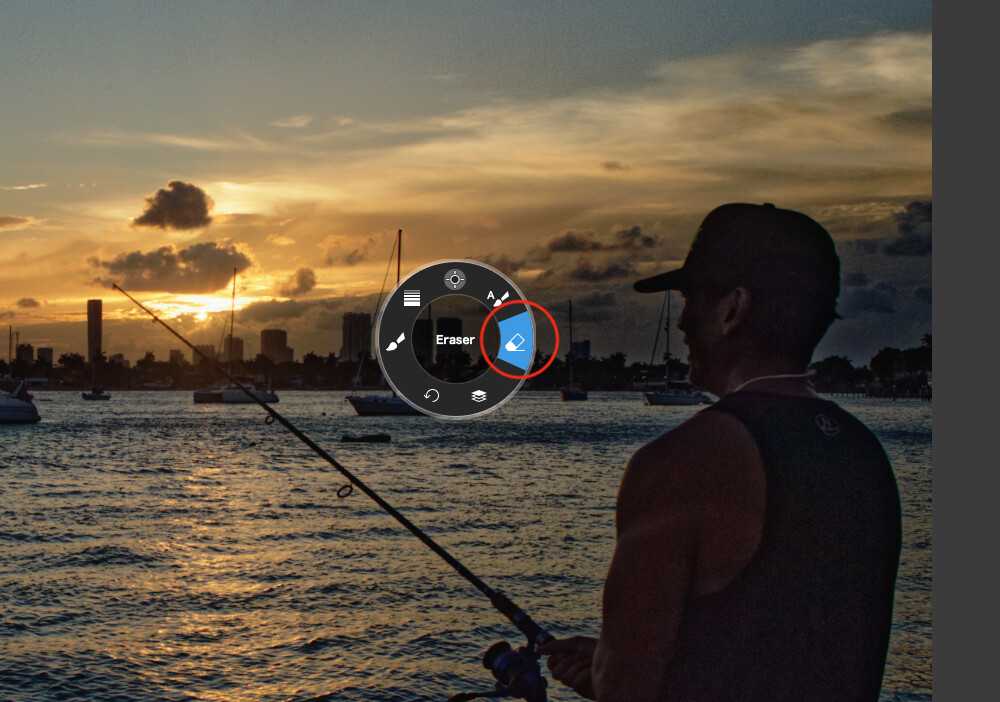
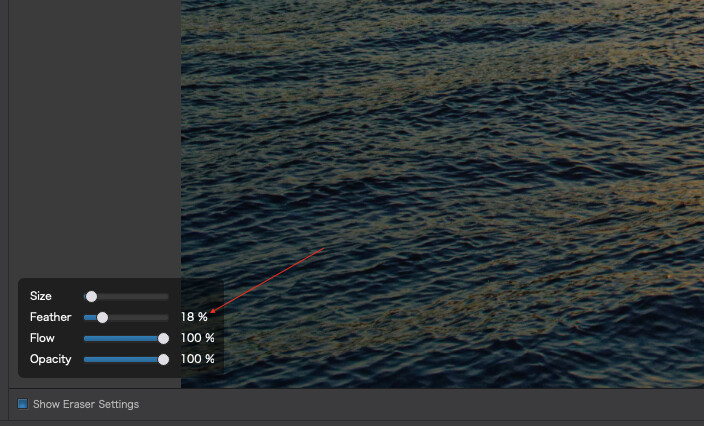
You can only really determine what to set this at based on trial and error. The size of the brush stays the same on screen so, the greater you are zoomed in, the finer control you get over what the brush covers and how “thick” this edge is in relation to what you are trying to erase.
You can also select the brush tool to add in to the mask but, once again, be very careful with the feathering size.
I didn’t realize this - I’ll try it later today. So, I can use a mask to cover a larger area, and then select an “eraser” (with adequate feathering) and correct what the first mask had done? So if I use a gradient mask to cover the sky, an it unintentionally covers other parts of the image, I can “erase” the effects of the gradient filter from those places?
That’s what I tried to do, but your way sounds much better.
Thank you - I need to learn “simple” first, before I work with “complicated”.
Did I read that right - the first time I might want to adjust white balance, PL4 will say it is at 5400, regardless of how it looks on my screen? Strange…
What a wonderful, wintery, beautiful, freezing, photogenic, uncomfortable place to go. I enjoyed watching the video, looking for things that might make a nice photo, but it looks like a VERY uncomfortable place to photograph. Need to keep camera warm enough so it works, need to prevent frostbite, need to stay warm or use an extra high shutter speed to take care of the “shivers”. On a day like that, I think my enthusiasm for photography would be overwhelmed by my desire to remain warm and comfortable. I wonder how this looks on a sunny, not-so-windy, day? I think you’re lucky to have access to this place, but maybe on a nicer day…
Your illustrations made this infinitely easier. I’ve never (yet) tried any of that. I didn’t realize there even WAS an eraser. My PL4 mental “toolbox” is getting more and more stuffed with tools. That is wonderful! THANK YOU!!
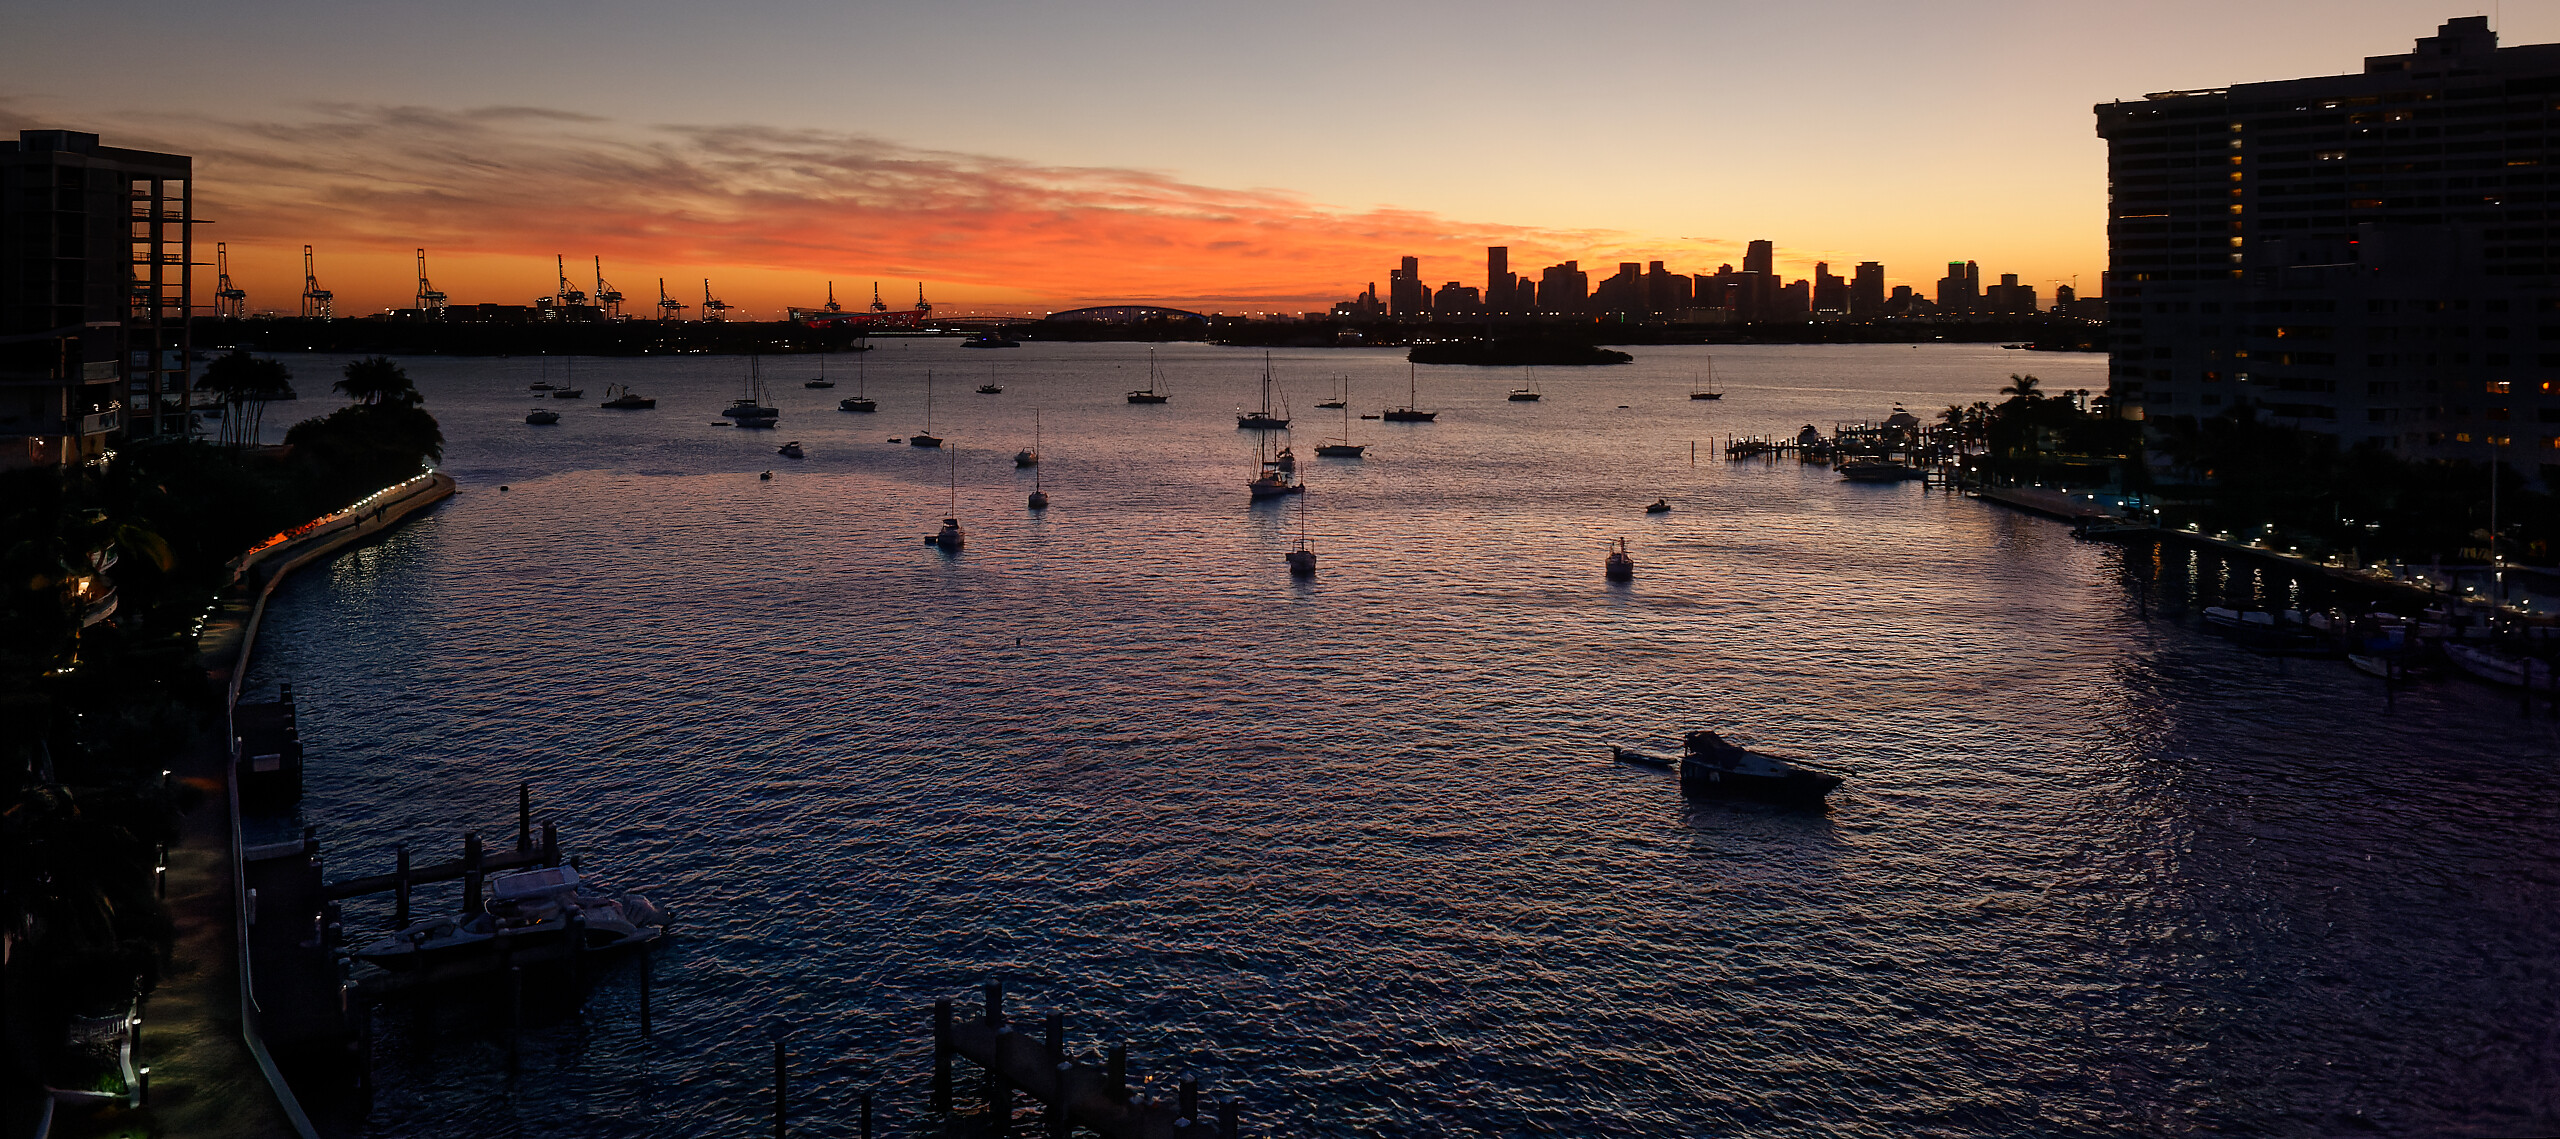
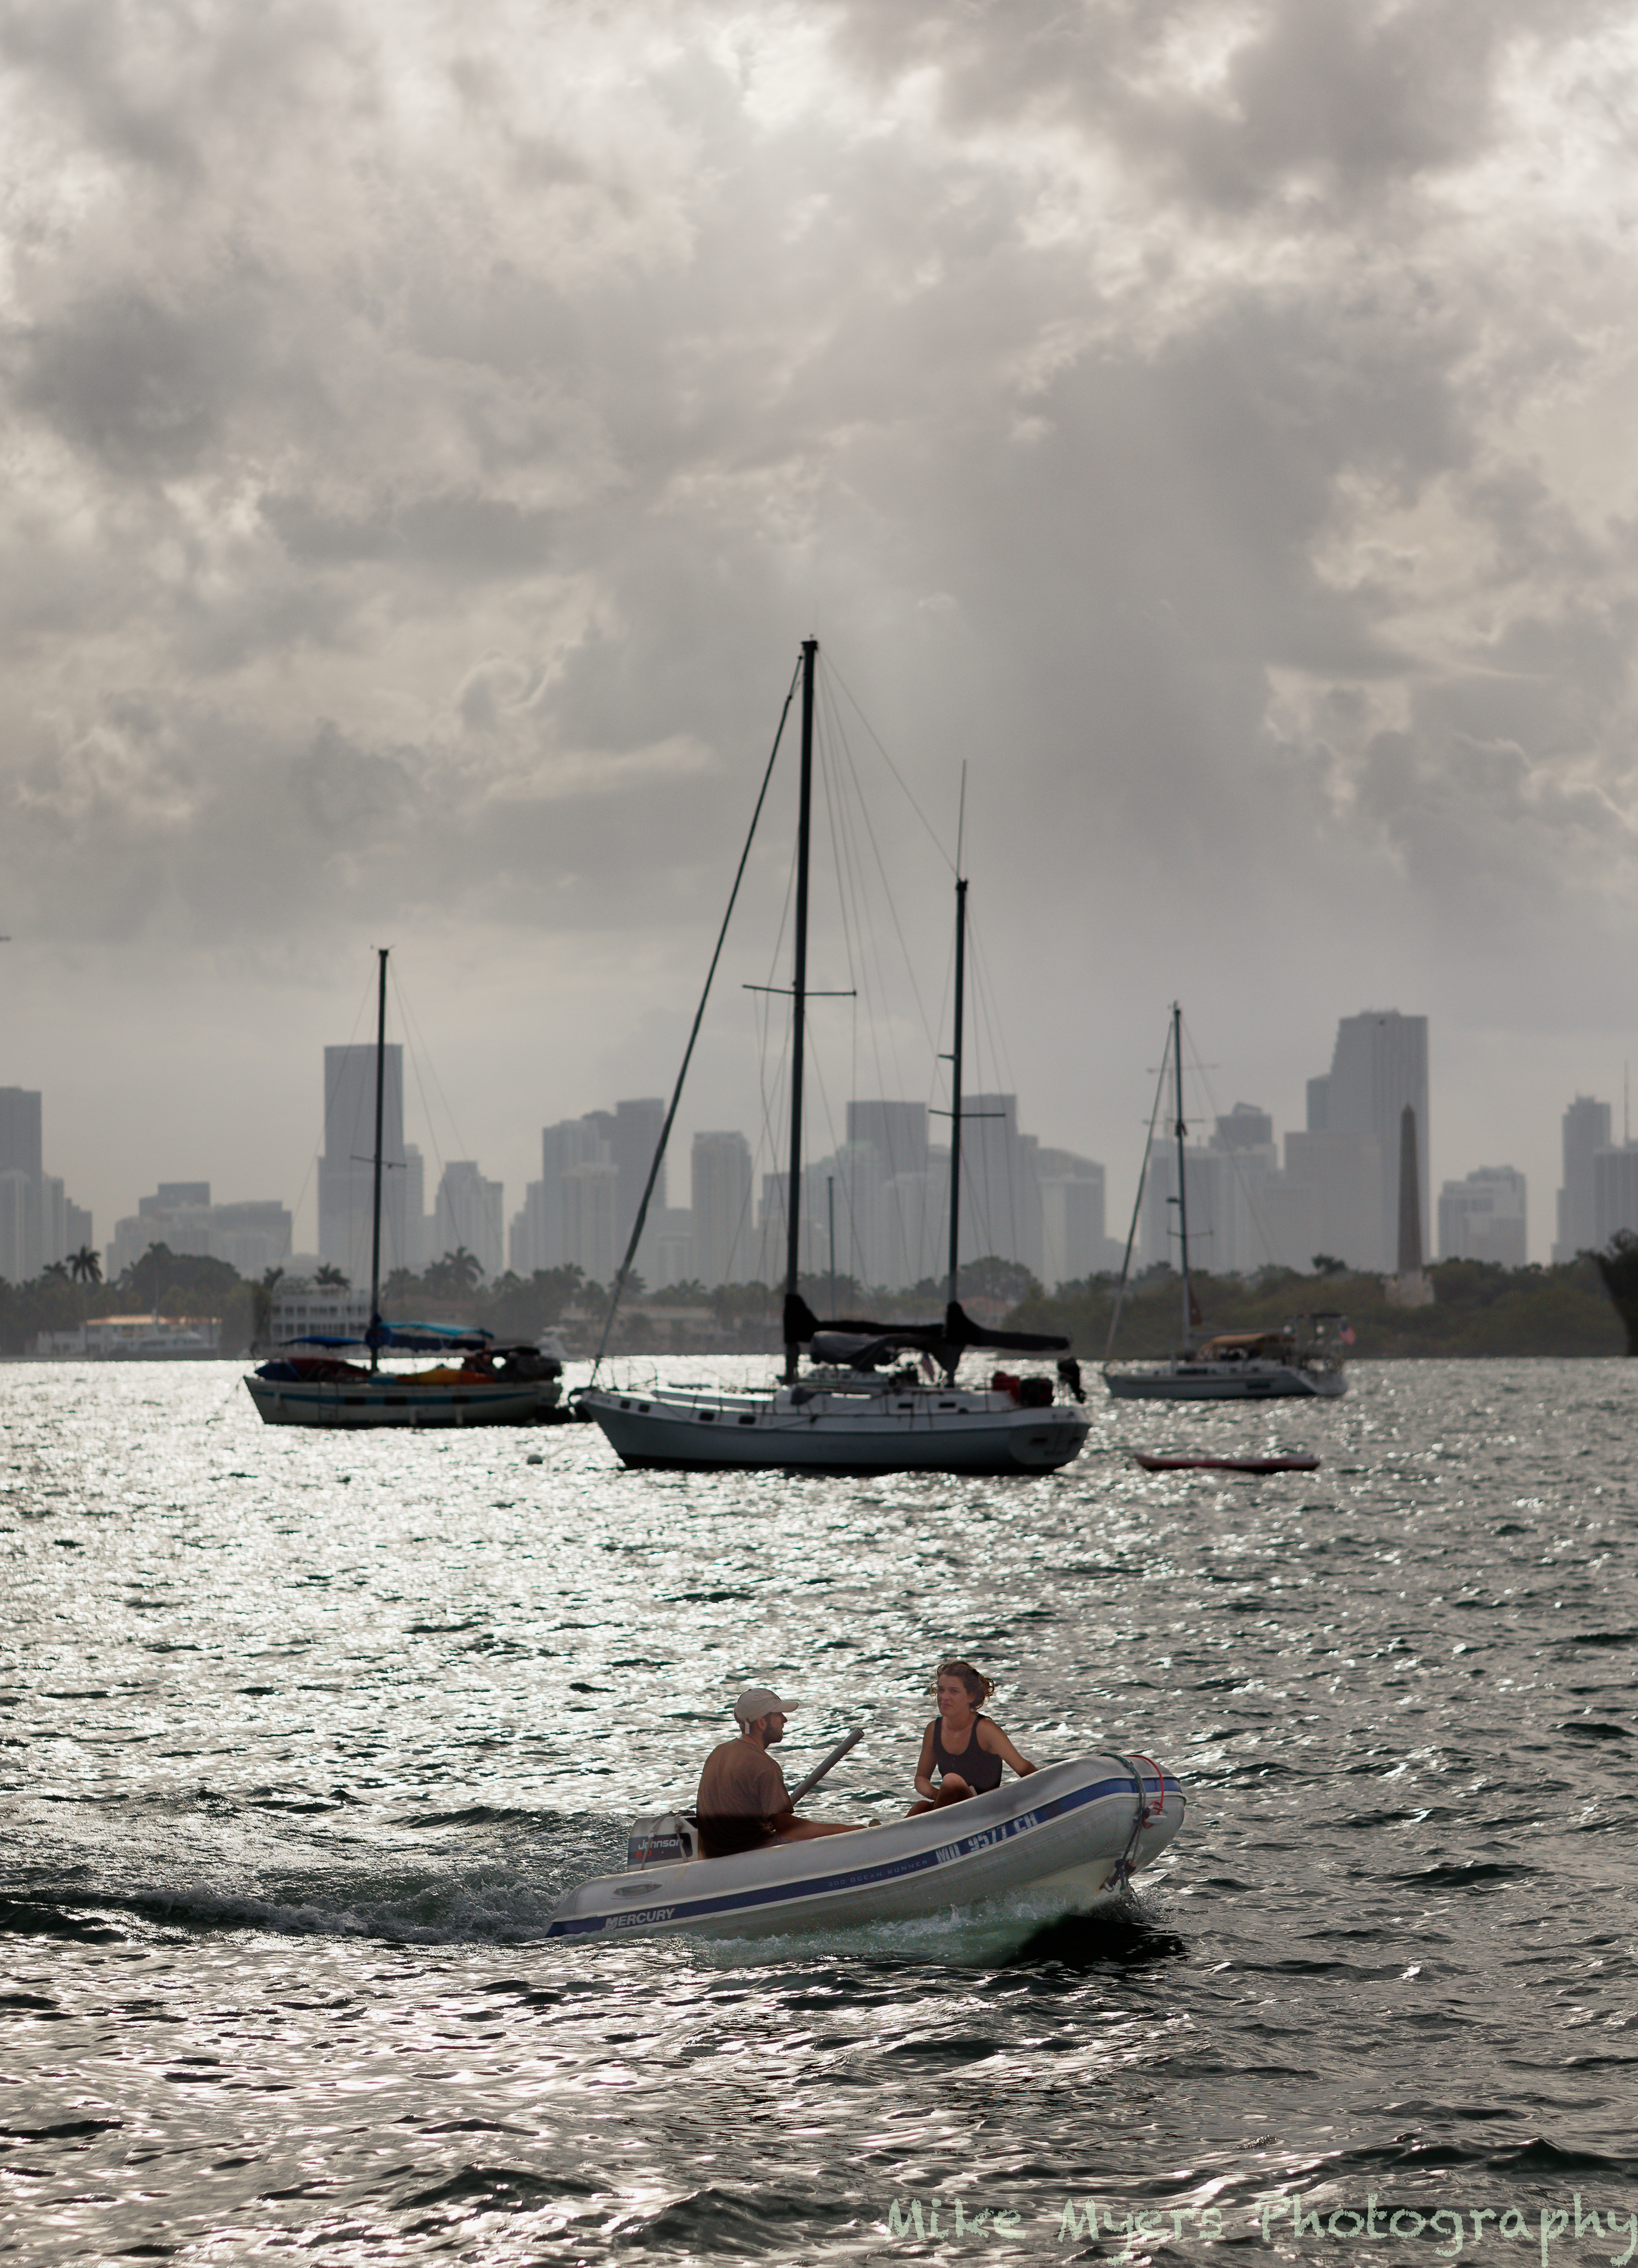
Checking your original photo _MJM2169 2020-12-25-Biscayne Jet Ski and Miami.nef you see,
that your lens is prone to some degree of Chromatic Aberation (see comment from @George).
– Your photo is sharp, otherwise all antennas, sailing boats and cranes wouldn’t be crisp enough
[depth of field at 0,30 cm / f8 never reach infinity].
Sunset pics are often counter light scenes. When important parts are not (cannot be) illuminated, present them as clear silhouettes as you did (compare to the difficult trial to bring back colour to your fisherman).
Interesting - I will go back and see what you did.
Of the two images I did last night that I didn’t like, one of them is now fixed to where I think it’s acceptable. It was obvious I forgot to crop a little more off the top. I updated the “.dop” file below.
What bothered me was that I was shooting into the reflection of the sun, and everything was so bright, but my first attempt left things looking too dark. One more image to go.
2pm Miami time - I lightened up the small boat and the people, and very slightly lightened the trees at the water’s edge.
Bummer - it’s not immediately obvious that the small boat and people are in focus, but everything else is not. Viewed in a large size, this is more obvious.
The indicators on the Nikon told me that some areas of the first image were slightly over-exposed. That everything looks “dull”, is because that’s what I see looking out my window.
Hopefully the tools you use will find that both images “make sense”.
Based on suggestions from Joanna, the D750 is now in aperture priority mode, and auto-iso is de-activated. I had forgotten how much I enjoy the D750.
Hopefully the tools you use will find that both images “make sense”.
Sorry, I’m not interested in test shots. – Go back to the photos, ‘we’ already edited and learn from them.
To get a quick overview you can switch on Active corrections. Then deactivate this button and play with the tools listed before.
When I get to see what “we” have done (you all get 99% of the credit, not me) I get the most satisfaction out of taking another photo, and using the things I’ve learned, edit it better than my previous attempt. As to the 24mm, I was starting to think that either the lens had a problem, or I had made a mistake.
Once you all show me something, and I see how it works, I immediately want to try it on a new image. Most of the time this works - ever so often I’m left scratching my head, until I figure out the reason.
It’s not you, it’s me. I can watch PhotoJoseph do something on my computer, pause the video, and try it on my own, quite often not getting the expected result. So I watch again, and try again. If it still doesn’t work, I play his video just a little, then do the exact same thing. Then repeat. The things you show me are similar - I need to think them through, and understand them. Once I know “why” you did it, it not only works for me, but it becomes part of my “toolbox”. As an example, to make an area lighter, I always used to use a tool to reduce the exposure. Then Joanna corrected me, do it by reducing the shadow slider. I’m not totally sure WHY it works differently, but it does seem more effective. Also, I used to use tools like a volume knob on my audio device. Now I use it so much more sparingly.
I’m still amazed by things that should be obvious. On my ASUS display, when something looks good in the evening, I know it’s good. By contrast, if I slide the image to my iMac, it rarely looks as good. Before PL4 and all of you, I never realized how important this is. So for all these years, when I thought I was making beautiful photographs on my screen, that might have all been for nothing.
In two weeks I expect to be using a Mac Mini that I’m getting from my nephew. The display will be the ASUS, calibrated. If my iMac becomes a second display for the Mini, it will also be calibrated.
Yes, lots of comments, but I keep at it until it (eventually) makes sense. Then I find new concepts, such as the “eraser” for local adjustments. I week ago I didn’t realize this. Pretty difficult to spell words correctly until you know the alphabet.
One lesson I learned from that is to not even try next time. If something is pretty much in deep shadow, it’s a waste of time to struggle to make it look like it wasn’t in shadow. That photo is very frustrating to me. On the other hand, I never would have learned my lesson if I didn’t at least try. I guess it depends on how deep the shadow is. Then Joanna said it didn’t need to be brought back at all - she could see a little of the color without modifying it.
Maybe one of the reasons I often do shoot into the sun, is because I was told not to.
Regarding what you wrote up above, I guess my plan is to bring out the sunset colors, and ignore what’s in the shade - but in the image I did last night, maybe I brought them out too much. Last night, I thought it was fine. When I woke up, it looked “too colorful”. Maybe I have “selective memory”, and I “remember” what I wanted to see, not what I actually did see. But what I ended up last night is close to the way the sky looked to me… I kept taking photos, and the colors started fading from one photo to the next. The sky at the left has already faded somewhat, and that “fading” moved from left to right, until all the golden light had vanished…