Did some shooting this weekend, and have some problem images - is it ok to post some of them for comments/advice (about PL7)?

Hi,

We were out this weekend, and I did some shooting at one of the surf competitions that was occurring the last week+. Yesterday was the finals day, and I took a bunch of images, but near the end of the day/competition in the afternoon (approximately 3:30 PM Hawaii standard time), some of the images that I got looked not-so-good and I was hoping to get some advice about how PL7 could be used on them, but I wanted to check before posting them here. I still have both SOOC Jpegs and the RAW filed (Sony ARW), which I’ll have to put somewhere…

Is that all right?

Thanks,
Jim

Off course.

George

George,

Ok, thanks!

Before I upload the images (or link the files), I wanted to mention that during the most recent session (when I took these pics), I was trying to do some testing to try to see how shooting manual (vs shutter or aperture priority) would work for me. I was also trying to experiment a little with the shutter/aperture/ISO setting to get “better” settings, e.g., lower ISO, higher f/stop, etc.).

This all (including to moving to using DXO PL7) is/was kind of moving towards shooting with RAW only, because one of the things that has prevented me from doing that has always been my concern that if I shot only RAW, would I be able to at least get JPGs that would be as good as the SOOC JPGs? I think that, for me, at least, the answer to that question (again, just for myself) before starting to work with PL7, my answer was definitely “no”.

Also, for yesterday, we were there at the location from early to about late afternoon, and it was cloudy most of the day until about 2:30 PM+, when it rained (kind of medium rain) for about an hour or more. The image files still have the EXIF so you’ll be able to see the timestamps, but the location is -5 hours from the timestamps.

I’ve uploaded 4 files into a folder on my Google Drive, SOOC JPG and RAW, for 2 images at:

https://drive.google.com/drive/folders/1KEl0s61mRWrNkMfk8BfFXJv2P2nlwaaG?usp=sharing

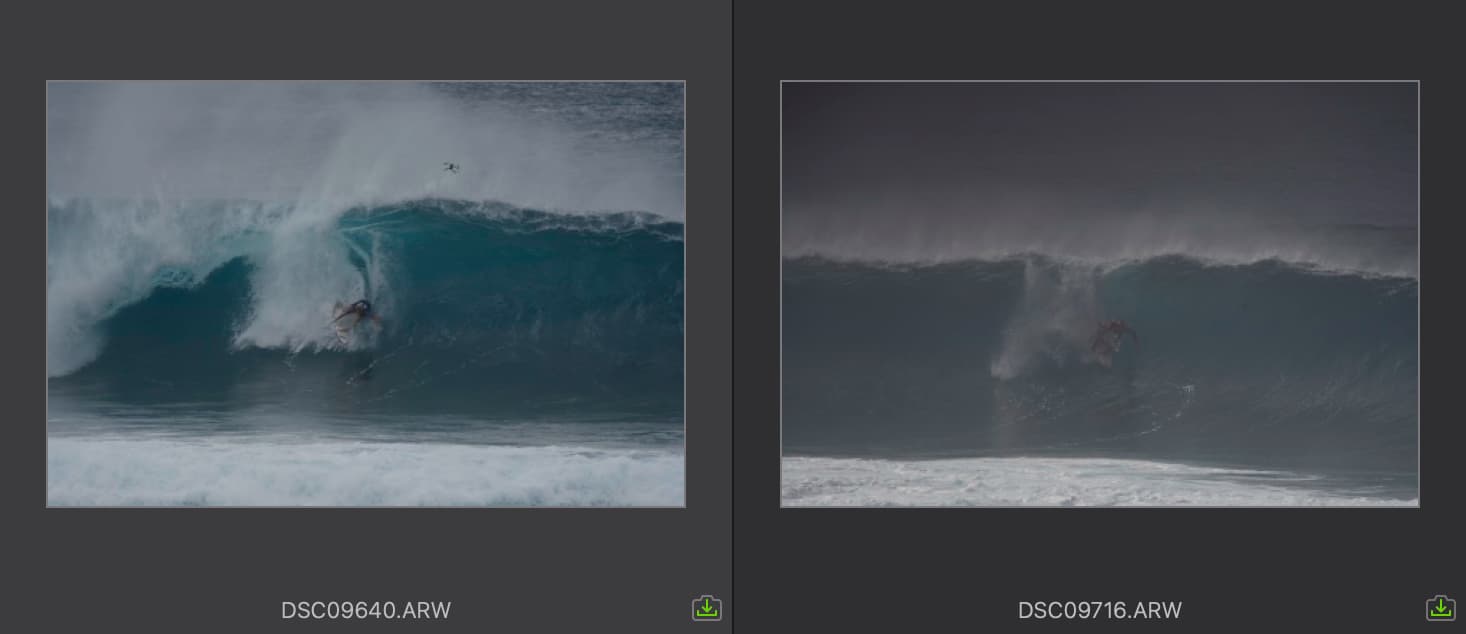
  • DSC09640.ARW and DSC09640.PG: These are similar to most of the images through the day. Timestamps are about 3:04PM.
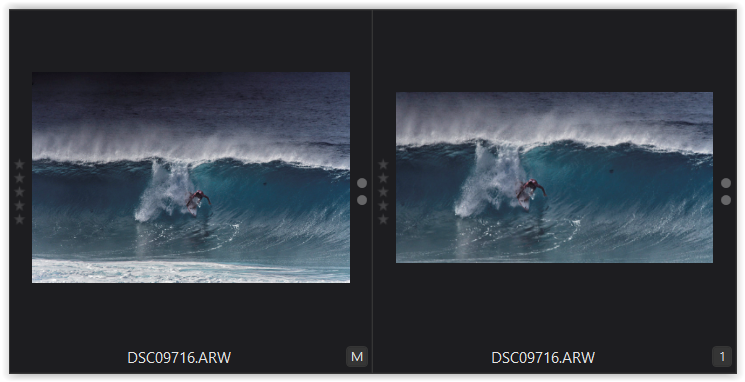
  • DSC09716.ARW and DSC09716.JPG: These are the ones that I would like to find out how best to process with PL7? These were about 20 minutes after the 1st pair.

As you can see from the 1st pair, the SOOC JPG “looks” about the same as the RAW, but for the 2nd pair, the SOOC is a lot different (visually) than the RAW.

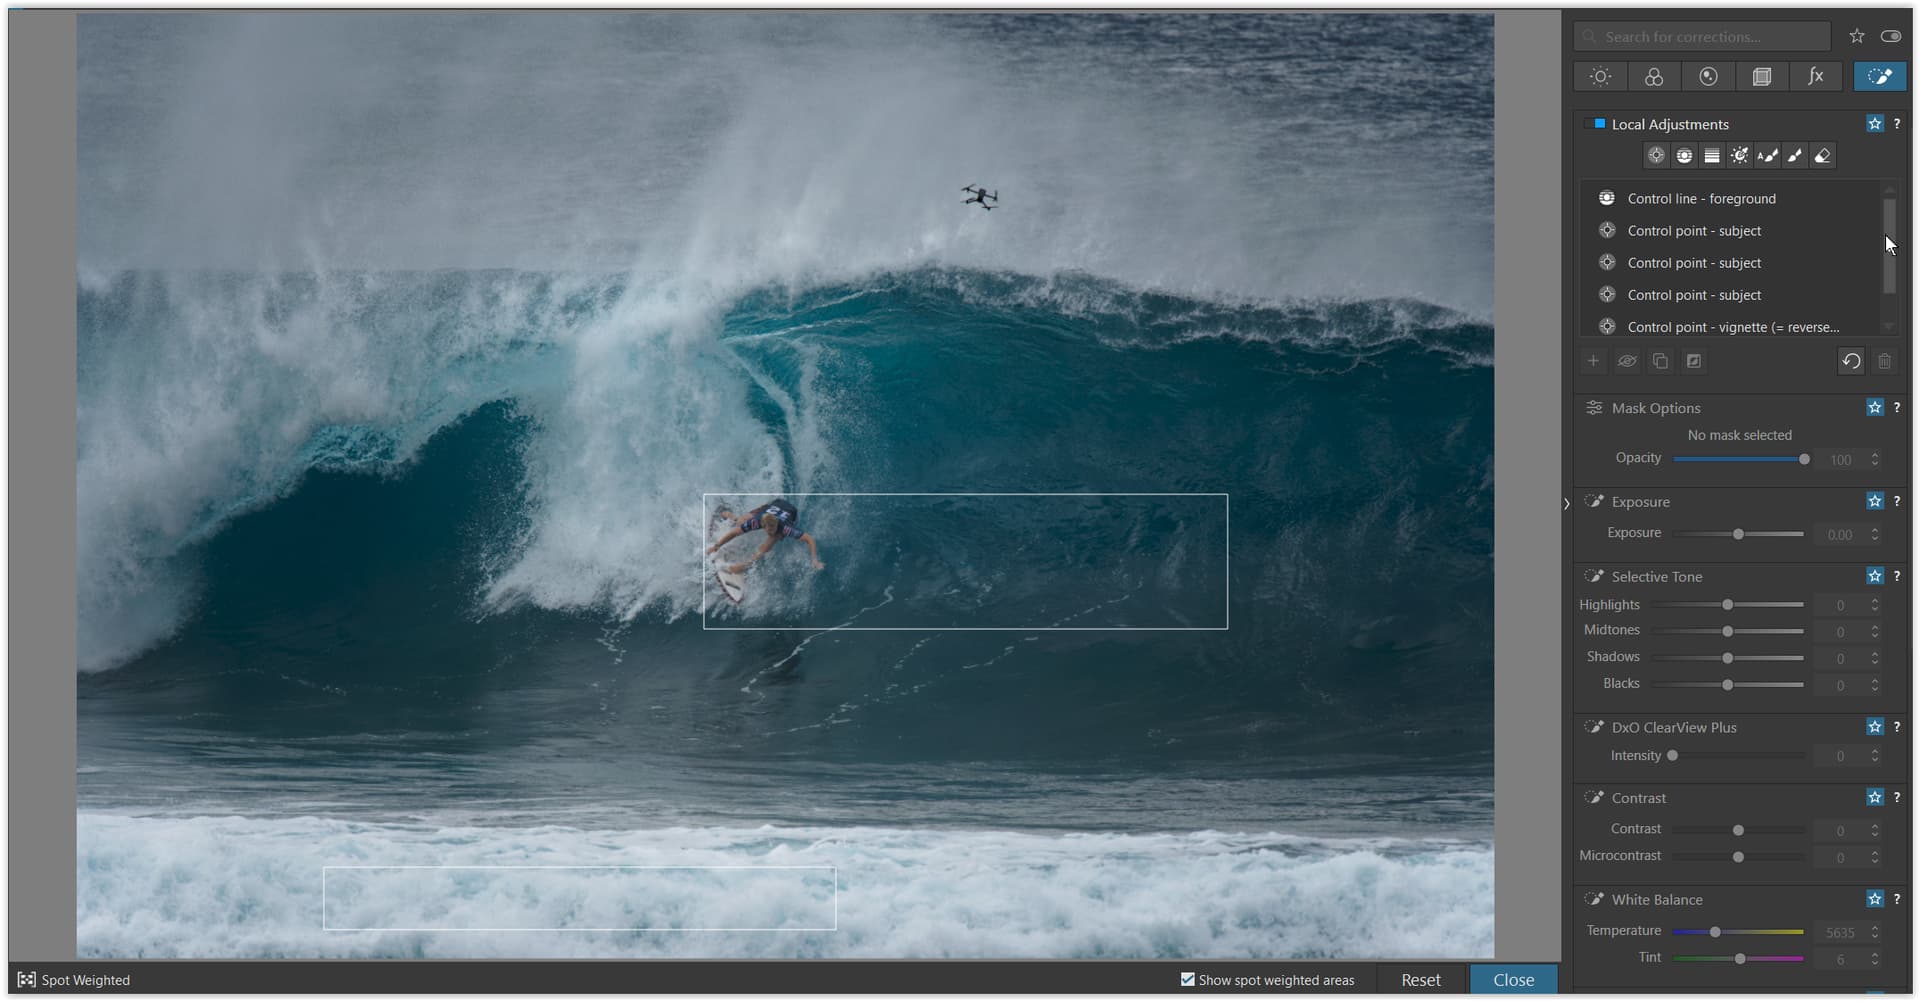
I’ve been tinkering with the RAW files using PL7 since late yesterday, and I think I’ve been able to make images that are “better” that what the RAW image looks like, but I wanted to get some feedback from someone who was more experienced with PL7 about what could be done (keep in mind though, that I AM a real PL7 newbie :slight_smile: !!).

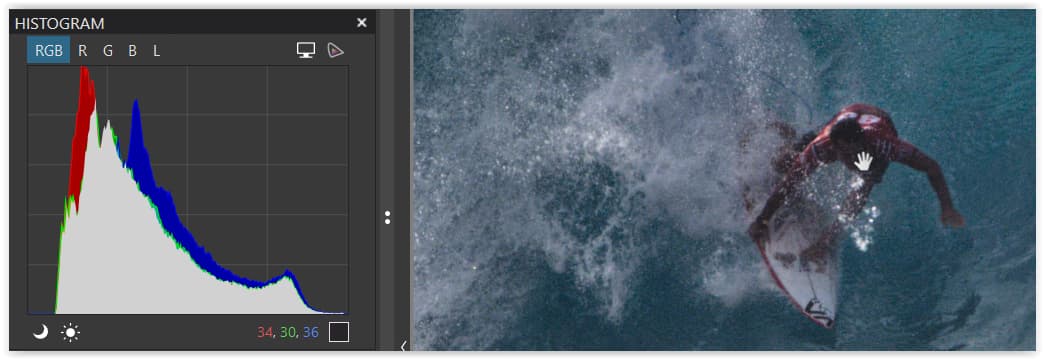
Also, I wanted to mention ahead of time that I noticed that there is some softness in the focus on both sets of images.

I use an app name A7info, that shows the focus points, and based on that, I think that the softness is partly due to I probably wasn’t tracking as well as I should have, but, also (a) esp. in the 2nd pair, there was a lot of spray in front of the surfer, and (b) there was some mist in the air, both due to the rain and also this location is just occasionally misty (fun factoid: the name of the beach can be interpreted in the native language as “misty” or “hidden”).

Anyway, I hope this all makes sense.

Thanks in advance,
Jim

To give you some ideas – just as a starter. :slight_smile:

( copy your raw-files and these dop-files into a new folder and experiment )


DSC09640.ARW.dop (35,2 KB)


DSC09716.ARW.dop (22,6 KB)

There’s the “magenta” cast again as seen in DPL with “No Correction”

Read more about it here:

The cast is present in DPL versions 6 and 7. Did not test other versions.
Again, this is a hefty issue imo and it should be reported to support.dxo.com

Wolfgang,

In the 07916 image - is there a way to brighten the face so that it is more visible?

Also, I see the “M” and the “1” at the bottom right of the images. What are those (sorry again this is a PL7 newbie question)?

Well, you could brighten the face even more
e.g. by using an additional Control Point from the Local Adjustments.
Please try it yourself and check if it fits with the very dark figure.

M = abbreviation for Master (here the first version of your raw- file)
1 = to signal the first Virtual Copy (here with the very same adjustments, but cropped)


may I suggest

:slight_smile:

Thanks for the link to the PL6 manual.

I was hoping you would say to try “Smart Lighing”, because that is something I am really interested in getting to work :frowning:

So far, when I try it (e.g., put a rectangle around the face, then change the mode or intensity dropdown), changing the mode or he intensity still appear to be affecting the ENTIRE picture, not just the area inside the rectangle :frowning:

It is almost like Smart Lighting is broken on my DXL PL7 :(…

Any idea what I might be doing wrong? Is something I additional I need to do to “enable” Smart Lighting?

Jim

Yes, that’s correct - it’s a global adjustment (it potentially affects the entire image) - BUT, the adjustment applied is influenced by the degree of bright/dark within the rectangle(s) that you create.

It’s analogous to having your camera’s metering system set to “spot metering”.

If you wish to apply adjustments only to specific parts of your image then you need to use Local Adjustments.

Ahh… ok. I just tried local adjustment with a control point and I think it was able to what I
mentioned… brighten just the face (it’s in same folder on Drive, “DSC09716_DxO.jpg”.

Thanks,
Jim

1 Like

Check both pics to see, that I used SmartLighting.

When setting up the “rectangles” over the bright and dark areas (pic 1), where you want to keep detail & texture visible, you can (also) control some contrast / the visual difference between bright and dark.

additionally – at the RHS the screenshot shows some Local Adjustments


In your second pic, the surfer got way less light. Move the → mouse over the person to see the values underneath the histogram.

While you can change the “lighting” to some extent, the image should be believable.


Experiment and find out what you like. There are many ways to treat pics.