If possible it would be useful to have the color picker available in the HSL palette in Local adjustments - would make skin tone adjustments easier, for sure.
2 Likes
You are aware of the workaround? Just use the global pipette, it will pick the correct color in LA’s. you are correct, this needs to be fixed. Voted!
I didn’t know that - so thank you!
1 Like
I tried to see your workaround but couldn’t find it - where is the global picker tool?
Unfortunately, Mark, that trick only works in the Windows version, and even in that version the selection is usually not exactly the same in the LA version as it is in the global version of the color wheel. We had a discussion about this when I first mentioned this as a workaround several months back. This was probably while you were still on the mend.
Mark
It’s in the global color wheel. But this workaround only works for Windows users, not for Mac users.
Mark
I must admit that I forgot it didn’t work on the Mac version . @mwsilvers I’m not a perfect color person and it’s always been close enough for me and I can manually adjust it if necessary. @Wellsyboy Steve if you are using Windows, open the HSL palette, navigate to where you see the colorful wheel. The color picker is the pipette in the center of the wheel.
Hi Mark - thanks - I know where it is but I’m on a Mac which explains why it doesn’t work for me ![]() Thanks for the help though.
Thanks for the help though.
1 Like
I don’t really understand the idea of a colorpicker that doesn’t really pick the nuances it points at. In fact the colorpicker in DXO can easily be substituted by just clicking one of the “color balls” of the Color Wheel-applet.
To make it useful it ought to have a completely opposit process. Now you pick say a basic blue and then you are supposed to adjust the nuances. Instead it should really pick the nuance it points at and use that instead. The picker doesn’t really do anything else than that. I have used the color wheel extensively a period now walking through a lot of older images of mine and pretty surpriced found how unsofisticated this tool really is.
I don’t think the color grading in Photolab makes me all that happy. It looks good but isn’t if I compare it with Capture One for example.
It seems like Capture One is the only converter that has got it right is CO. Recently I saw a video comparing AI-masking in CO and Lightroom and realized that even Lightroom have problem with color grading in local mode. Even there not all the grading that is available in global mode is available locally. Separating global and local don’t seem to be an all that good idea.
From what I have been able to determine, it is the mask that determines what colour is selected, not the colour wheel. There is, therefore, no pipette.
For LAs, the line on the wheel no longer represents the currently selected colour but, instead, the “neutral point” from where you moved the outer ring, so you can return to “no change”.
It has taken me ages to work out how this is meant to work and it is only just now, that I realise what it does.
The colour rings are a sort of tint control, where you need to look for the selected colour on the inner ring and then you look at the outer ring, adjacent to that colour, to see what the colour will change to.
e.g. I brush a mask to cover some of the chimney and some of the leaves behind…
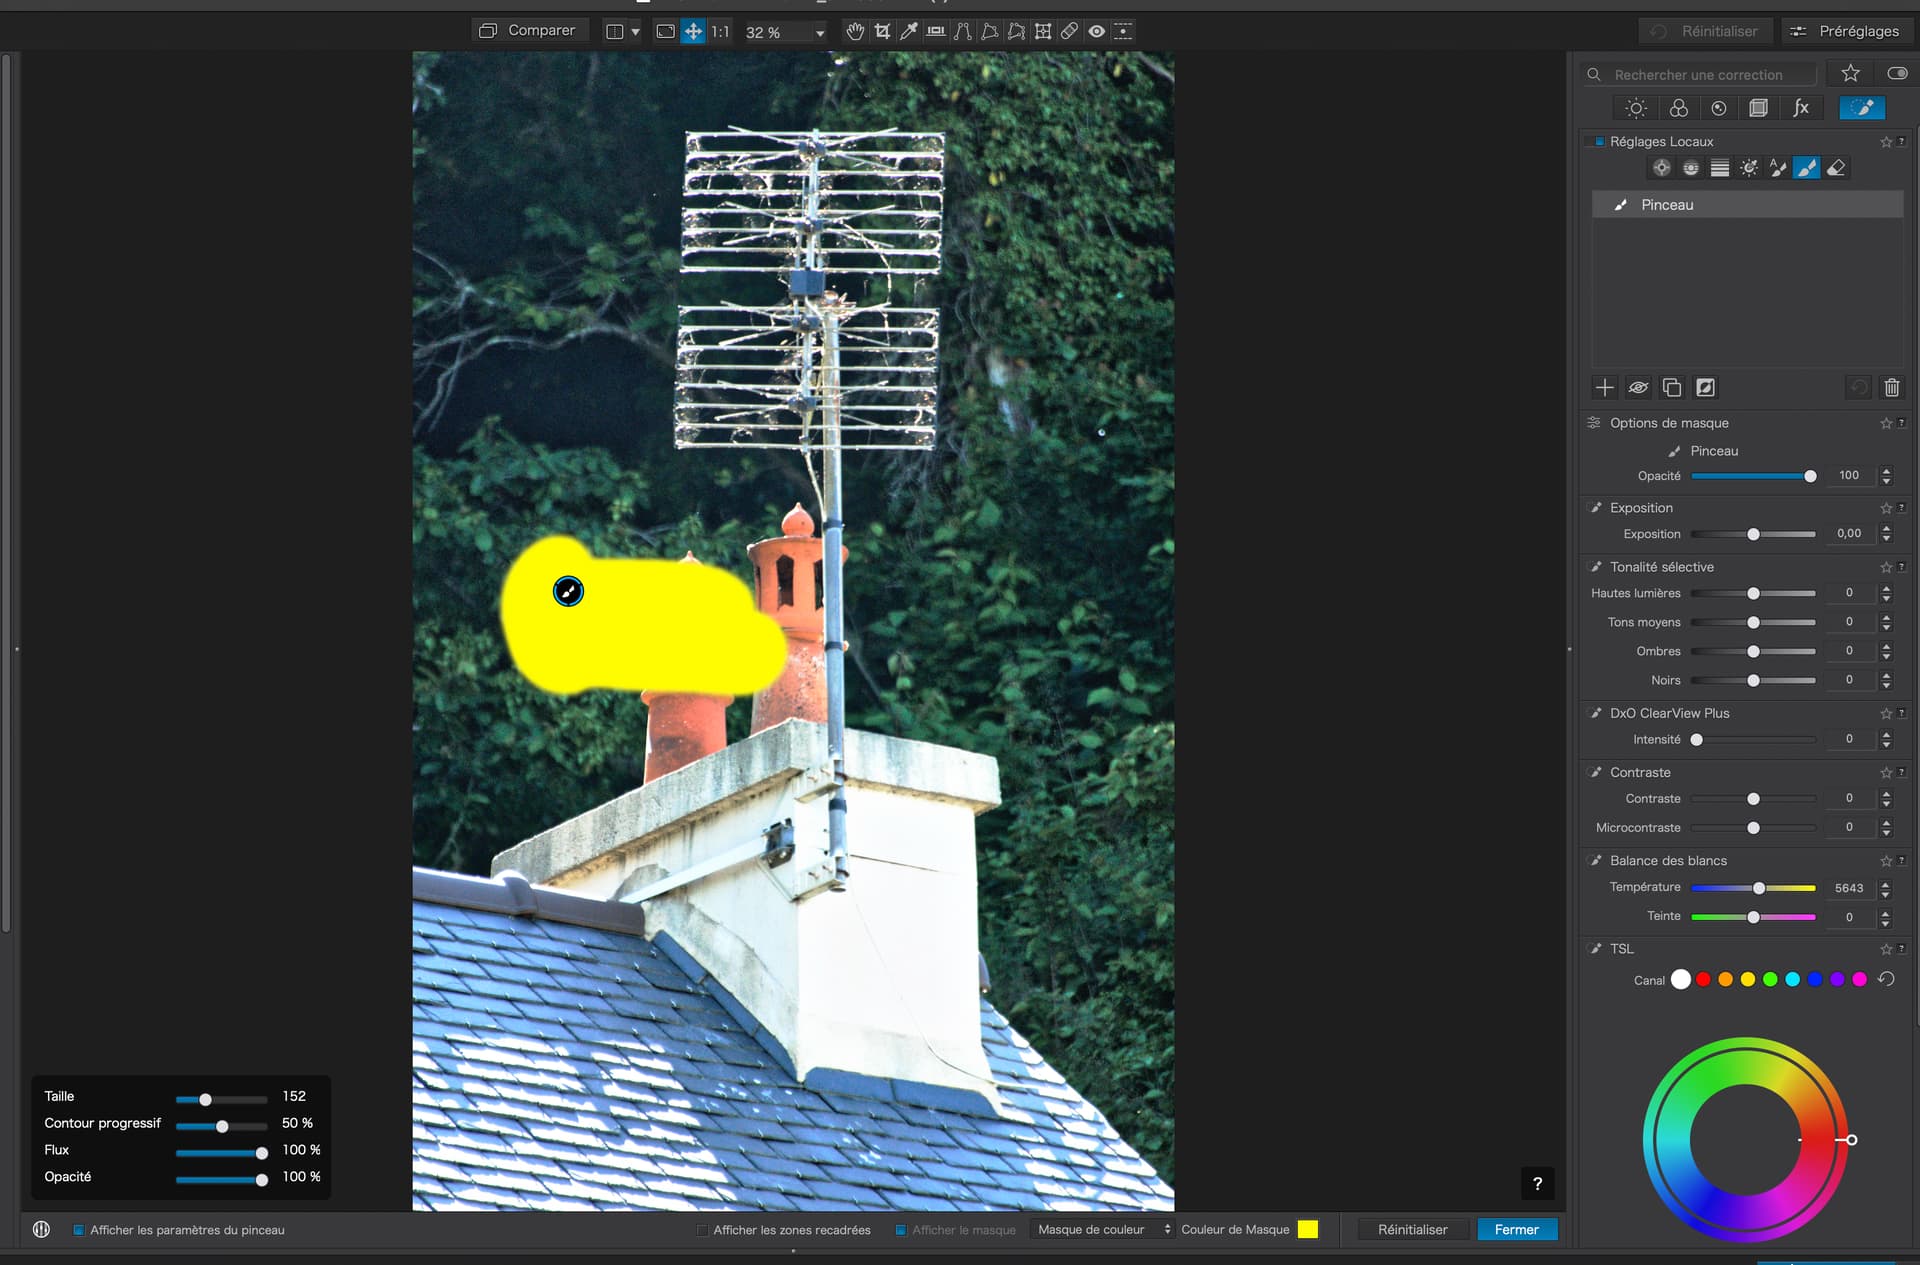
The white line doesn’t change position. And I wouldn’t expect it to, because there is no single colour in the selection and the white “global” dot is selected.
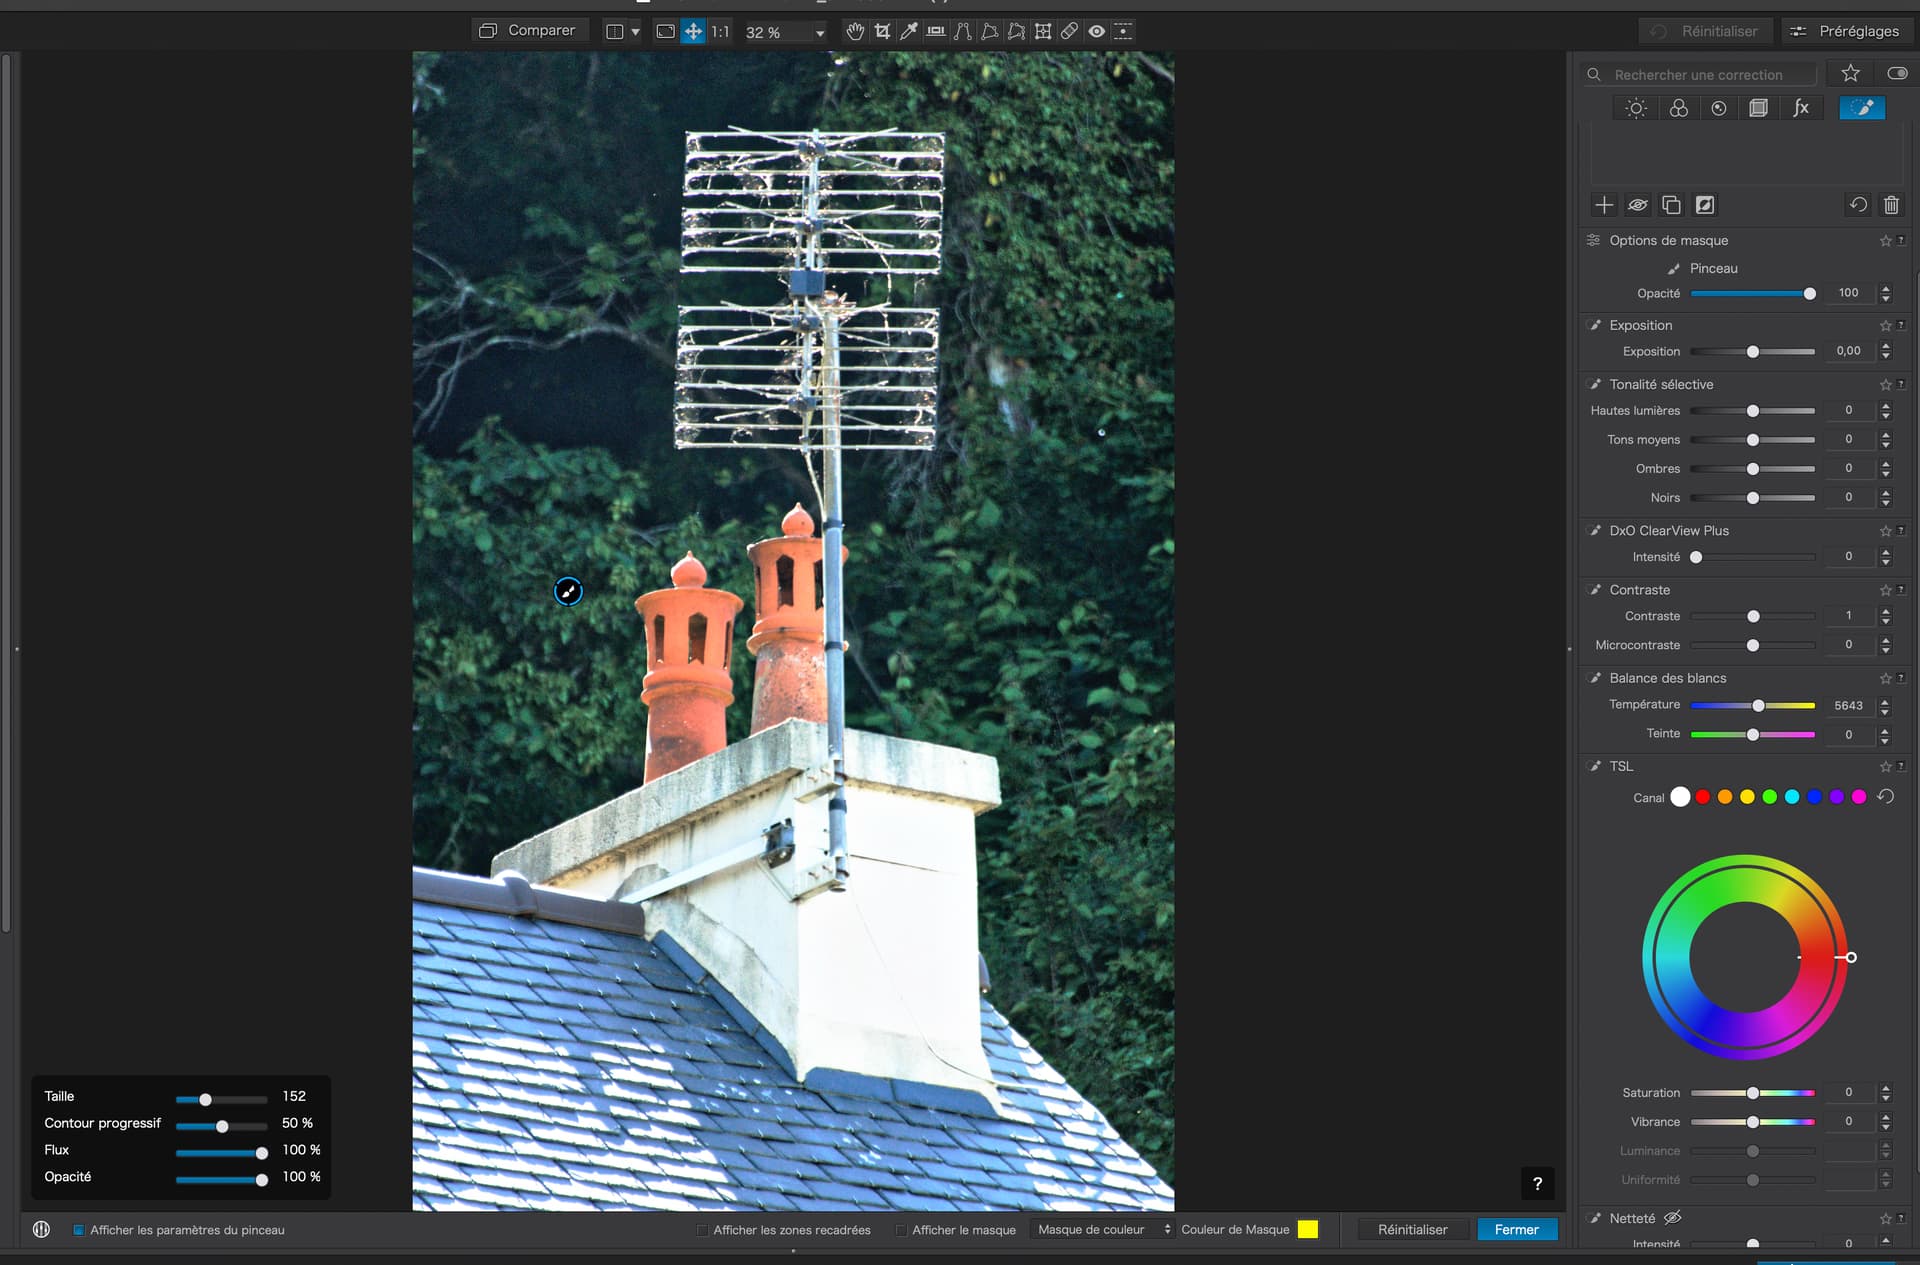
Now, moving the outer ring changes all colours to their “opposite”. Here, the red on the chimney changes to cyan but, also, the green of the leaves changes to mucky magenta…
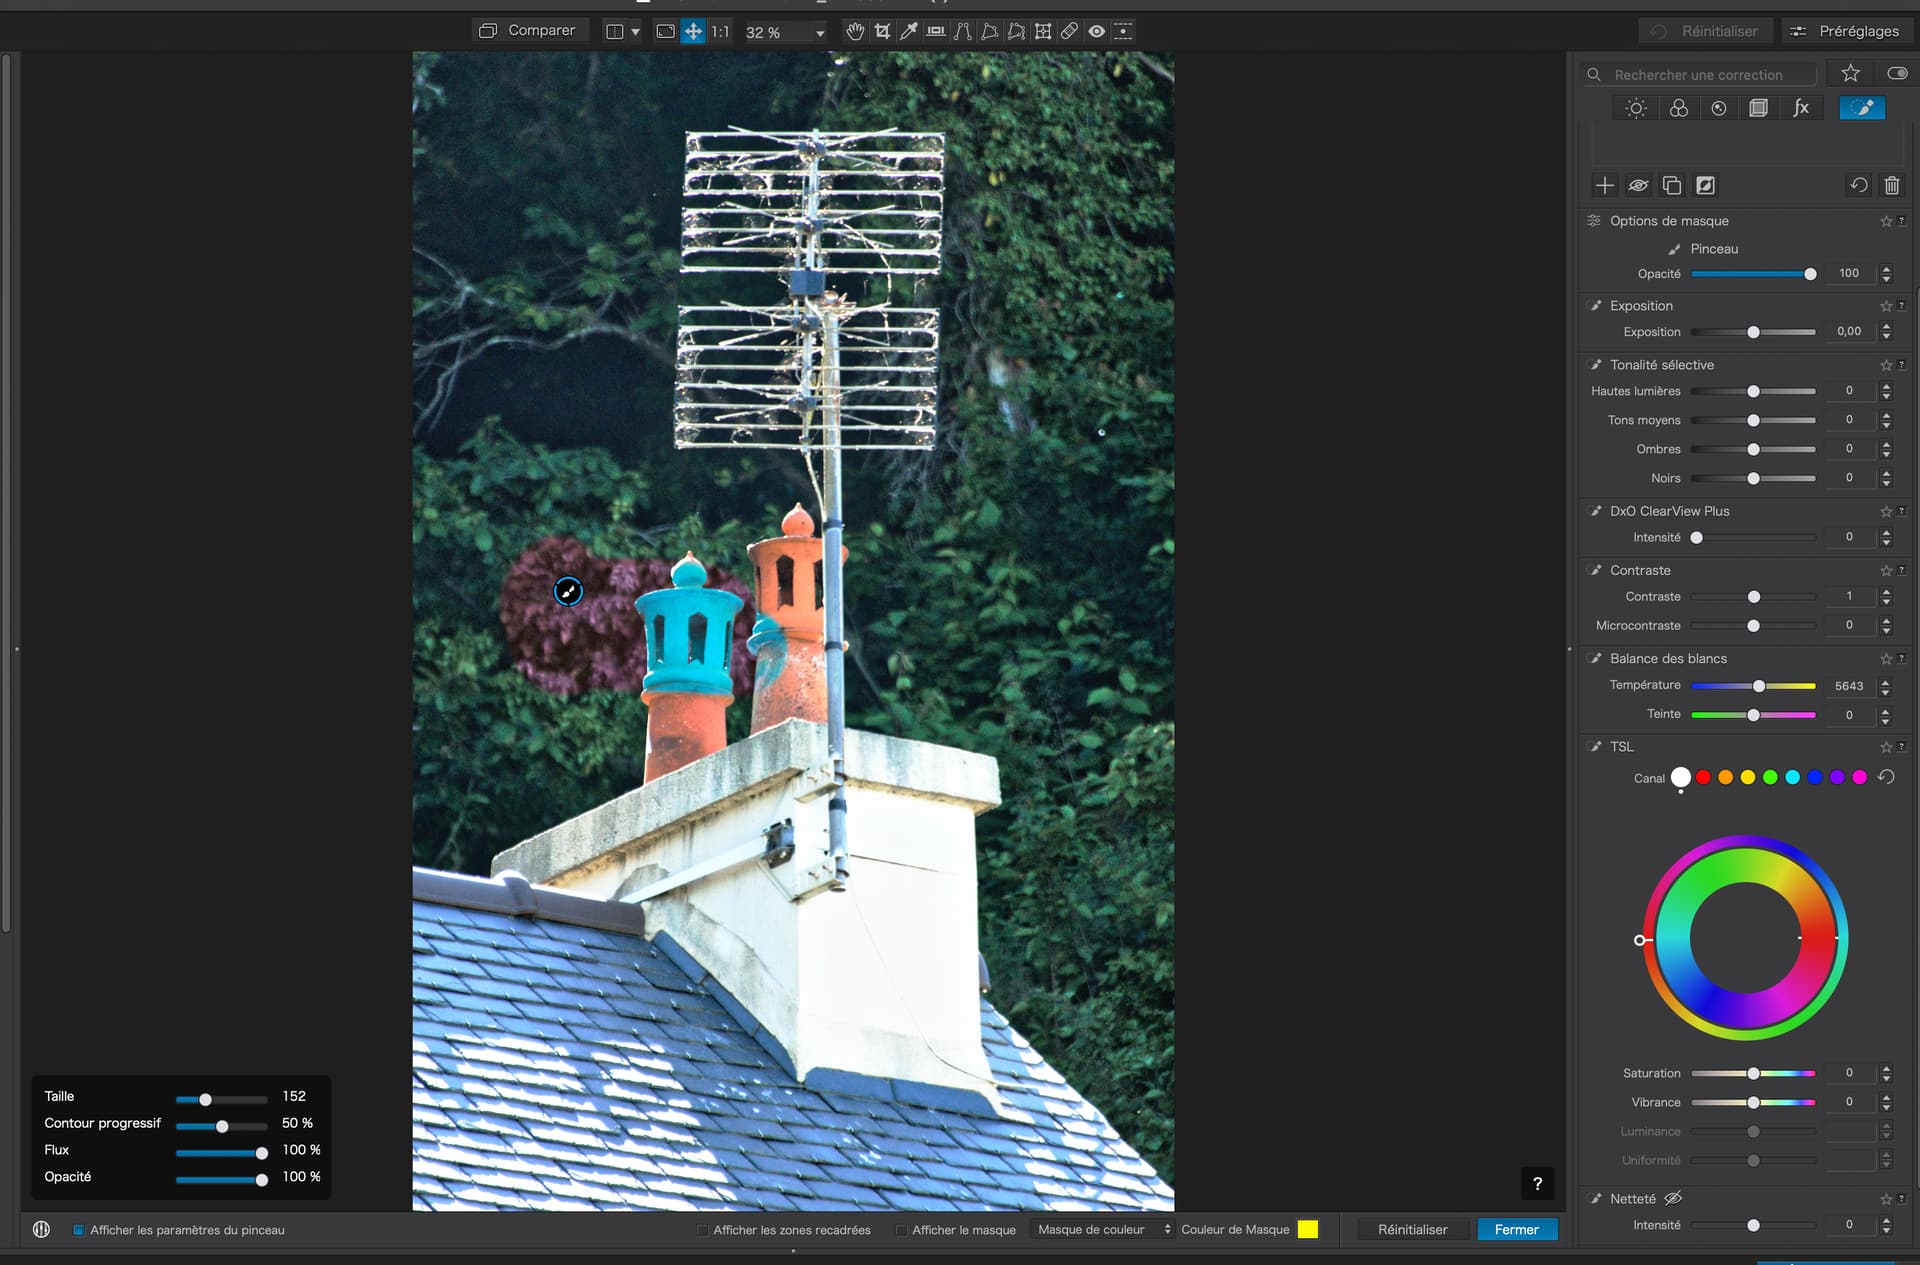
Next, with the same paintbrush mask, I select the red colour dot and move the outer ring to blue…
Note how only the chimney is affected, because it is in the colour range of the sector on the inner ring.
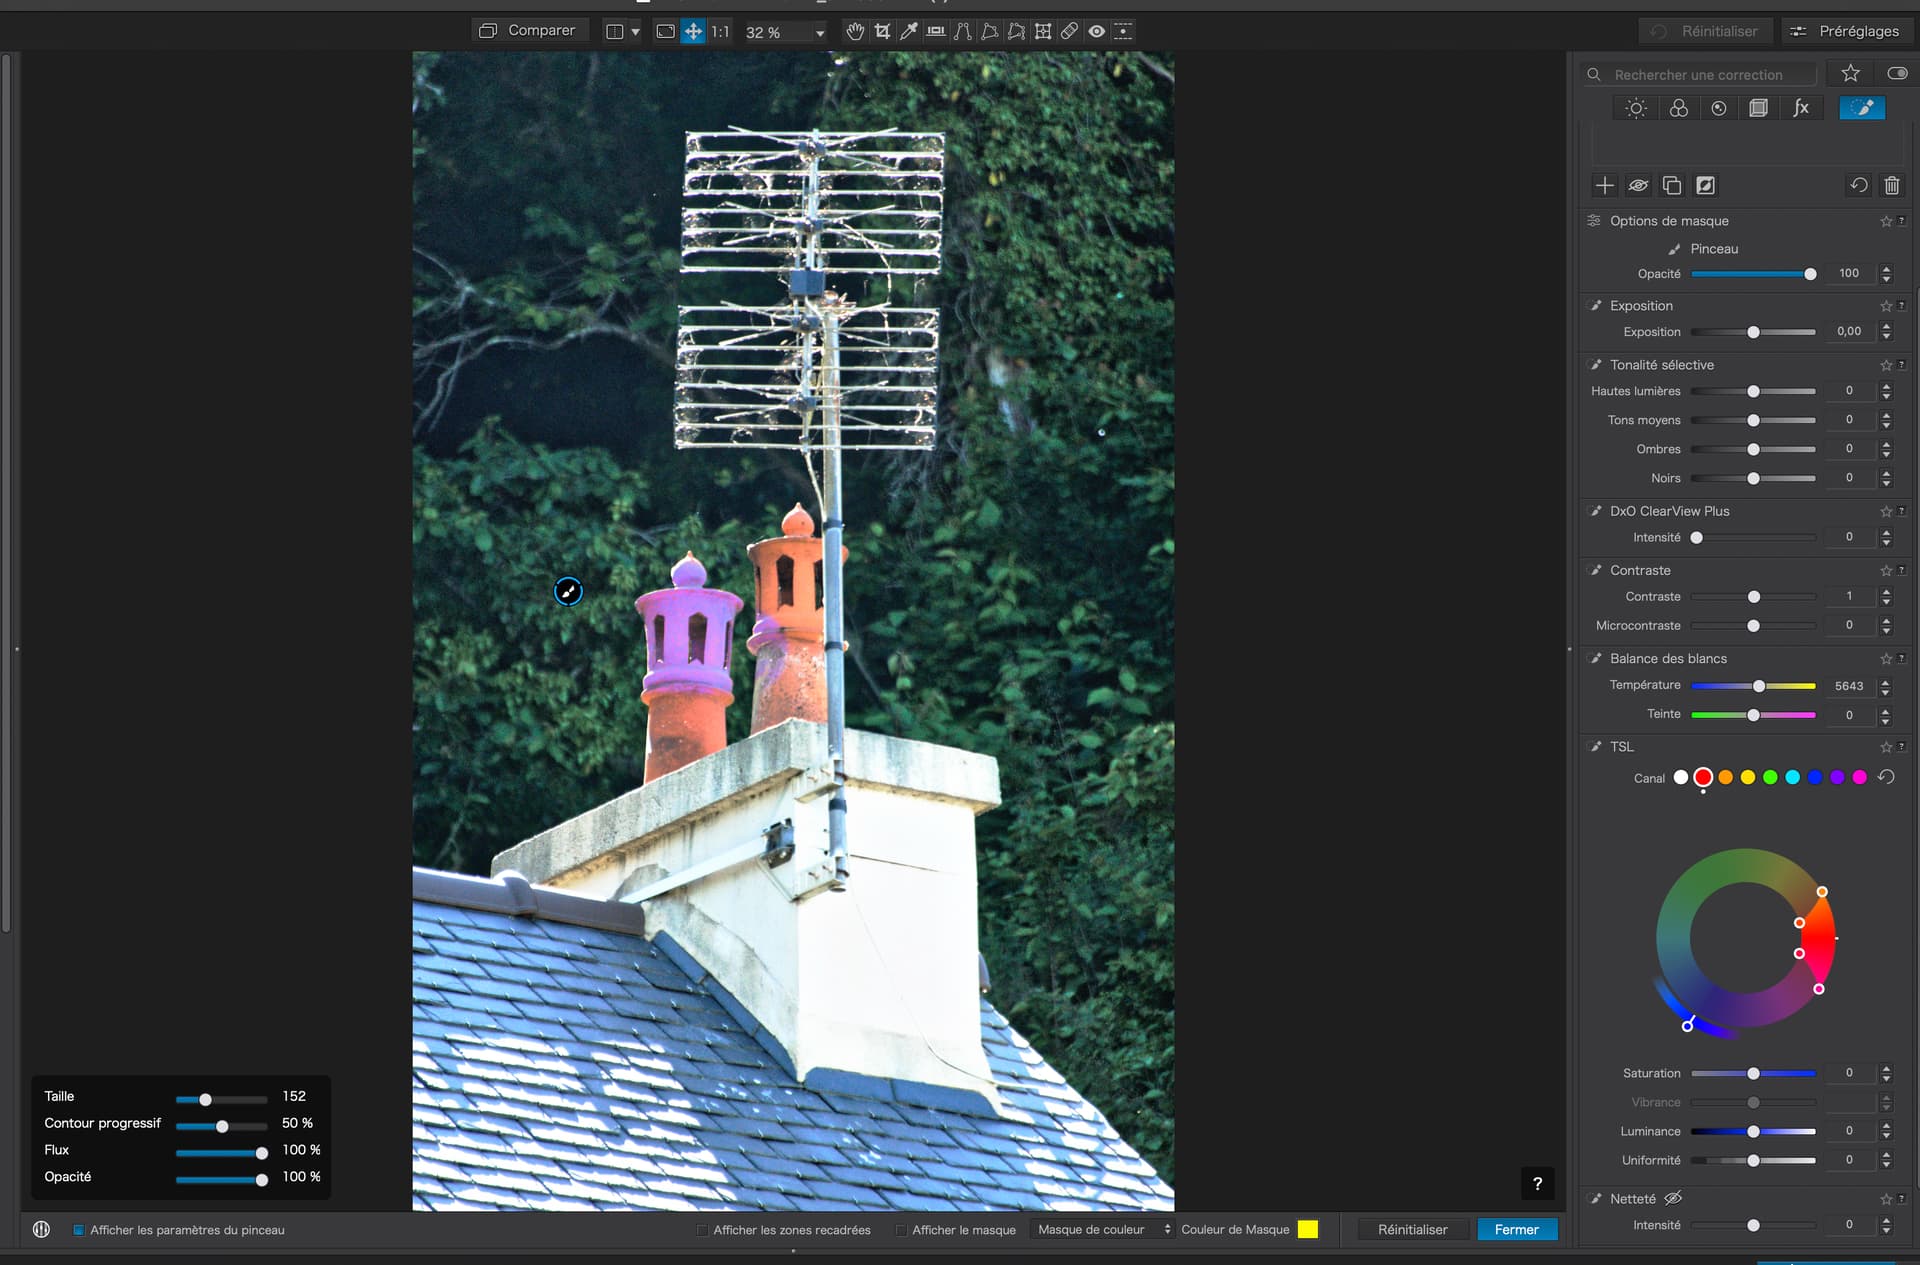
But, at the moment, the chimney becomes a sickly shade of purplish blue instead of proper blue.
So, I adjust the bounds of the sector on the inner ring, along with the Saturation, Luminance and Uniformity sliders…
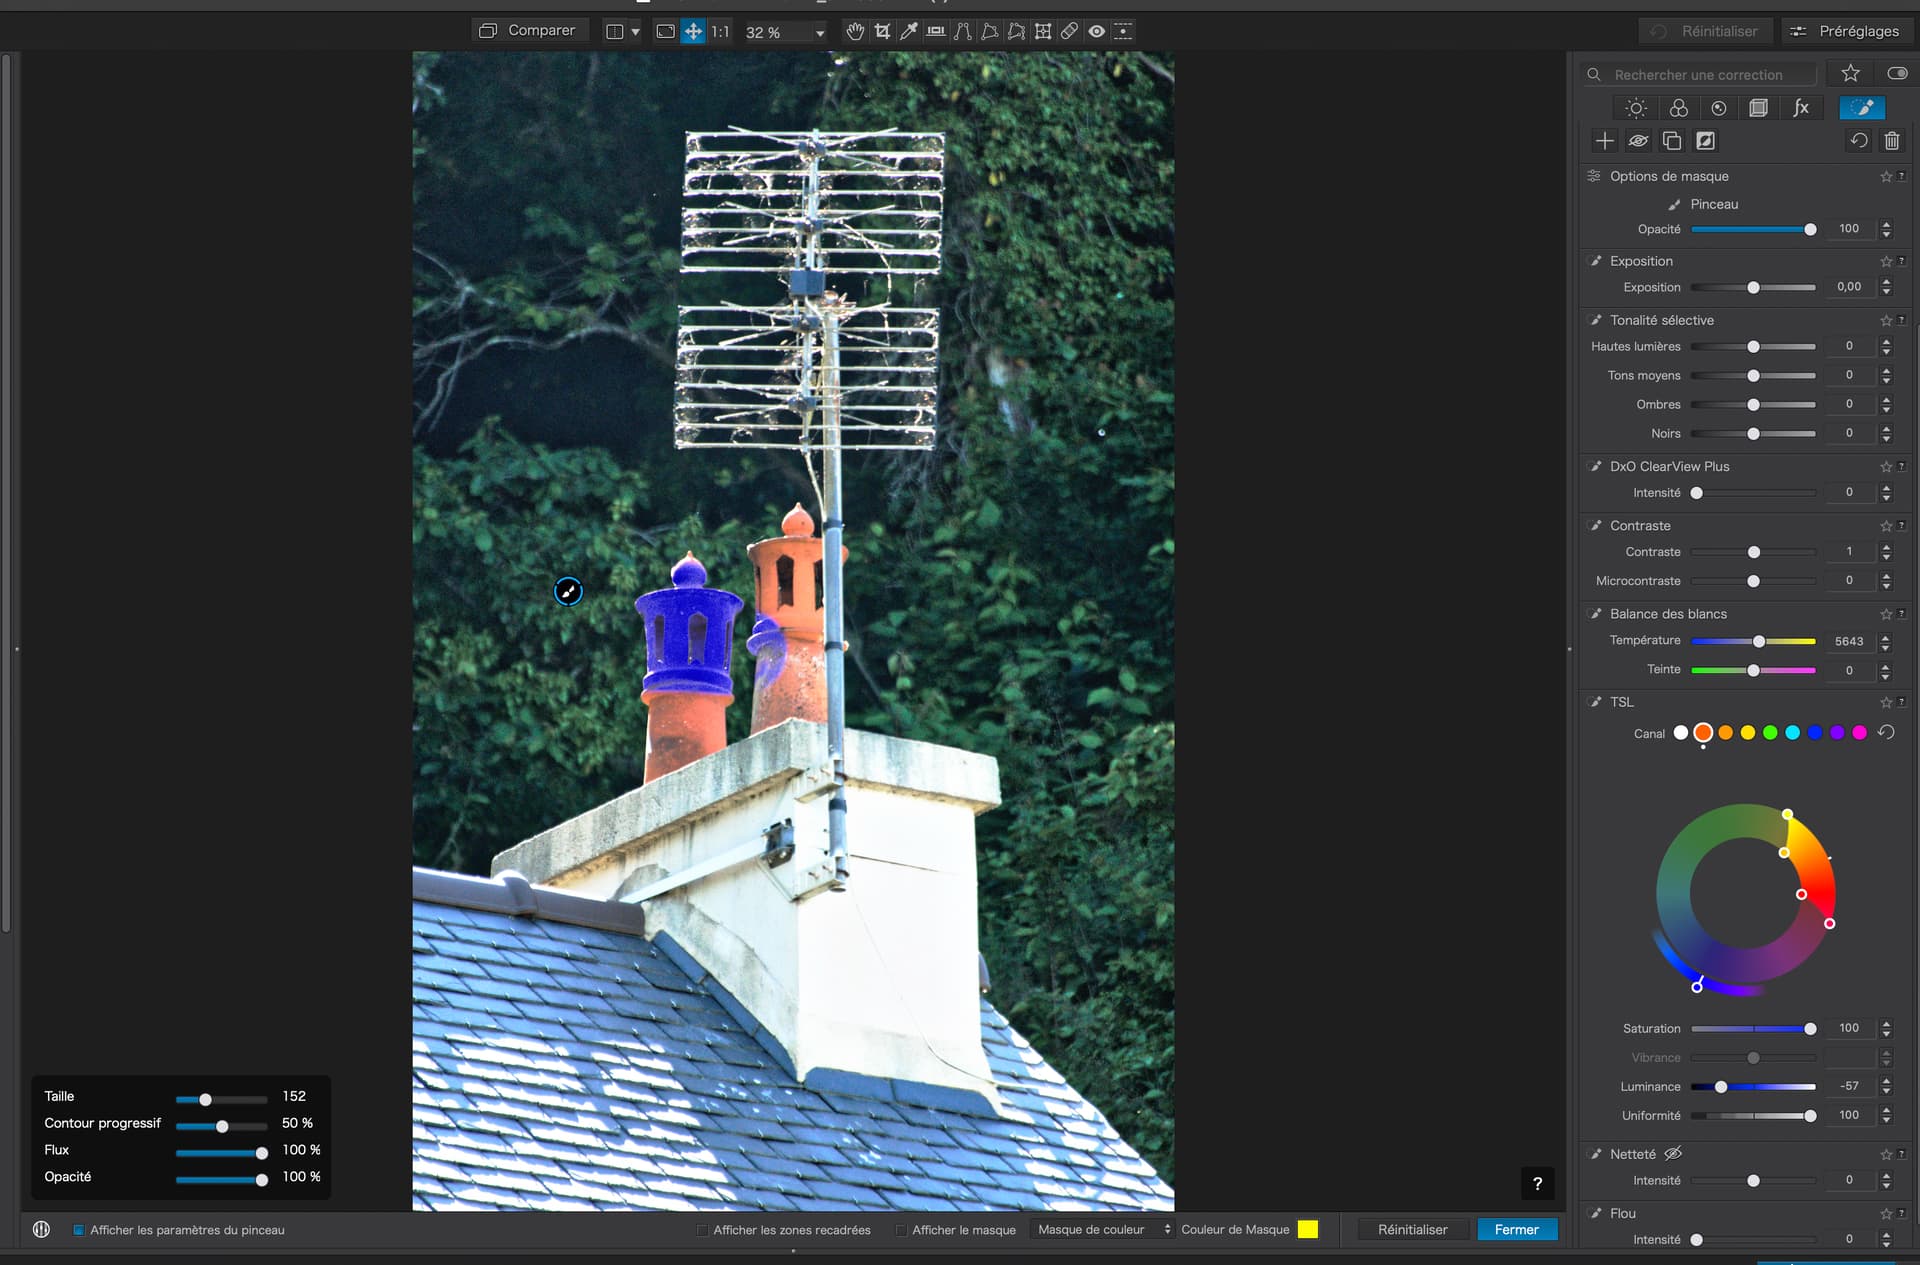
Now, I am getting closer to the colour I wanted for just the chimney and, with a bit more fiddling, I should be able to get a better result.
All without the need for a pipette because that would be limited to only the spot under where you place the pipette, whereas, here, I have been able to use the inner ring as the colour selector in order to increase the range affected.
In summary, for LAs, the coloured dots and inner ring become the colour picker
Do you get it now? Not forgetting that I only now realise all this stuff and this the first time I have actually used the Colour Wheel effectively and accurately in an LA.
If you know better, or differently, please say so.
Addenda
Perhaps changing the Colour Wheel “picker” for something like the Luminosity Mask mechanism could avoid confusion between global and LA colour masking…

???
2 Likes
I use the colour picker in HSL to select and adjust skin tones. If you use the command key (mac) at the same time as the picker you can isolate the tones you are after and can see which tones will be affected. I would just like to be able to do the same thing in LA so that I don’t have to worry about the rest of the image.
1 Like
Well, you, sort of, can.
Once you have masked the part you want to change and selected the nearest colour dot, adjusting the colour wheel inner segment position and size, you will see the modified colour of the selected area change, as you drag the inner and outer rings, Saturation, Luminance and Uniformity sliders.
But I would recommend that you choose a very strong colour change to start with, in order to establish the the mask is correct - then start working with more reasonable colours.
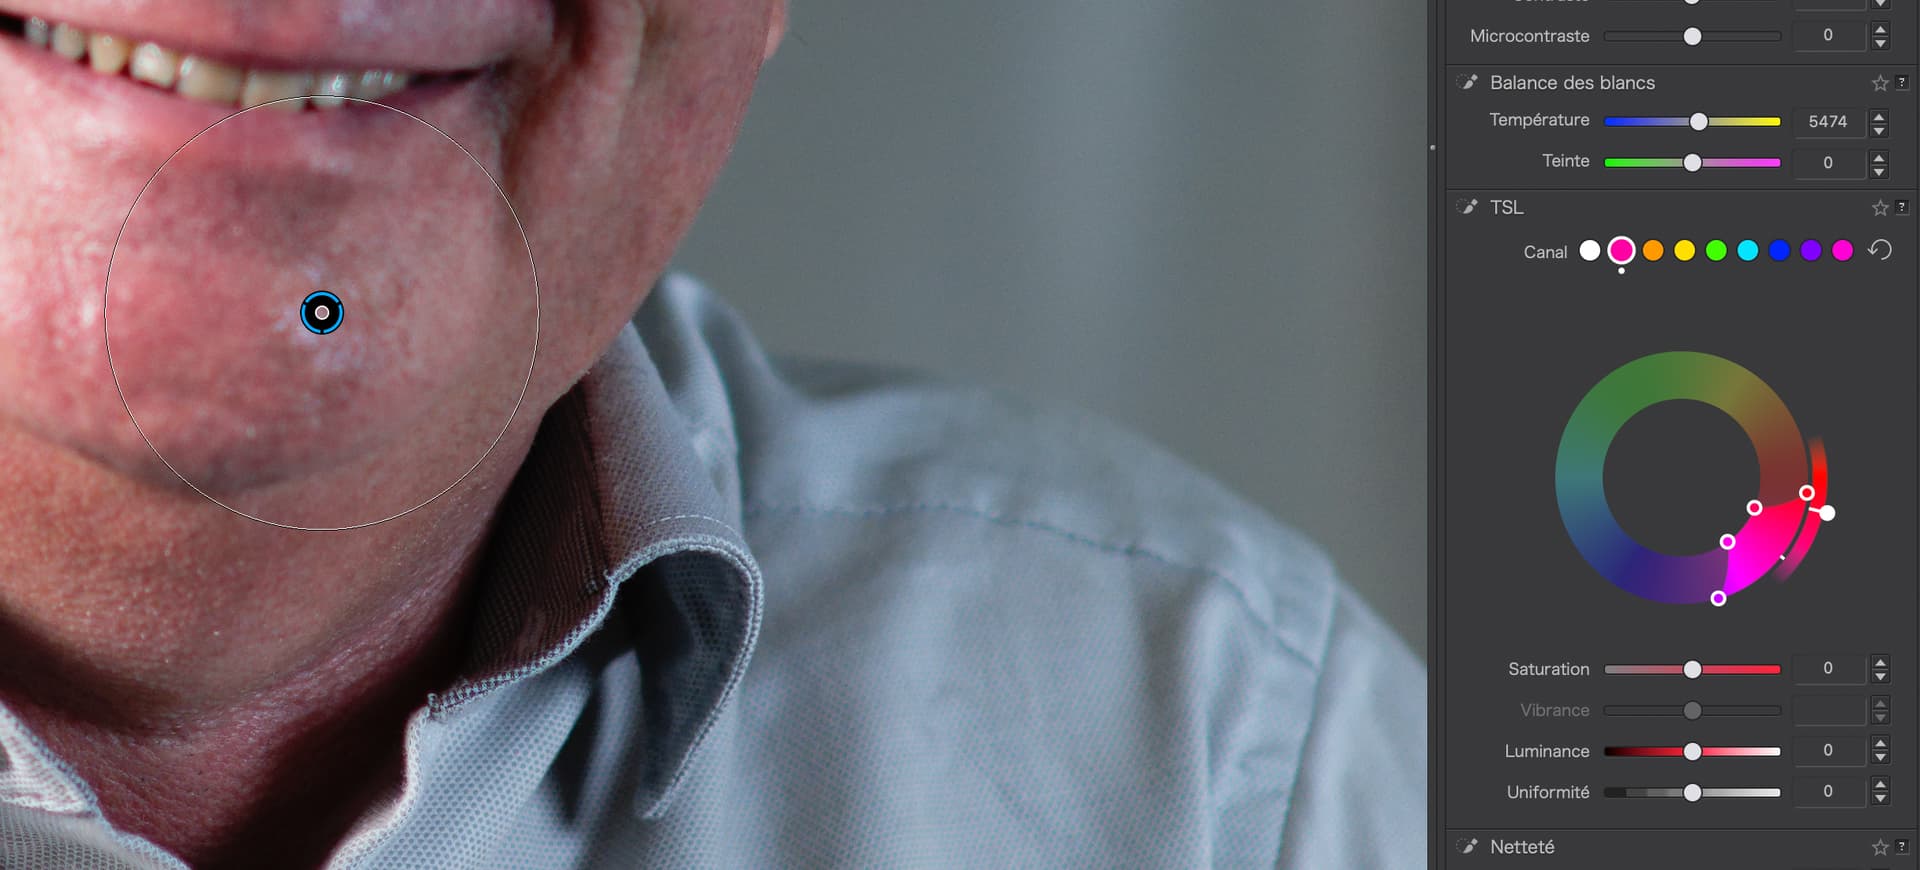
Here’s an example of this man’s chin, which is slightly purple…

So, I played around and got a subtly more yellow/red rendering for just that part…
1 Like