Just checking to see if other people have this same problem, and what the correction/workaround is.
When using the SELECTIVE TONE feature, saturated pixels (255,255,255) don’t reduce in intensity when lowering HIGHLIGHTS. Very bright white sections get reduced to grey, Why can’t these pixels also reduce in intensity? Leaving them saturated while bring down other highlights produces an unusable image.
Start with using the boxes of smartlighting to mark points of interest. bring down bright spots by exposure adaption. if you have filmpack you have the same sliders as in tone selective in contrast. use both equally. do highlight minus 20? do the same in contrast highlight. this will help to get the correct color.
or local upoint tool there you can do local satuarion adjustment. and other things to ease the saturation and brightnes
That’s true, but frequently that’s what I want or is at least an acceptable result. White items (like the breast of a bird, or a buoy in the water) get overexposed in the sun even when I decrease exposure a little. There is a lot of NEAR SATURATED white in the area. When I lower highlights the bright white decreases to less white (grey), the saturated pixels are just stuck.
Its true the “color” of the pixels is lost, but sorry to repeat, the stuck bright saturated pixels are the worst choice.
I see that if you have a section of sky that is saturated maybe you don’t want grey.
So now that we have LOCAL corrections, maybe there can be a special process for SATURATED pixels.
a) reduce intensity like other pixels
b) offer a new color choice from a color wheel.
Even if option B gives a sharply defined region, if its small it may be okay, if its large you can always use another app to smooth the transitions.
Hi, Fjames,
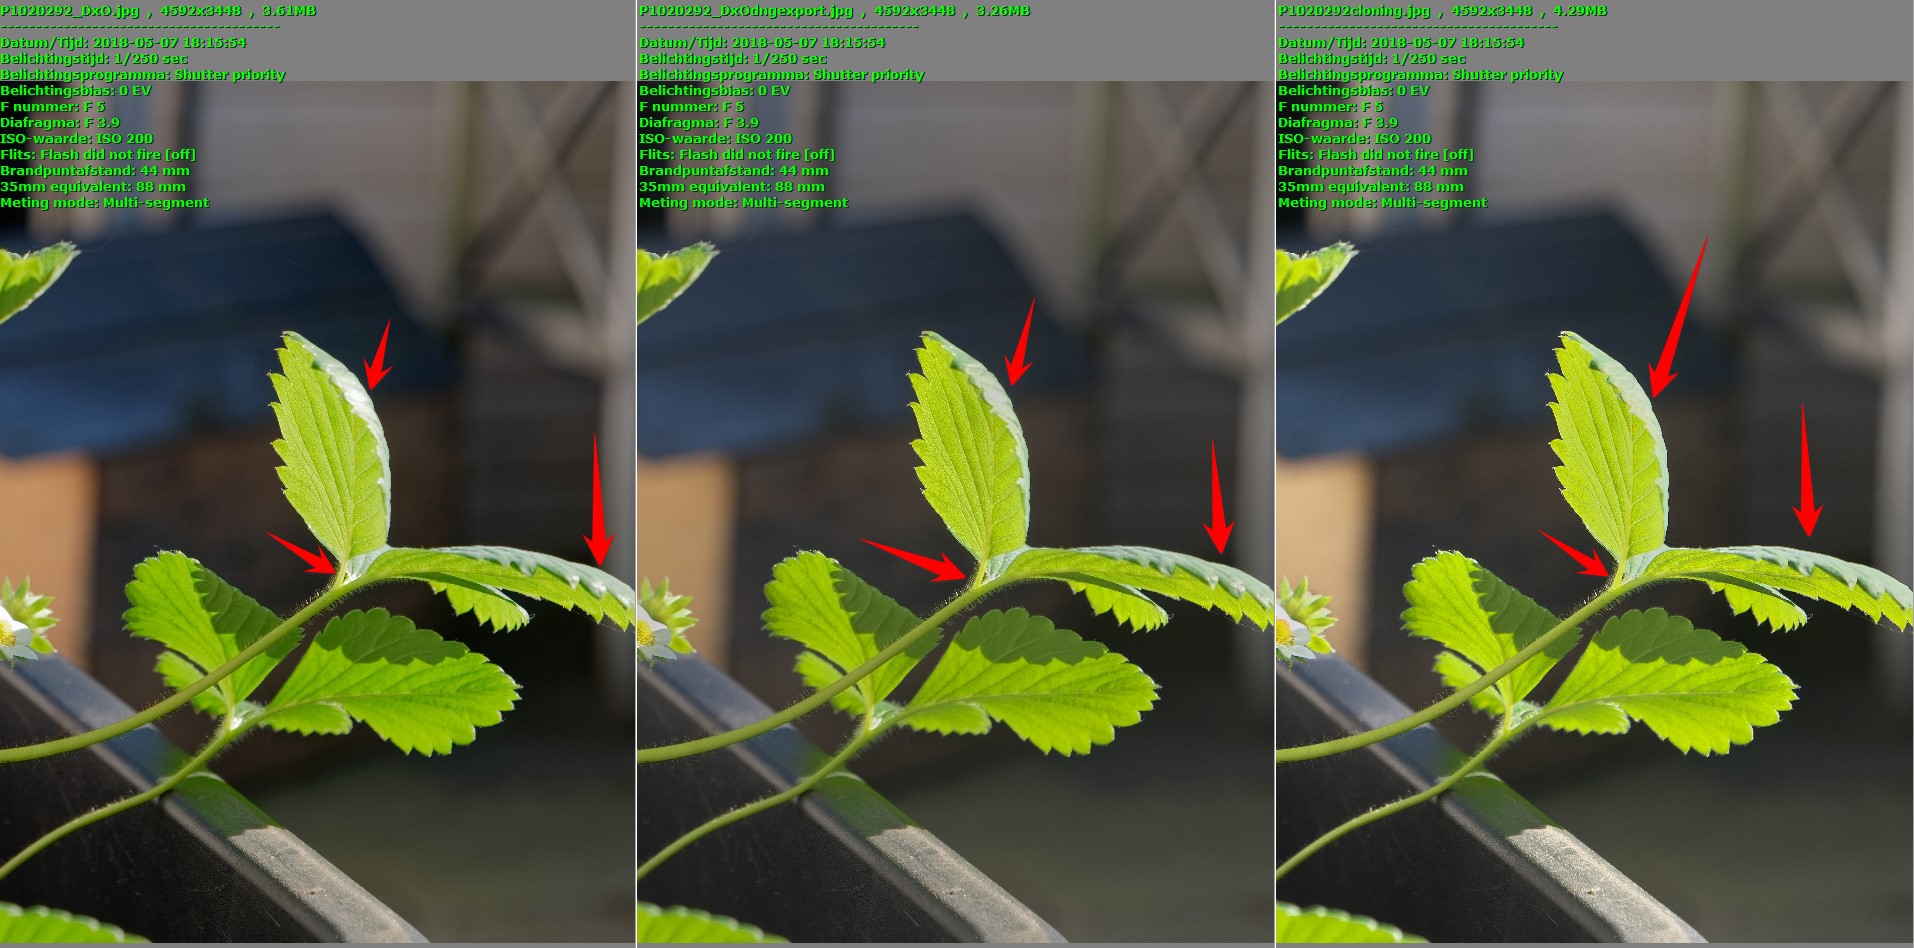
i ran in to the same issue when a leave (for instance) is bleeched by sunlight.
normally i start to bring down highlight watching Histogram (Smartlighting tool and exposure compensation tool (dynamicrange expansion) Together with the highlight/midtone sliders in selective tone and contrast.( luminance control and saturation?)
The real blown over saturated area’s can’t recover the color what was behind.
This would be chroma/luminance control to the max and otherwise cloning the color back on a local detailed way from less damaged area’s.
I must admit i am not completely skilled/ trained in/ experianced with photolabs interface and tools so i could be missing the answere in DxO Photolab.(namecalling something issue so to speak. But i would say in tool “color-tools” is a chroma-luminance slider missing. (It could be hiding/embedded in the highlightsliders and smartlighting software.)
I was trying the same image in a other application i understand how to recover blown highlights and the results are near similair with the above told work steps. The manual control of the specific aspects is more separated if i go to the hightlightcontroller which allows me to fine tune easier. But as i compaire both images DxO’s blown area’s are looking less “greyed”