Need help recovering blue sky - saturation/lum. not working either global or local

That may in part be due to the adjustments he made being applied to a very heavily cropped image resulting in a low resolution jpeg. I was actually surprised that my own reworking of this image earlier in this thread looked as detailed as it did despite the very heavy crop.

Mark

I think you have to use your own interpretations here. Is replacing a sky any different than removing unwanted objects. Look at fashion photographers or portrait photographers. Skin smoothing, hair and blemish removal, teeth and eye whitening. I think all of that photo manipulation would fall under the same category. Making a sky more blue or adding a whole similar sky doesn’t seem that big of a difference. This example was a photo of a bird and the OP was looking for suggestions to enhance the sky. I gave him one option that was fast and free. I use Photoshop and also Capture One but assumed the OP only had Photolab. That’s why I used a free online editor. I don’t use Photolab much as I am used to editing using layers, and the AI masking qualities of Photoshop and Capture One are so amazing fast and precise that for me there is no point in using anything else. I also feel that the noise reduction abilities of Topaz are close enough now to anything DXO has to offer. Once again, this is only my opinion. There are many posters that prefer Photolab and have become proficient with the application.

That was just a “quick and dirty” edit(about 10 mins) done just as much to test @Wolfgang 's idea of using luminosity masking as opposed to control line masking, as it was to help OP. I was not expecting it to stand up under 100-200% magnification( in addition to the apparent magnification due to the crop)

So here is a reasonably detailed attempt at eliminating those artifacts near the edge of the mask(34 mins edit). Please be advised that the tiny white spots e.g. between feathers are not artifacts but rather are areas so small(remember that this is an highly cropped image) that no masking technique manual, luminosity or AI would catch them. This was all done in the Photolab 7 creative suite of PL 7+FP 7+VP 4(not used for this example). No need of C1, anything from Adobe or any other software.

Here is just a color adjustment. Both much different than the original sky but if it’s closer to what was viewed at the time of capture is it okay? It’s not a composition but the sky is being altered from what the camera captured.

I believe that when using any of the RGB colour spaces that if there is say nothing in the blue channel then no amount of colour manipulation will allow more blue content. after all multiplying by zero always results in a zero result. To get blue into a sky where there is no blue content requires the CIELAB color space, something that I believe DxO PhotoLab does not support.

???
First, grey has blue content, unless it’s black.
Secondly, you can make color shifts in any colorspace.

Oversimplifying, making color more saturated means shifting it further from greys towards gamut boundary. You can’t saturate grey by the definition of saturation. Hence HSL will not have any effect on greys.

The vibrancy is a different story, because there’s no commonly agreed formula for it. Usually it means ± saturating more the less saturated colors, without gamut clipping and preserving skin tones. Implementations of this slider vary greatly.

In PL, to change grey into something non-grey in a more or less controlled way you may use the Temperature/Tint sliders. PL does not have other “painting” capabilities because it is not a graphics editor.

I recognize that one can’t adjust the combined RGB channels and produce a color out of the combined gray using the HSL tool. And I also recognize that adjusting the Temperature/Tint sliders will adjust the color of the affected area(s).

But I still haven’t seen an explanation of why using the HSL tool on one or more individual color channels does not result in what starts out as a gray area showing color after the individual channel(s) have been adjusted.

In my example, the histogram shows that the intensities of each of the R, G, and B channels was about 200. So their composite produced a gray region. Why, though, doesn’t selecting the individual R & G channels and lowering their saturations and/or luminances, and selecting the B channel and raising its saturation and/or luminance not produce a blue color in the sky? Or any material color change at all?

HSL in color channels is about saturation and shifting the hue of selected color ranges. Grey cannot be saturated and it has no hue. Take a look at HSL and HSV - Wikipedia as a starter. You probably think of the ‘channels’ as color components, which they are not. To change color components (RGB) making grey look bluish you have to use BW sliders or RGB Tone Curves. The latter is not present in Local Adjustments, so you are left with WB only.

1 Like

Thank you.

I understand this is just an example but normally these oversaturated skies that not just digital cameras tend to give us but also for example positive color slide film like Agfas CT 18, is what I use to try to desaturate.

… and to Joanna and @mikemyers:
From time to time there are eruptions of long discussions about cheating in photo competitions and recent even using other photographers’ images in photo books published (by mistake or not). A photo book that here happened to win a competition. Sometimes it is done (predominantly by very competitive men who tries to cut corners to fame, money or whatever. There was an especially nasty and very toxic case here some years ago where a nature photographer used “cutting and pasting” of rare and shyer animals like lynx and raccoon dogs, the later even classified as an invasive species in Sweden. That guy was almost torn apart.

I have always felt the “rules” we have in the forums I have been a part of concerning manipulation of pictures, have been pretty vague and unprecise or too soft in the edges and of that reason I consider all of my pictures handles in my converters being “manipulated” or “altered” if you think that m-word is too much - even if they are not.

Of that reason I have added a part to the introduction of my blog (excuse the capitals - they are the format of the blog) that takes care of that.

By Google Translate:

“SINCE I THINK THAT ALL POST-PROCESSING IN RAW CONVERTER IN PRINCIPLE IMPLIED THE POSSIBILITY OF UNLIMITED CHANGE AND THAT IT CANNOT BE VERIFIED WITHOUT A RAW IMAGE, THEN YOU CAN CONSIDER ALL OF MY PICTURES AS MANIPULATED. MY BROWN-TONED REPROPHOTOGRAPHED SLIDES ARE ABSOLUTELY BY THE DEFINITION OF THE PHOTO PAGE AND I LOVE TO CLONE OUT THINGS IN MY PICTURES THAT I DON’T WANT THERE.”

I also have to add that cloning today with the state of the art “Retouch”-tool in Photolab has taken that to a very much higher level than we have been used to before since it now is possible to get rid of disturbing shadows etc. even when they are displayed over tricky patterns like some floors or stoning in old streets.

For me, the difference between unmanipulated and manipulated images in RAW converters is more about degree than something absolute. So, these rules don’t work well all that well for me personally and of that reason I don’t really care about them to any degree other than laying me totally flat and admits that all my images can be seen as manipulated. In that way there will be no uncertainties.

The next step is ‘picture generation’. See e.g. OpenAI’s Sora is racing into a brave new world of misinformation: Digital Photography Review (dpreview.com) and innocent comment by the editor:
It is undoubtedly impressive, but what exact problem does it solve?

On the other hand, what we perceive is often very different from what camera records.
Our brain processes the data to change local contrasts, WB, dehaze, ignore the background and few other things. That’s why we need things like PhotoLab.

I apologize for the way I described things. I think it’s perfectly fine for me (or anyone) to do whatever they enjoy doing in photography, there are costs to do so. My rules for most of my life have been based on rules that came from photojournalists. @Joanna pointed out how silly that usually is, as I’m not working as a photojournalist, and there are lots of types of photography, including photojournalism.

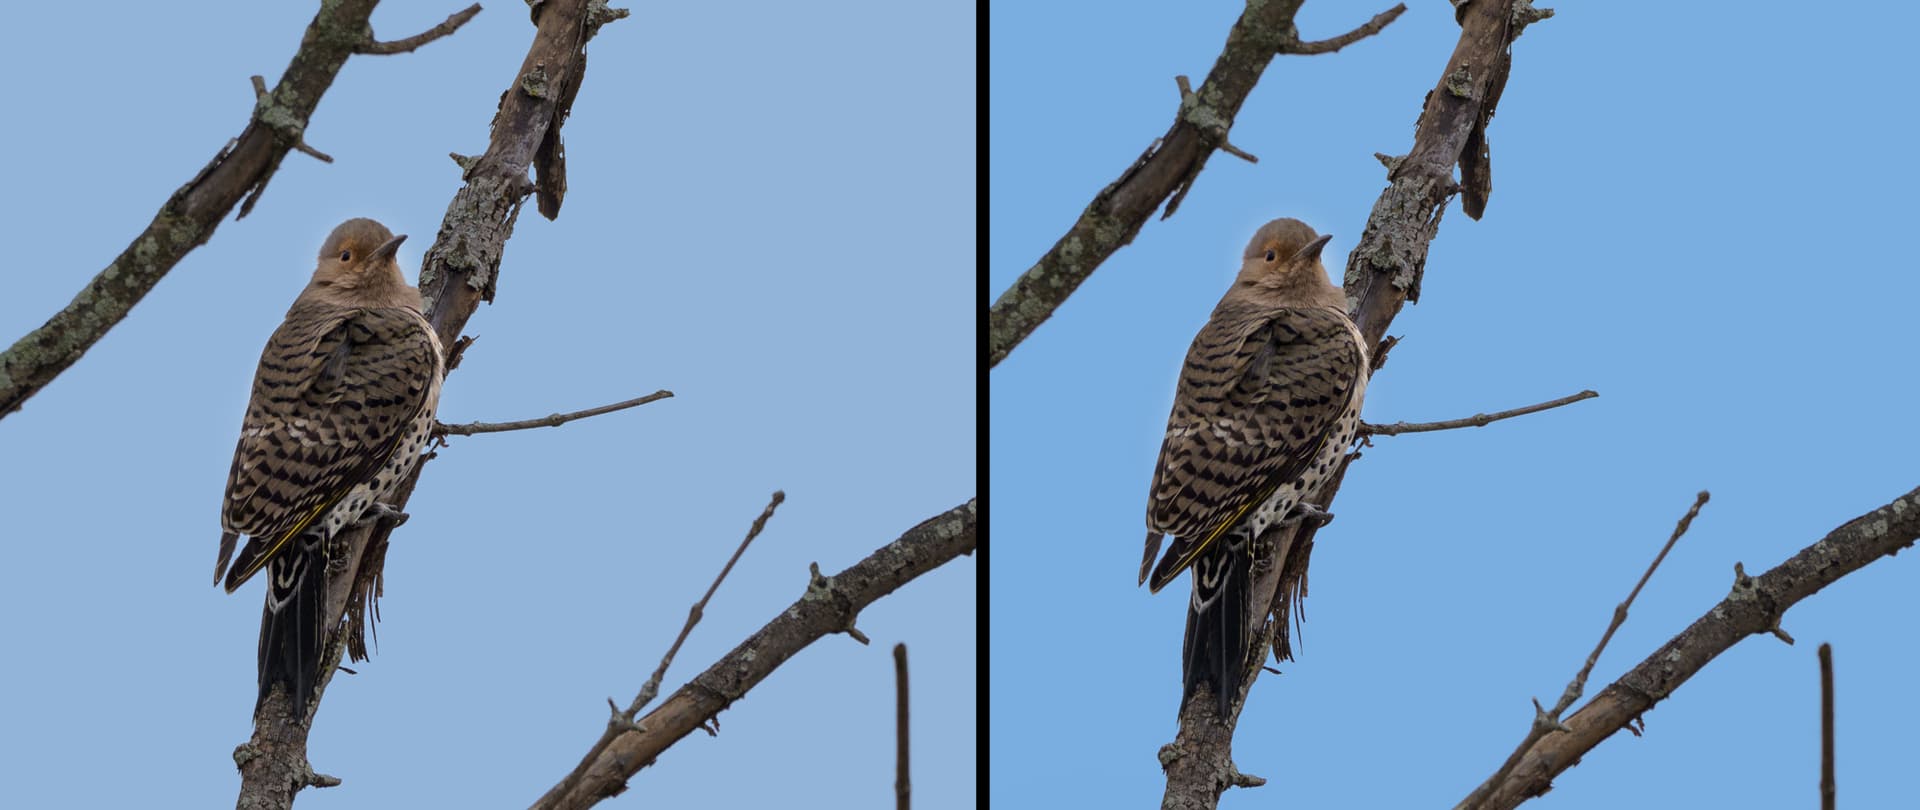
First time I saw a photo with a sky that was pasted into an image, I thought wow!!! The more I thought about it, the more I detested the idea of doing so. Nowadays, I figure if I don’t get @Wolfgang or @Joanna upset at an image I post, I feel more comfortable about having done so.

It all comes down to who I am taking the photographs for - and if it’s just me and most of you here in the forum, I just do the best I can - even if it’s not yet good enough.

If the photo is to be sent to a competition, with a rule of “no manipulation”, and if I want to submit a photo, I would try to follow their rules, to avoid being praised for the photo, only to see it disqualified for technical reasons.

I take back what I posted here in this topic, as my own “rules” (including no pasted in skies) are not rules for everyone else, just for me.

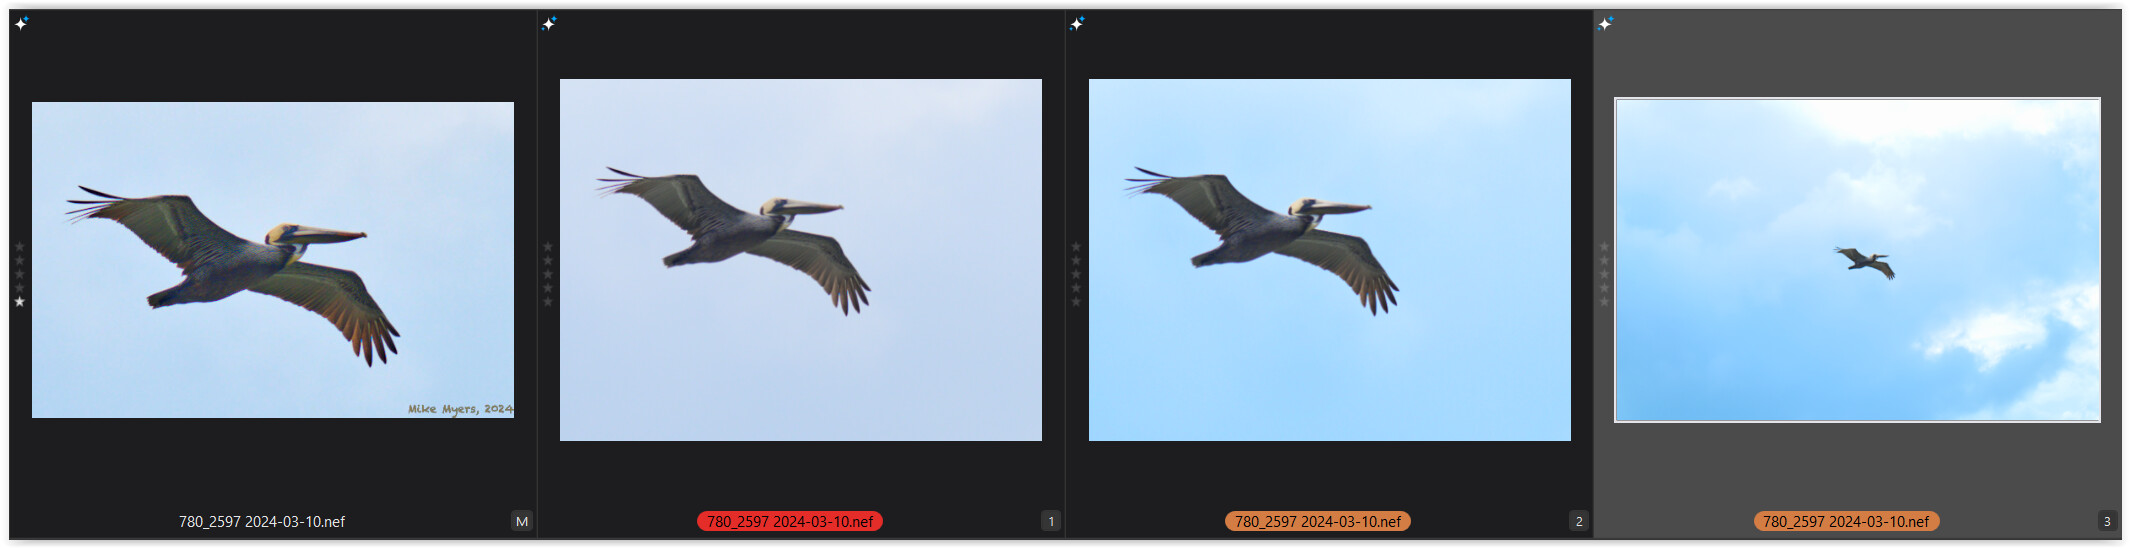
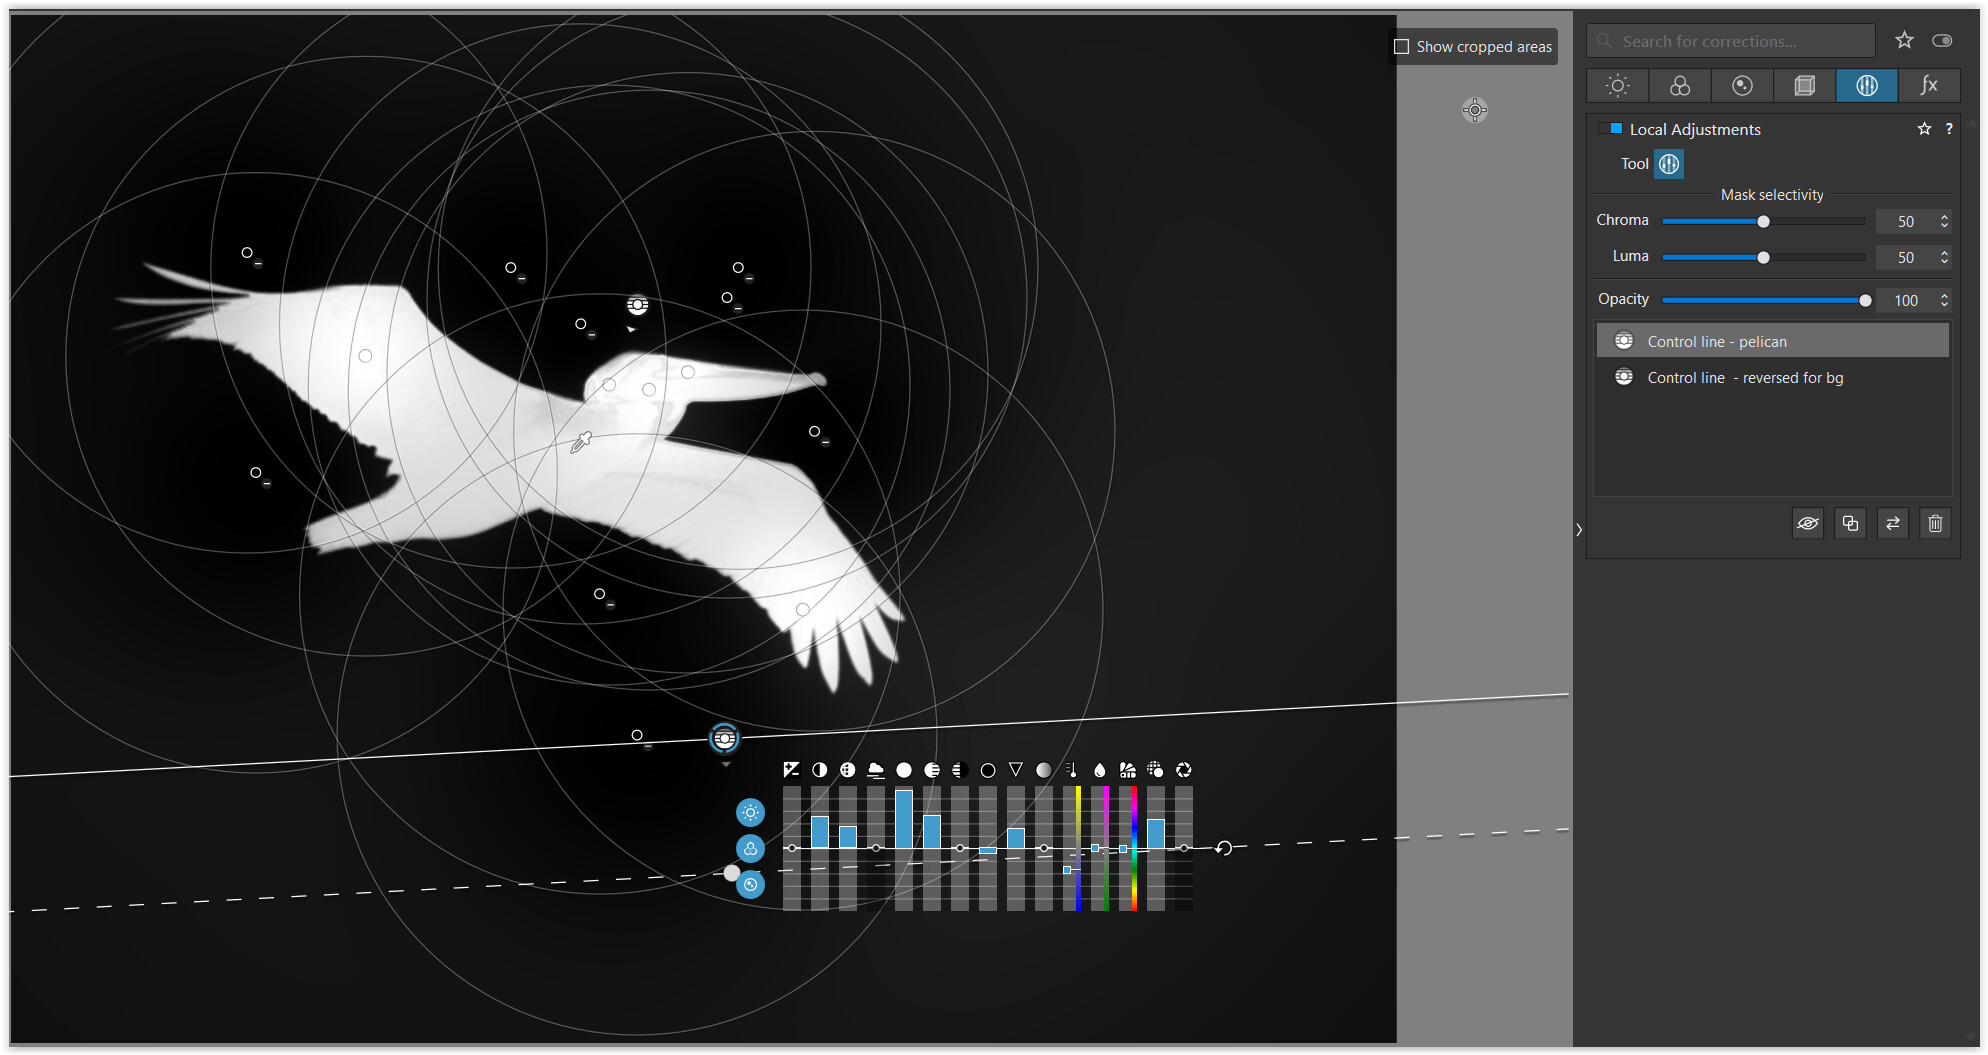
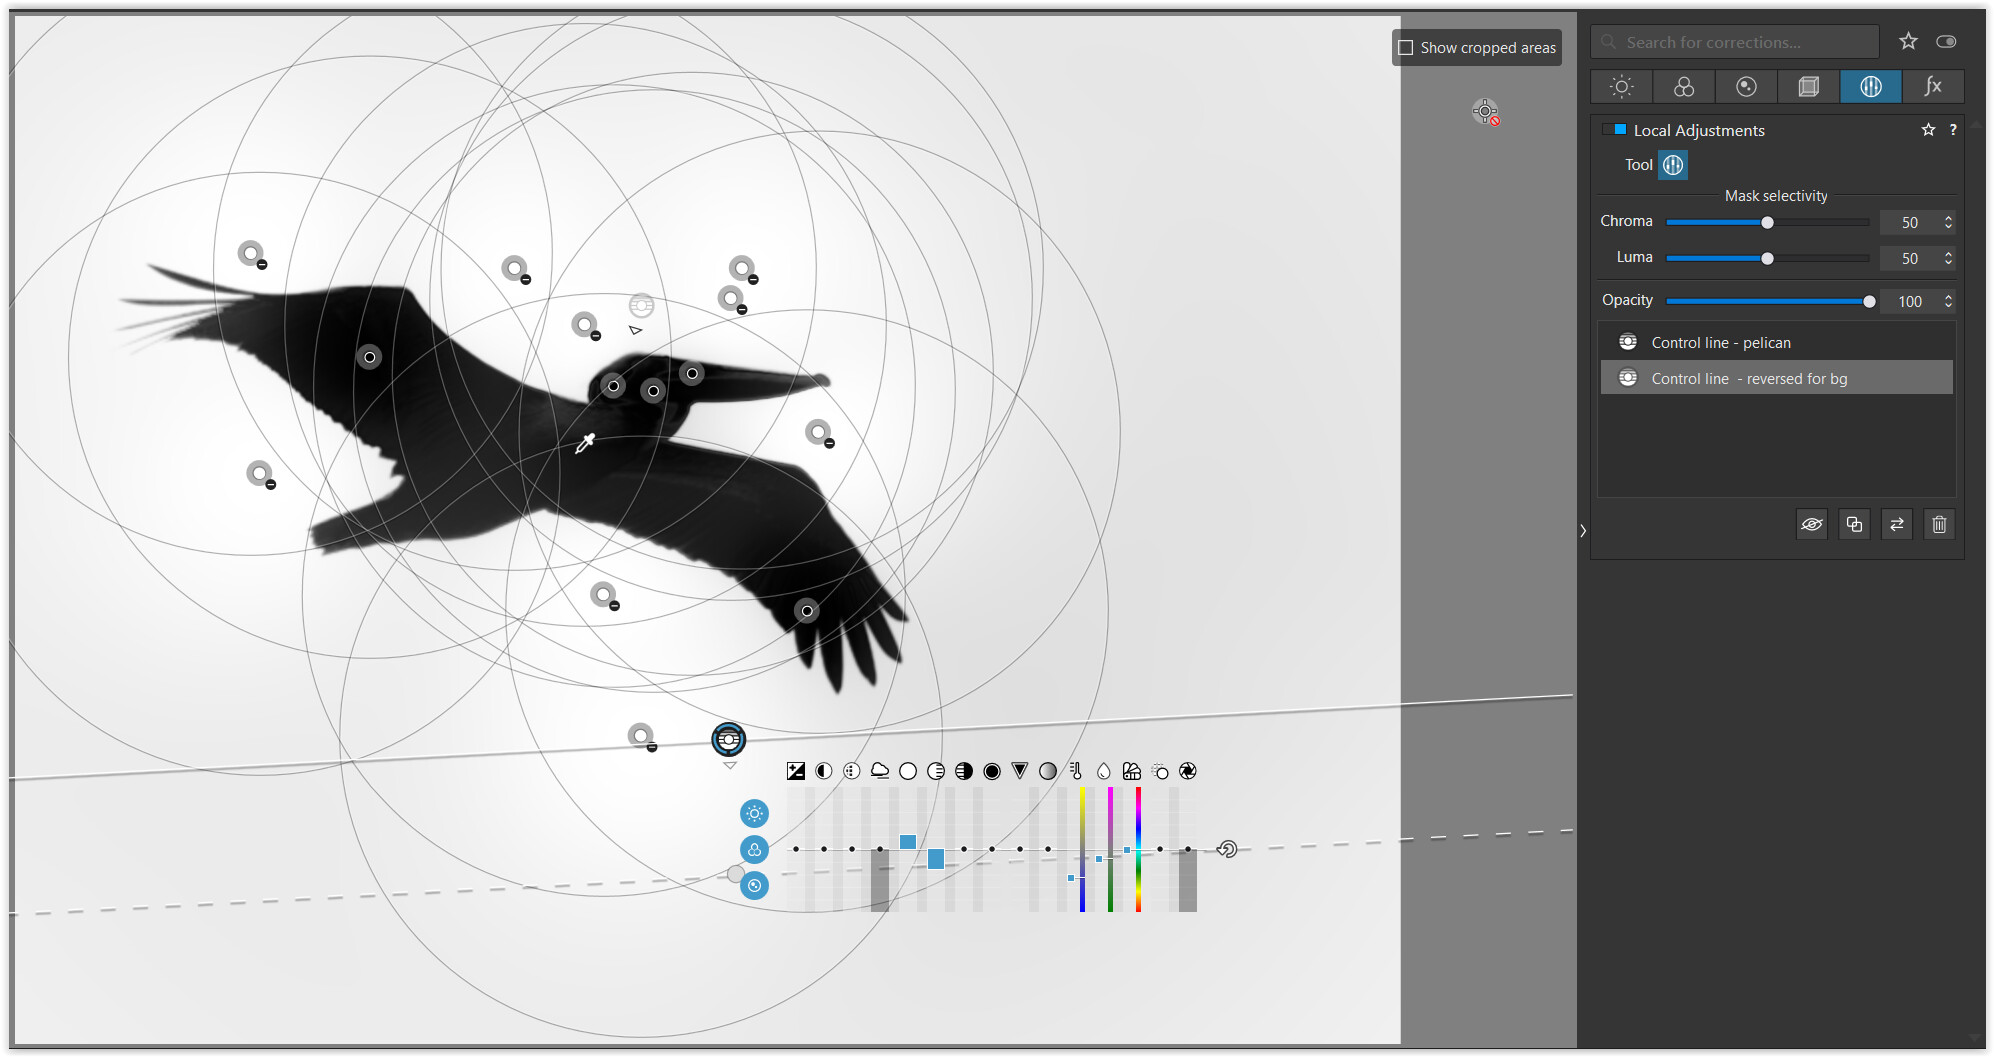
I’m not sure there even are any rules in the forum for what is allowed, other than seeing what other members post, and using that as a guide. If I’m posting here in the forum, and there is a piece of trash in my image, I enjoy using Photolab to “erase” it. If I don’t, I’ll be getting lots of responses to do so. If the photo is for a competition, I will be sure to carefully read all the rules.

Bottom line, I probably should not have reacted so strongly to the idea of painting in a new sky, but who knows, others may love the revised photo with a beautiful sky, so who am I to take away their enjoyment?.

There are times when I wish there was a simple way to do just that in PhotoLab. Then it would be trivial to make the sky any desired shade of blue, or whatever. Maybe in PL8.

If you feel like to (slightly) colorize / tone the sky, try it yourself … in PL6
– no need to wait for ‘doomsday’.

Time to stop debating and start practicing !


*)
by mistake I had included a former set of screenshots + dop-file → corrected now !!

Brilliant, you really are a genius at PhotoLab. Now I need to make a new VC, and using what you have done as a guide, try to replicate the end result.

One question - I cropped to make the bird as large as possible, without going too far. My image just shows the bird. By reducing the size, and placing the bird where you did, it now is a picture of the event, the bird - flying, with the extra space at the right showing where the bird is going, and by having the bird so high, it’s more like “looking up” at the bird. My result is just the bird - while your version shows more of what is going on. I need to remember this for the future. (A bonus is that the smaller the bird is on the screen, the less it will suffer from not having enough pixels from the camera/lens.

When I look at your screen shots, I wonder if there are enough “cloud” pixels to have shown the few clouds I did capture. But doing it your way, the clouds would also turn blue? You did get the end result I preferred, a blue sky, which is more important.

Time to stop typing, and start. doing, which will probably take me several hours…

First question, instead of all the work to fix the sky, maybe I can under-expose the image in PhotoLab by 1.25 stops , recovering the real blue sky with clouds:

Screenshot 2024-03-20 at 10.10.12

This leaves me needing to lighten the now under-exposed Pelican. …which was a disaster. Using control points didn’t look natural, and neither did using “auto-mask”. That tool seemed confused by the edge between “bird” and “sky”, which I tried to correct.

Need to save my image, stop for a cup of coffee, and start over again using your ideas.

On the positive side, I got to re-learn how to use auto-mask, and found that it is known to have problems separating things like fur (and maybe feathers) from the rest of the image.

please check again – and btw, the VC 1 is identical with this

Am downloading your new file now, need to add the “vertical bar” to the file name, and will then open your images.

On the positive side, by simply decreasing the exposure for the sky, I got exactly what I wanted - very stupid on my part, I should have just done that somehow before. What I did, under-exposing the sky also darkened the Pelican, which was a nightmare for me to fix.

There is probably a simply way to simply select my sky, and under-expose it, without messing with the rest of the image.

One of my brothers has been dealing with “MCI” (mild cognitive impairment) for a few years. Now it has become “dementia”. Maybe I have the same issues, which my doctors tell me I don’t, but I forget so, so many things that I need to re-learn. You are the person who taught me how to use “Auto Mask” two or three years ago, but between then and today, I forgot most of what I knew about it - but did remember how to get working for me after an hour or so.

Bottom line, in my flying bird photography I get to choose between too bright skies and too dark birds - off course, as I’m shooting up at the sky, and photographing the bird from below, which is likely in shadow (as in the bottoms of the wings).

There are always too many details, for me to not forget at least one of them…

You (and others) seem to never forget anything. This is good.

Darkening the sky + using Automask was not the best idea (plus the watermark disturbs the composition).

May I suggest to first follow the example given and play around with these settings… and wait for other steps until you understand what and why I used this method. Then and only then try something else. – I am far from saying “I know better”. It’s up to you to get a feel (aka knowledge) of what you can do with these tools. It is you who wants control.

Well, I took your DOP file and added another virtual copy…

780_2597 | 2024-03-10.nef.dop (122,3 Ko)

I managed with only one Control Line…

And here is a jpeg export…