I know more about the many issues PhotoLab has than most posters here. I have never been afraid of making negative comments about PhotoLab or DxO’s development approach. Many of the issues expressed on this site are not new and I don’t always feel the need to rehash my earlier thoughts on those topics every time a new group of users on this forum discovers them.
I was not offended at all by your comments. I am not that thin skinned. I simply disagreed with your assessment that not having a sky replacement tool was a shortcoming. If you had mentioned other PhotoLab limitations I would most likely have agreed with you.
With regard to my comments concerning the legitimacy of using a sky replacement, that had nothing to do with you. I know many people who use them on a regular basis. Your mention of such a tool just reminded me of some of the reasons I avoid using one.
Mark
1 Like
Stenis
(Sten-Åke Sändh (Sony, Win 11, PL 6, CO 16, PM Plus 6, XnView))
22
I think it´s a lot in that comment because all you have is the Color Wheel really and unlike for example CO there is no Magic Brush that can helt to create a layer of a complicated sky. … and the Luma Mask is not a really good supplement for proper modern masking tools. We have had examples here where not even the new AI-masking in CO has been sufficient but luckily, we have the older Magic Brush to fix that. To do things like that in Photolab is almost impossible.
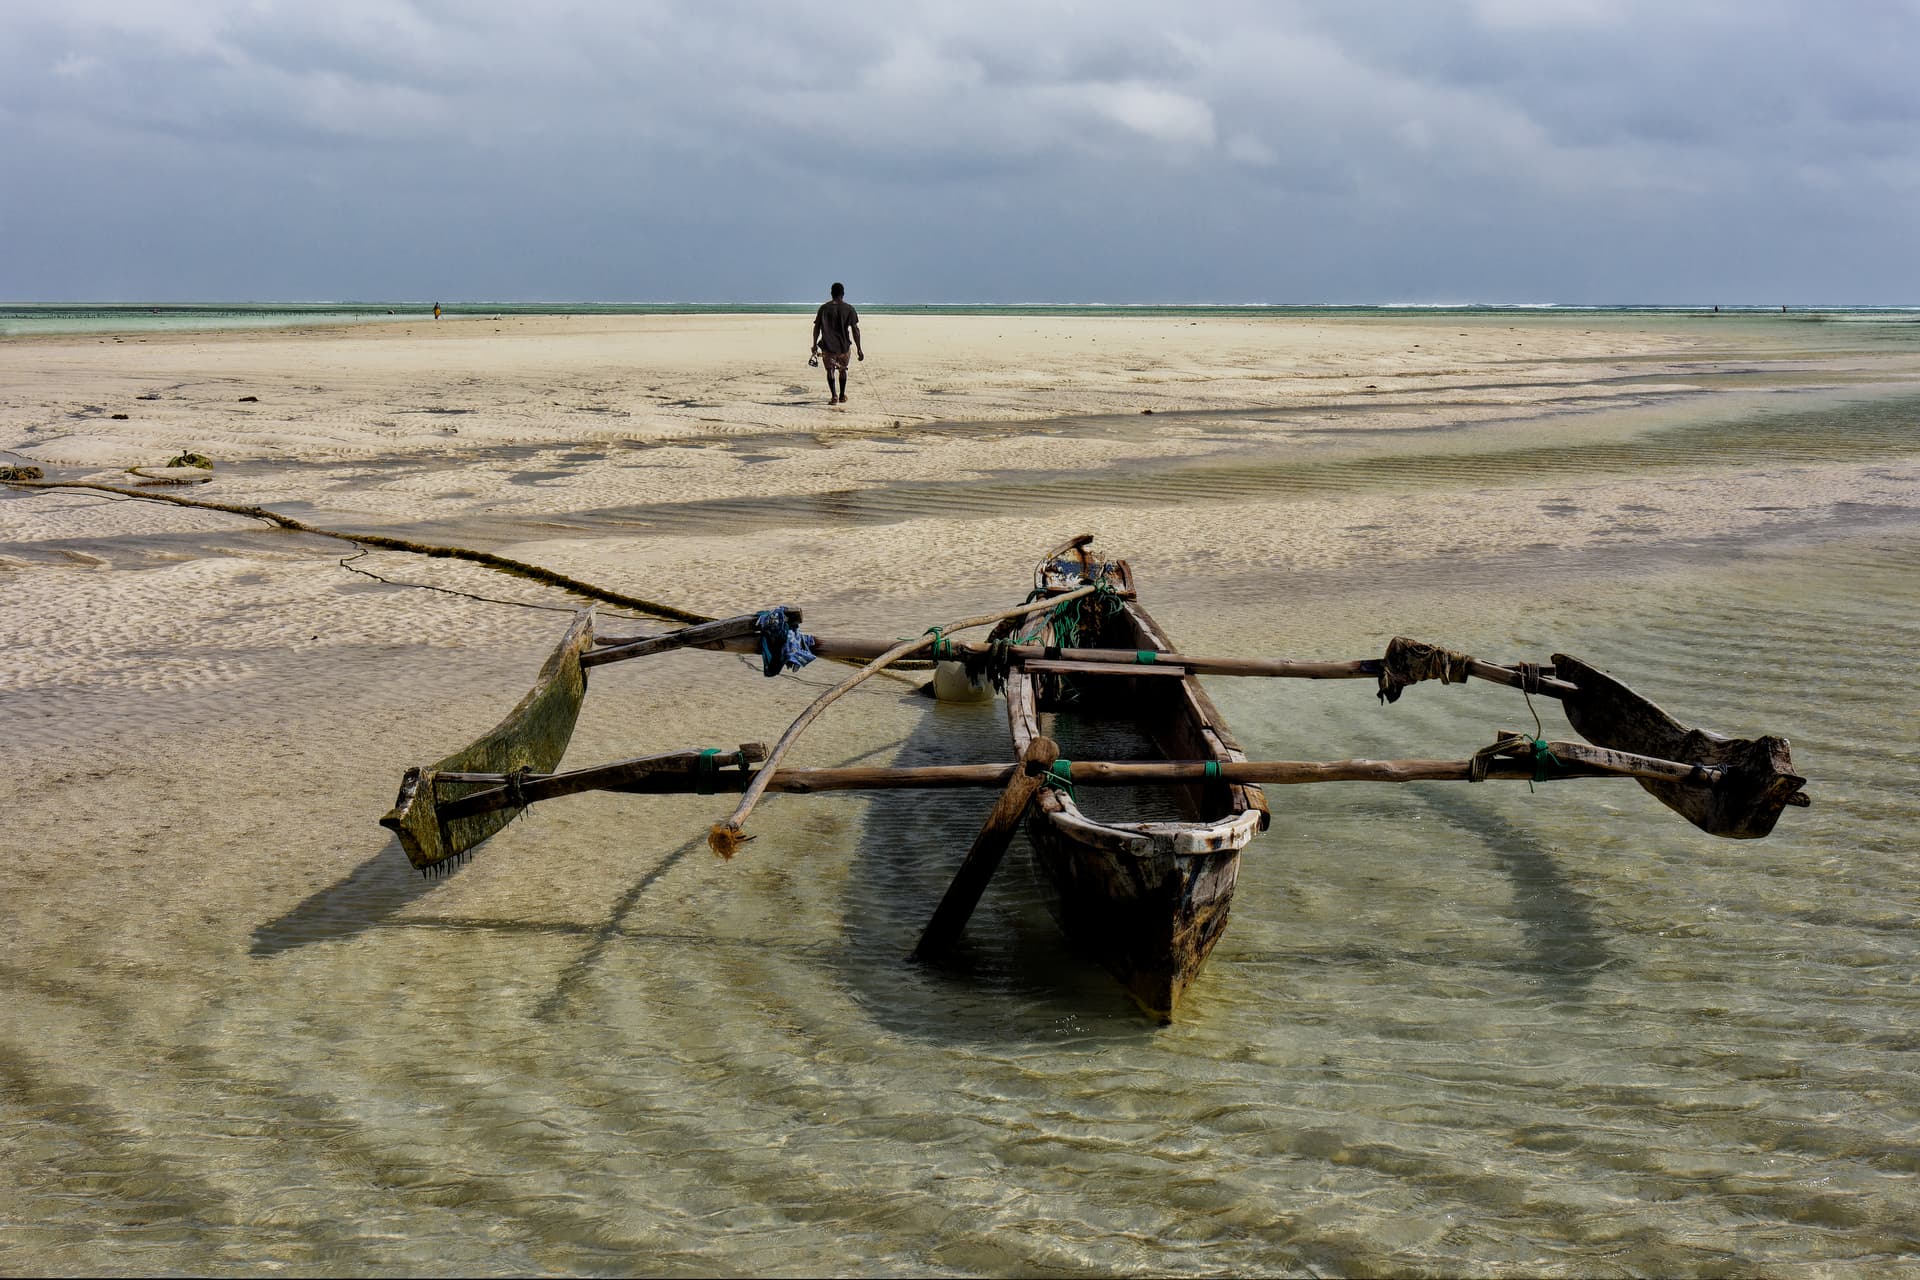
The example of making a sky bluer is mostly possible even if I have struggled with that too in a few cases I can recall. Here a picture from Zanzibar of squid fisherman heading for the reef. This time of the year on Zanzibar skies can be very dark and difficult and sometimes not just grey but also bluish or a little purple.
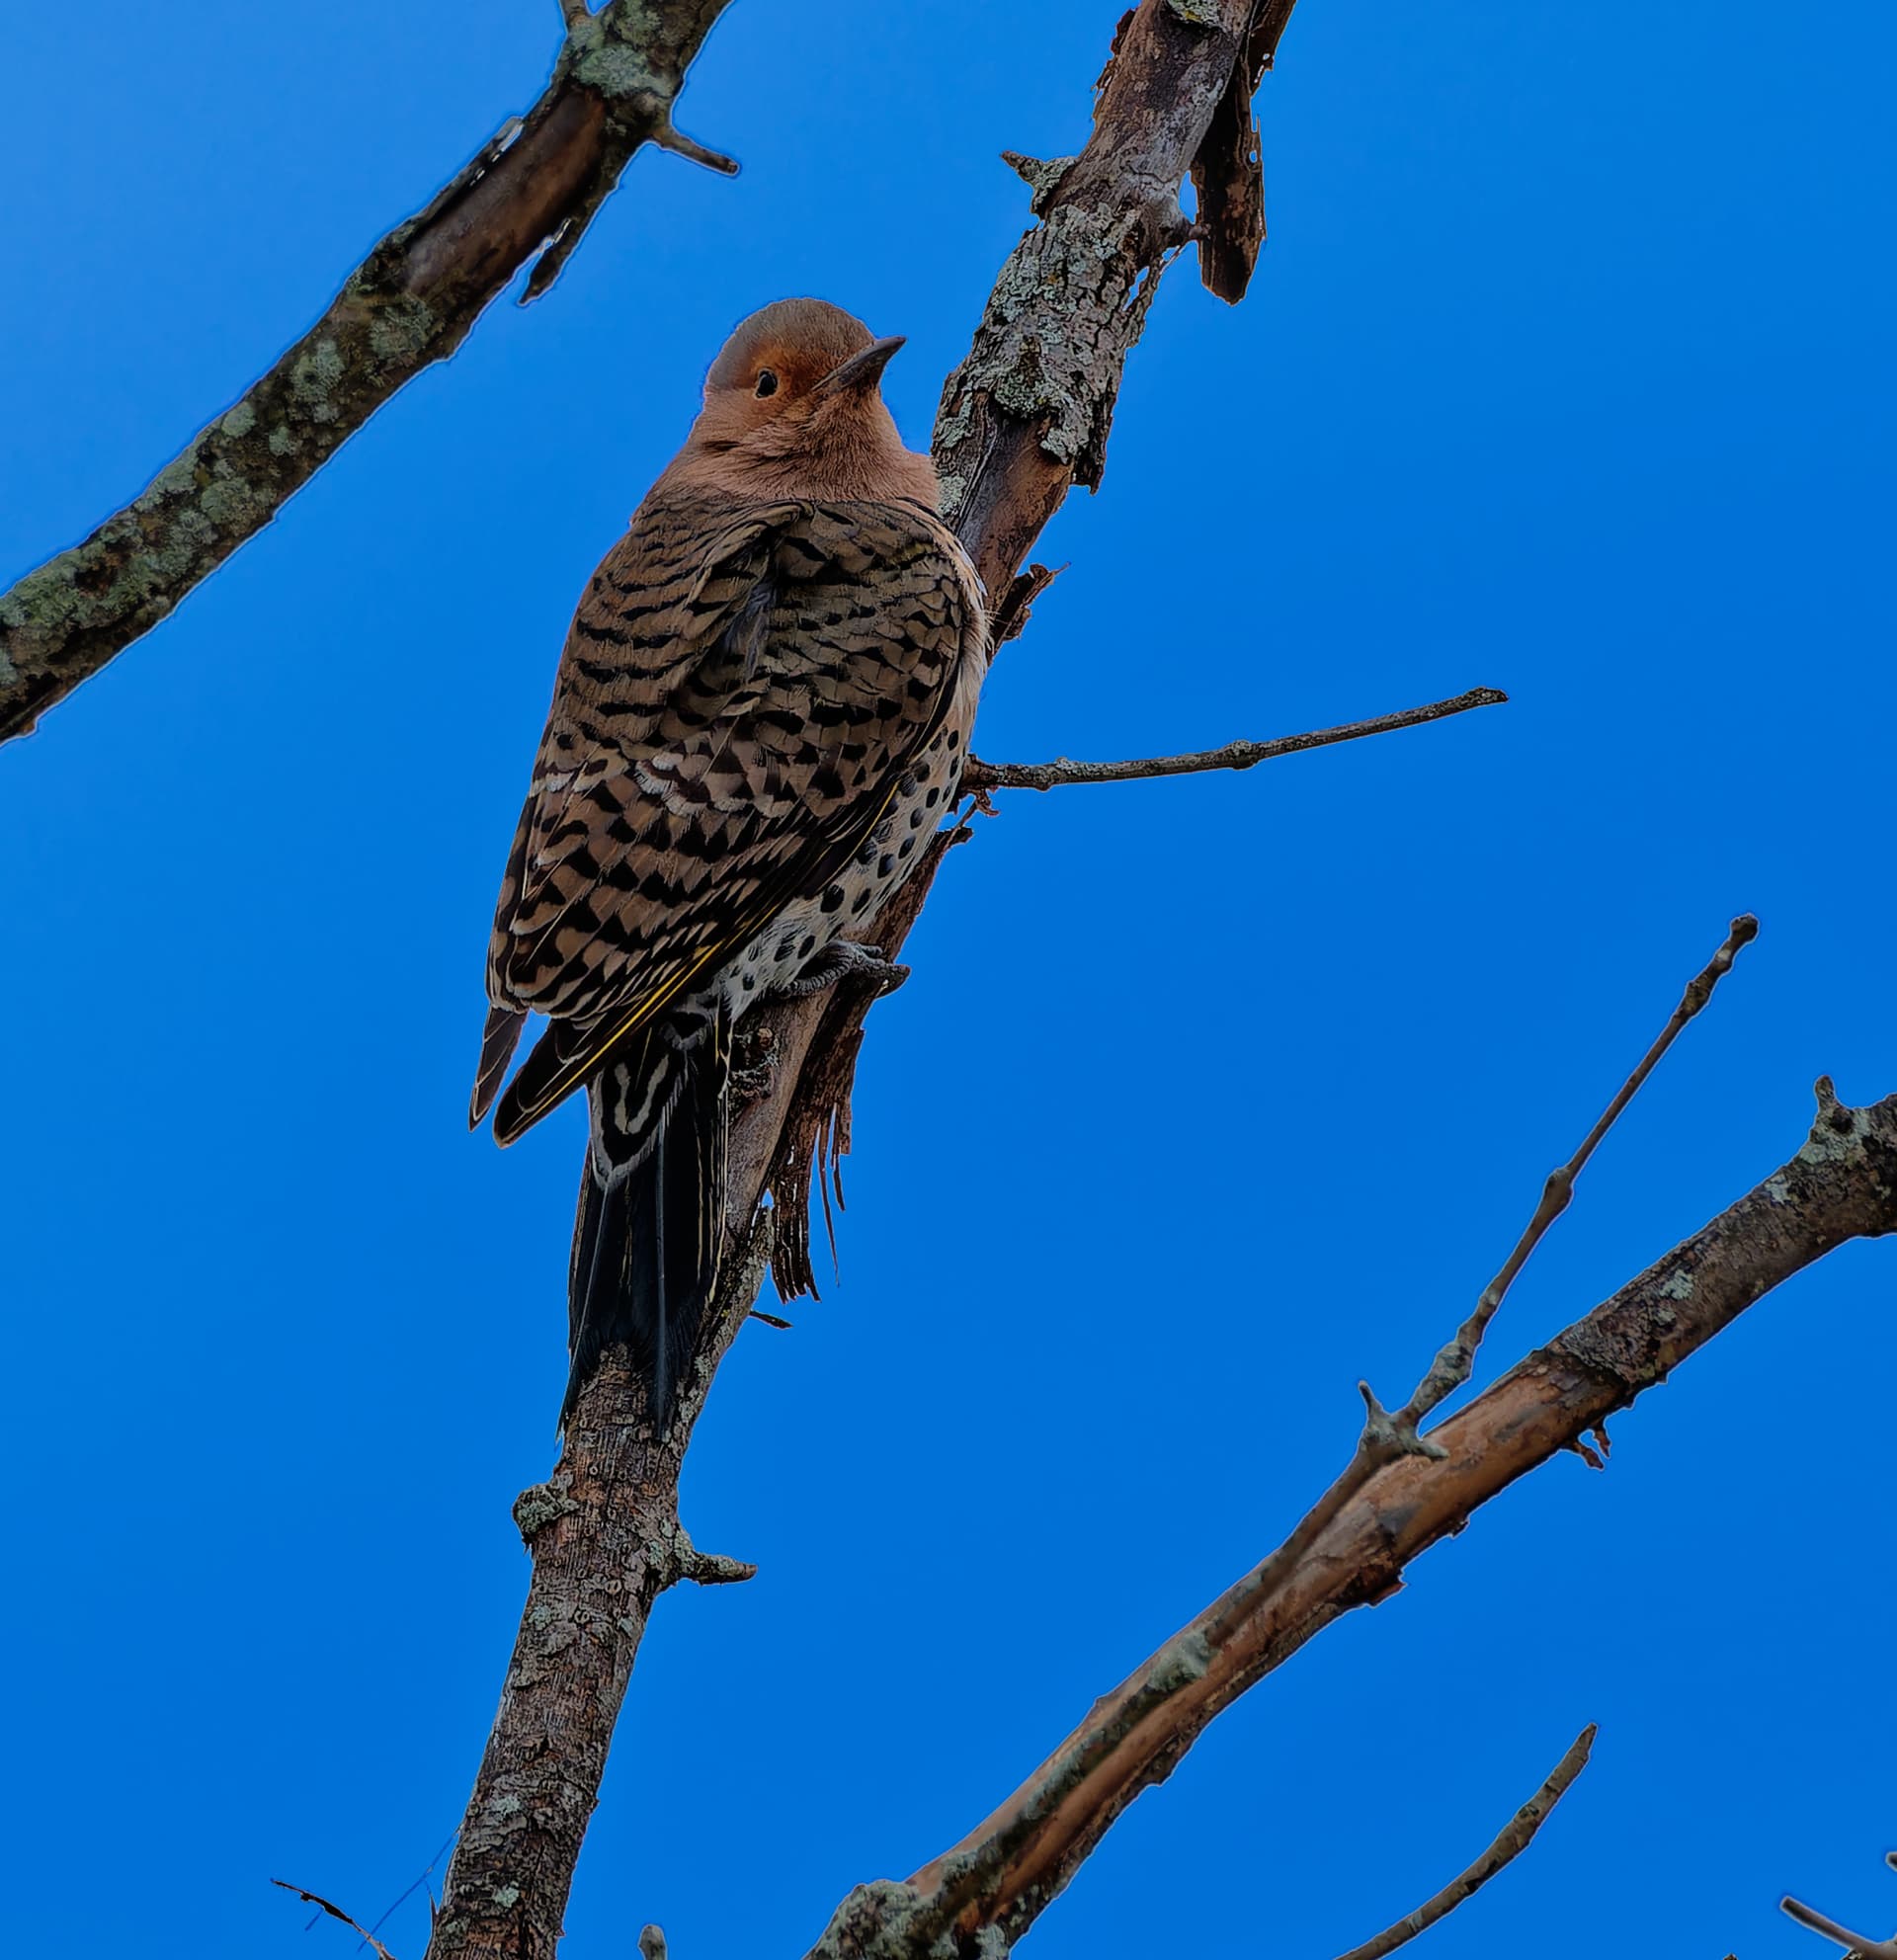
… and a case like the one with the bird it is not just about sky “replacement”. For me it can be about both being able to isolate the foreground - a tree - branches from the sky - and the bird itself in an effective manner and Photolab is not a very good tool for that and I think you know that don´t you? I have already covered that with examples from CO.
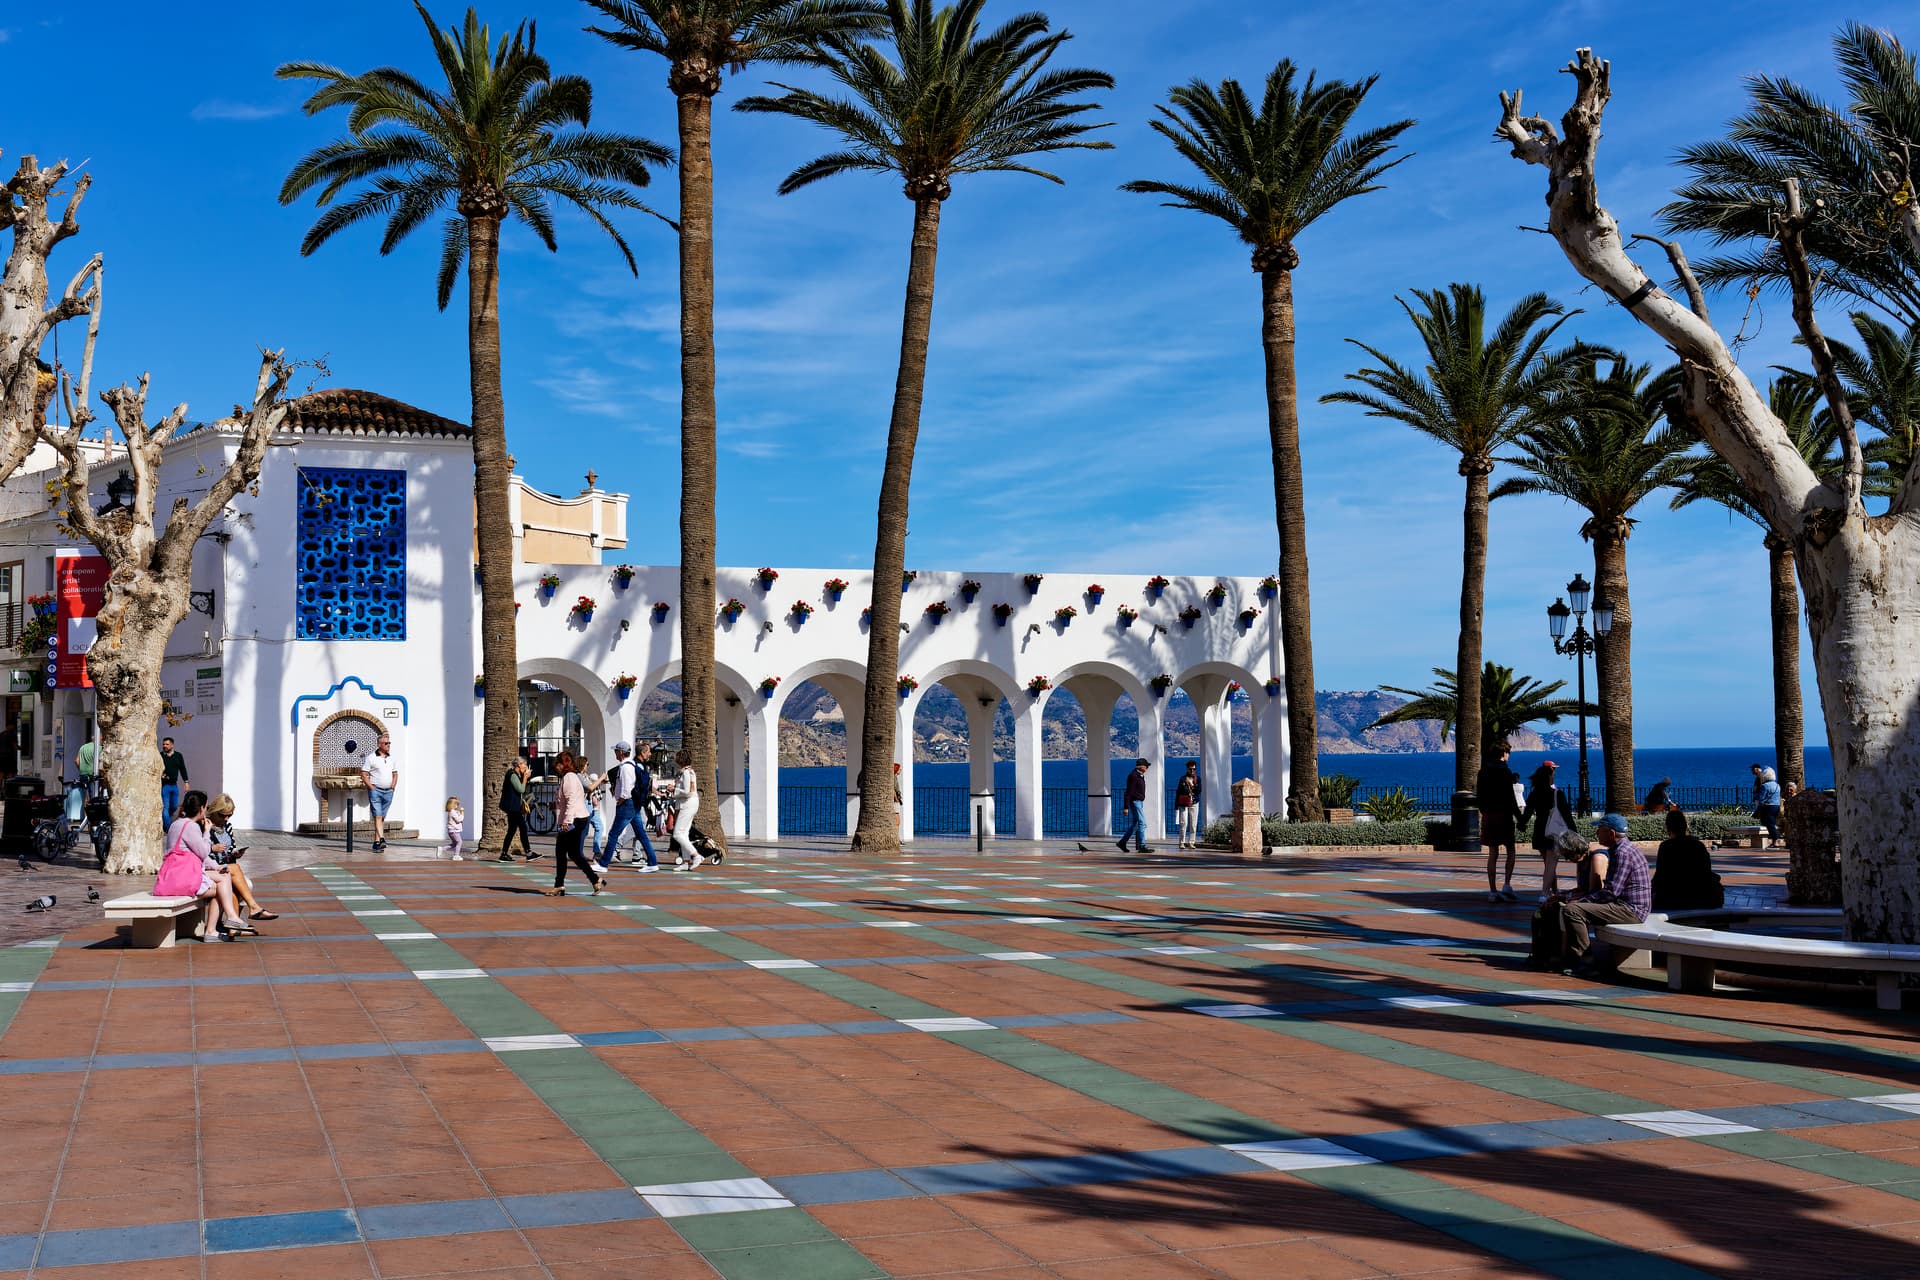
I have recently worked a lot in Photolab with adjusting gradations of blue after coming back from a roundtrip to some villages, Granada, Sevilla, Malaga in sunny Andalucia in southern Spain and that works really well and effective with the Color Wheel but I can think of a lot of situations where Photolab is just hopeless to use and even I go to other tools. In any other more complicated case I always use Capture One these days and especially if I am going to print a picture.
Here an example from the Frigiliana Village that twice have won the competition of Spains most beautiful village.
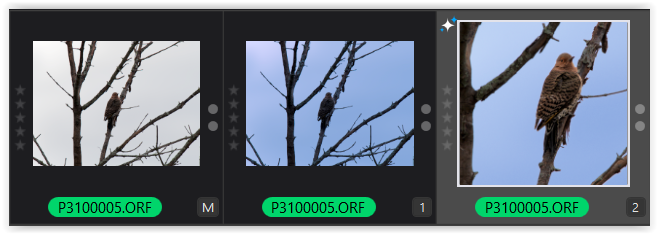
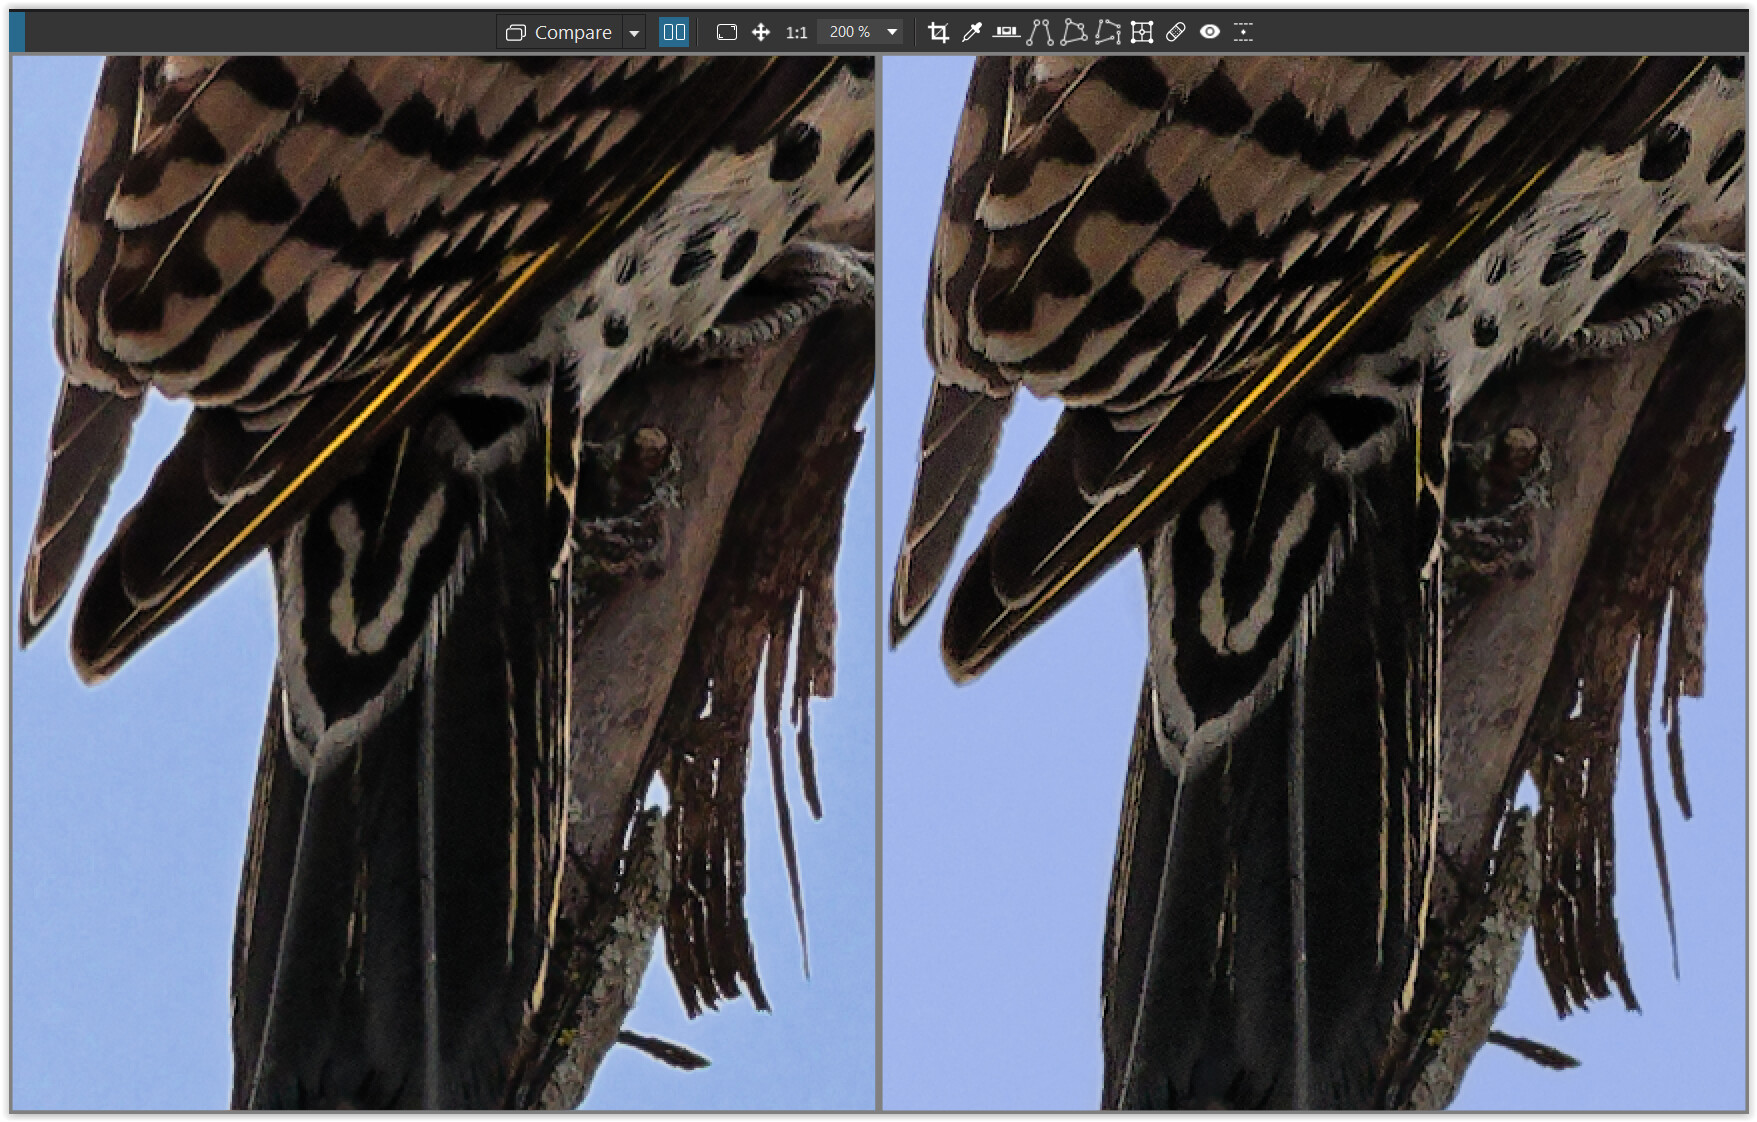
Please note – I am neither a wildlife photographer nor familiar with your camera. But despite such a long focal length (MFT 300 mm x 1.4 = 420 mm >> FF = 840 mm), the subject is very small (too small) to achieve a reasonable resolution / to really see details.
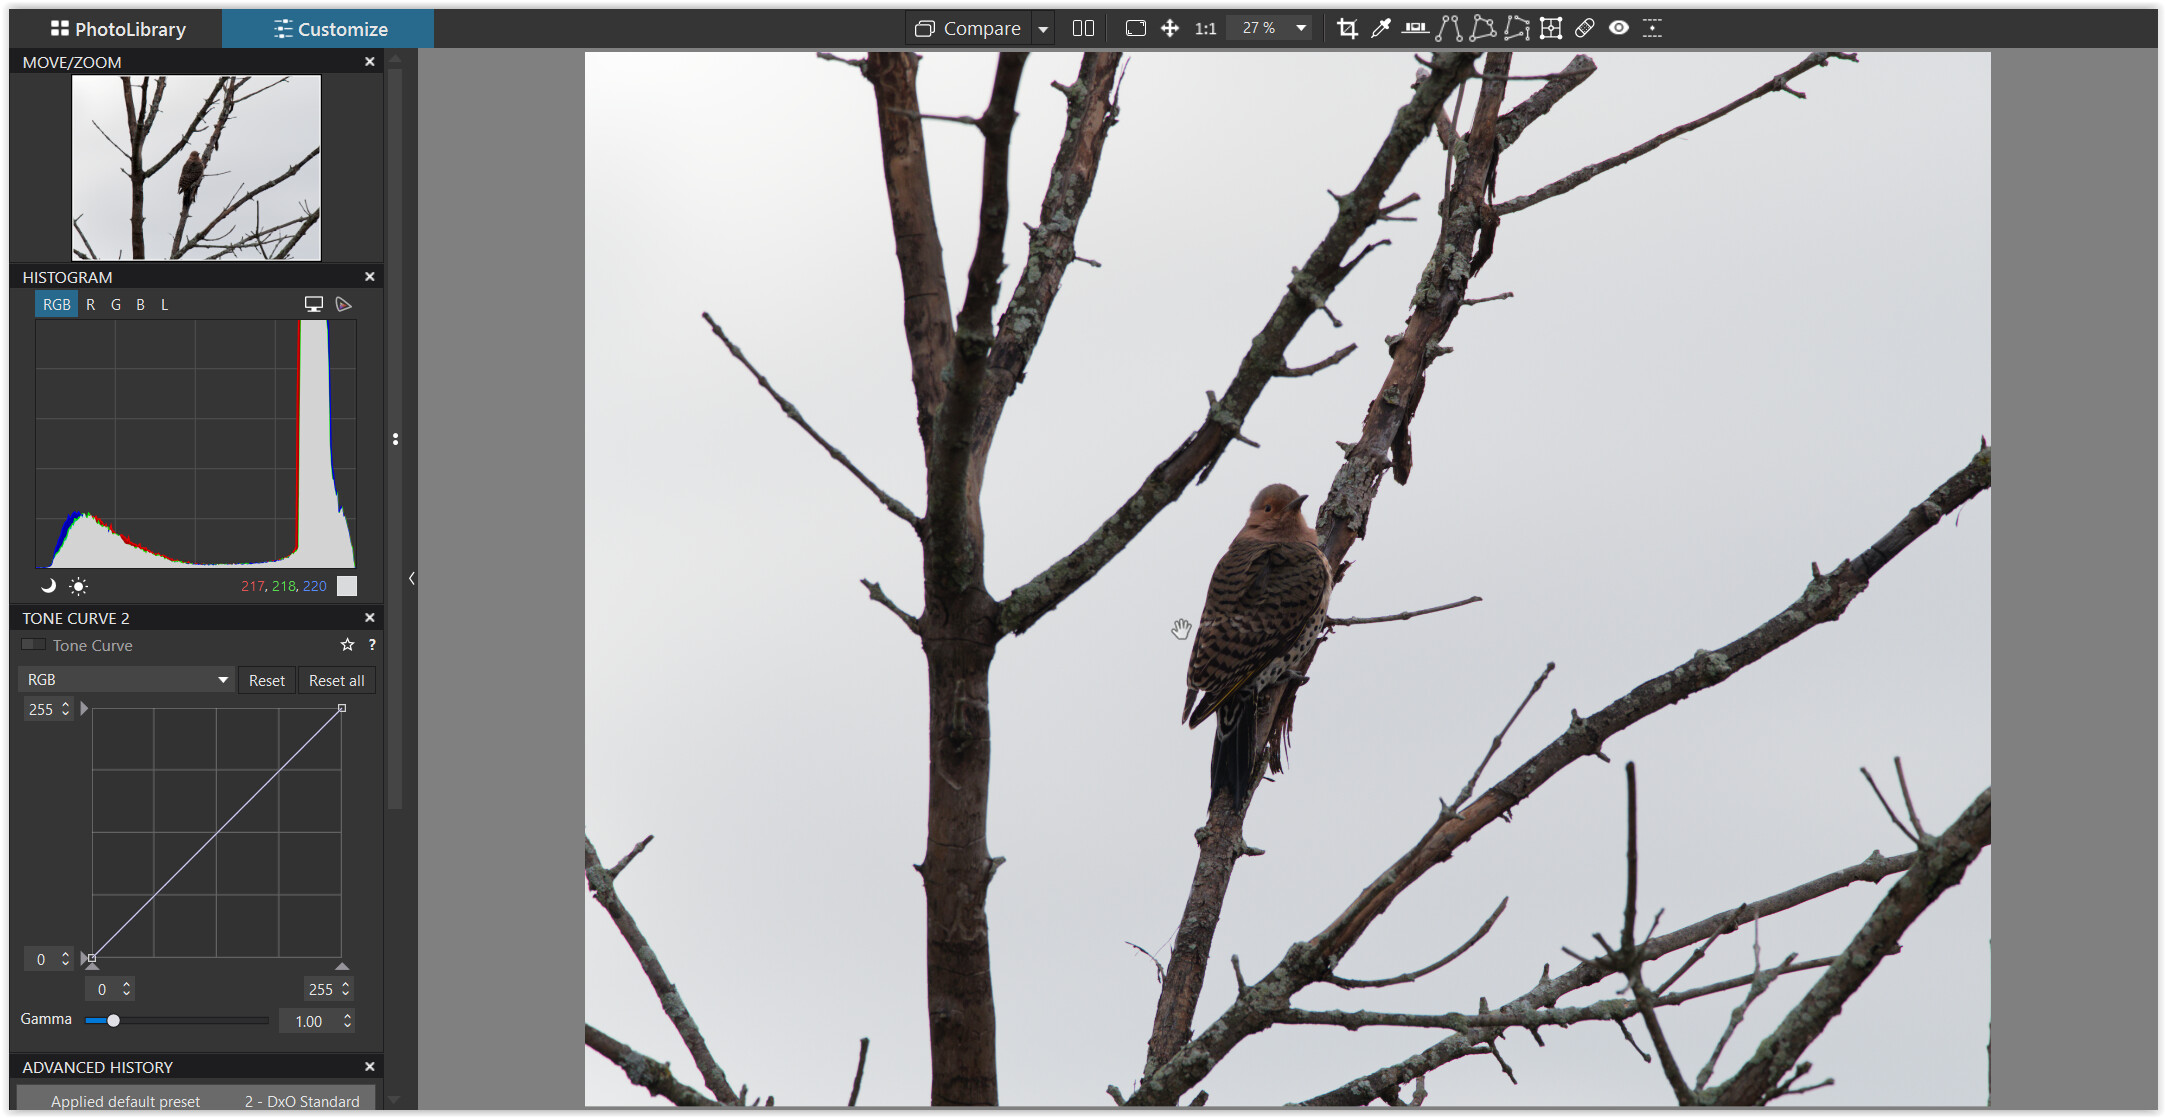
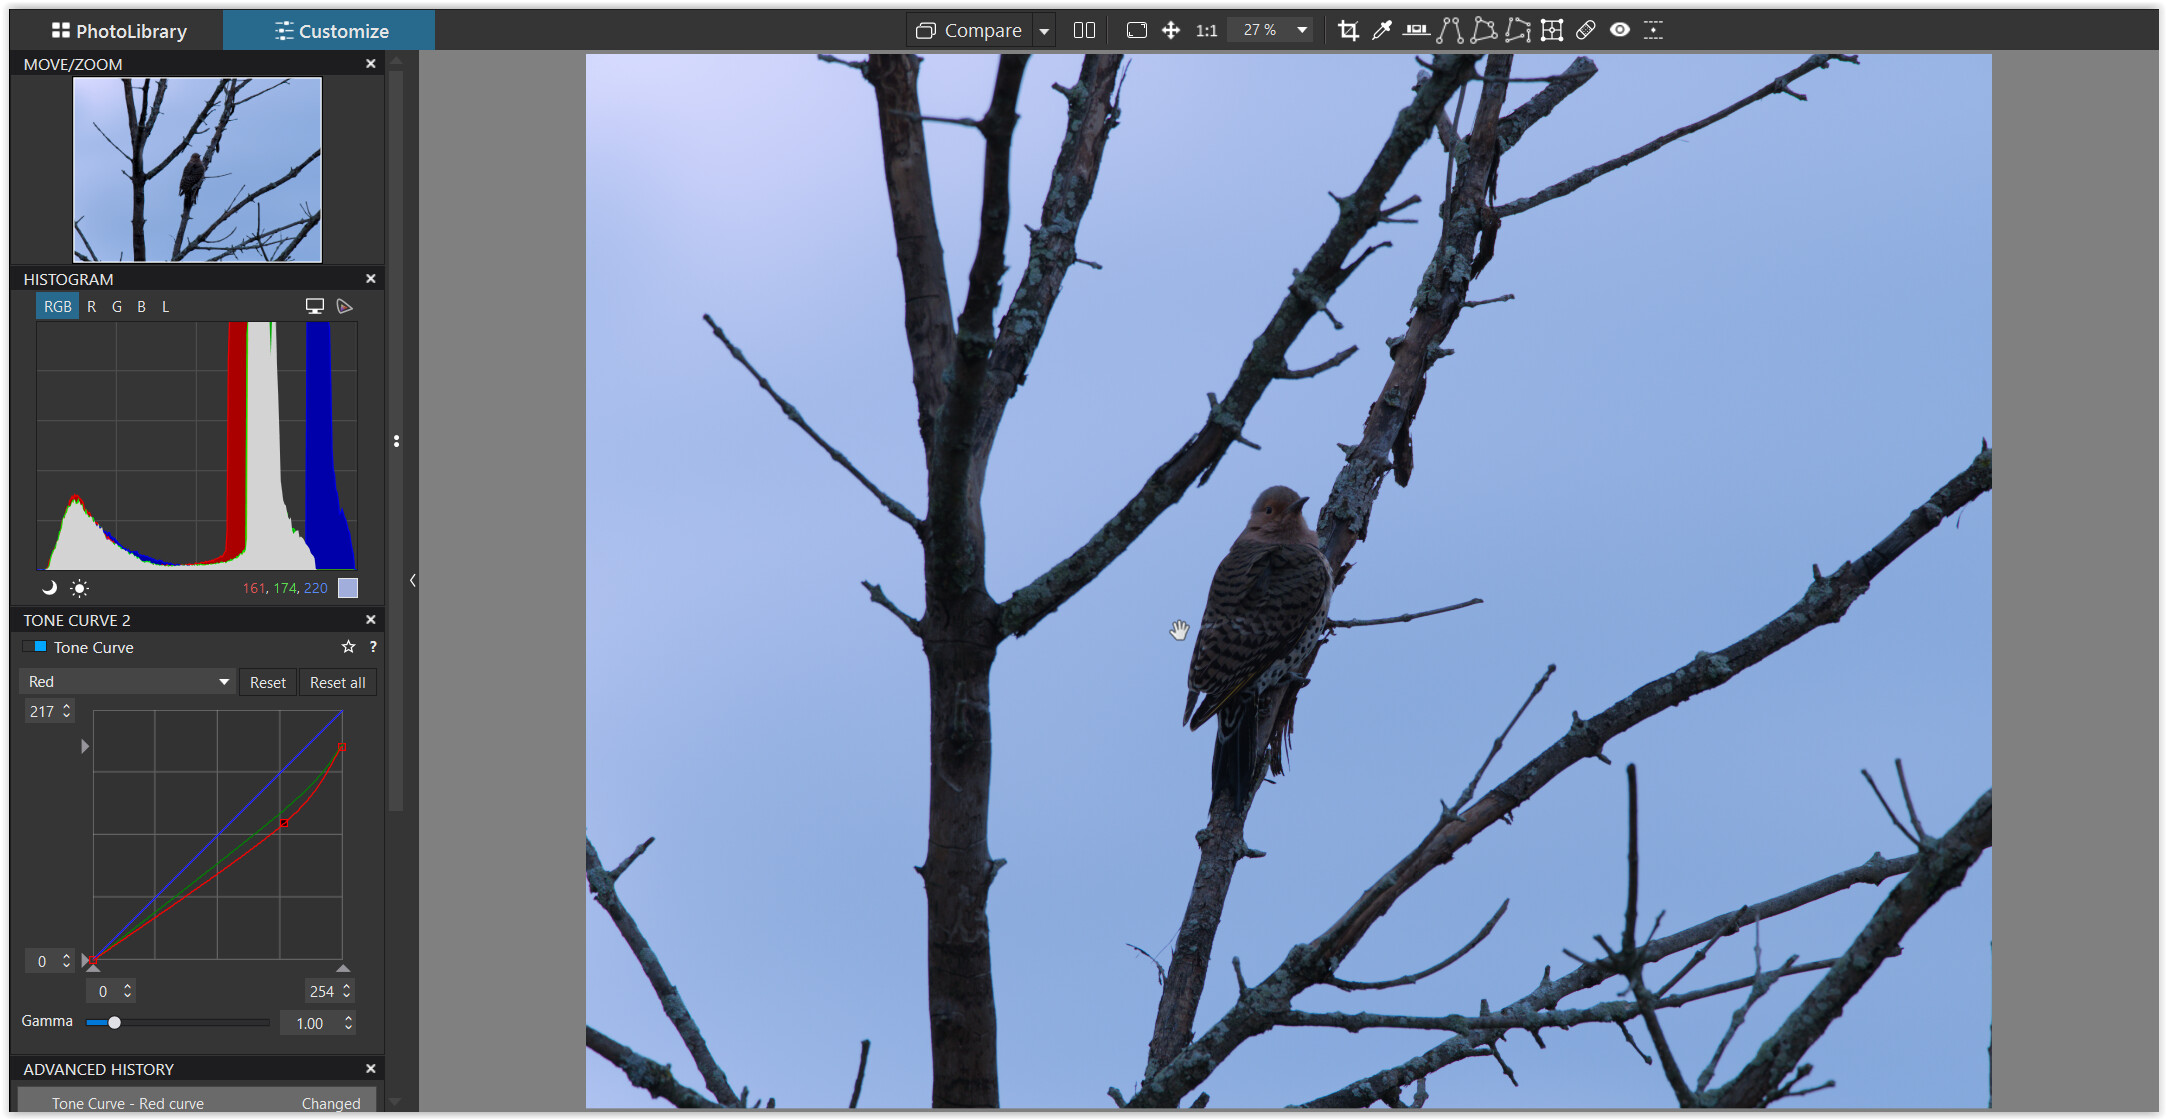
Histogram and color values show an overall gray sky. While you took the image backlit and increased the exposure to let in more light, reducing it in PL does not create a bluish effect.
but when applied globally, you have to counter / repair the blue overlay on the subject.
.
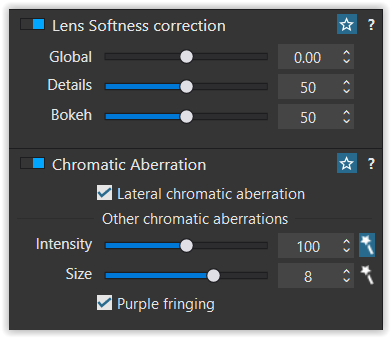
I reduced the Lens Softness correction to 0, increased CA → Size to 8
and activated Purple fringing
to counteract some side effects of PL’s sharpening,
especially along the out-of-focus stem.
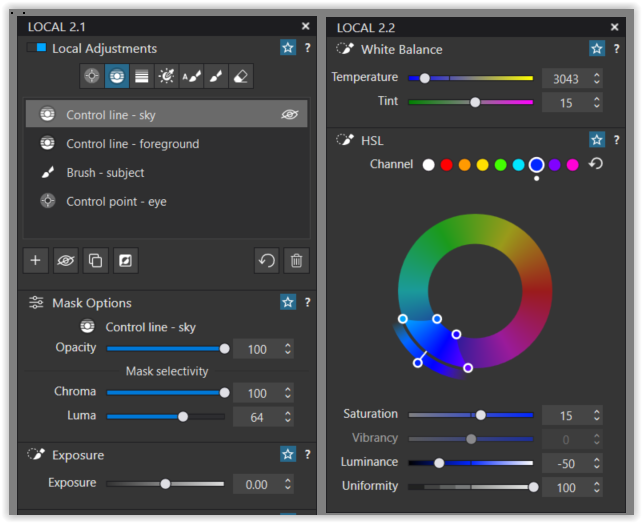
. As you don’t have FilmPack 7, which also comes with Luminosity Mask, I used Control Lines ( VC 2 ) → P3100005.ORF.dop (166,8 KB)
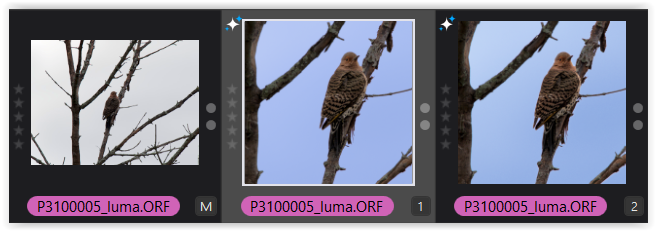
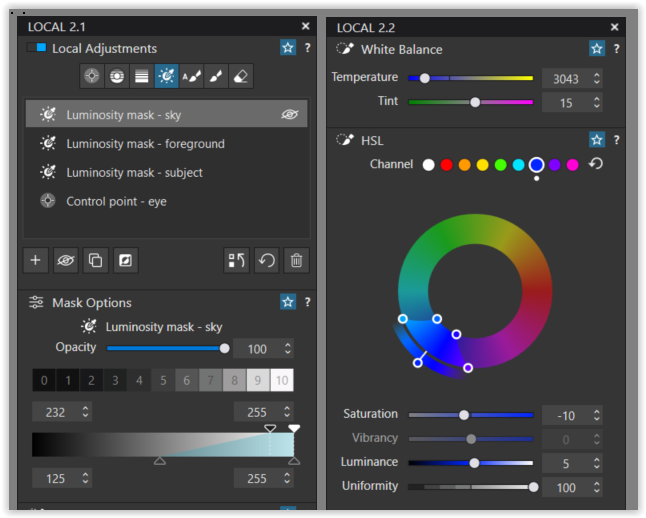
. For anybody else with Filmpack 7 – here is a version with Luminosity Masks ( VC 1 ) vs. Control Lines ( VC 2 ) → P3100005_luma.ORF.dop (276,6 KB) [copy & rename the raw-file]
Thank-you Wolfgang. So it looks like with either a control line or a luminosity mask the source of the blue is still lowering the white balance temperature, not changing the HSL of individual colors.
Can you explain for me why HSL masking seems to be having no effect on the masked sky? I recognize that the sky comes up as gray. It shows up with the almost equal R, G, and B channels of the histogram. But I expected that I could change it to blue by selectively removing red and green using the HSL tool on each color separately and either lowering Luminance, Saturation, or both Luminance and Saturation. Then use the HSL tool on the blue channel to adjust its saturation and luminance as needed.
Why doesn’t that work? Or why doesn’t selecting the sky with the HSL eye dropper tool (which produces a blue wedge) and adjusting that range also not work?
… until I lowered the WB Color temperature … to then use the HSL tool.
( If we would be able to use the Tone Curve tool locally - I’d done so instead of WB. )
Play with it and try yourself. – Even if you may not be able to produce the exact blue you have in mind, everything will look stronger than your initial examples.
This concurs with my findings. The Luminosity Mask makes for a far cleaner transition between dark and light, where the type of halos produced by Control Lines just don’t exist with Luminosity Masks.
But it did take some initial learning.
@mikemyers PhotoLab was always designed to include both FilmPack and ViewPoint. DxO sells the basic version at a lower pice for those who don’t want the full functionality. As for the Nik collection, it is superfluous for most users of PhotoLab as it is primarily for those who use other software.
Stenis
(Sten-Åke Sändh (Sony, Win 11, PL 6, CO 16, PM Plus 6, XnView))
29
I mean that the Color Wheel has too unprecise tools to handle some color related issues regardles of being the global or the local variant together with som sort of a mask.
A Color Wheel and Photolabs pretty inefficient and unprecise masking can be pretty problematic when a picture has several objects in the same picture with different shades of for example blue. Using the Color Wheel to increase saturation of a blue sky might severely interfere with the blue shade of the sea or some other detail in that picture. In order to solve a situation like that I prefer better tools than the ones in Photolab. In Capture One it is just to turn on the AI-masking and click on either the sky, the sea or the blue grid of the white building.
I think Photolab Color Wheel often does a very good and efficient work if there is just one area of a special color in a picture but many times that is not really the case.
I still think luminosity masks och the variant of it in form of Control Lines are emergency solutions when there is nothing better to use. It is like using the backside of a crowbar to hammer a nail because there is no hammer available. That might work too for one or two nails but say you are facing laying a new wooden roof on a building, then I think most people would try to get hold of a proper hammer instead.
Even if a the “adjustable spanner” or “adjustable wrench” was invented in Sweden by Johan Petter Johansson some 120 years ago, I have to say I strongly feel it often is far better to use a fixed spanner both for the bolt-heads and the mechanic (a lot of accidents happens every year when mechanics use old worn-out wrenches). A fixed spanner is an example of a specialized tool while the adjustable spanner is a general tool. Many times there are strong benefits using more precise precision tools than general or supplement solutions. I think Luma Masks and Control Lines in these cases are good examples of supplements people tend to use since there is nothing better in the tool box they happen to sit on.
We have already had this discussion really and repeating the arguments for using Control Lines or Luminousity Masks, doesn´t make either of those tools any better. They are still as dull and unprecise as they always have been compared to the competition.
Stenis
(Sten-Åke Sändh (Sony, Win 11, PL 6, CO 16, PM Plus 6, XnView))
30
I mean that these Zanzibar skies always have been a source of dissatisfaction when I have tried to handle them in Photolab. Luckily enough there is better tools both for masking and handle colors is Capture One.
Quick question - is the image still a “photograph” once someone has replaced the sky?
(To me, it becomes a “photographic illustration” or something similar. )
I have recently taken several images of birds flying, with the sky color turning white. I was trying to find a solution, similar to some of the solutions described up above, but I wasn’t comfortable with any of them.
If the photograph is to be considered “art”, I guess anything goes. That’s something I still struggle with.
Maybe I’ve been doing it for the wrong reasons, but 99.9% of the time I’m using (only) PhotoLab (although I’ve learned to export the image to other applications that do things PhotoLab can’t).
(Not that it matters, but my computer is constantly updating Adobe, almost every week, and my other imaging apps are getting rusty/dusty. Several people here are constantly posting examples of how to do unique things using PhotoLab (and its siblings). Makes me want to try them myself.
To me, “replacing” a sky is not something that I would entertain but “enhancing” the sky like I did here is perfectly acceptable, as is the technique for tinting the sky demonstrated here.
But we already had this conversation back in 2021 and several times since and, as long as you insist on your no-longer relevant mantra…
(To me, it becomes a “photographic illustration” or something similar. )
… you are never going to progress in your photography beyond boring reportage shots of nothing in particular.
Most people do not think in such limited terms and, unless they pixel-peep, would never know what was originally there.
On the subject of bird photography, you are just as guilty of “faking it” by using a lens that doesn’t show how far away the bird was. You, as a photo-journalist, are lying about what you saw. Now, put a 50mm lens on your camera and retake the shot and do not apply any post-processing - that is truly what you saw - a speck in the sky that was barely discernible as a bird.
Oh, and use the same lens and never reframe your shots from your balcony over the bay. What do you get? Boring!!!
Cropping (within reason) is just as much image manipulation as using any other tool in the post-processing box.
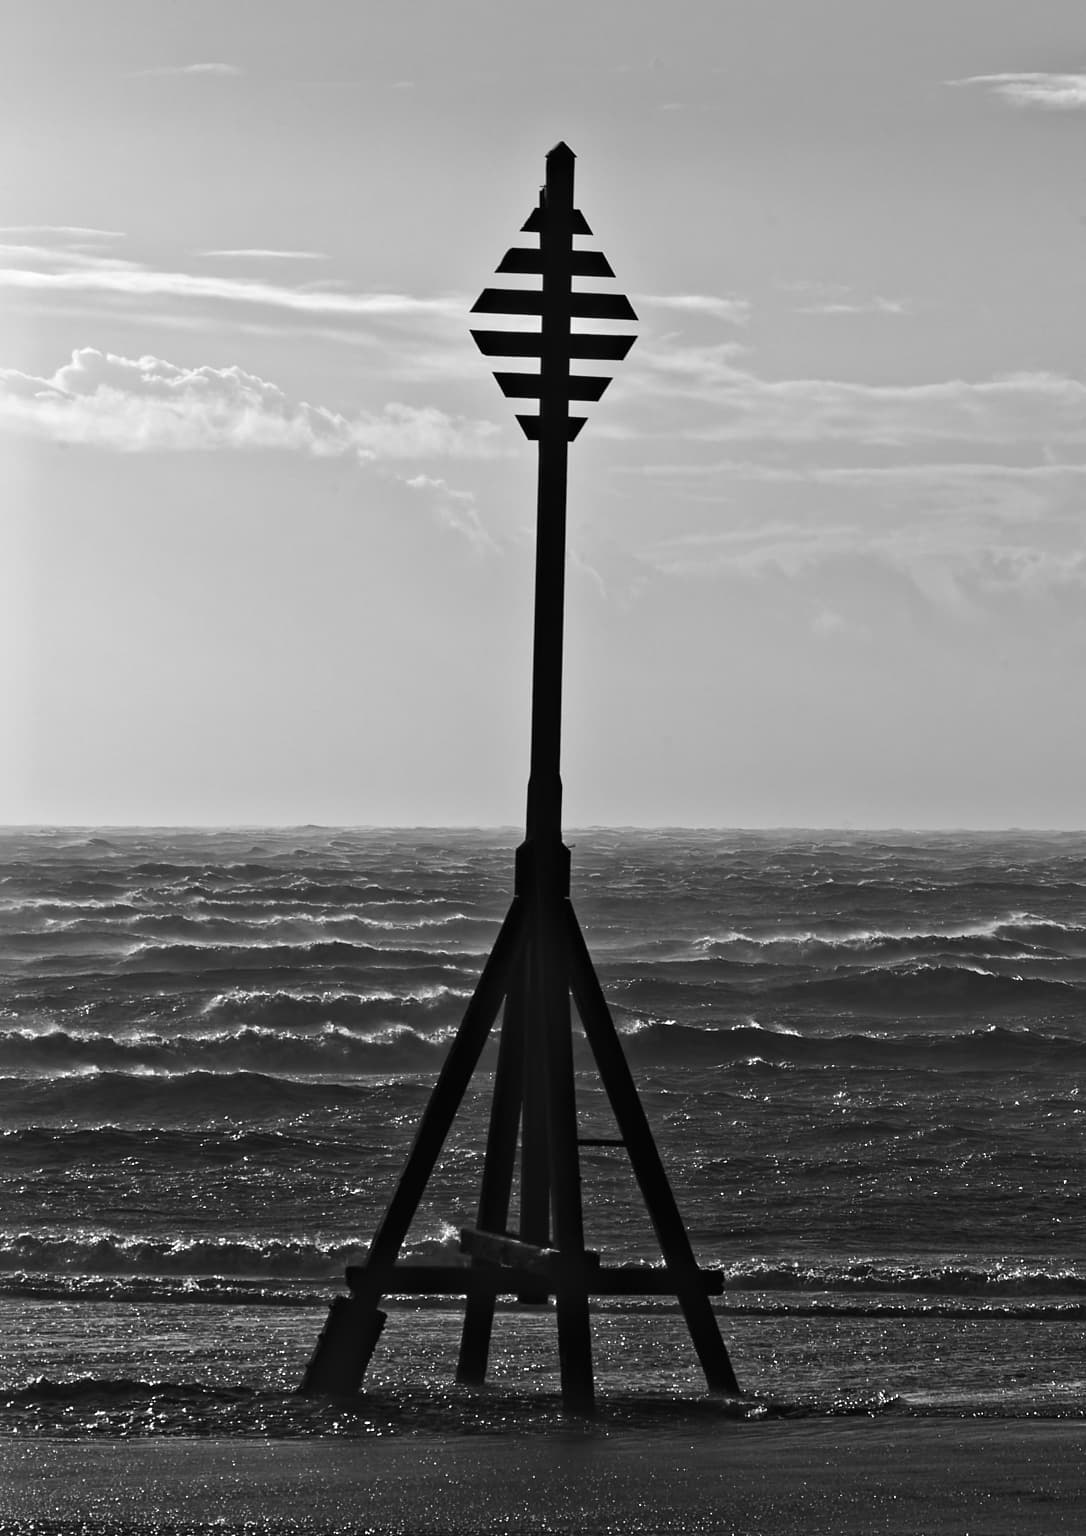
By the way, my image of the lamppost is as framed in the camera - it was truly what I saw, taken at a 91mm focal length, to avoid having to crop in PL. I could see more detail of the whispy clouds in the sky, so, just as Ansel Adams would do, I used a red filter and increased the contrast to realise what I experienced when I took the shot.
Or would you say that using a coloured filter on the lens is also “cheating”?
Or is changing contrast, or over-exposing under under-developing to fit 14 stops of range into 8 stops of film changing what you saw? Without that technique B&W film photographers, including press photographers, would never have been able to print half of their work.
Take a look on my website and you will see colour images taken with my LF camera, on Fuji Velvia 100 film, using graduated filters to match the exposure because you can’t change development times on transparency film and, without such filters, the sky, or white sand beach, would be totally over-exposed.
I would dare to say that well over 90% of folks on this forum are not photo-journalists, they just want to create beautiful images.
You are trying too hard. It is a B&W image of an illuminated lamppost taken around dusk, with some detail in the sky.
The sky through the glass will look different because it is curved glass, which distorts things and lends a slight filtering effect.
There are no curved lines visible from the back of the lamp because the material between the lines on the front is translucent.
So your brain can’t cope with a B&W image because it doesn’t appear as “real” as a colour one? How on earth did you cope before colour film existed?
It’s an abstract image of a lamp. That’s all the viewer needs to know. And up-market galleries sell such images for thousands of $/€/£ all the time to discerning clients to decorate their living spaces or offices.
From Google Dictionary - photograph:
“a picture made using a camera, in which an image I focused onto film or other light sensitive material and then made visible and permanent by chemical treatment, or stored digitally”
Very simple question, and my answer is "no, once part of the image has been replaced/manipulated this way, the image in question is no longer a photograph.
…just my take on this, and why I won’t do it.
Reminds me of Ansel Adams - the “straight” print from his negatives didn’t come close to what he intended to do with them. Beautiful results, that he anticipated before he ever pressed the shutter button.
That wasn’t a question back then - I used what I had, and could afford, and bought a lot of colored filters to adjust the image to what I wanted. Along with that, I bought wide angle and telephoto lenses to get what I wanted. As I recall, I bought printing paper that could be manipulated to create different levels of contrast - but I can’t remember the name of that stuff. Oh, and I bought many of the photography magazines available back then. As for film, 99.9% of the time it was Kodak Plus-X.
I never thought of this as “coping”. If I drove a car in the winter, I mounted snow tires.
Many of your photos are “art”. Most of my photos were just to show what I saw. Huge difference. I guess I was making “snapshots”, while you were creating art.
multiple exposures with dodging and burning when printing
retouching print to get rid of dust spots
For digital…
adjustment of contrast in the camera
adjustment of exposure in the camera
adjustment of sharpness in the camera
adjustment of film emulation in the camera
multiple exposures in the camera
development of RAW data into a visible image
etc.
What about stitched panoramics or gigapixel images made from multiple shots?
Bearing in mind the above lists, how do you intend to avoid manipulating any image, film or digital?
For film, it is impossible and, for digital, my quick answer is to uninstall PhotoLab and any other processing software because, as soon as you open a RAW image in such software, without having touched a single slider or switch, you have manipulated it.
Did he ever make a “straight” print? What is a straight print? See the film list above.
So, you manipulated the image.
It is still available and is called multigrade and, once again, you were manipulating the image.
And those “art” images show exactly what was there at the time, are they any less a photograph just because they have a natural beauty and aesthetic?
Hmm, I’m not complaining about manipulating an image. I’m complaining about replacing a lot of it with a different image, perhaps downloaded from the internet.
Let’s stick with replacing the sky - if we don’t like the sky in our photo, just download another image and copy it into our image. Personally, I don’t see any problem in doing the list of things you just posted, other than maybe retouching the negative.
Curious, are you really trying to say here that replacing a sky is acceptable?