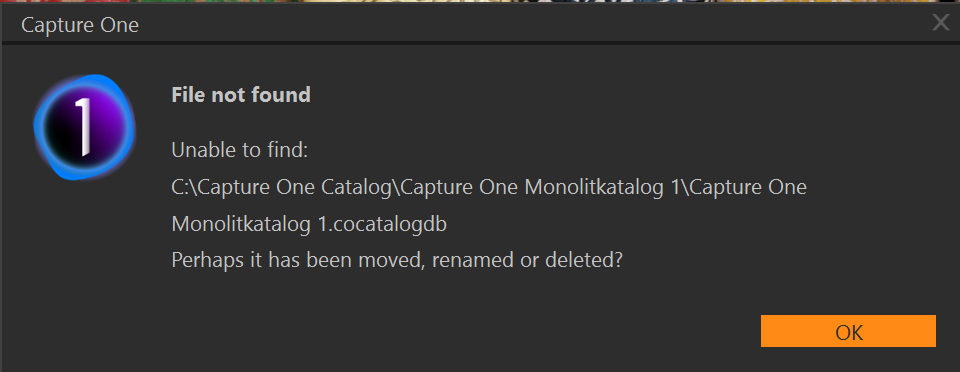
Yes it renamed the catalog "Monolitkatalog 1 to Monolitkatalog 2 which was first a little checking since there was no files shown just an empty space. Well the images were there.
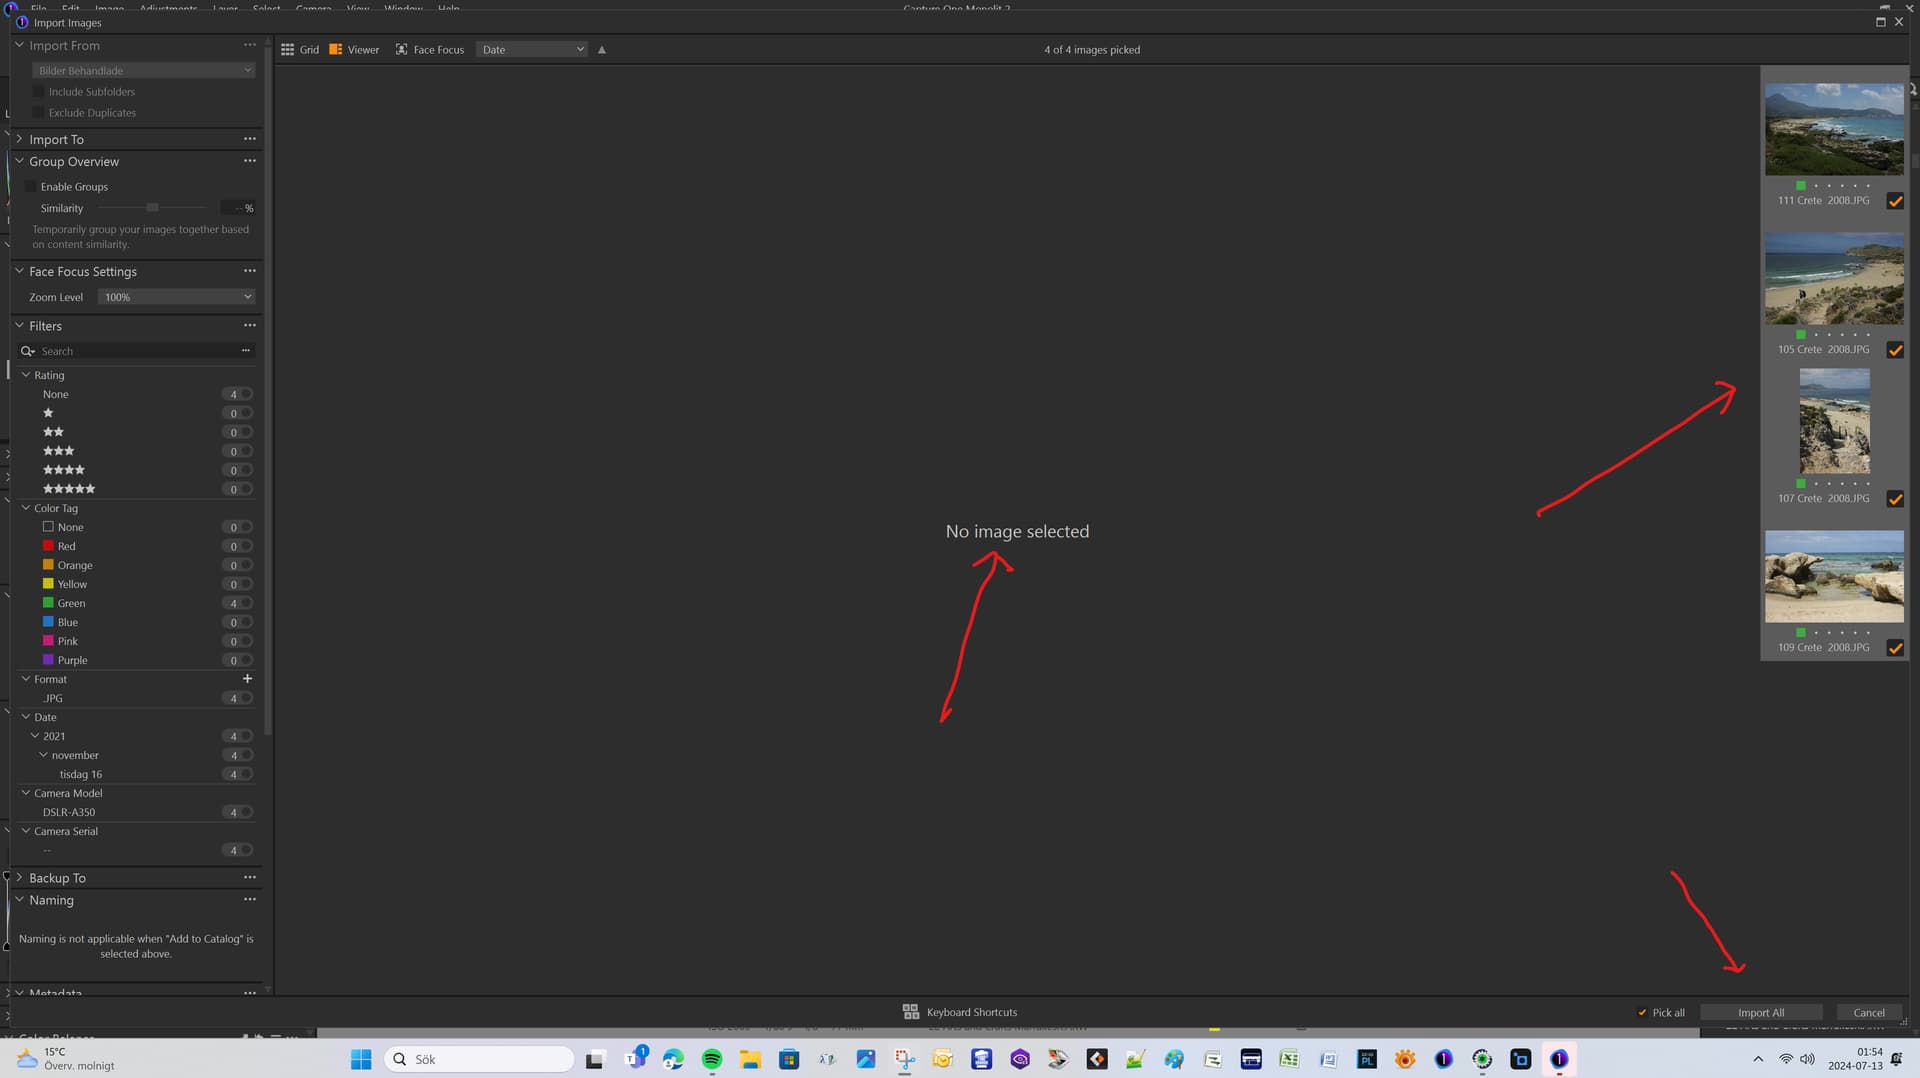
When importing CO refused to open the selected files since they were already in the catalog. So I think I can say that integrating CO with PhotoMechanic is not all that straight forward as it is in Photolab.
So when I use Capture One I always use it in session mode and always have.
When doing the same prodess with Photolab it it is just to start working!
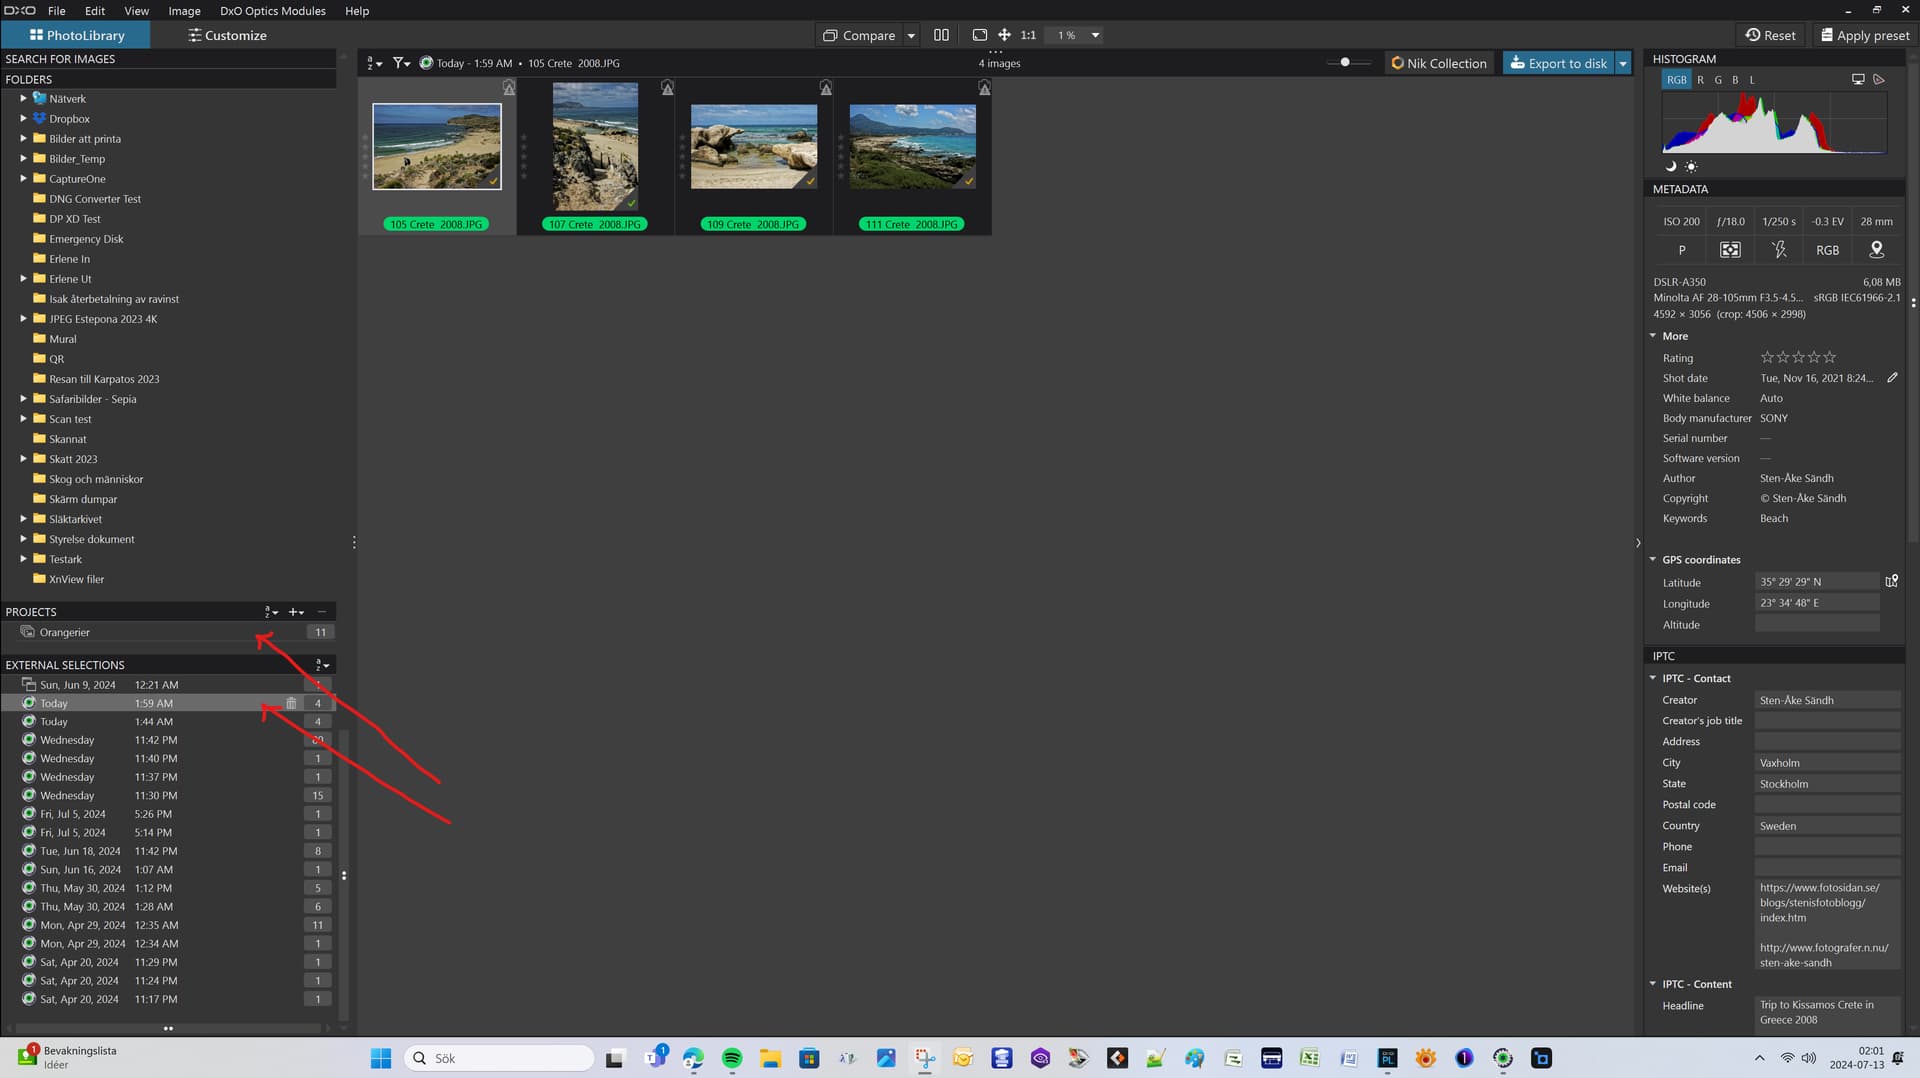
Another advantage with Photolab is that it keps track on the “External Searches” it I have done from PhotoMechanic or any other third party application used to “import” a selection from. To go back to an earlier “Selection” is just a click away and to create a “Project” from a selection is very easy too.
The reason Photolab fixes this is that it is working directly on the folders and files in the file system and that Capture One in this case doesn´t. Personally I think the way Photolab works here is a great advantage for the work flow.
The thing with Photolab is that it always tries to render/refresh the previews of the folder you are working in “on the fly” in the background and that has a performance cost. Applications like CO and LR likes to import-render previews in order to avoid the constant rendering process that Photolab suffers from when opening a bunch of pictures/preview but even they have scale and refresh the preview in say 1:1 when working on a specific picture.
So this is not about what you might be able to do in say Capture One. It is about what actually happens when a selection of pictures are selected and opened in the selected converters using the “Edit Selected Picture With” in PhotoMechanic Plus
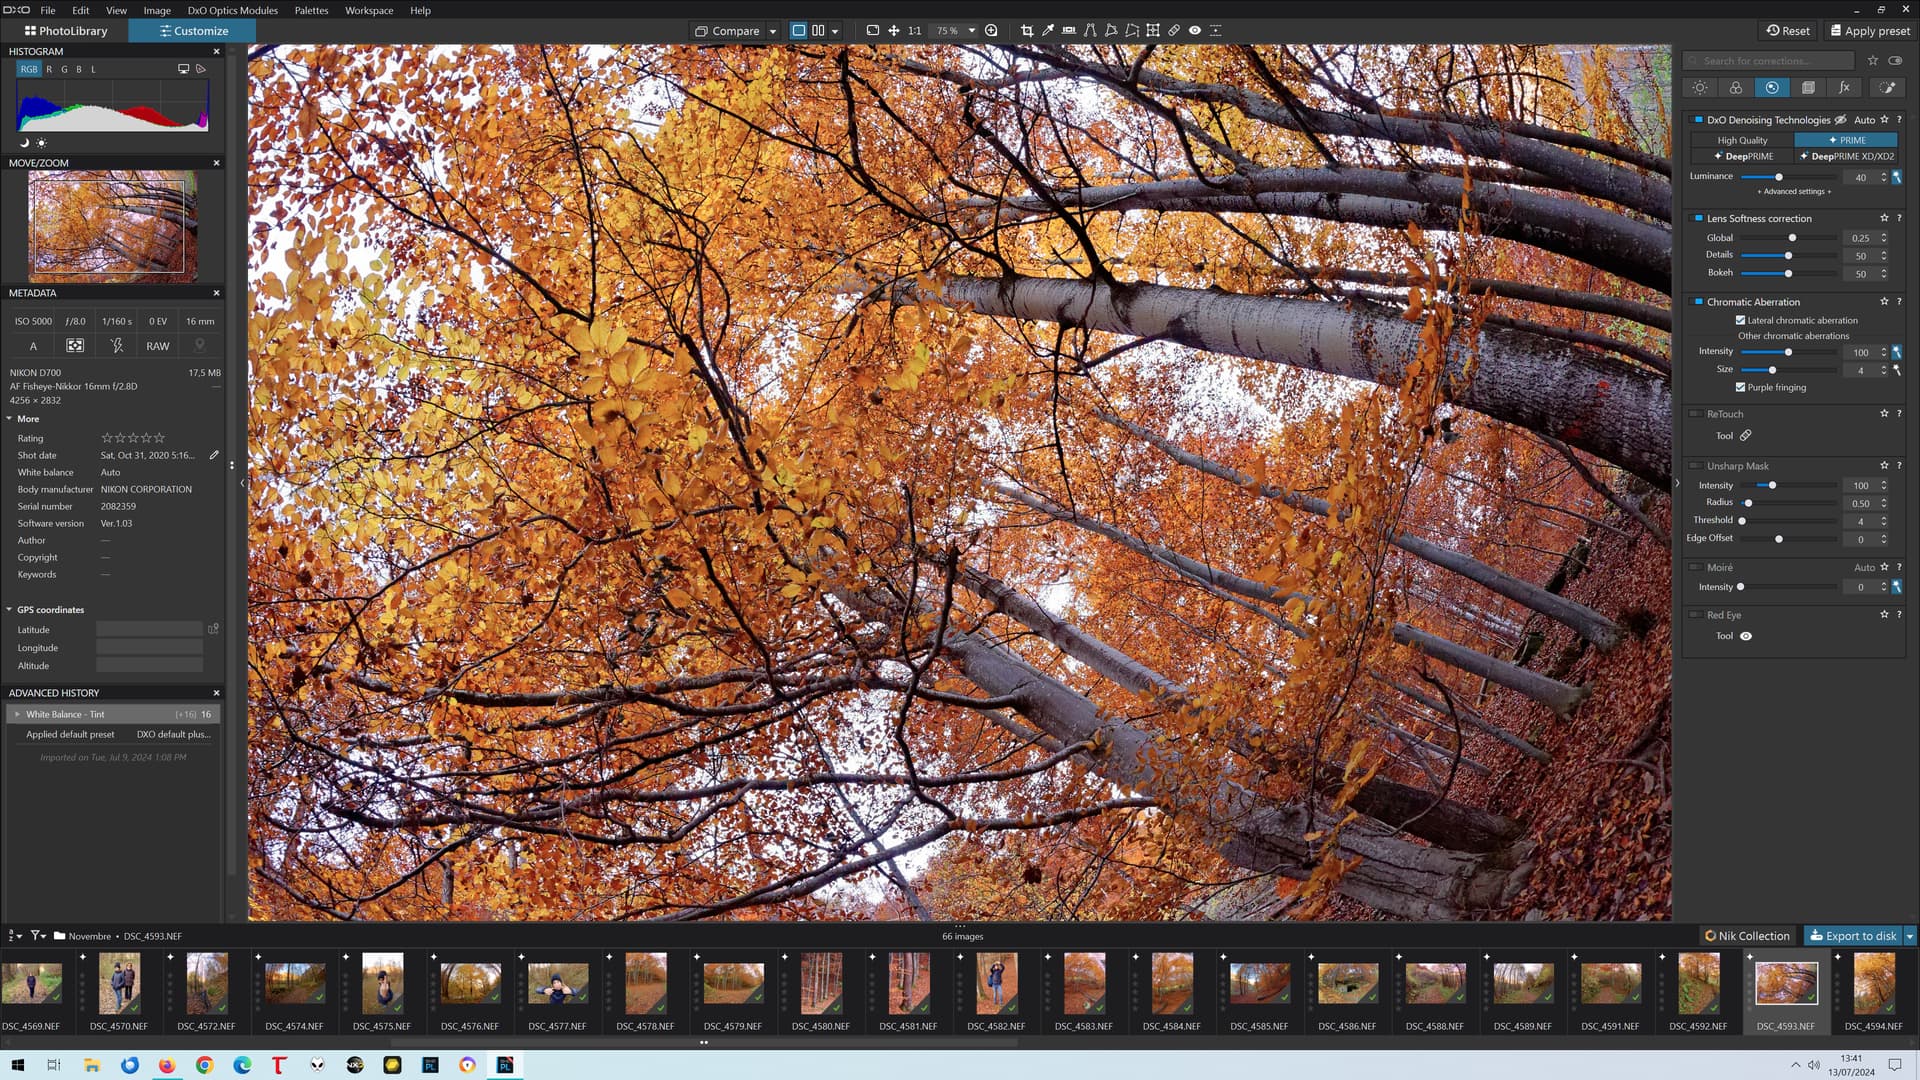
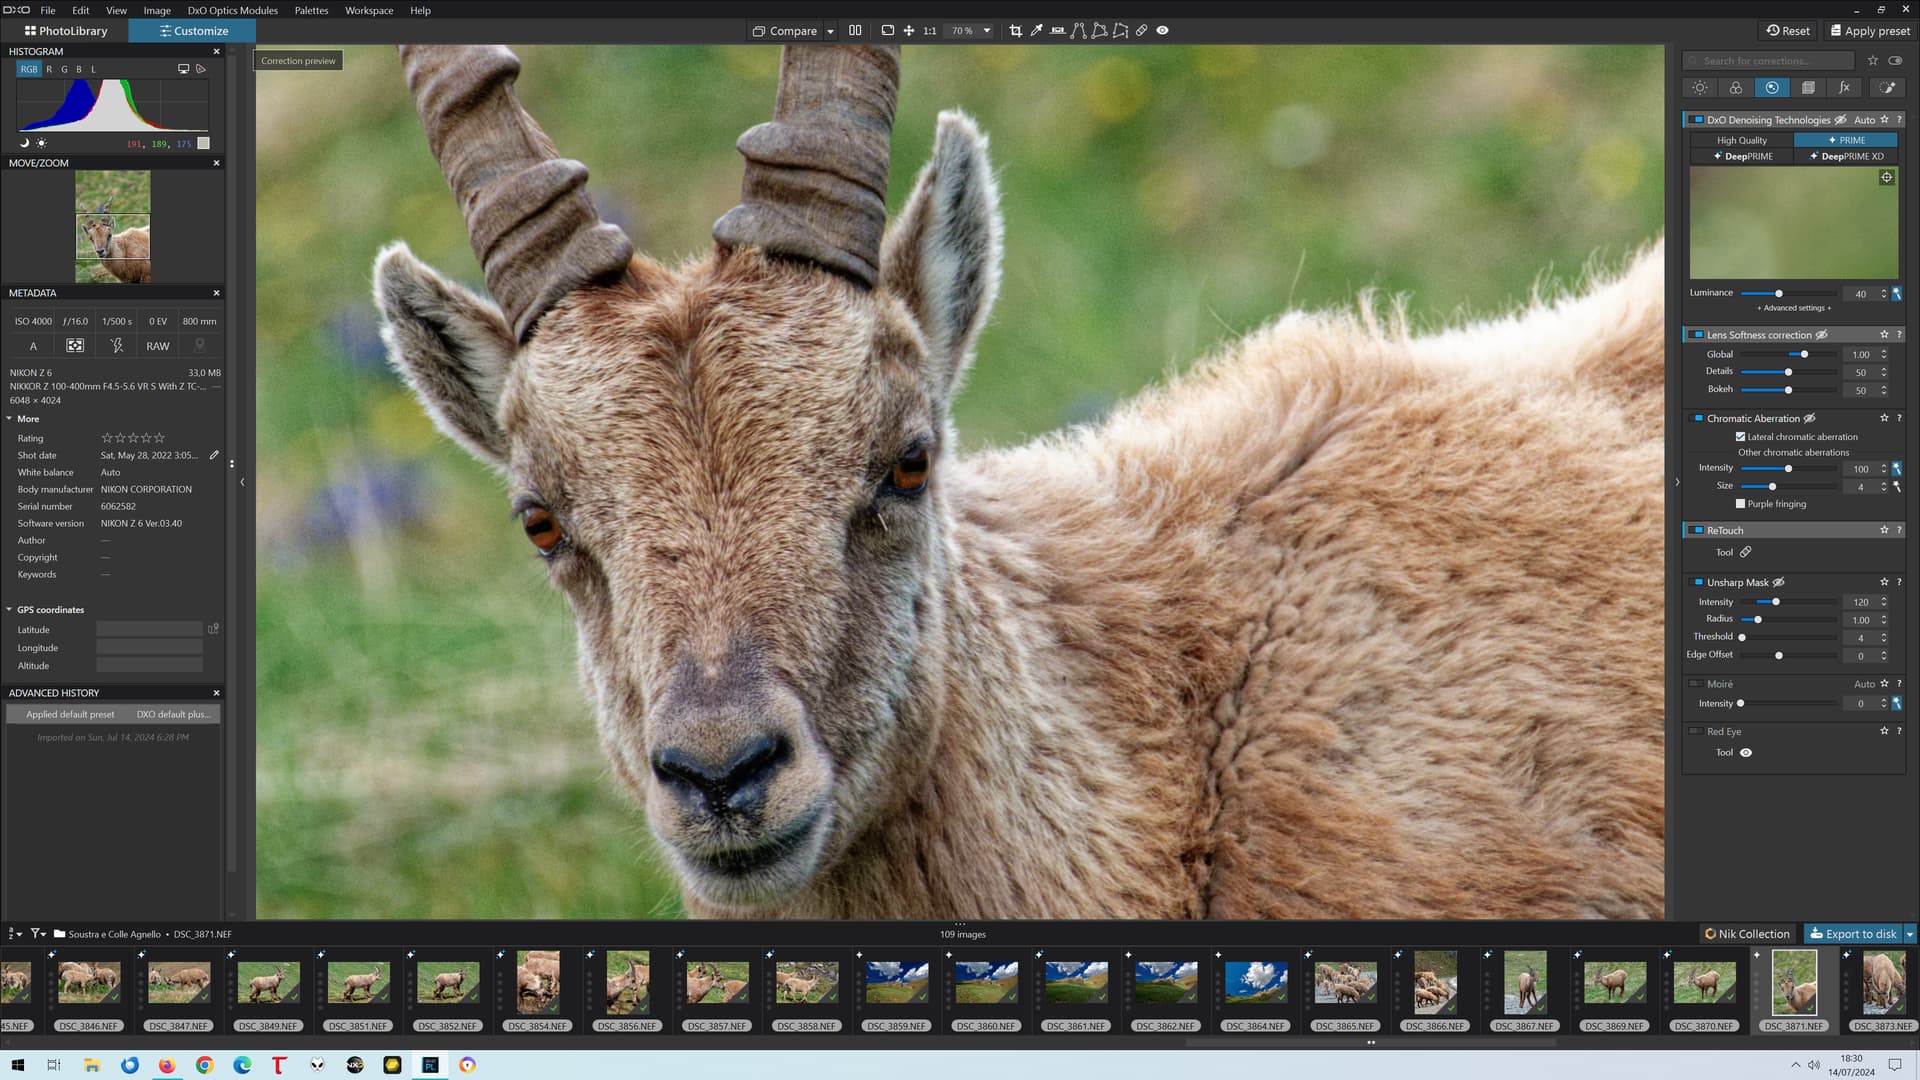
Are you willing to wait for view of your photo the time it takes to render DeepPrime or DeepPrime XD?
In addition, many of the settings that affects rendering will probably make that wait a repeating occurrence. I feel you can have either the best rendering or many long waits during development of your pictures.
I don’t need DeepPrime/XD for the preview in the editor. And I don’t think anyone else does. We are not asking for this.
What we are asking is for an accurate preview at every zoom level of ALL OTHER settings which aren’t currently applied (chromatic aberration, sharpening, purple fringing), EXCEPT for DeepPrime/XD. And that is highly feasible, and wouldn’t cause any noticeable increase of refresh times on any current PC with a CPU that’s at least decent.
All modifications except noise reduction are almost instantaneous on my 7 years old i7. They are almost instantaneous even at 75% or higher, so they would just be as instantaneous at lower zoom level.
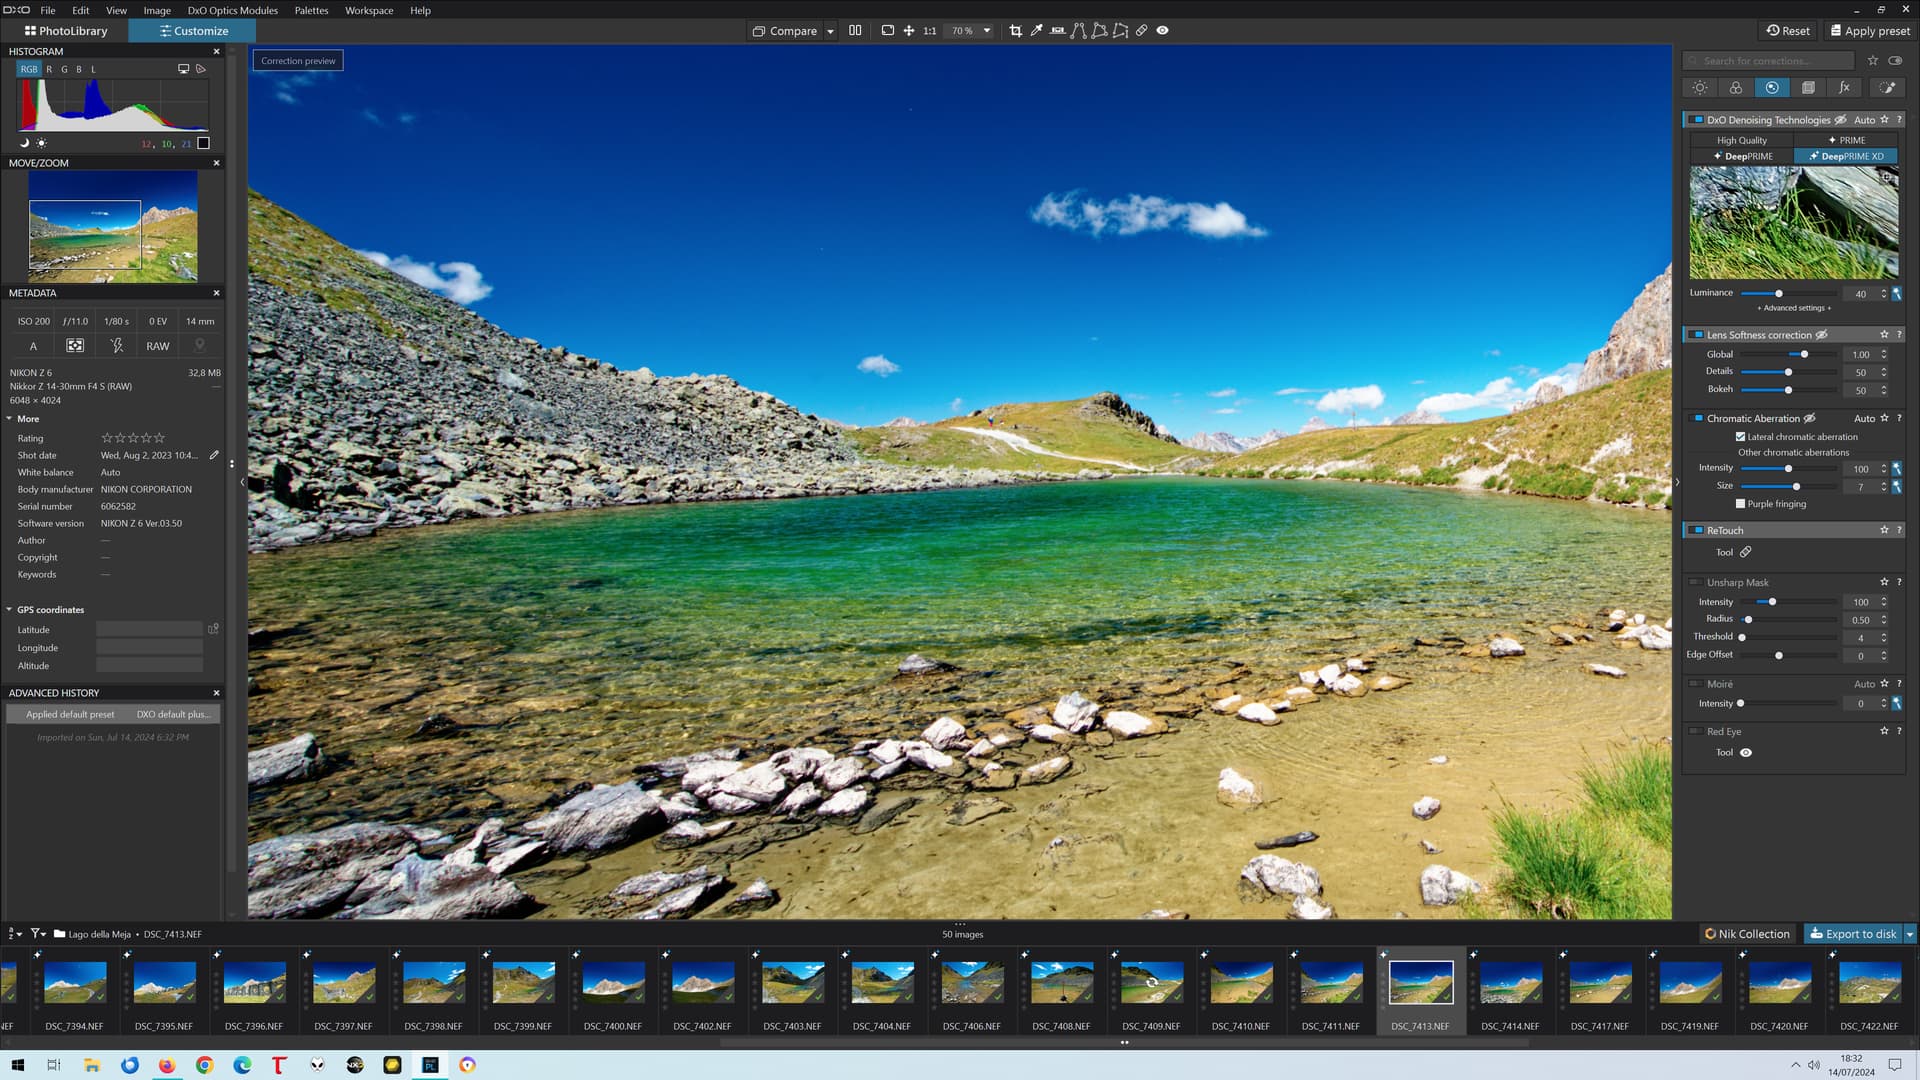
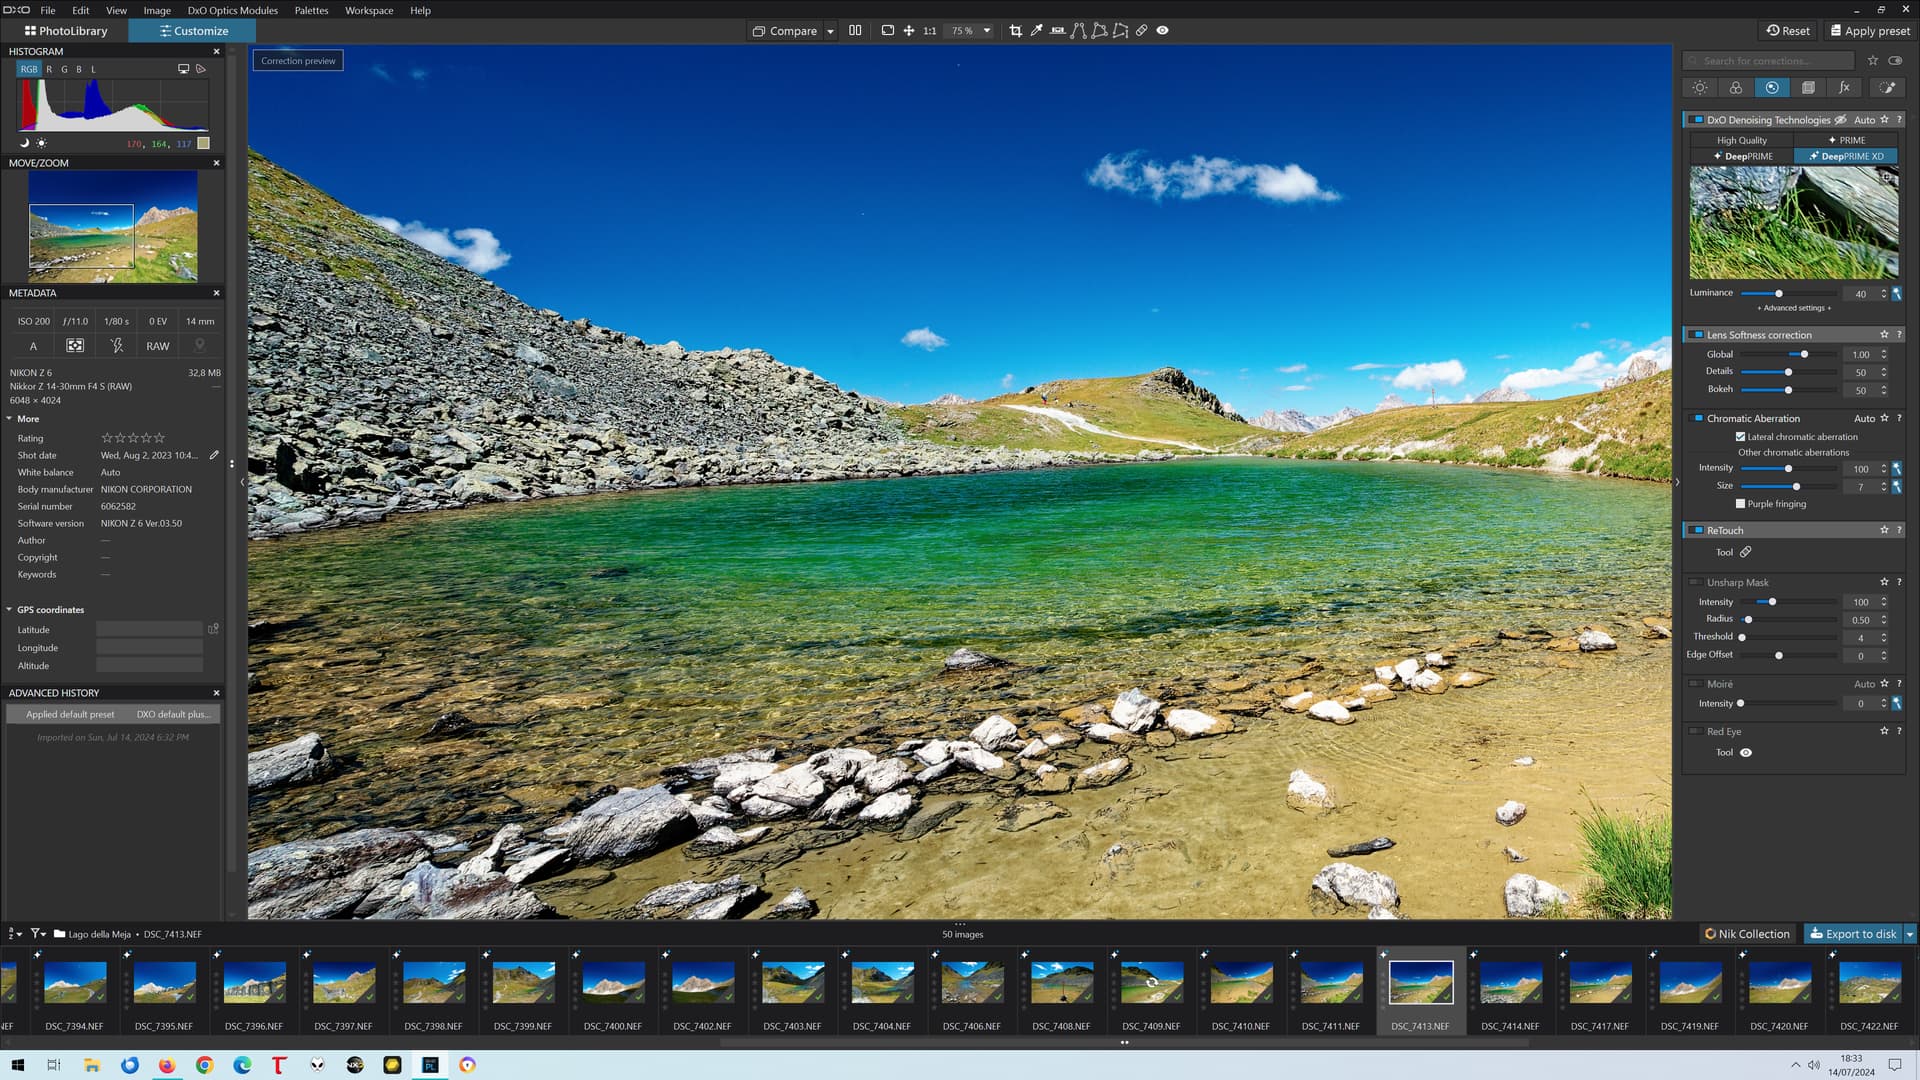
Current implementation of the viewer applies every correction except for noise reduction at 75% or higher. It would not cost anything more in terms of performance to to the same also for 70% or lower. That’s the request, and it would be so easy to do it…
The way to do it would be to always render the image at 100%, and then RESCALE it (which is a quick and easy to do, and it is what other editors do). No reason why this rescaling can be done at 75% but not at 70% and below: just plain laziness or because they think the difference cannot be noticed. It can, and sometimes it’s a HUGE difference, as I have proven several times with images:
If one can’t see the difference, well… I would check a good optometrist. It’s visible in the 1080 screenshots, and even more visible on a 4K screen.
But… tones and saturation are not affected. They are correct even on the “noisy” image. On the contrary, they are very much affected and wrong in a 70% preview.
The best proposal, again, would be to make it user-selectable from preferences:
as it currently is
all modifications except Deep Prime/XD always applied at zoom levels above XX (where XX is a user selectable value)
all modifications including Deep Prime/XD always applied at zoom levels above XX (where XX is a user selectable value) - FOR USERS WITH EXTREMELY POWERFUL MACHINES ONLY
Since saving a dng with optical corrections and denoising and then working on this DNG SEEMS (as some told on this forum) to be a workaround to this render time problem, it should be possible to do this on the fly and then be able to continue work at any resolution without waiting for those process to happen again.
Unless this “workaround” isn’t ok depending of processing needed on the image ?
So, is this workaround right ? (can we get same result with and without this workaround whatever processing applied on the image ?).
If yes, why not to cache on the fly this process (optical corrections and denoising) and only process it again if modifications are done on optical correction and denoising ?
And so have no major processing time problem when changing zoom factor ?
Current workstations have 32 or 64 GB ram, and current graphic cards have 8 GB vram at least, so memory should not be a problem to do this.
And a better option could be to write those cache on disk too (optionaly ? - for those with small drive configurations) for further work cession (it should be faster to read it once from disk than to process this again).
Anyway a well thought-out caching system should certainly make it possible to greatly limit or eliminate this photolab’s enormous latency which is not compatible with lot of professionnal workflows.
Reprocessing so often the same time consuming process could (should !) be avoided in a modern software. (Do it once. Not two or often lot more !!!).
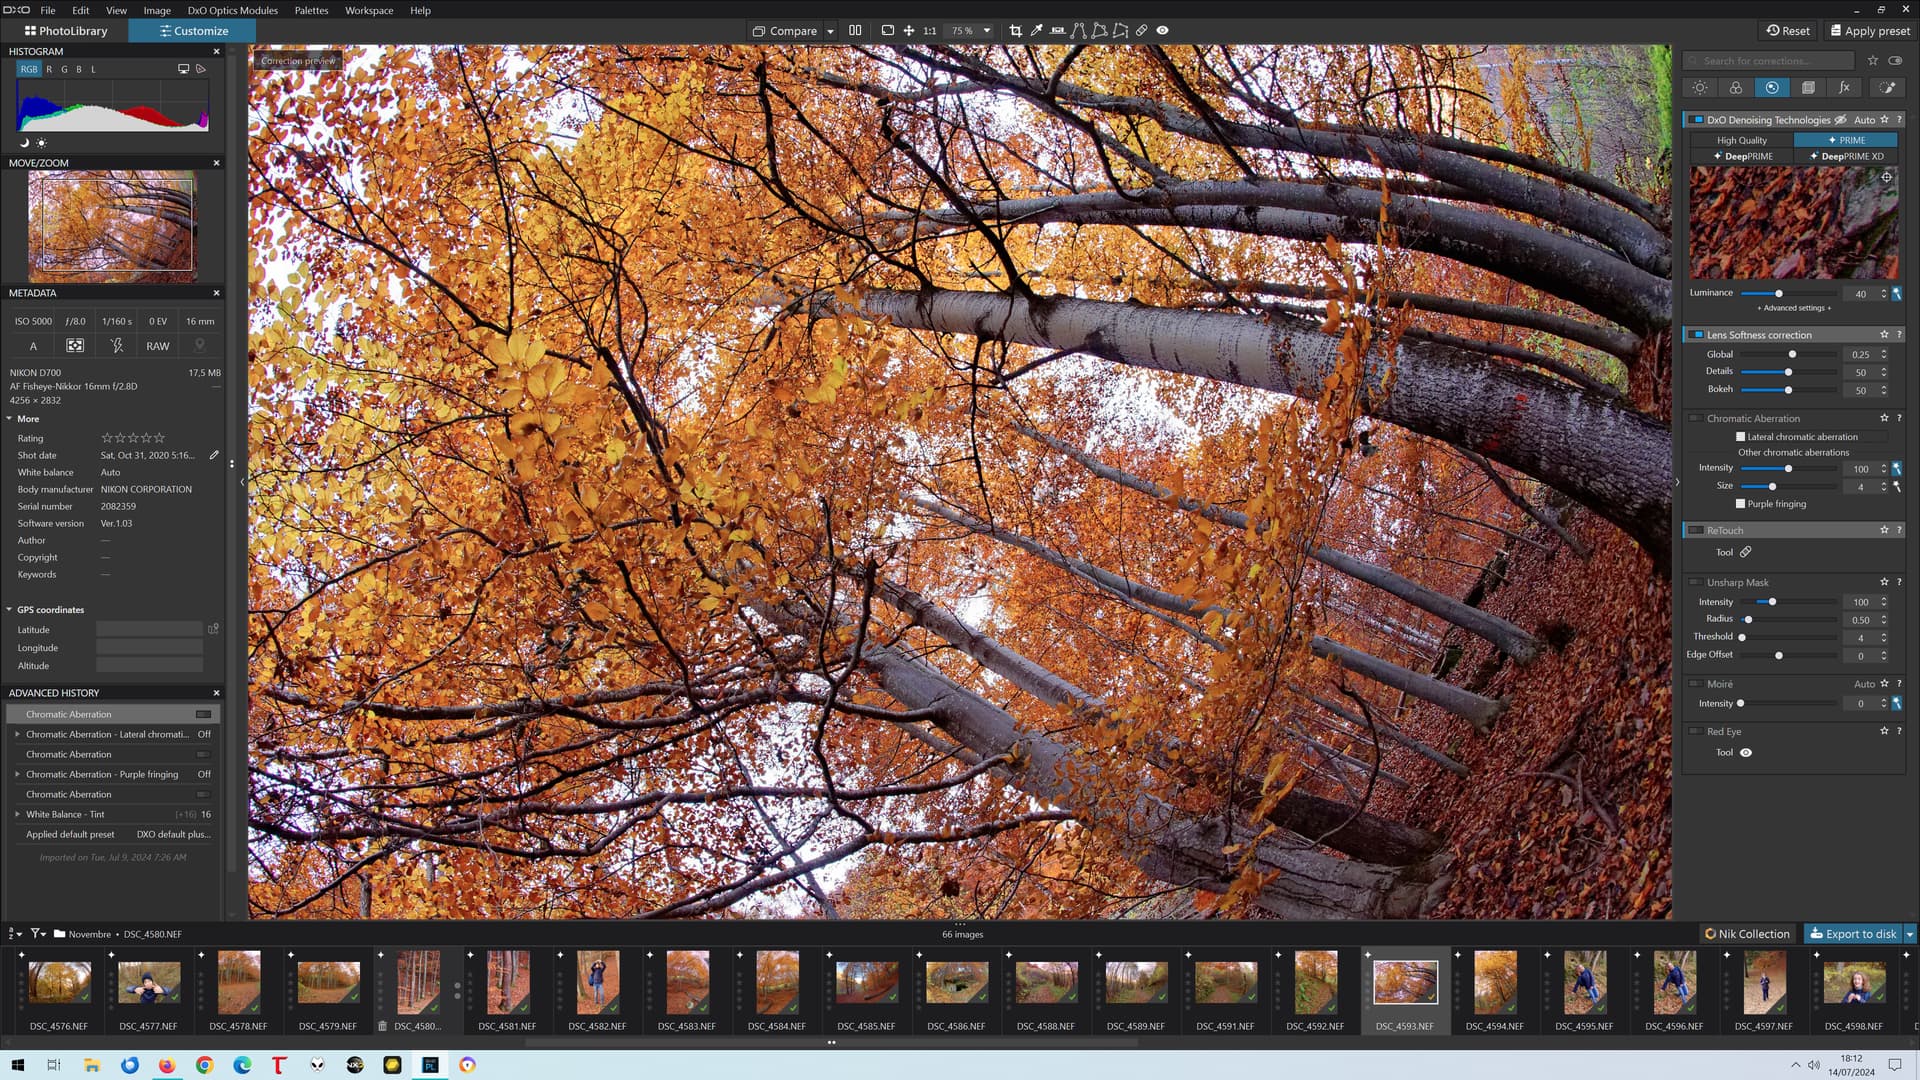
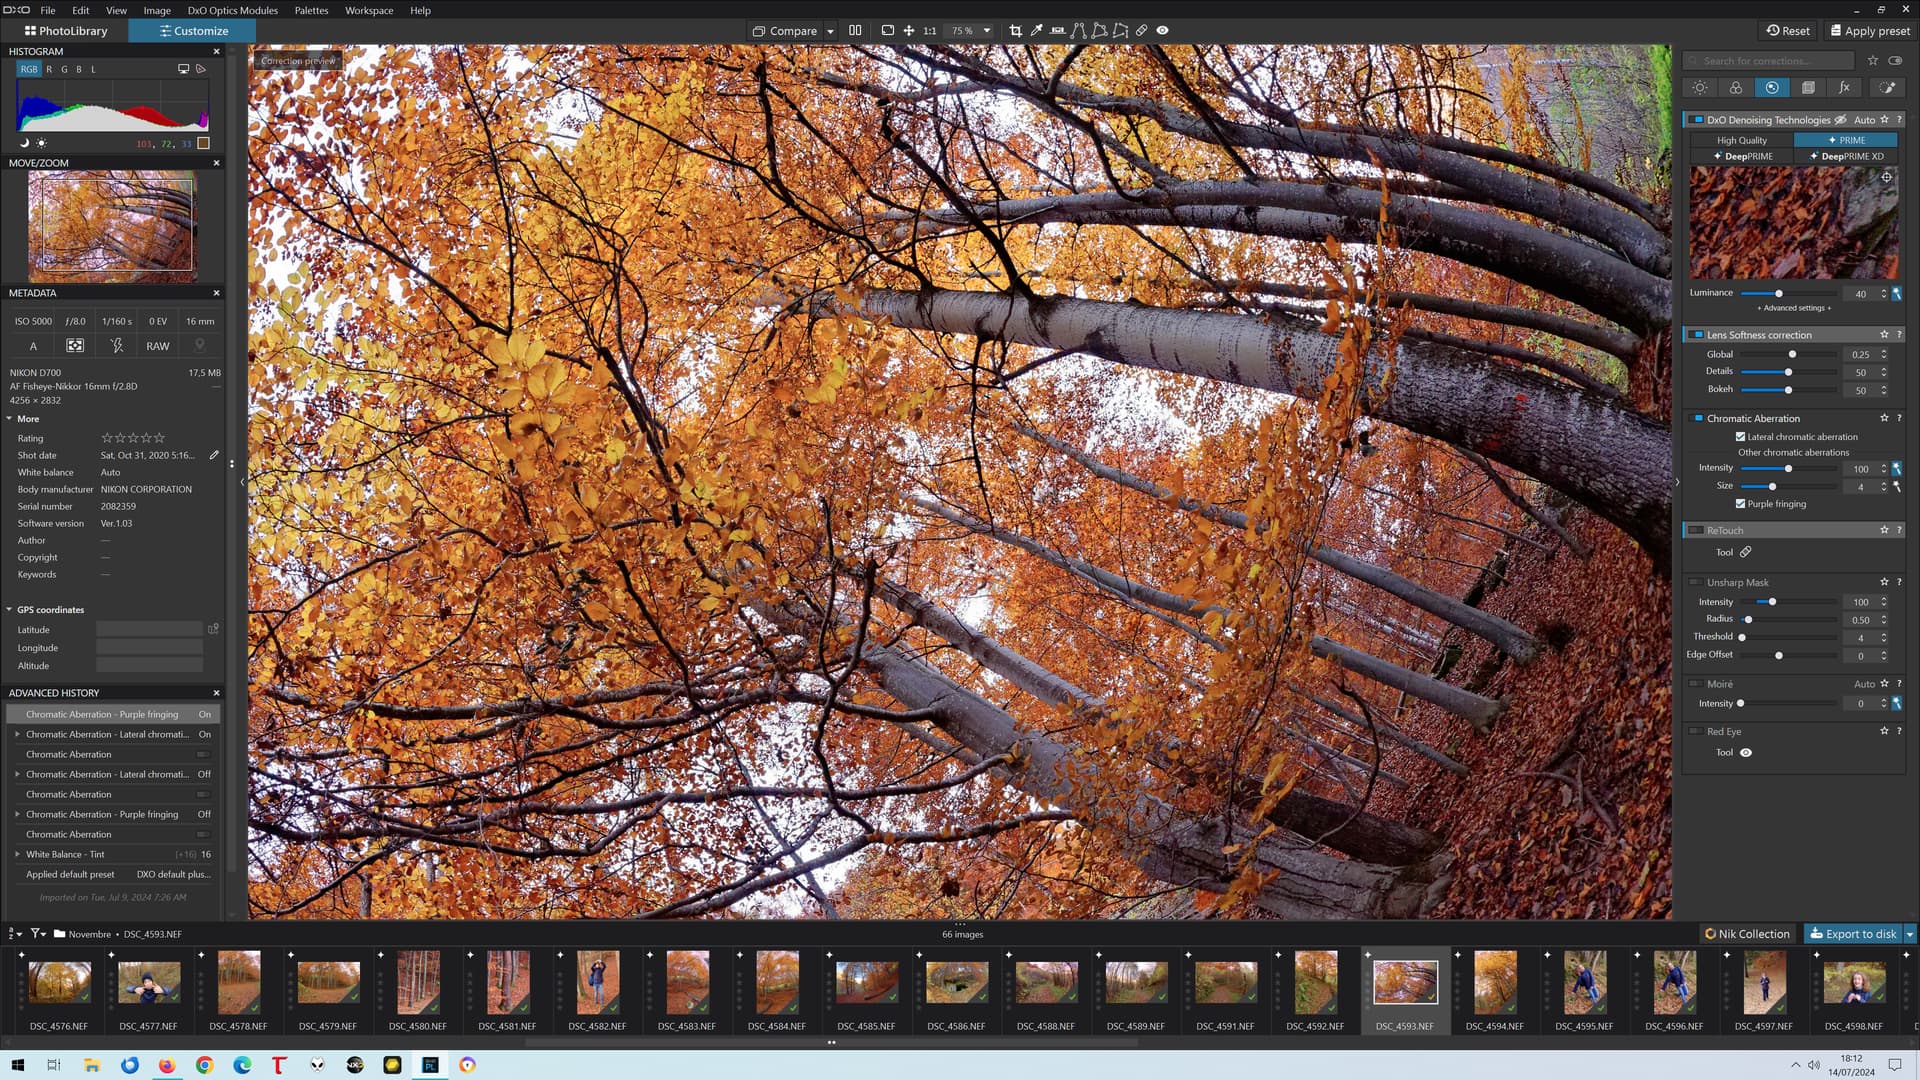
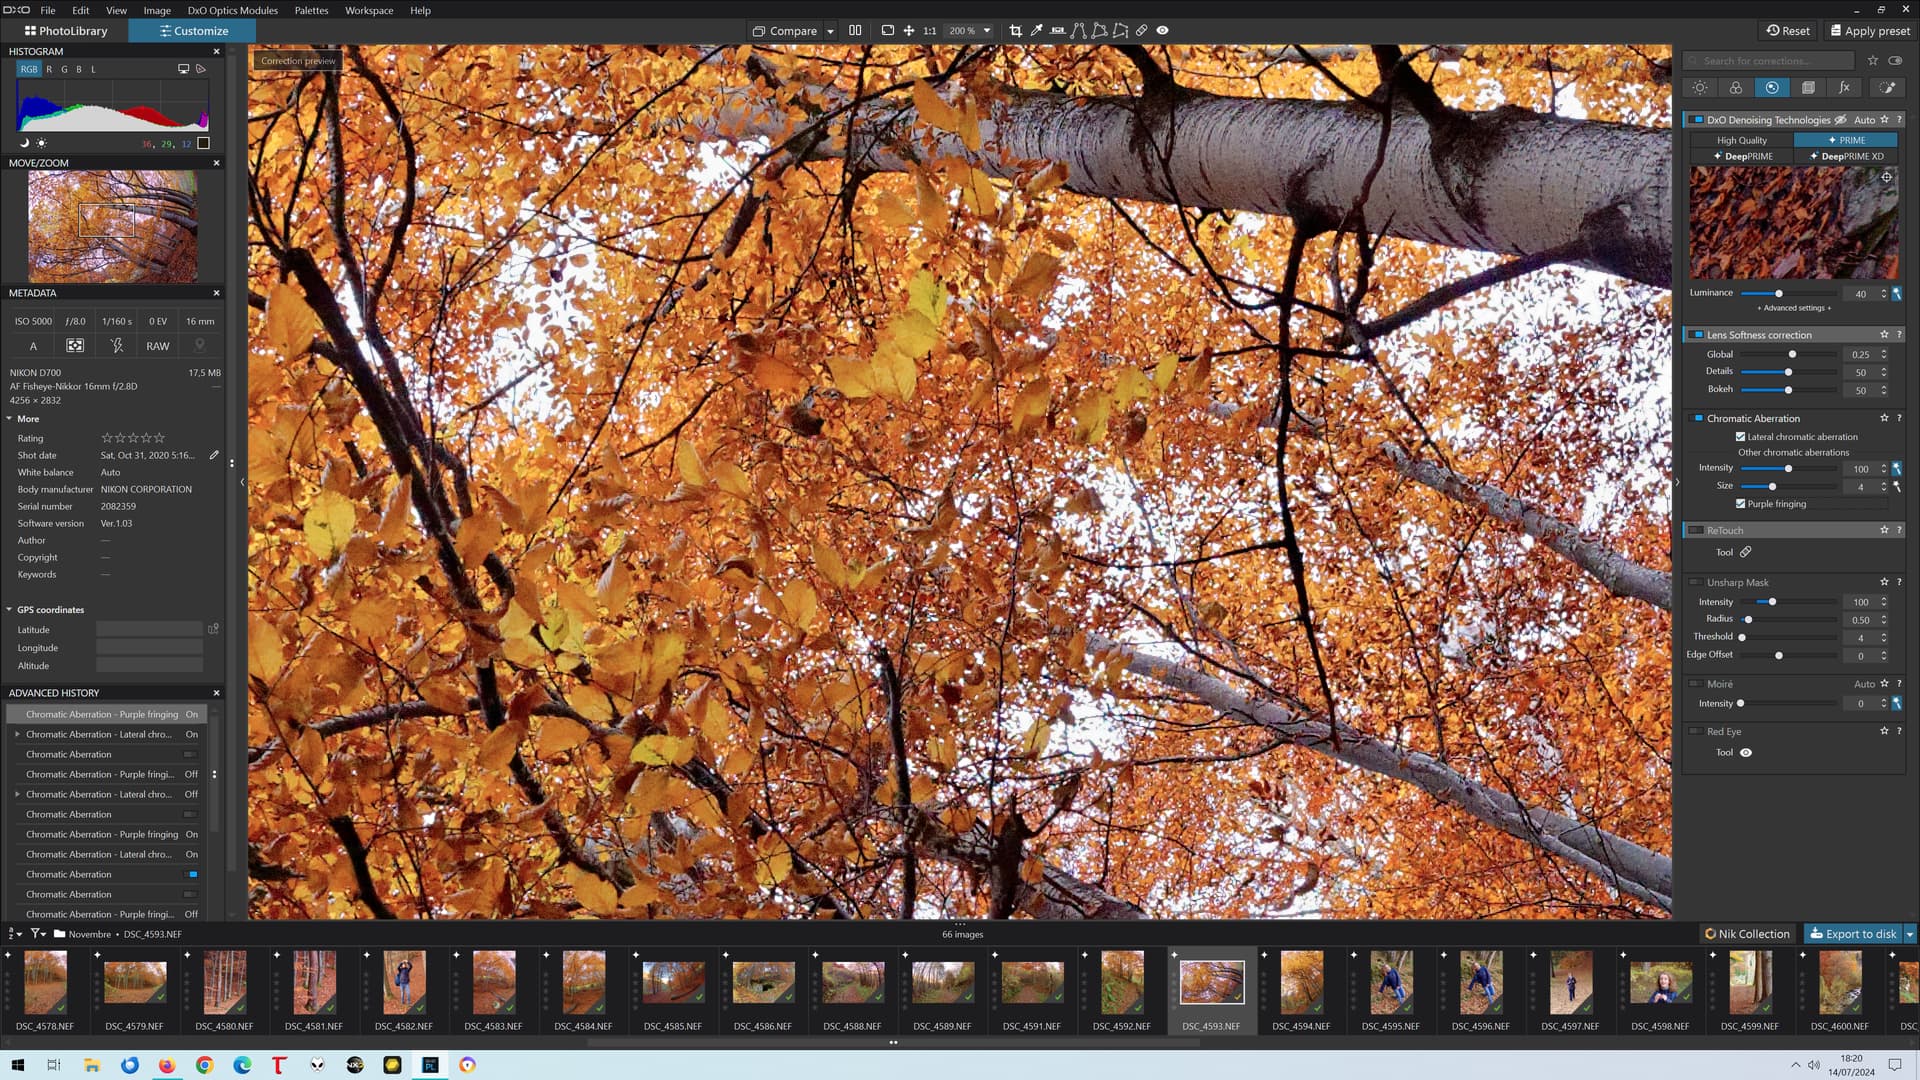
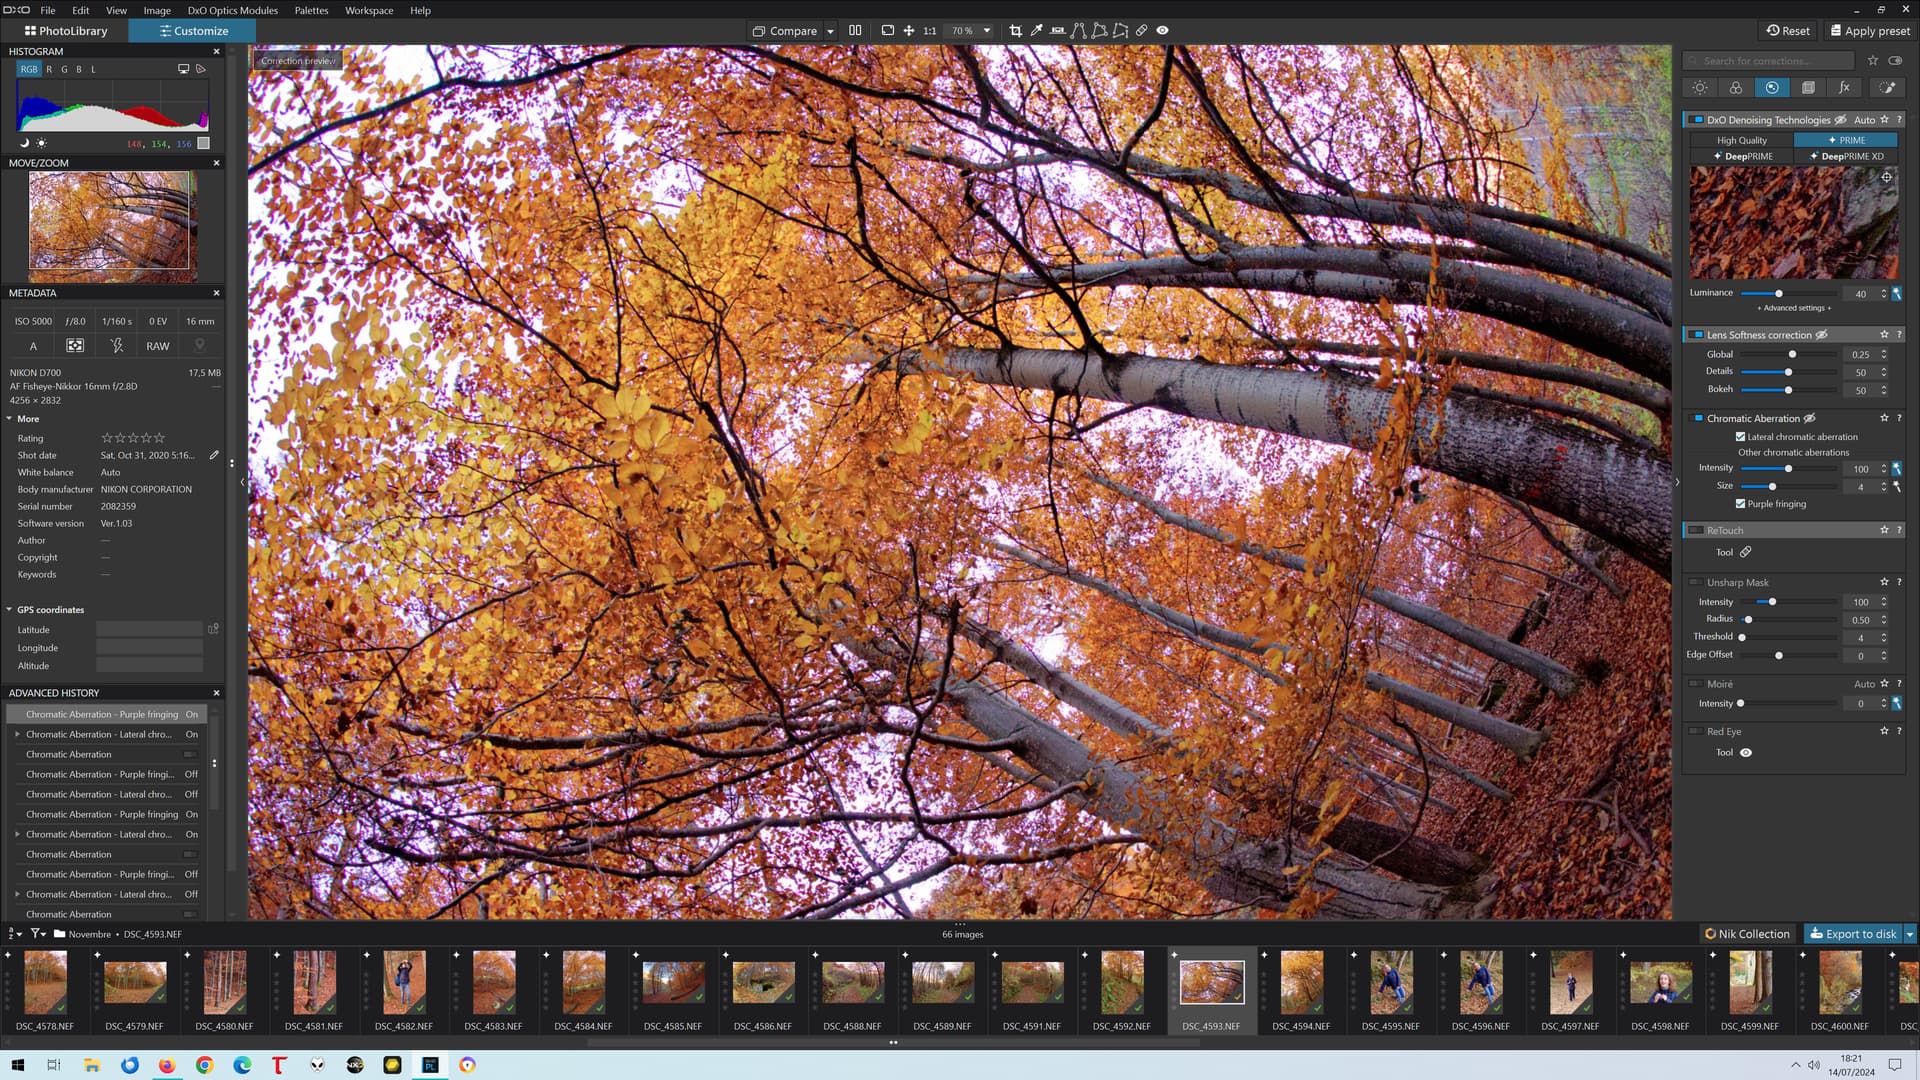
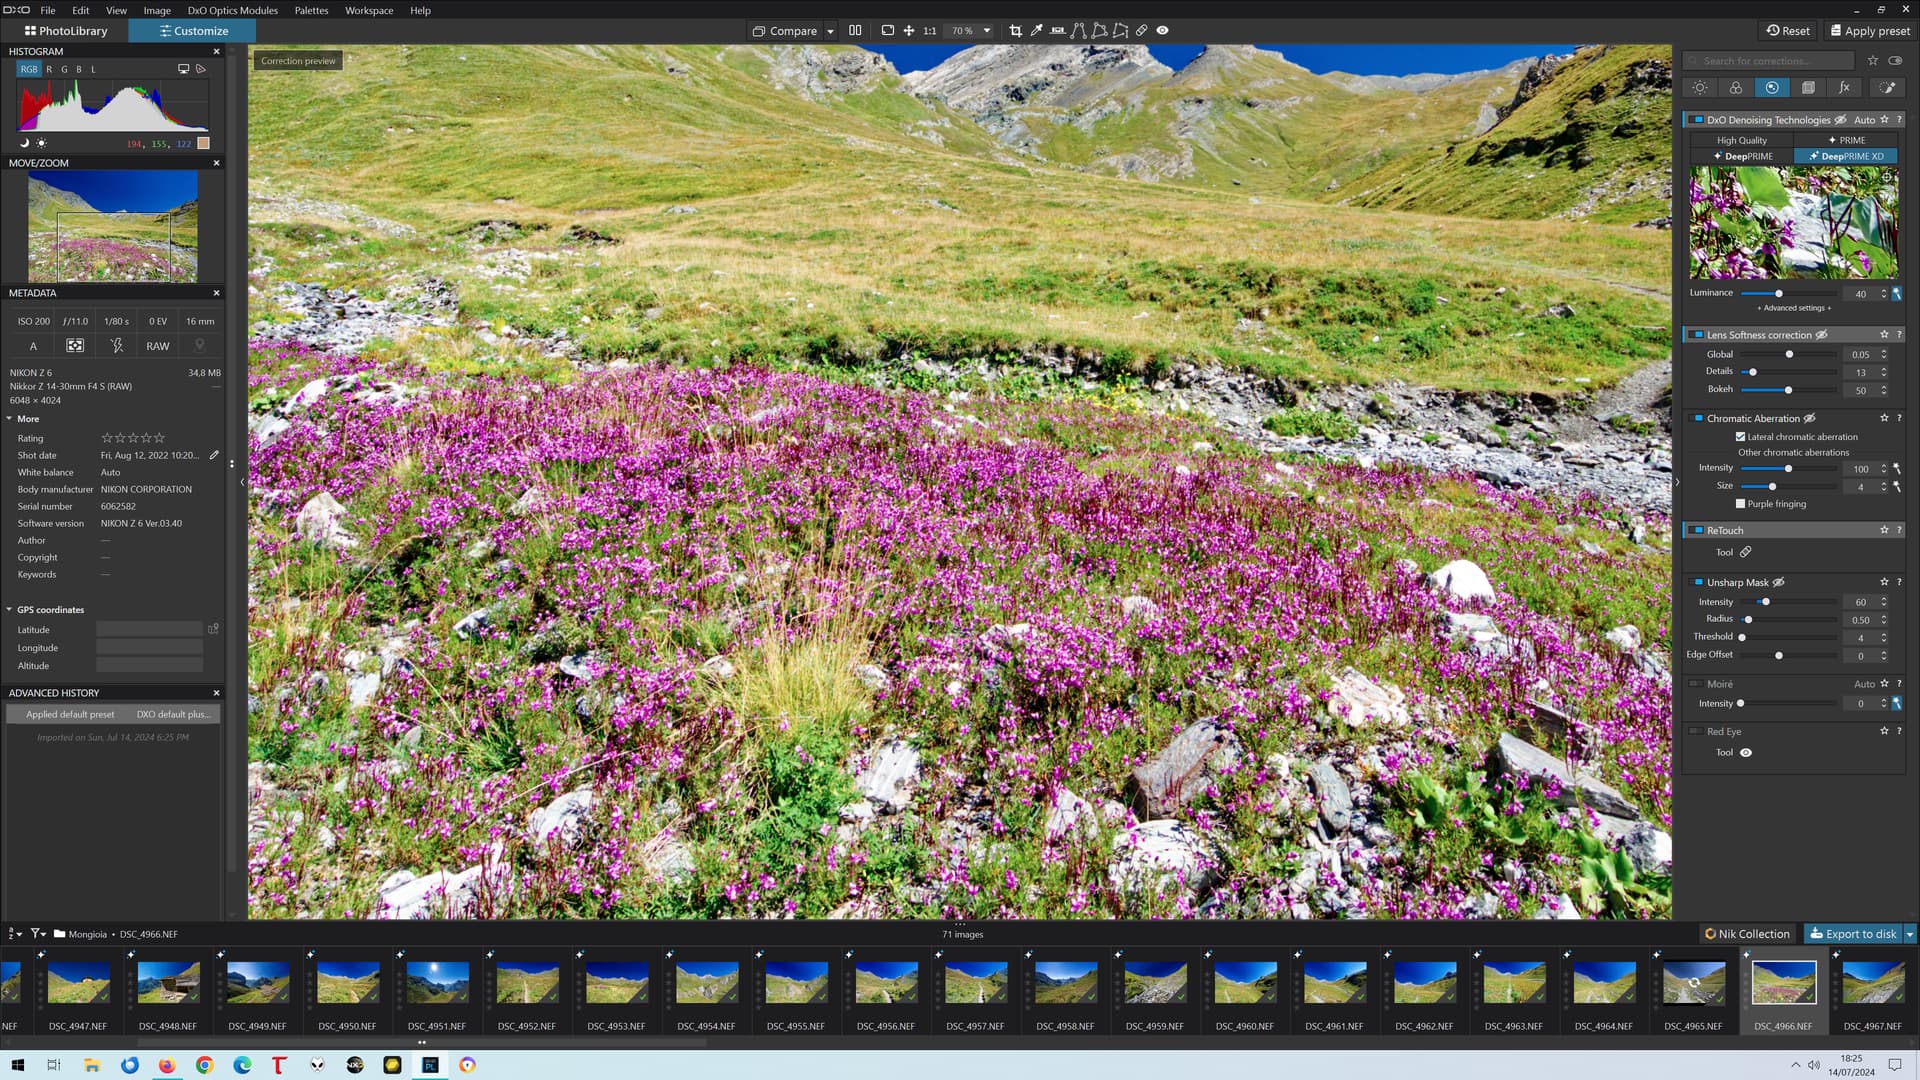
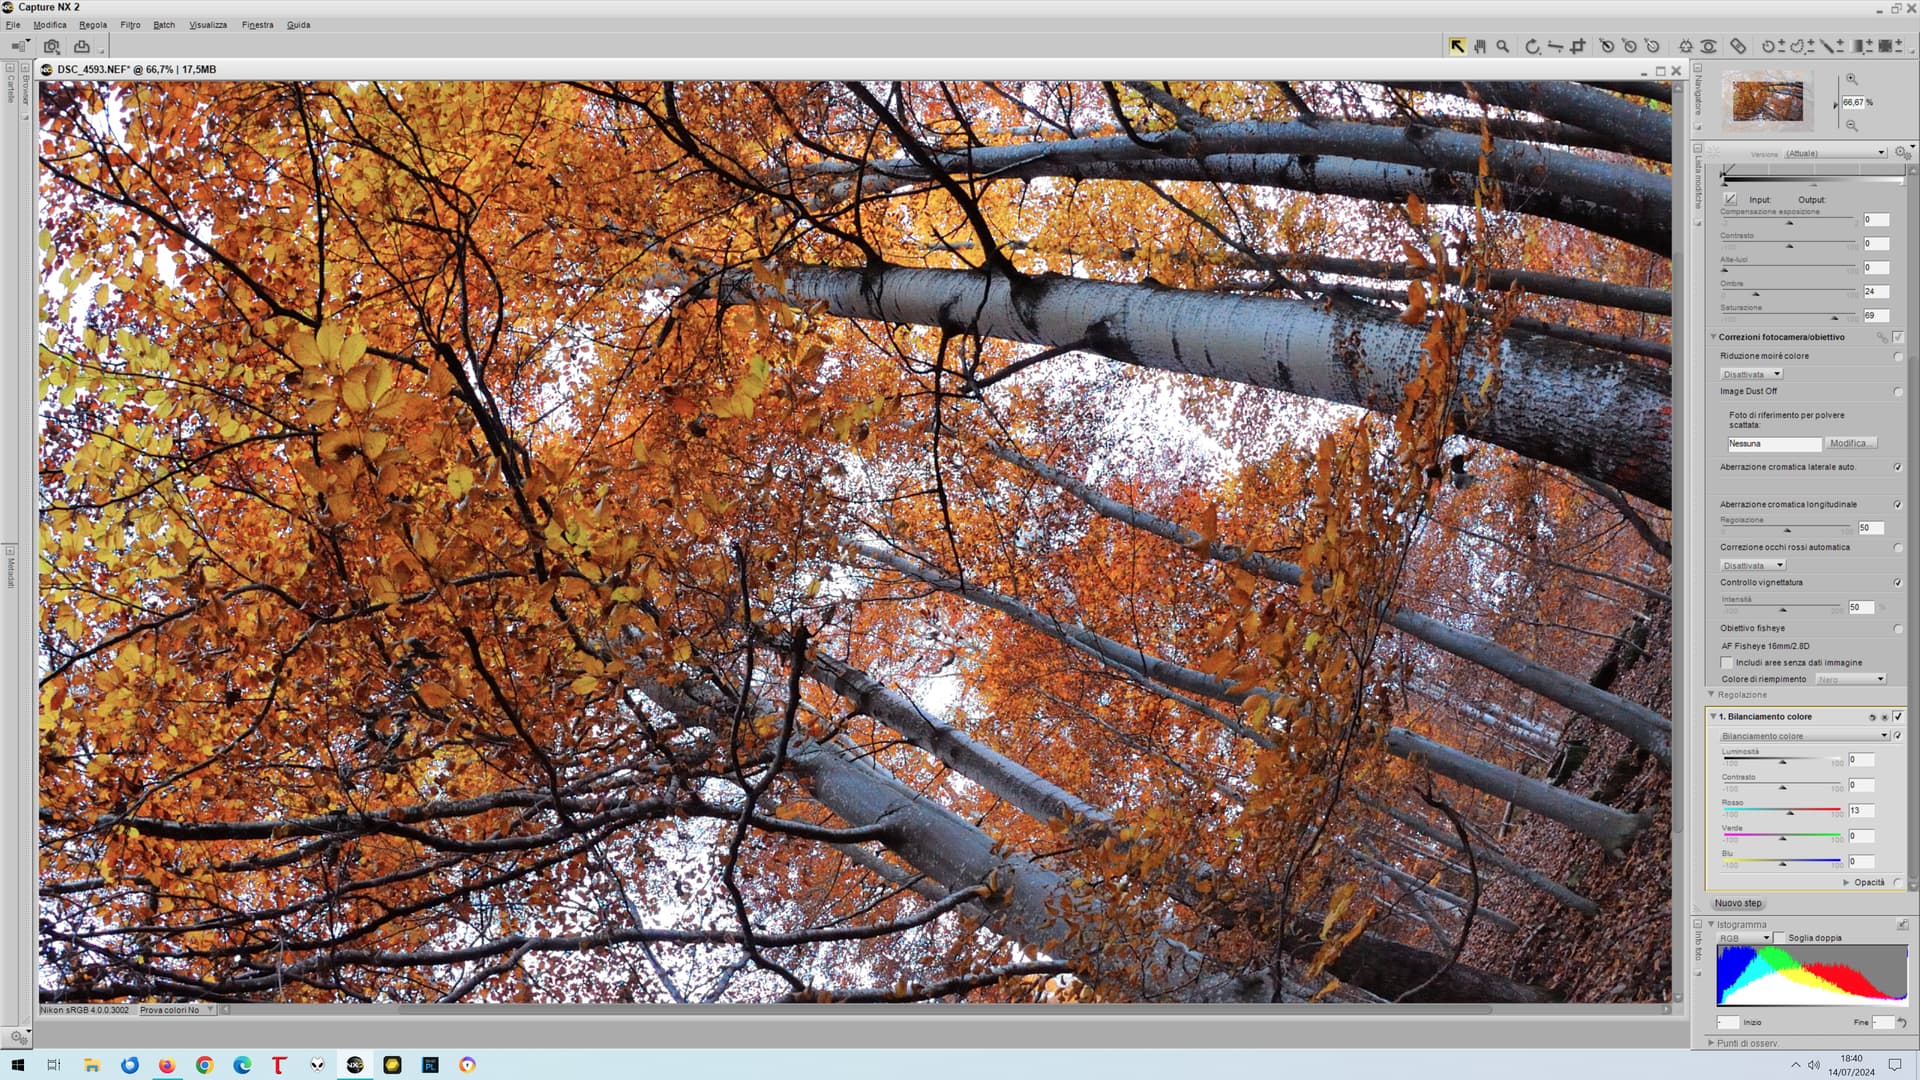
Excusable or inexcusable, I believe what you see at 70 % is extensive Chromatic aberration. So, this is a bit of an extreme case.
Anyway, I agree that DxO should do something with their rendering before export, even if they cannot fix everything.
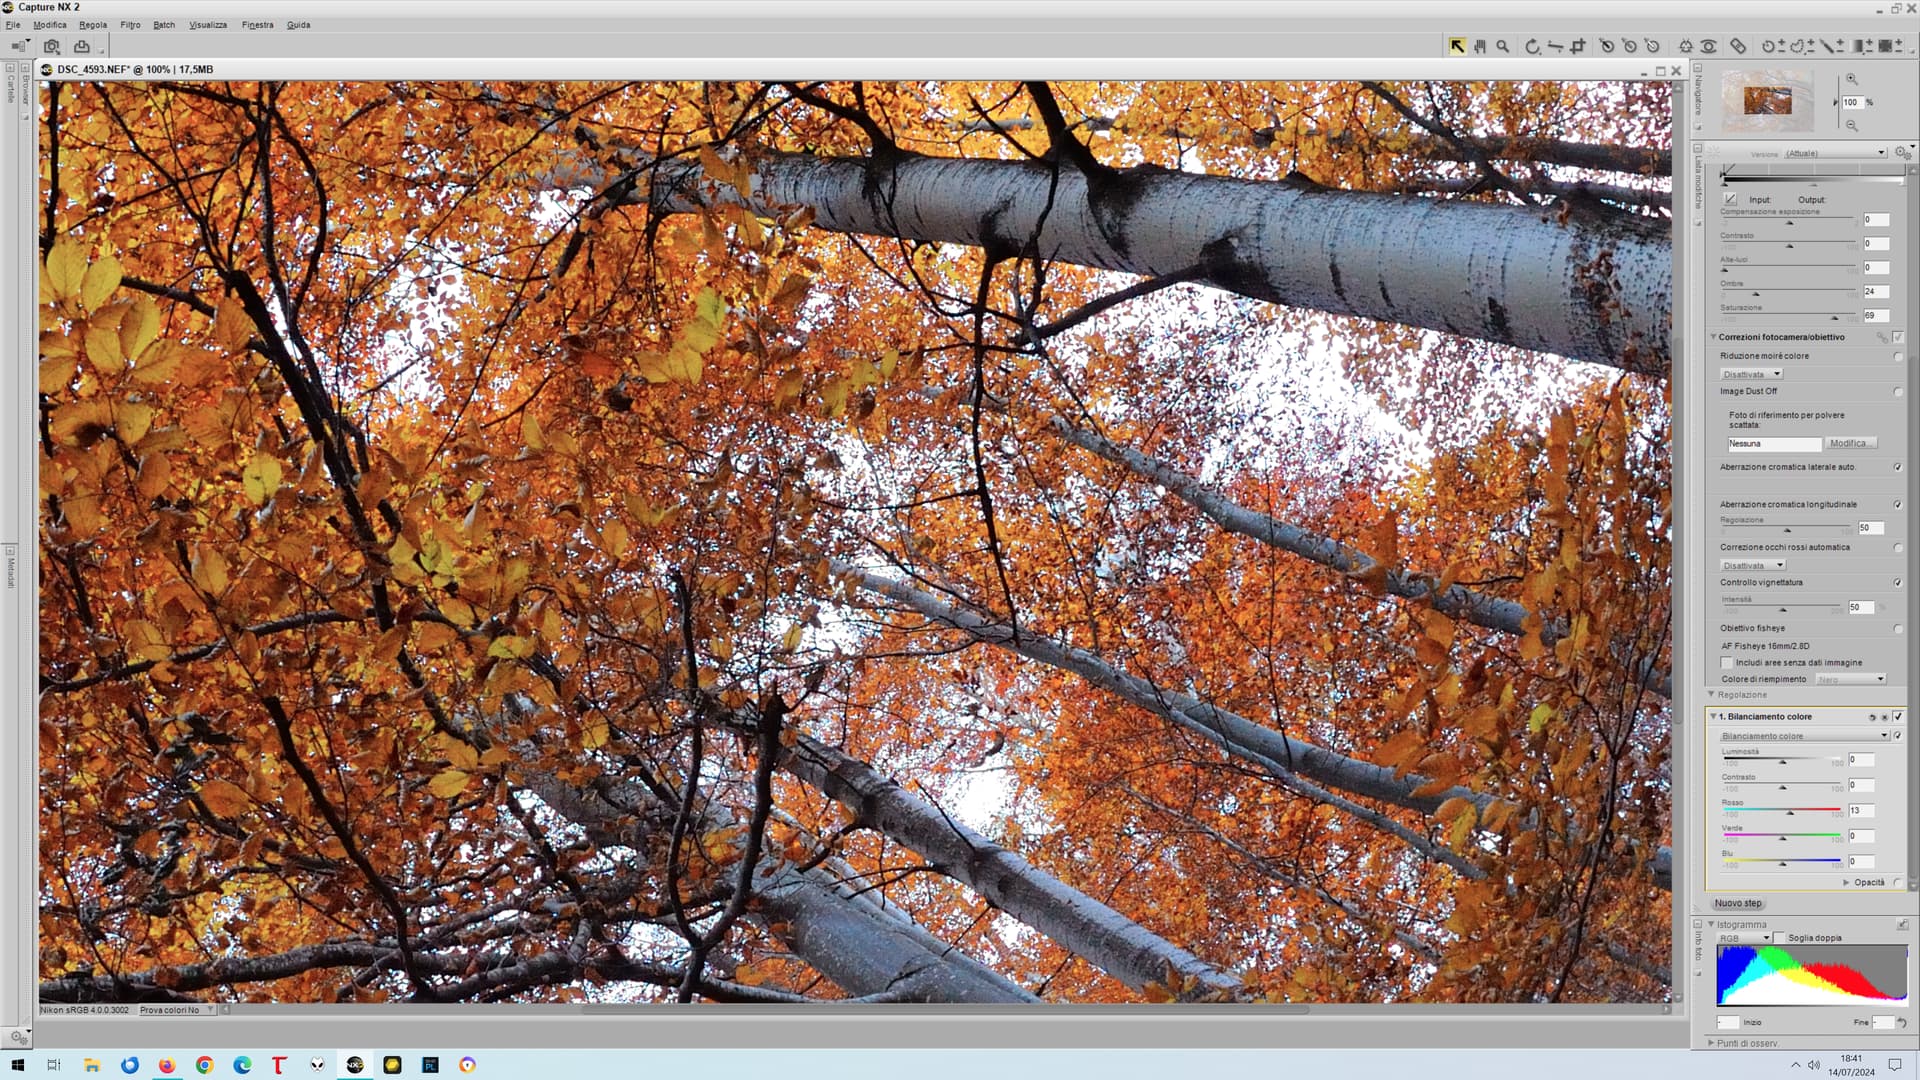
If you look at the file at 100%, even without activating the corrections, the chromatic aberration is actually not that terrible. It’s PL’s inaccurate rendering that makes it look that way.
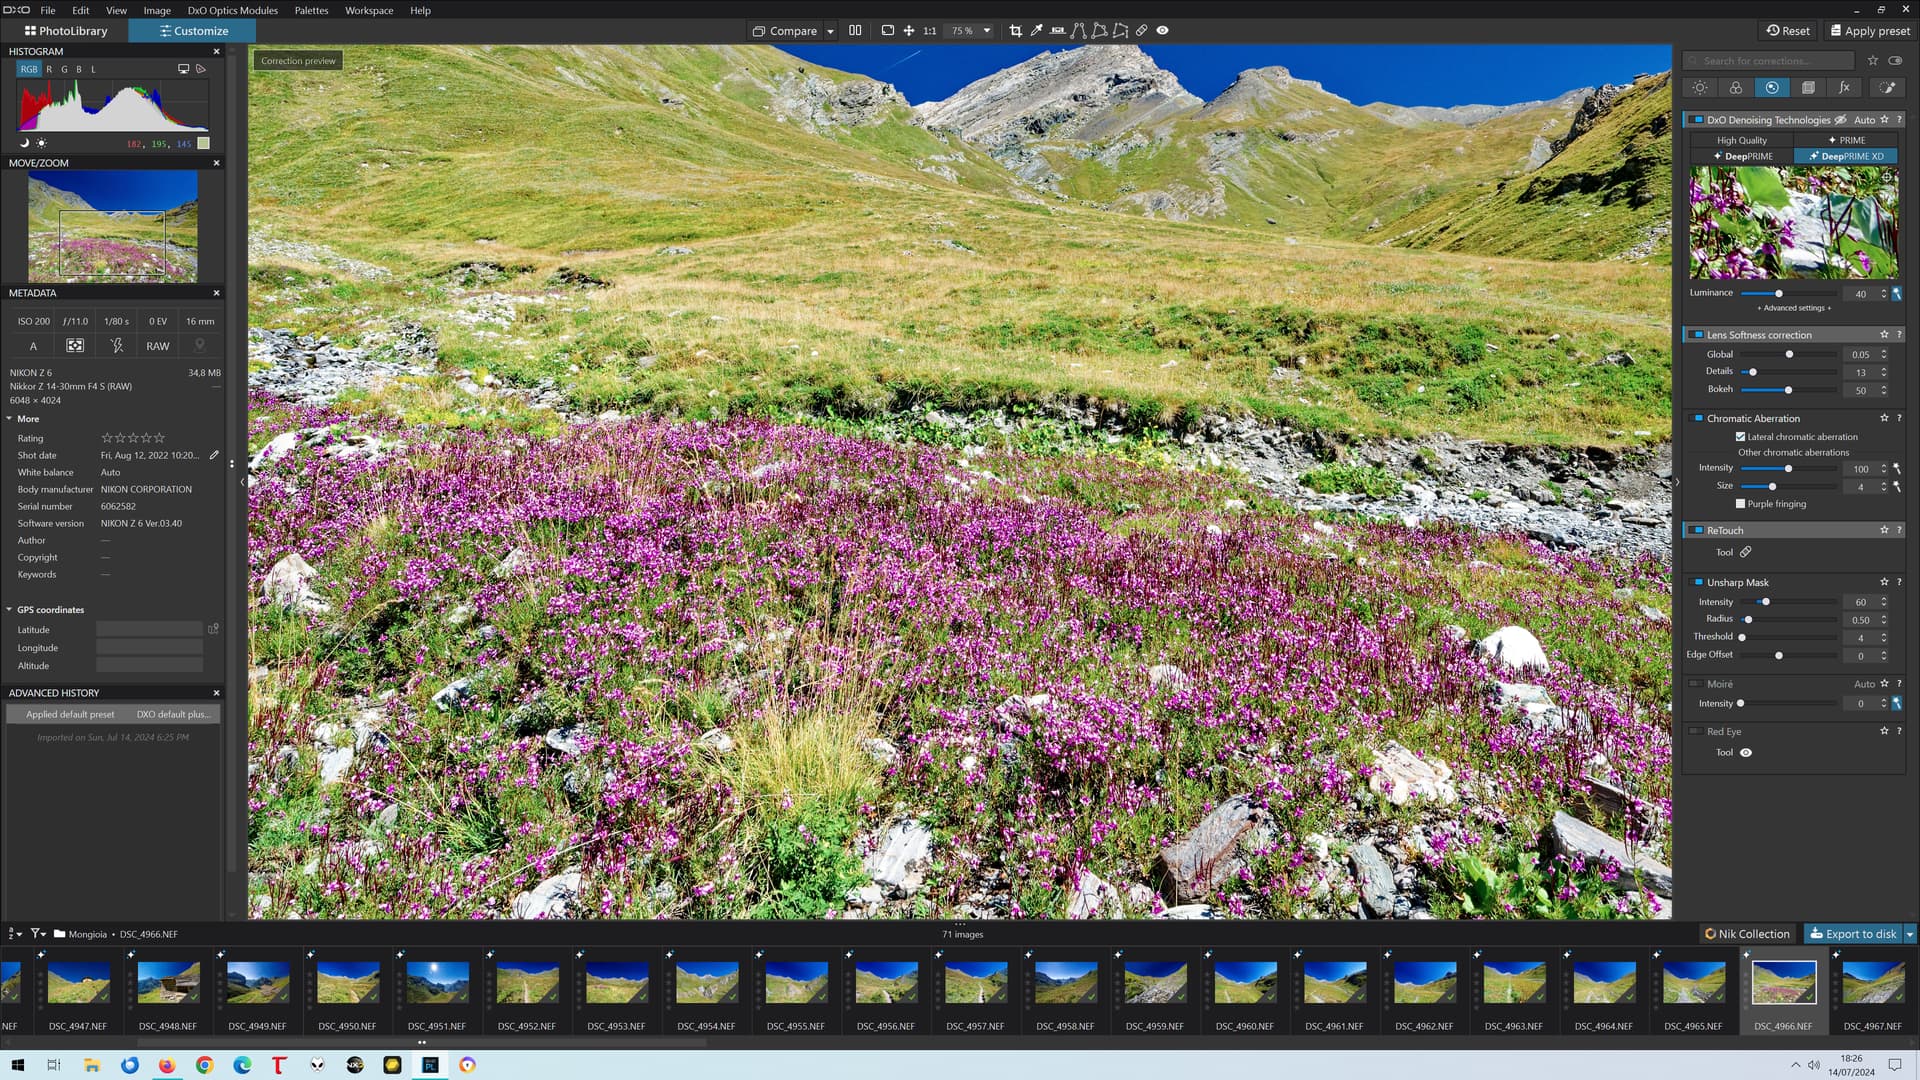
Look here… This is the image at 75%, with NO correction for chromatic aberration or purple fringing:
The actually look the same, and both look exactly like the exported jpeg would look. It’s proof that it’s NOT chromatic aberration that causes the difference. It’s completely and only caused by a very bad rescaling algorithm at 70% and below: completely PL’s fault.
Look at how dramatically the saturation of the flowers and grass changes from 70 to 75%. How is one supposed to work on the full image to regulate saturation and vividness, if it’s so unreliable?
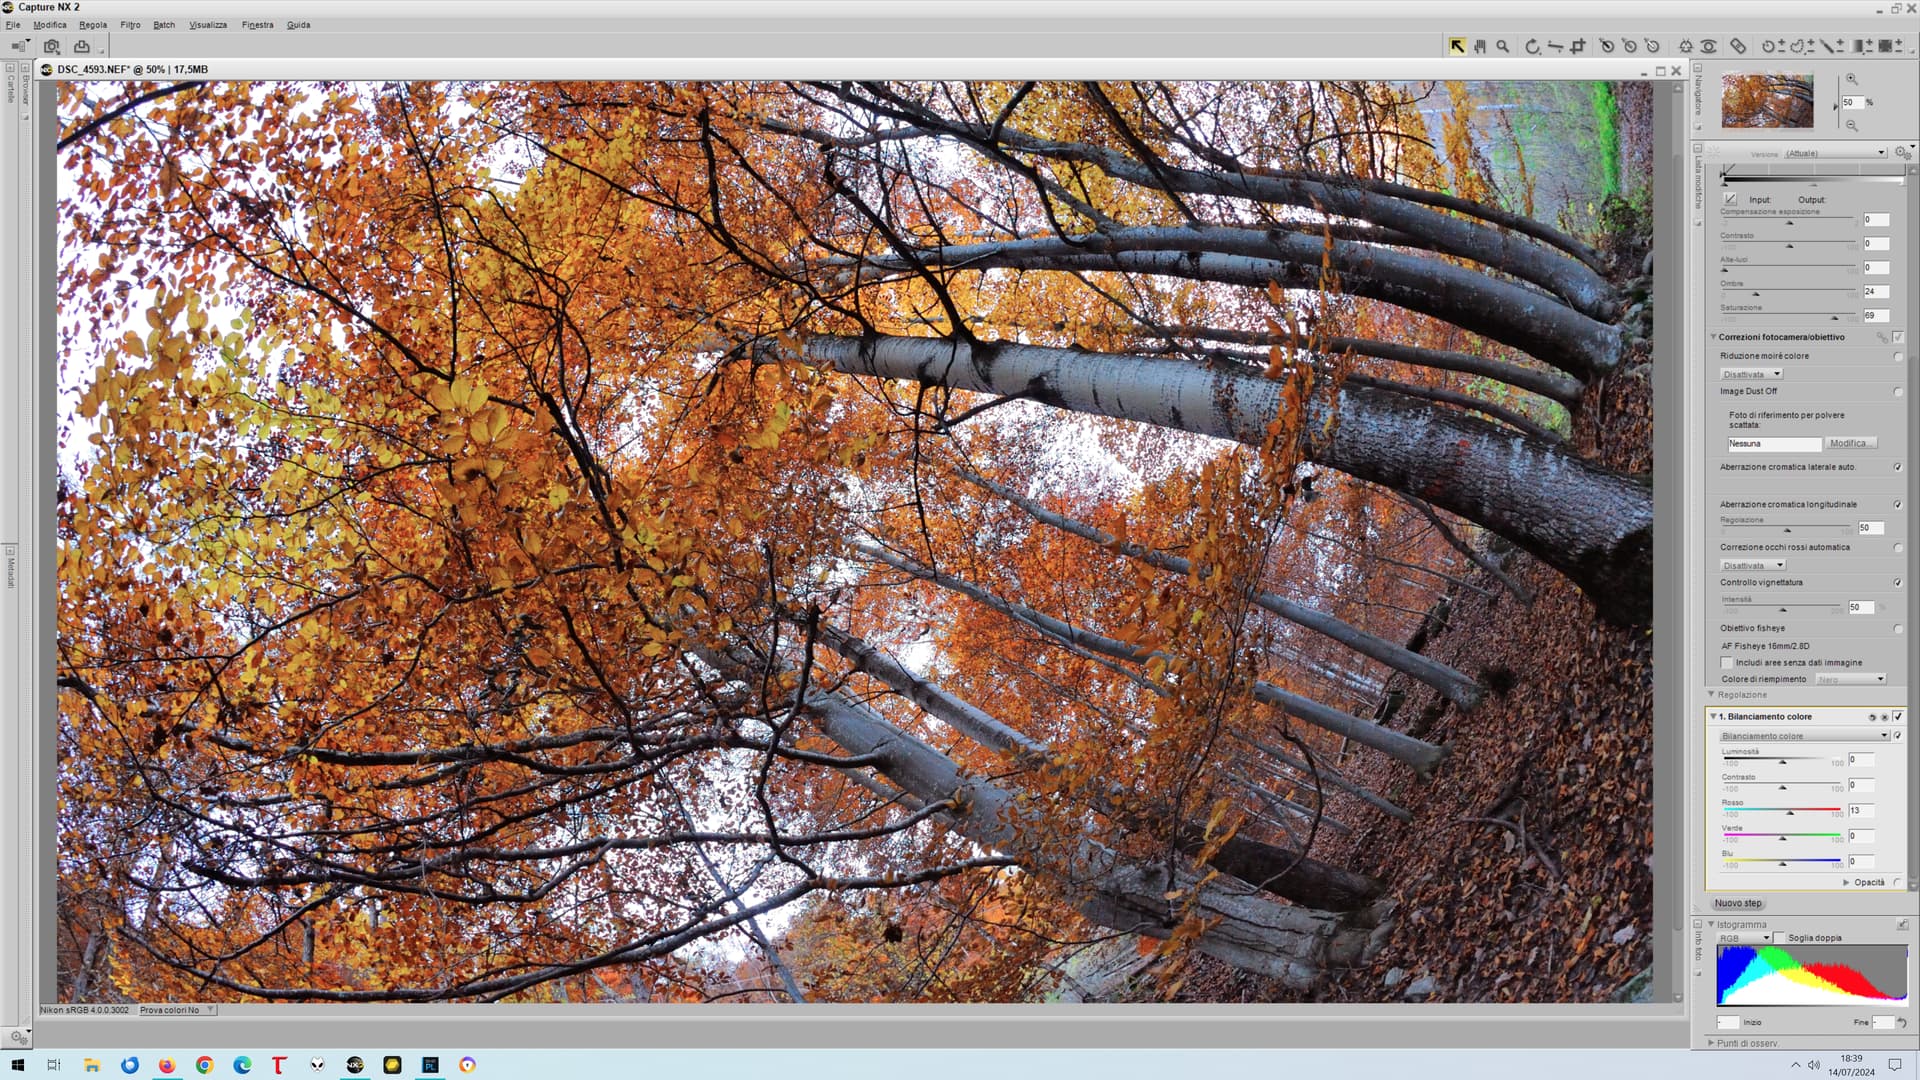
That’s right: a program that dates back to 2009 (FIFTEEN YEARS AGO!!!) has perfect rendering at any zoom level, with no colour artefacts whatsoever.
So, please, let’s cut the bullsh*t about “it would be too heavy on the CPU”, “DXO took some necessary shortcuts to speed up the rendering”, “it’s unavoidable”. Bloody Capture NX2 operated correctly FIFTEEN YEARS AGO, with no performance issues. I used to run it on a Pentium 4! No reason PL can’t do it yet even in 2024.
Methinks they are related. Render time problem. While waiting for over two minutes for the image to be rendered on my Mac mini (Intel powered), I used to just try to not be bothered. But when I found that My (Mac chip) MacBook Pro did it in a fraction of a second, rendering is the reason why I’m now only using my MacBook Pro, and the Mac mini is mostly abandoned on a different desk.
…and what led me to this post is your earlier post:
Ignore the above, unless more of you have this issue that I had.
My simplified way of thinking about this:
When you’re up to your neck in alligators, it’s difficult to remember the original objective was to drain the swamp.
Stenis
(Sten-Åke Sändh (Sony, Win 11, PL 6, CO 16, PM Plus 6, XnView))
81
The problem has been and still is that if you open a folder with lots of high resolution images - and we have had examples here where people have been complaining despite having even more than 1000 pictures in the folder they have tried to open and in a case like that it hurts.
I always use Photolab with 1:1 previews despite that limitation since I in a case like that always just open a fraction of all these files using PhotoMechanic and the function “Edit Selected Pictures With” - Photolab.exe. If I do I never have a performance issue because of the Photolab design but it you don´t use an external application to open a smaller fraction of all the files you want to process, you will have these problems with Photolab.
… but, every RAW-converter have to handle exactly the same problem really because when in library mode you need fast and light previews but when editing you will prefer 1:1 if possible and refresh and scaling of the big 1:1 previews will have to take place sooner or later in that process. This is a compromise in every RAW-processor that has a built in monolithic catalog/database.
In an external software like PhotoMechanic there are no need för big 1:1 previews since no editing is taking place there. There the previews are strictly dimensioned to support max speed scrolling and culling and if I just open a fraction a time I will not have any problems with opening big folders since it will not need to render previews for all pictures - just for the ones in the slection.