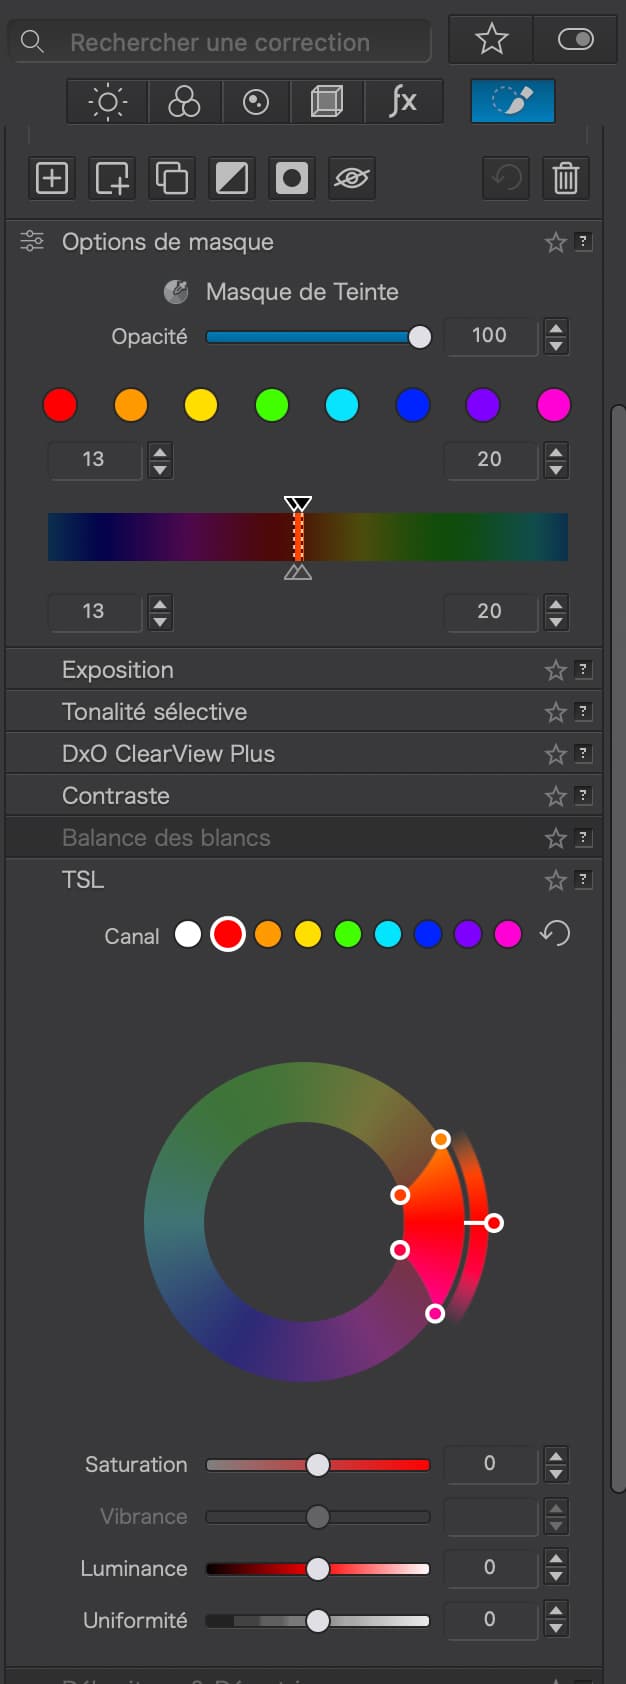
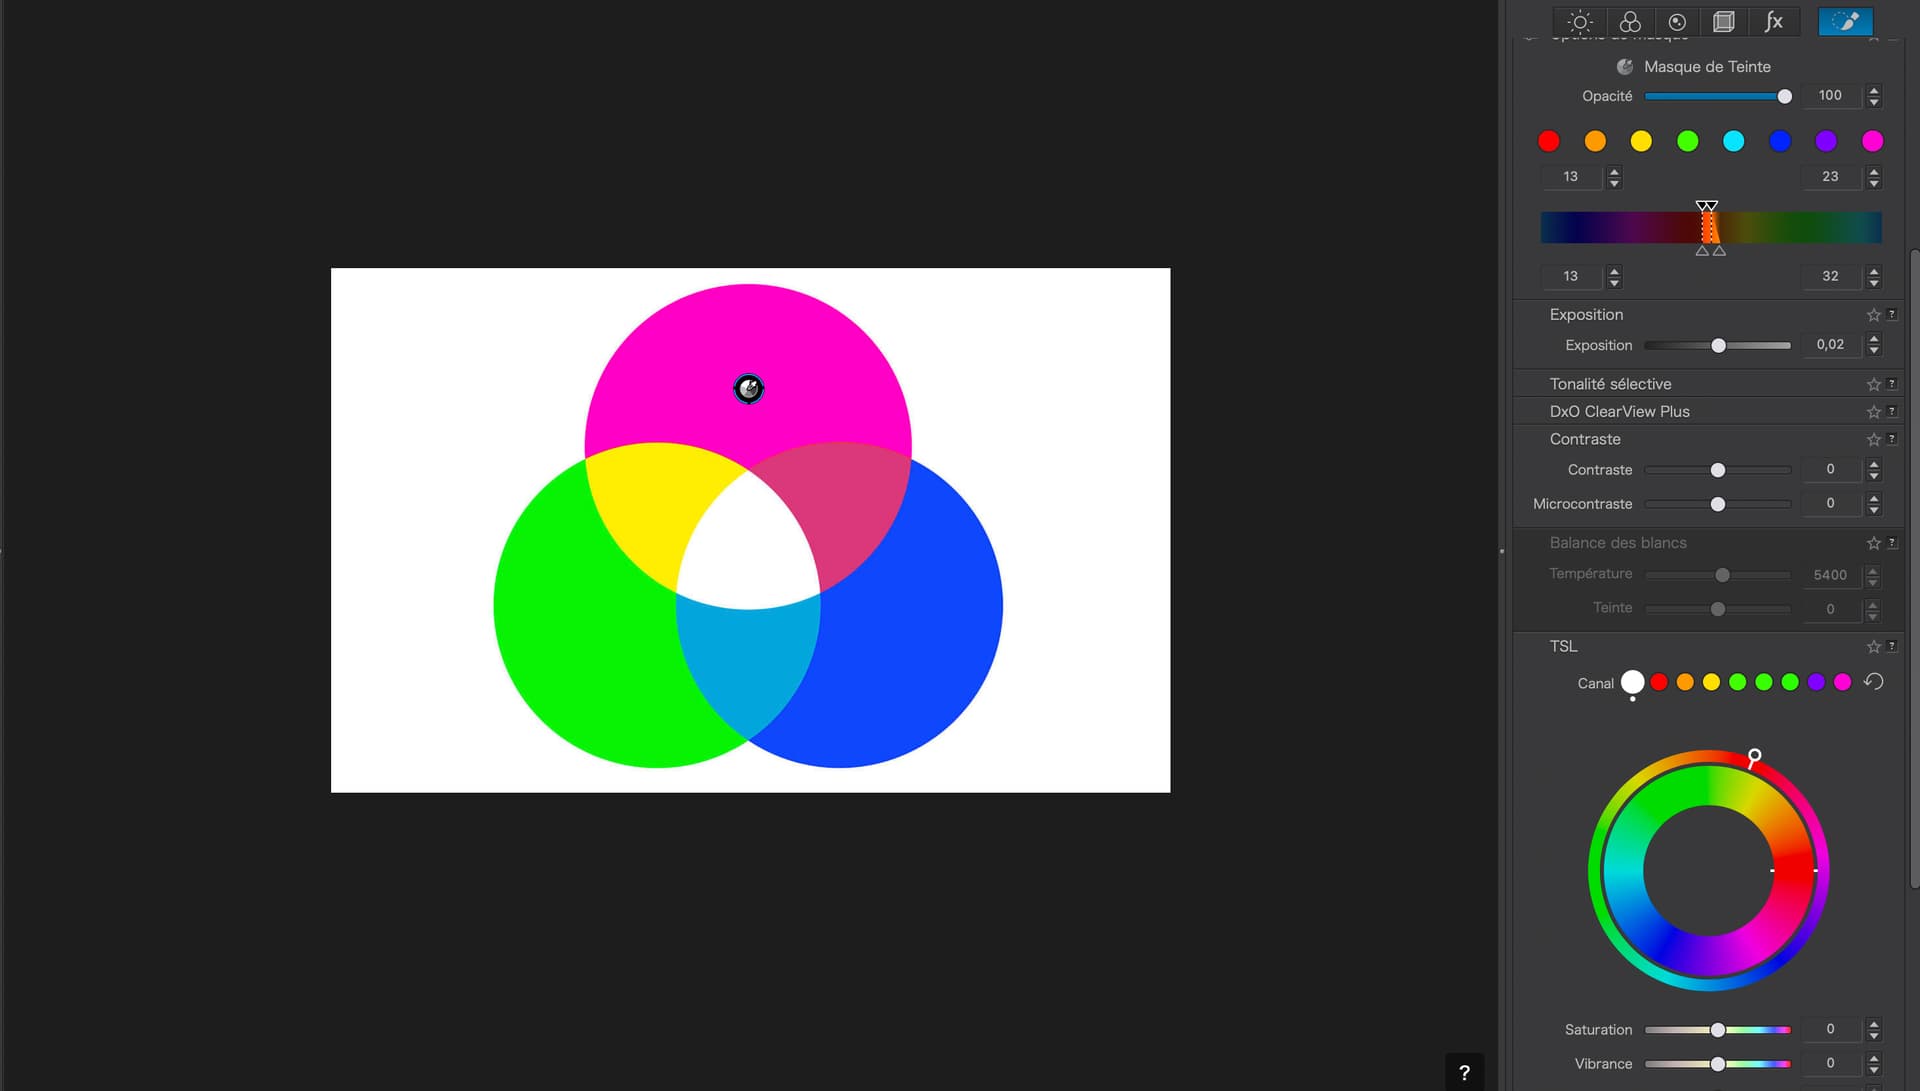
Please excuse this remark but, what is wrong with using the top selector for both and scrub the duplication on the wheel? Surely, both are there for selecting an RGB value on the “input”. You only need the wheel for altering the “output” colour.
Why not?
The bar selector can make your choices much more precise, which isn’t easy with the wheel. Sometimes just 1 degree change in hue ranges can make a difference.
On that note, I have found myself wishing I could adjust the Wheel by input numbers rather than moving the selection points by mouse and hoping I get it right. It can be fiddly.
In other words the wheel is not a duplication of the bar, it’s a subsetting tool.
If you selected only reds in the bar and then blues on the wheel, none of the colour adjustments (to the blues) would have any effect.
The bar = define the mask.
Everything else (including the wheel) = affect the masked areas.
This is a variation on the discussion some time ago about the hue mask being “pointless” given the HSL wheel tool. It’s not. It selects parts of the image for many different types of adjustments.
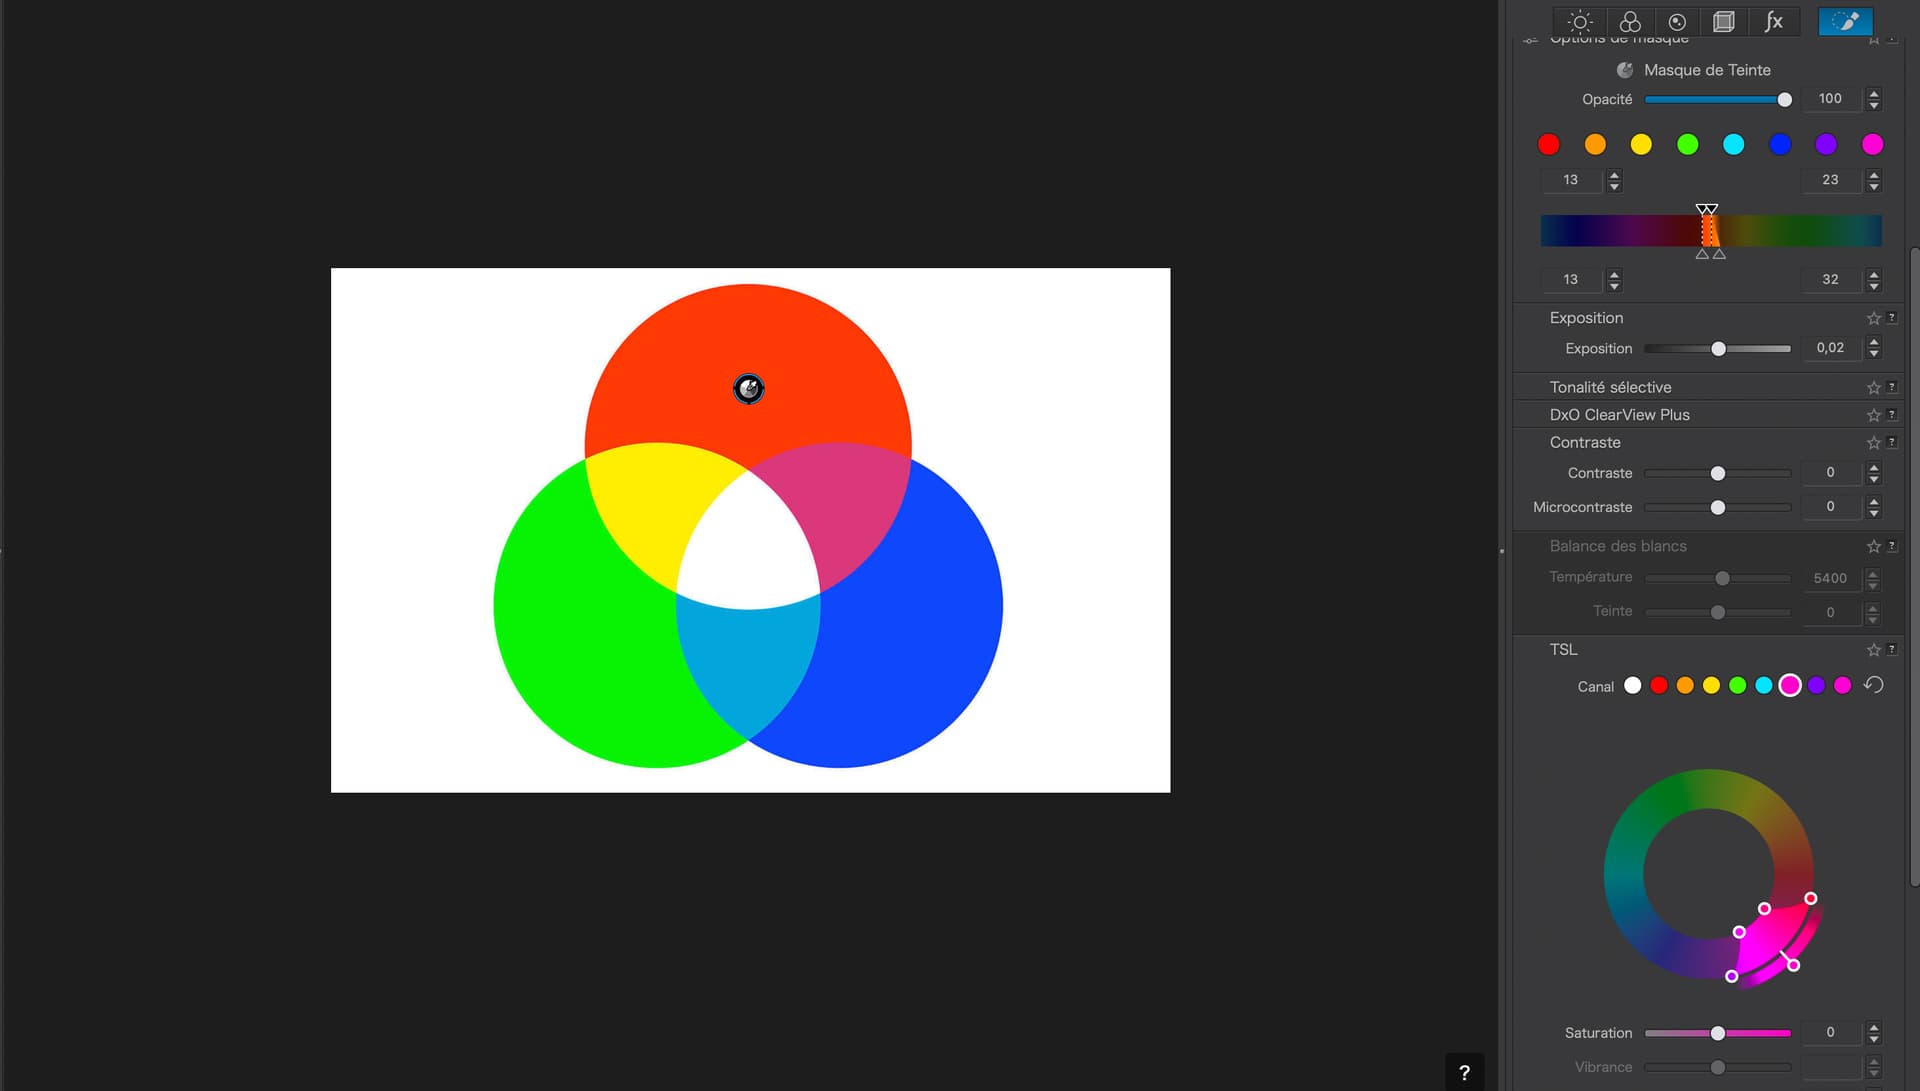
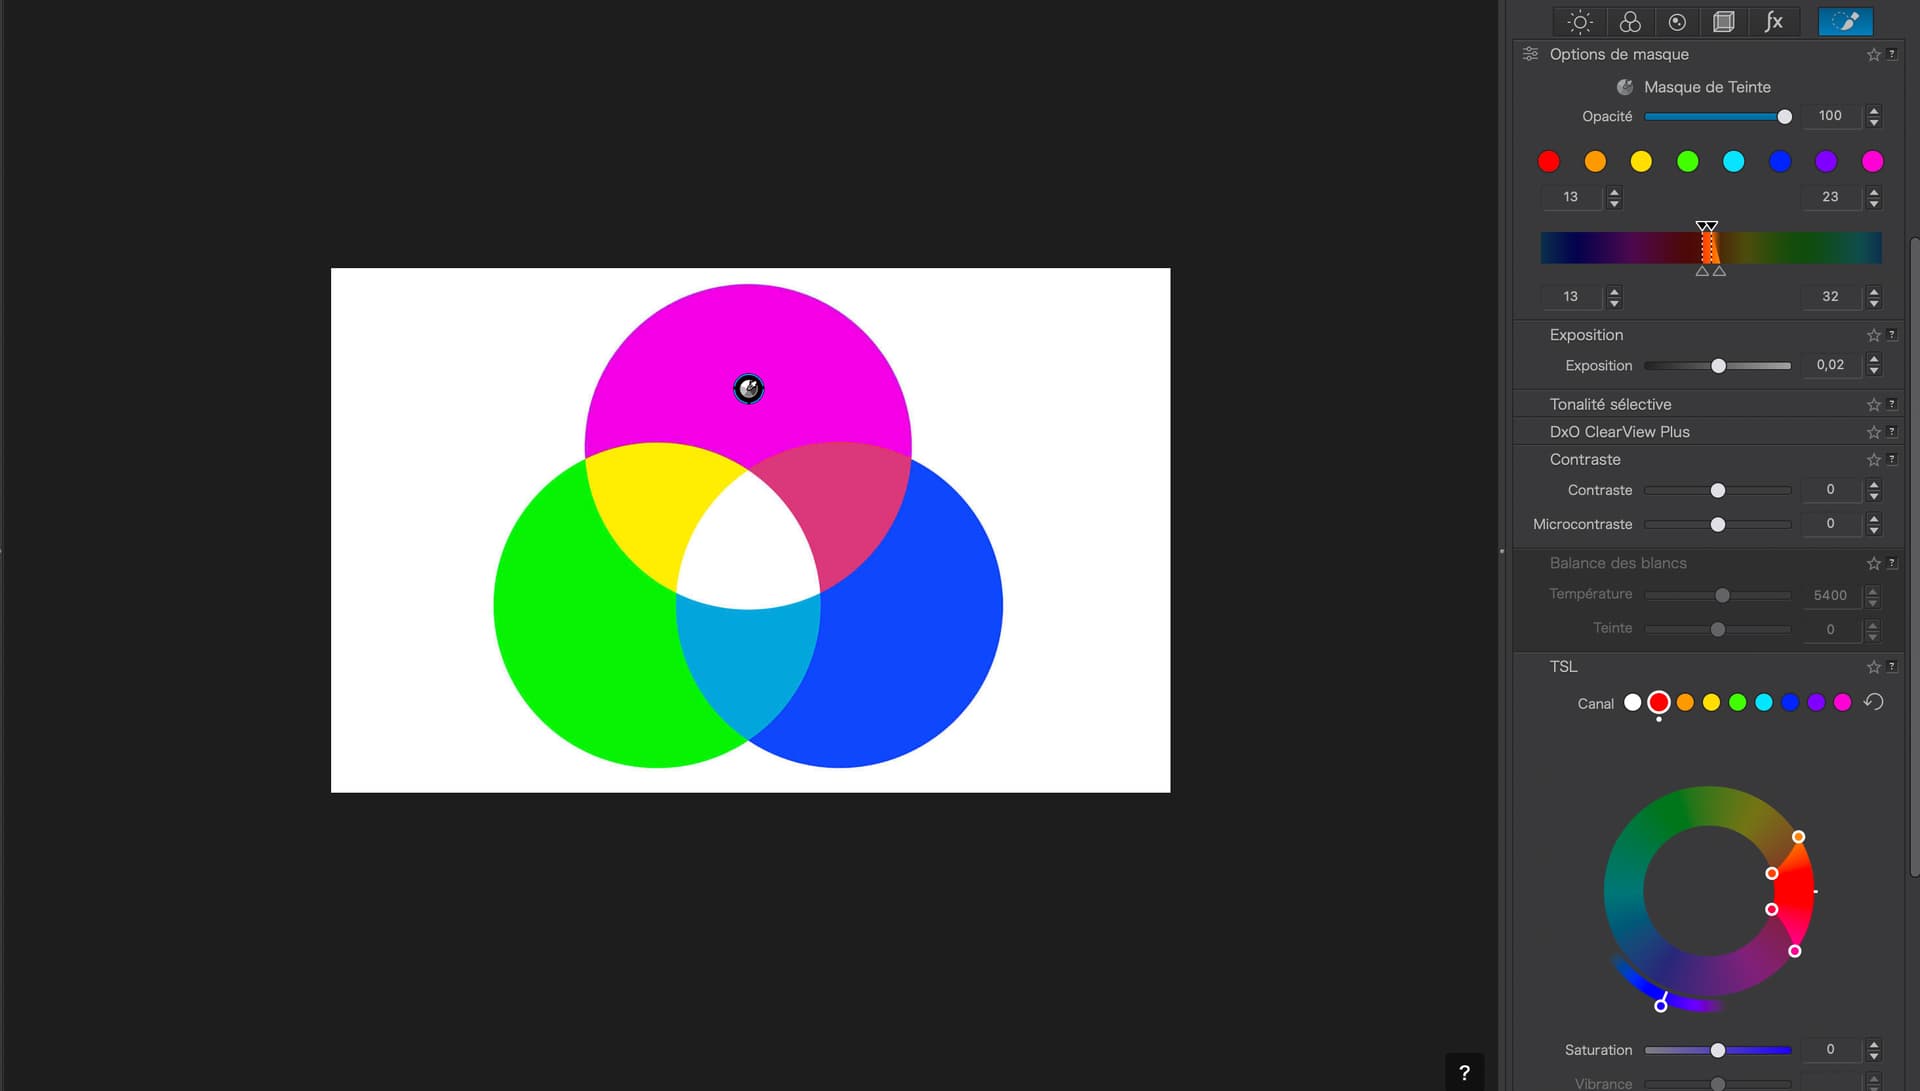
… nothing happens. You might have found this out by experimenting, but it is not intuitive as to why nothing is happening since the mask colour is already selected.
If, as you say, I select the same colour dot as the slider, then things work…
@Joanna I have been testing your examples and it works perfectly for me.
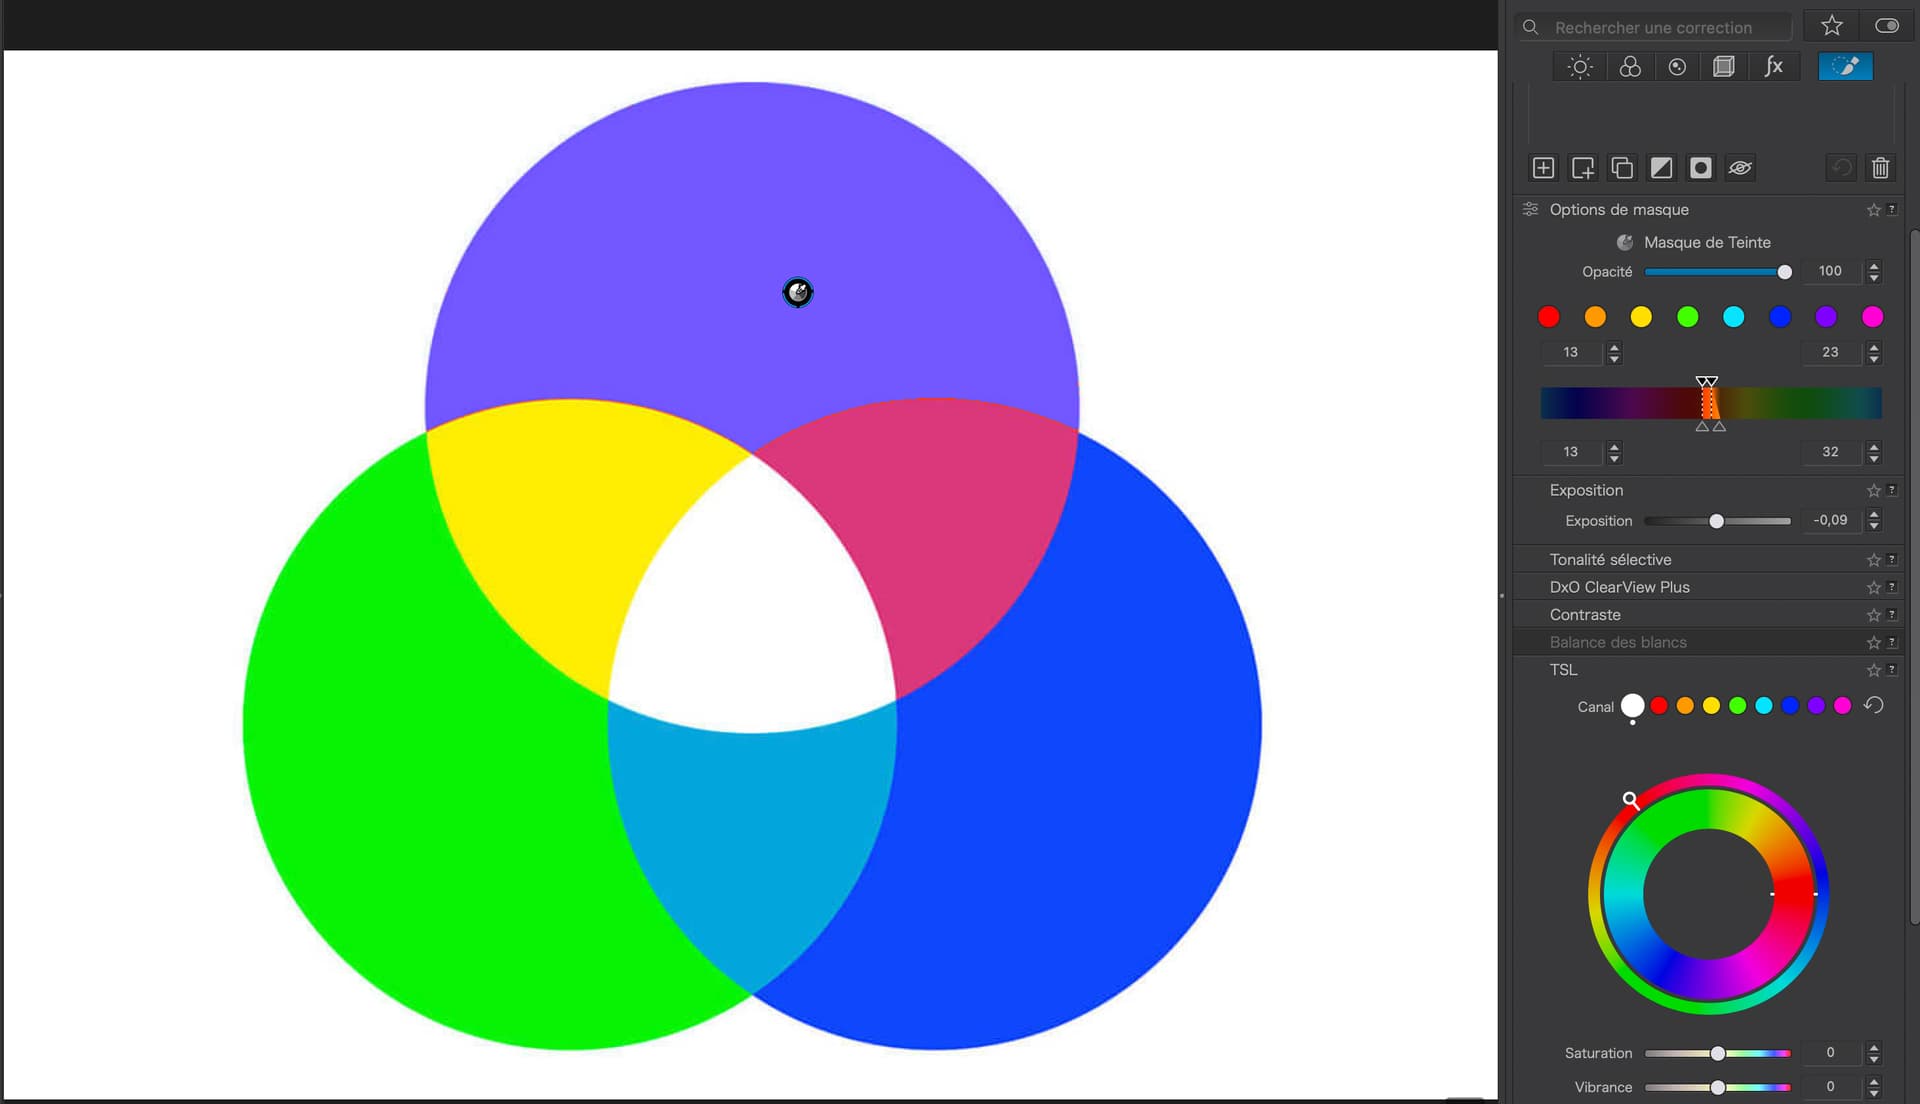
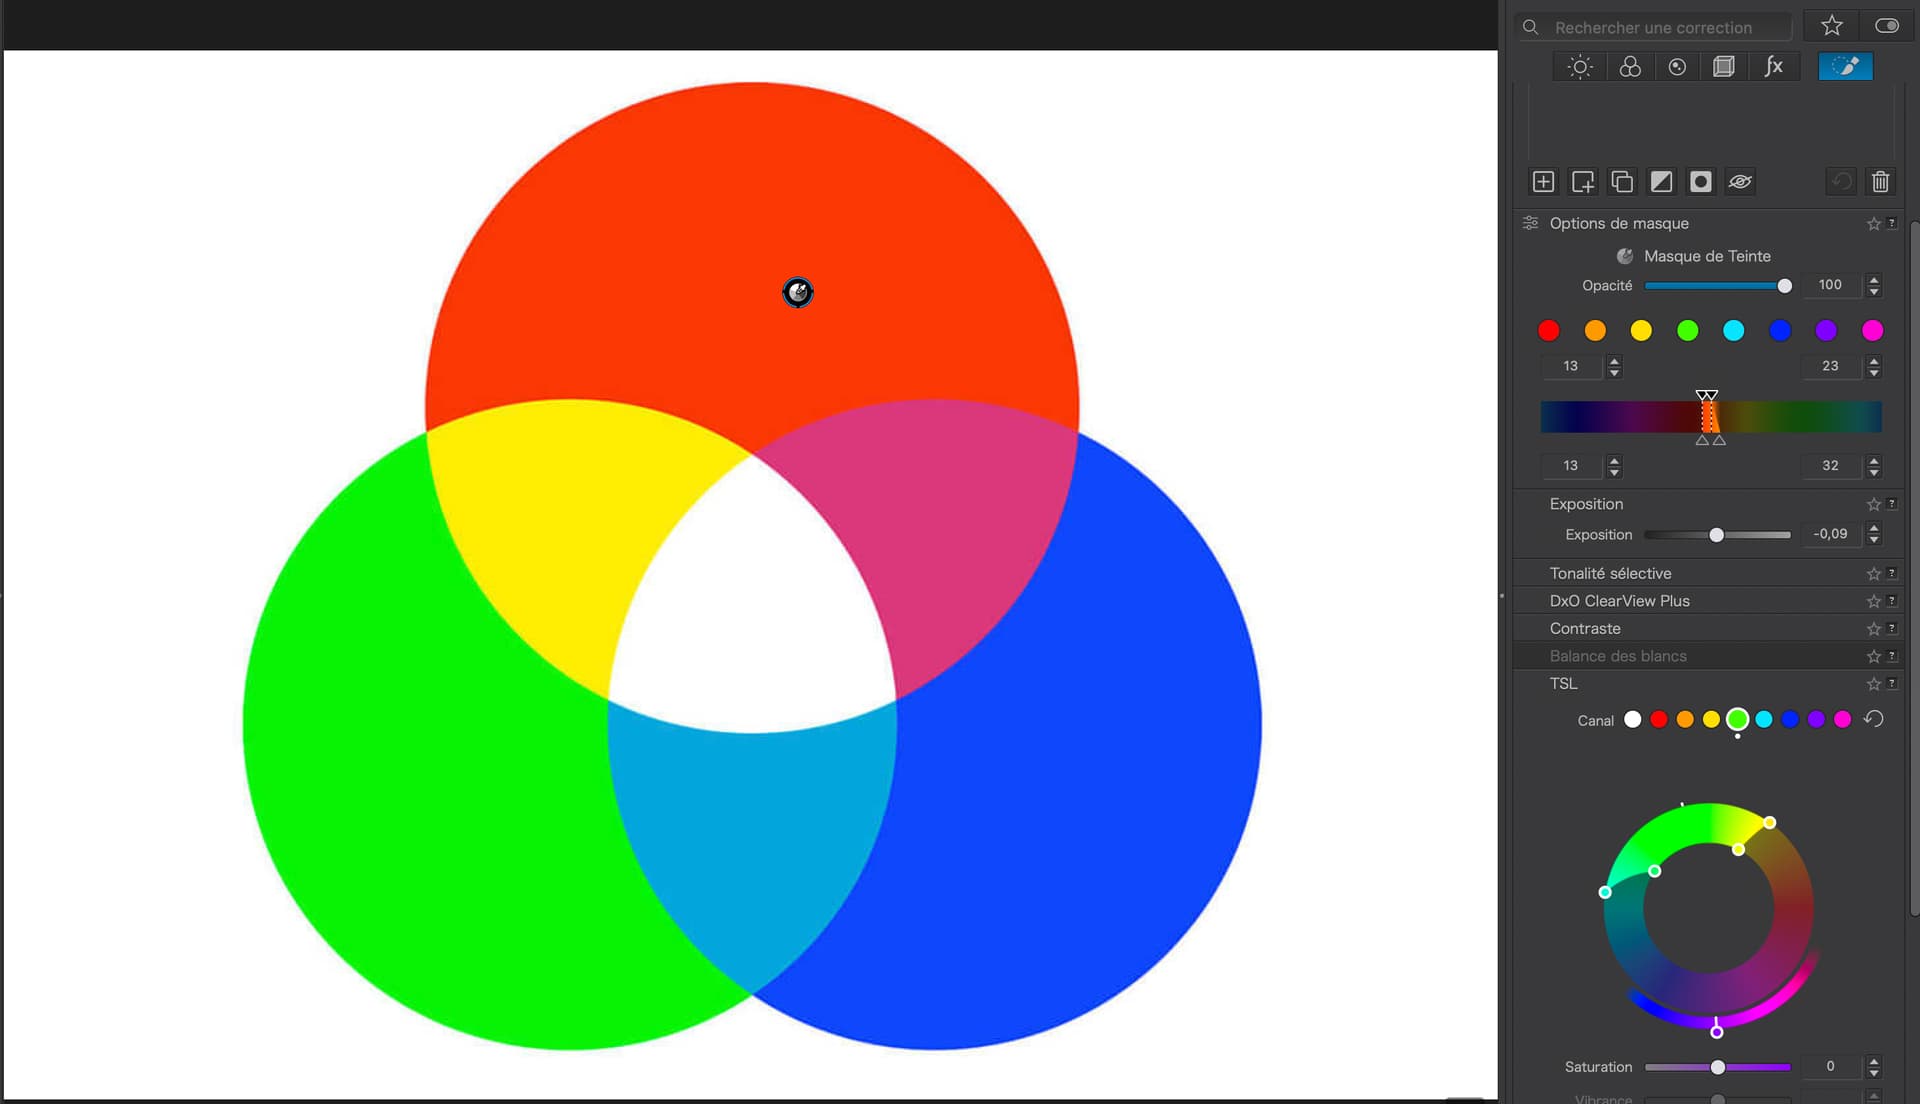
What you have to remember is that any adjustment made is applied ONLY to the colour range selected by the mask. Additionally, in the colour wheel you need to ensure the colours you select are INSIDE the range of the colours selected by the mask. If the colour wheel does not select any colour present in the mask then nothing will happen.
In your last example adjust the mask selection to include more to the blue side then you may see colours change. It is possible that only a small portion of the colour wheel colours are in the mask selection.
I have played around with this a lot and I cannot fault it as long as you follow the above rules.
Going back to basics, a mask selects an area of the image or attributes of the image to adjust ( in this case, a range of colours). Adjustments then apply to the selection criteria of the mask. If the adjustment does not apply to the mask selection attributes then nothing happens. In this case you have selected a colour range to adjust but the colour must act on the colours in the mask otherwise nothing will happen - simple logic.
I think I know where you may be getting confused: you believe that you are selecting an area of the image based on Hue and you then want to adjust any colour in that area but you cant because the mask says you can only adjust the hues that are selected by the mask and NOT the area of the image covered by the Hue range you selected.
Also … the local HSL/color wheel tool works with all masks, not just the HUE mask, which in a way “replaces” the color picker/eyedropper we have in the global HSL tool.
It took me a few reads to understand what you were saying, but this is a great point.
If you use the dropper on the global tool, you pick colours, but you can’t see explicitly on the image those picked colours (excepting doing a wild adjustment like huge exposure change).
Whereas with the Hue mask, you get to clearly see the affected areas. An improvement.
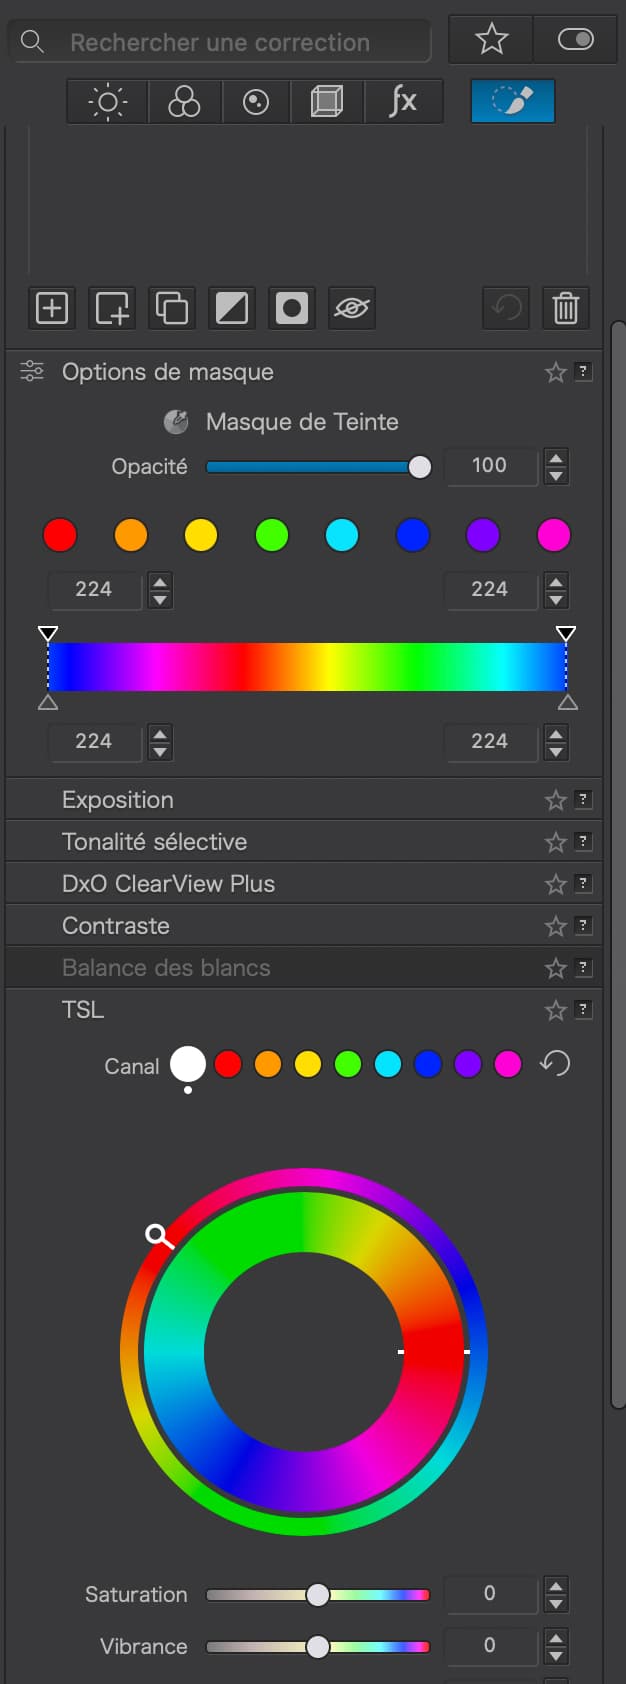
In the global HSL tool, you select a tonal range using the color picker. The four dots on the color ring mark this range. All colors in the image, that were not covered by this range will be grayed out, if you now left-click and hold down the Ctrl key. At least that’s how it works on Windows. – And by moving the points on the color ring, you can change/adjust the tonal range selection while reviewing the image.
The local HSL tool doesn’t have such a color picker. When it comes to colors, you can (pre)select / adjust this range using the HUE mask. – But as @KeithRJ clearly explained, don’t select differing color ranges in the local HSL tool.
Following some experimentation and careful thought, this does make sense - - but, I agree with Joanna that this behaviour is neither obvious or intuitive. (Perhaps this was something that was pointed out to DxO during PLv8 beta-testing - however, they chose to ignore it … but I couldn’t possibly say !)
I disagree strongly. You just need to draw a big, fat, solid line below the part of the palette that has the bar. Everything above is selection. Everything below is adjustment.
I think the confusion only occurs when considering this particular scenario without the context of how the entire Local Adjustment system works. Namely, there are many ways to define a mask (one of which is by colour) and then there is a standard set of adjustments that can be applied to that mask (one of which is colours).
It’s no different to this situation, which no-one seems to be worrying about. Why does this not adjust the shadows on my photo? (Rhetorical.)