As I said, there are 2 options
-
either color management in the app (and you need to disable color management in the printer driver to avoid double profiling!!)
-
or color management in the printer driver (and your app is NOT involved).
So let’s talk about the 2nd case.
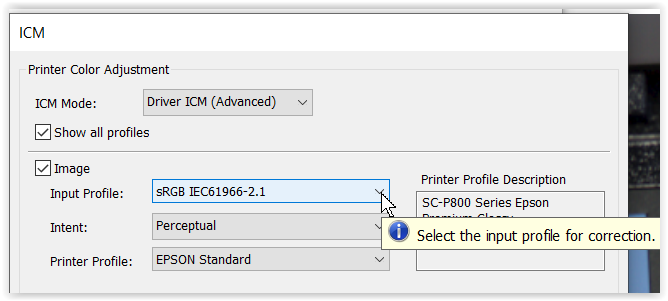
When you send a tiff-file, say in Display P3 color space, from PL to your printer and let the printer handle the color management, the app PL is NO MORE involved. The printer driver provides the necessary tone mapping. In order for this to work properly, you have various settings to choose from … input profile, rendering intent, printer profile … easily susceptible to application errors.

Then, when the printer driver doesn’t have a decent preview / soft proof, you’re literally “flying blind” (well, relying on autopilot). However, you will need to print your image to see if the colors look as desired.
What works for snapshots, where you don’t invest any time and on smaller paper sizes, will most likely not satisfy you when printing at a reasonable size. Then it’s better to at least use soft proofing in PL, but also convert your image accordingly before sending it to the printer.
Now, let’s say you don’t bother exporting your image as a TIF file, but you want to send a raw PL file to your printer. – If you haven’t done any soft proofing yet, then too, you don’t know whether the colors of your image fit into the target color space of your print.
As the raw file has no color space (the AdobeRGB or sRGB camera setting is primarily intended for an OOC JPG file), I’m assuming PL passes on the “DxO Wide Gamut” designation to the printer …
I don’t know PrintFab and can’t say anything about it. According to their website, it should act as a RIP.
Personally, I leave the color management to the application and use PS in combination with the printer driver (softproof, custom paper profiles / presets), to create an image version specifically for the respective printing paper.