One small comment: I believe Set Picture Control only affects the embedded jpg in the raw file and does nothing to the raw data. This is certainly the case with Canon so I assume the same for other makes of cameras. This also extends to the white balance setting which is used as the initial setting in your raw converter but you can change it to anything you like when developing your raw files
I have always though that the RAW “image” is essentially a copy of the data that was on the sensor at the moment the image was captured. It’s not a “raw image”, it’s just “data”. I certainly hope that “set picture control” can not make any change to that data, although “compressing” the data is technically all right - but just as Joanna wrote, I would prefer to have the file saved straight from the sensor, no compression, no ‘nothing’.
Unfortunately, there seems to be an almost global shortage of the Manfrotto 290, possibly because it is such a fantastic little treasure. Personally, I would wait a bit for supplies to resume. It might be bulky but your Bogen should be good for a couple of months at least.
I must admit I didn’t know about that, but, actually, it’s something that I’ve never even thought about needing when I already have the +/- zoom buttons. I switched it on and instantly found that the 100% zoom left me wondering where on earth I was in the image - so I’ll leave it off thank you
Well, it does on both the D810 and the D850 but the D750 doesn’t appear to have the same access to changing the picture control setting directly in the live view. I would guess setting it in the menus will still work because it is the basis for the the JPEG preview on the rear screen anyway.
Spot on.
When I was in my early 20s, I used to drive buses (including double deckers) We could have 4 speed manual crash box (no synchromesh and having to double-declutch), semi-automatic and fully automatic, all within one day.
Sounds good to me.
You are correct but it also affects what you see on the rear screen, which is essentially a JPEG preview.
Sure thing, no problem. I’ll buy the missing foot, if the support people can find one for me. In the meantime, I’ll wait. I’ll also do some more searching.
They might not have explained that correctly - you are looking at whatever focus point your camera used for taking the image. That’s the beauty of this - it shows you the spot that YOU selected for focus.
Yep - and I set it as you suggested - but have yet to actually try it…
Yes, I waited 24 hours, and Amazon had it!
I just placed the order.
If you disagree, let me know and I’ll cancel - but with Amazon I can easily return it if I don’t like it. I’m pretty sure it’s what you want me to get though.
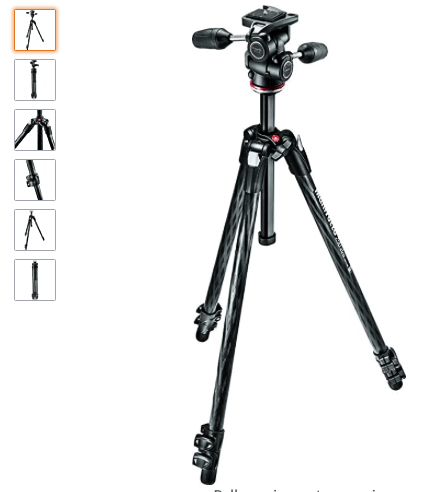
Manfrotto 290 Xtra Carbon Fiber 3-Section Tripod Kit with 3-Way Head (MK290XTC3-3WUS),Black
You are obviously seeing a different version of the site from within the US. From France, it comes up as “currently unavailable”. If it is indeed available to you, well done!
Now that Wolfgang’s explanation fit into my brain properly, I wanted to try out Joanna’s idea of how to deal with high dynamic range. Using my D750 and the 50mm lens, I took a few test shots to see if the concept worked for me. I thought things were working, so I went off on a walk, and found a fisherman on a small pier. We spoke for a few seconds before a fish hit on his line - I didn’t have any time to change settings or even think, but I did try to focus on the fisherman, and then on the fish. The scene was in the same lighting as my test shots, and while I don’t know what to expect, I’m sure I’ll hear back from all of you.
(Note to self: when walking around, turn off all these special settings, and leave the camera free to catch an unexpected shot the moment it happens. Turn the special settings back on when needed. Sounds obvious now…)
The “whitest” thing I could see was the clouds, and I centered the meter in (M)anual mode, with exposure comp still set for +1.7 …and I guess I need to remember this, so I turn it back to “normal” after taking a photo. I expected the image to be much brighter, like my test shot was, but this image was looking reasonably good OutOfCamera. …good enough for a starting point.
I did use “spot lighting” for the image, and then a control point to lighten up the fisherman’s face. All of that was a series of compromises. I don’t know how to make his face look lighter, without looking “fake”.
Oh, and I do have a “posed” shot of the fellow holding up his larger fish, but this shot was “live”, as the fish (a small barracuda) was thrashing around. I also took a close-up of the barracuda, and will post it (check the teeth!!), but today’s objective was to learn how to use these new settings.
Reasonably good you say? From my point of view, you have nailed the exposure perfectly
This is just how a well-exposed shot should look like with the brightest whites placed just (and only just) below the top limit of the dynamic range. The whole image needs so little work to perfect it and, as you have worked it, acceptable, but just a tad too dark in the darker parts, but not excessively. it’s just a bit difficult to see the tonality in the man’s face and arms.
As you would expect, I have played with it, just to give you an idea of how to better accommodate the darker tones when the lighter ones are so beautifully exposed:
I moved the Smart Lighting zone in the sky to the top left, where there is the brightest bit of sky next to the mast and the one on the wooden rail, I enlarged so it was more aware of the texture in the rail.
After that, I found that neither of the local adjustments were necessary after tweaking the tone curve and adding fine contrast for both the highlights (cloud detail) and the shadows (skin and, to a lesser extent, texture on the wooden rail)
I took the liberty of repairing the flecks of water spray on the man’s face, as they made him look like he had a skin condition.
The reframing on the bottom was just the tiniest bit too small and showed the cut off part of the rotated image.
As for the detail shot of the fish, it seems perfectly exposed for the fish, which has clear detail. The only comment I have is to try and avoid the bright background next time, but that is being really picky
Thanks, but that credit goes to you and Wolfgang - I followed the instructions - but most of what came after that is me, but me following what you have taught me, and now I have learned a bit more.
I took several shots as the fish was thrashing around. I wanted the fish “in the air”, not hanging on the fishing line.
Reframing - oops, I should have checked at 100%. I thought I got it right, but I guess not.
I like your version more - the fellow looks so much better, even his arms. I’ll have to check what you did.
Two thoughts - while I expected your exposure method to work, I was pleasantly surprised when I saw the results. Oh, and I fell in love with my D750 all over again. My brother is asking when I’m going to buy an 850.
After taking the fishing photos, I continued on to my market, and passed by this decorated bicycle again. I’ve taken photos of it with my Leica cameras, film and digital, and never was really satisfied with the results. I shot it again, using the same exposure techniques, aiming my camera at the brightest part of the sidewalk, using the +1.7 exposure, and recomposing. The resulting image looked too bright to me. I worked on it yesterday, then some more last night, and again some more this morning. In the glaring sunlight, it really did look overly bright to me, but not as much as I created in the image.
If I had a broom, I could have swept away the stuff on the ground, and I don’t like the shadow on the bicycle seat, and the advertising sign is still too bright, but I like it. Those “flaws”, and others, make it feel “real”.
I should add that with this new process for capturing a high dynamic range image, it “feels” to me like I’m using my Leica, but on steroids. The viewfinder puts the Leica rangefinder and Visoflex to shame. Focusing is instant. The camera “feels” more secure in my hands. I still enjoy my Df, but the 750 is technically better in so many ways. Having spent over two hours on working with the menus, using the 750 your way doesn’t require much use of the menus at all. The one change I need to make though is I need to find a way to put the camera in a more “normal” mode, for use when I’m just walking around, and need to grab a shot quickly, like what I do with the Leica. At those times, spot metering is not the best choice, and the exposure comp should be turned off. It’s so simple though to turn those things on for a carefully photographed image, and I think the technique is now fully assimilated into my brain.
That is to be expected, because the pavement wasn’t really in Zone 9 or 10, which is where using +1⅔ will place it. Fortunately, with the combination of the Nikon sensor and PhotoLab, it is rescuable.
Your version is similar to the fisherman, with not enough shadow recovery and detail - a little contrasty.
I then used the colour wheel to alter the contrast by “unbleaching” the colours, rather than playing with luminance based contrast. Here is my version…
I didn’t need to use smart lighting and the only local adjustment I made was to the flowers in the front basket, where I increased saturation and sharpness whilst reducing the exposure slightly.
You used both the horizon and rectangle distortion tools and ended up with them fighting each other. I replaced them with just a vertical parallel distortion tool, taken from the joint in the stones on the wall to the left and the joint in the doors on the right.
Instead of adding a creative vignette, I simply turned off the optical correction vignette.
But, I really like your “removal” of the distracting vehicle lights.
All in all, a perfectly usable image - just a tad over-exposed.
Why do you think I’ve been encouraging you to rediscover the Nikon? But, now, you are back in control of what you thought was an automated bucking bronco
If you want to use spot metering, you now need to get used to assessing which “zone” to place the brightest part in, adjusting the exposure compensation dial to get it there. In this image, Helen (who is better at judging zones than I am) reckons you should have placed it in Zone 8 and a bit because the pavement is not pure white, which your setting of +1⅔ almost gave you.
Just to clarify:
Your D750 has 14.5 stops of dynamic range but that is very unevenly divided, with only 2-3 stops of over-exposure and the rest under-exposure.
The meter normally measures 18% grey at around zone 7-8 and you only have up to zone 10 before things start to get blown out.
It is up to you to decide how much brighter you want the brightest part of the image to be - between zone 7-8 and zone 10.
In this case, referring to the fact that I adjusted the exposure by -⅔ stop in PL, you should probably have adjusted the camera to only +1 or thereabouts. You will get used to knowing by how much you need to compensate with practice. Try shooting the same type of scene with an off-white brightest point at everything from 0 to +3 in ⅓ increments to see what it gives you
You can do the switch to “grab shot” mode in four steps:
change the metering mode to centre-weighted
change the shooting mode from Manual to Aperture Priority
set the aperture to f/10 for the optimum depth of field
reset the exposure compensation to 0
These are all available without resorting to the menu system.
Having said that, you can now easily change aperture to regulate of depth of field or exposure compensation if necessary without having to go to the trouble of switching back to manual.
The site you link to is not available from Europe for some reason.
You do realise that you can get the upgrade to both PL5 and FP6 for only $127.99 if you go into your user account on the DxO site? In my opinion, at that price, it is worth every cent.
If I understand correctly, if I’m shooting a scene with a high dynamic range, a good way to do that is as you suggested, with the spot metering, and +1.7 exposure correction. When I come upon a scene like this, or should I ask, when you come upon a scene like this, what exposure settings do you prefer for your D850/750 ? Matrix metering for the whole scene, as Nikon expects me to do, sounds reasonable to me. That’s what I would have done for the past 5 years with this camera, unless I went with center weighted which likely covers the heart of my photo - although not this time.
Note to self - I edited, then put it aside, then edited more, and put it aside, and when I woke up this morning, I wasn’t satisfied so I worked on it some more. I think I will be better off creating a virtual copy when I stop work, and when I continue, I should start from the beginning, as you did. Otherwise, I’ll likely have settings “fighting each other”. Also, every time I start from ground zero, I do better, from what I’ve learned before.
Likely because my +1.7 exposure correction? I’ll remember this next time. Thanks - I learn when I do things right, and I learn when I make mistakes.
For this kind of photography, the Nikon is obviously becoming the better tool. It’s not what the Leica was made for. I wouldn’t say I’m in “back in control”, but I’ll certainly agree I am a LOT more in control. At this rate, I better plan on getting an 850 eventually, but not now.
If I understand you correctly, I need to find a new scene, where the brightest part of the scene is not quite white, measure that point, recompose, and shoot it in with 0, .5, 1.0, 1.5…2.5, 3.0 exposure compensation, then compare. Sure, will try - maybe today, or maybe tomorrow.
I will do that after each time I take a “controlled” high dynamic range photo, so the camera is instantly available for a “grab shot”.
Center Weighted > Aperture Priority > f/10 > no exposure compensation.
Question - I have just installed PL5. From now on, I hope to be using it instead of PL4. I assume there will be a new forum for these discussions?
Nope,
Same forum new headers.
It’s enjoyable to read this thread, like watching in the corner a class of people like a intern learning to be teacher.
Have you camera customise setting storage ?
If so, set your camera in most used default settings.
Say A-mode, auto iso, AF multi, centreweighted AE.
Set max iso, aperture number, and all aid Menu’s right.
Store this in safe number 1.
So when you play with settings and want quickly back to default just turn to safe number 1 and poof all back to normal so you can change again.
Back home you can clean up the mesh in A-mode.
I don’t think I have ever use matrix metering. As I already said, centre-weighted for everything except the exceptions
With my LF hat on, for the ultimate control, if you’ve got the time and inclination, use spot metering and manual mode. You just need to learn where to spot read and how to use the zone system. to place the exposure.
You really don’t need it right now - the D750 is perfectly adequate for the kind of photography you have been sharing here (but I must say, it is a beauty)
If you are seeing ½ stop increments, you need to change that to ⅓ increments for finer control. But, yes, it’s an exercise in getting to know your camera.
But don’t forget, you can still change the aperture to control the depth of field, or maybe adjust the compensation if necessary but without reverting to “full control”
Nope. But you might like to start a new thread yourself discussing using PL5 instead of PL4, so folks don’t get confused.
Nikon can do this kind of thing but, for what Mike wants to do, it is actually easier to change the two modes and that is all. The other two steps are optional, depending on the picture at the time.
I use it for grab shot’s when my normal mode is off default or set wrong for the spontanious task and i like to keep those settings for later.
I have a A-mode, a A-mode for centre focus bif mode so to speak, one jpeg only 1.4x EZ mode. (wronglens no time to swap to short of reach so electronic zoom to the resque.)
EZ is better to focus on small things and exposure is more set on cropped area.
Most of the time just alter A-mode to the task or S-mode. P-mode i use for when i let some else use the camera.