You should try working with the software for a bit, rather than just bringing over your exact workflow from another application. As you mention, there’s SmartLighting to start. Combined with an overall Manual Exposure adjustment, SmartLighting will get exposure to a good place much faster than tinkering with Selective Tone sliders in any application – I usually use SmartLighting at very low values, btw, not the defaults, which are very strong.
Once I have the image in general exposure range I want, I’ll use Selective Tone or curves to tune specific ranges. As others have mentioned, there’s no need to push Selective Tone sliders as far as in Lightroom. Push down highlights a bit and push up mid-tones a bit and you’ll probably see what it is you are after. Neither way of calibrating Selective Tone sliders is right or wrong. They are simply different. DxO’s calibration is more subtle. Not all cars steer the same way, even though they all have steering wheels. Same thing for the tiller on sailing yachts. A new user must acquire a feel for the software.
The trial is 30 days. It’s mystifying that that think you should be entitled to a free lifetime trial just because you don’t like the calibration of Selective Tone Sliders.
No; I’m not saying I should be entitled to free DxO software for any reason.
I’m just saing I would gladly use it for free without complaining about any slider. I just won’t buy it at the moment.
I will use it till free licence expires.
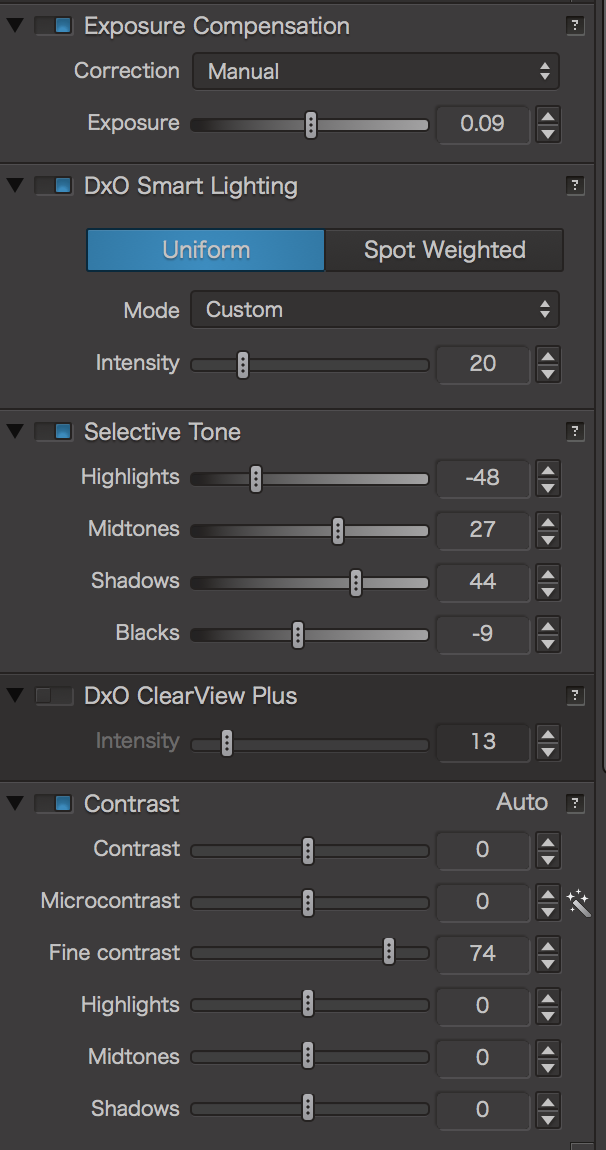
Here’s an example of recent image with difficult dynamic range (shooting into a sunset with dark foreground) which I’ve largely corrected using almost exclusively DxO’s Selective Tone Sliders. First, here’s the settings (there’s no noise reduction or horizon - these are the only corrections made).
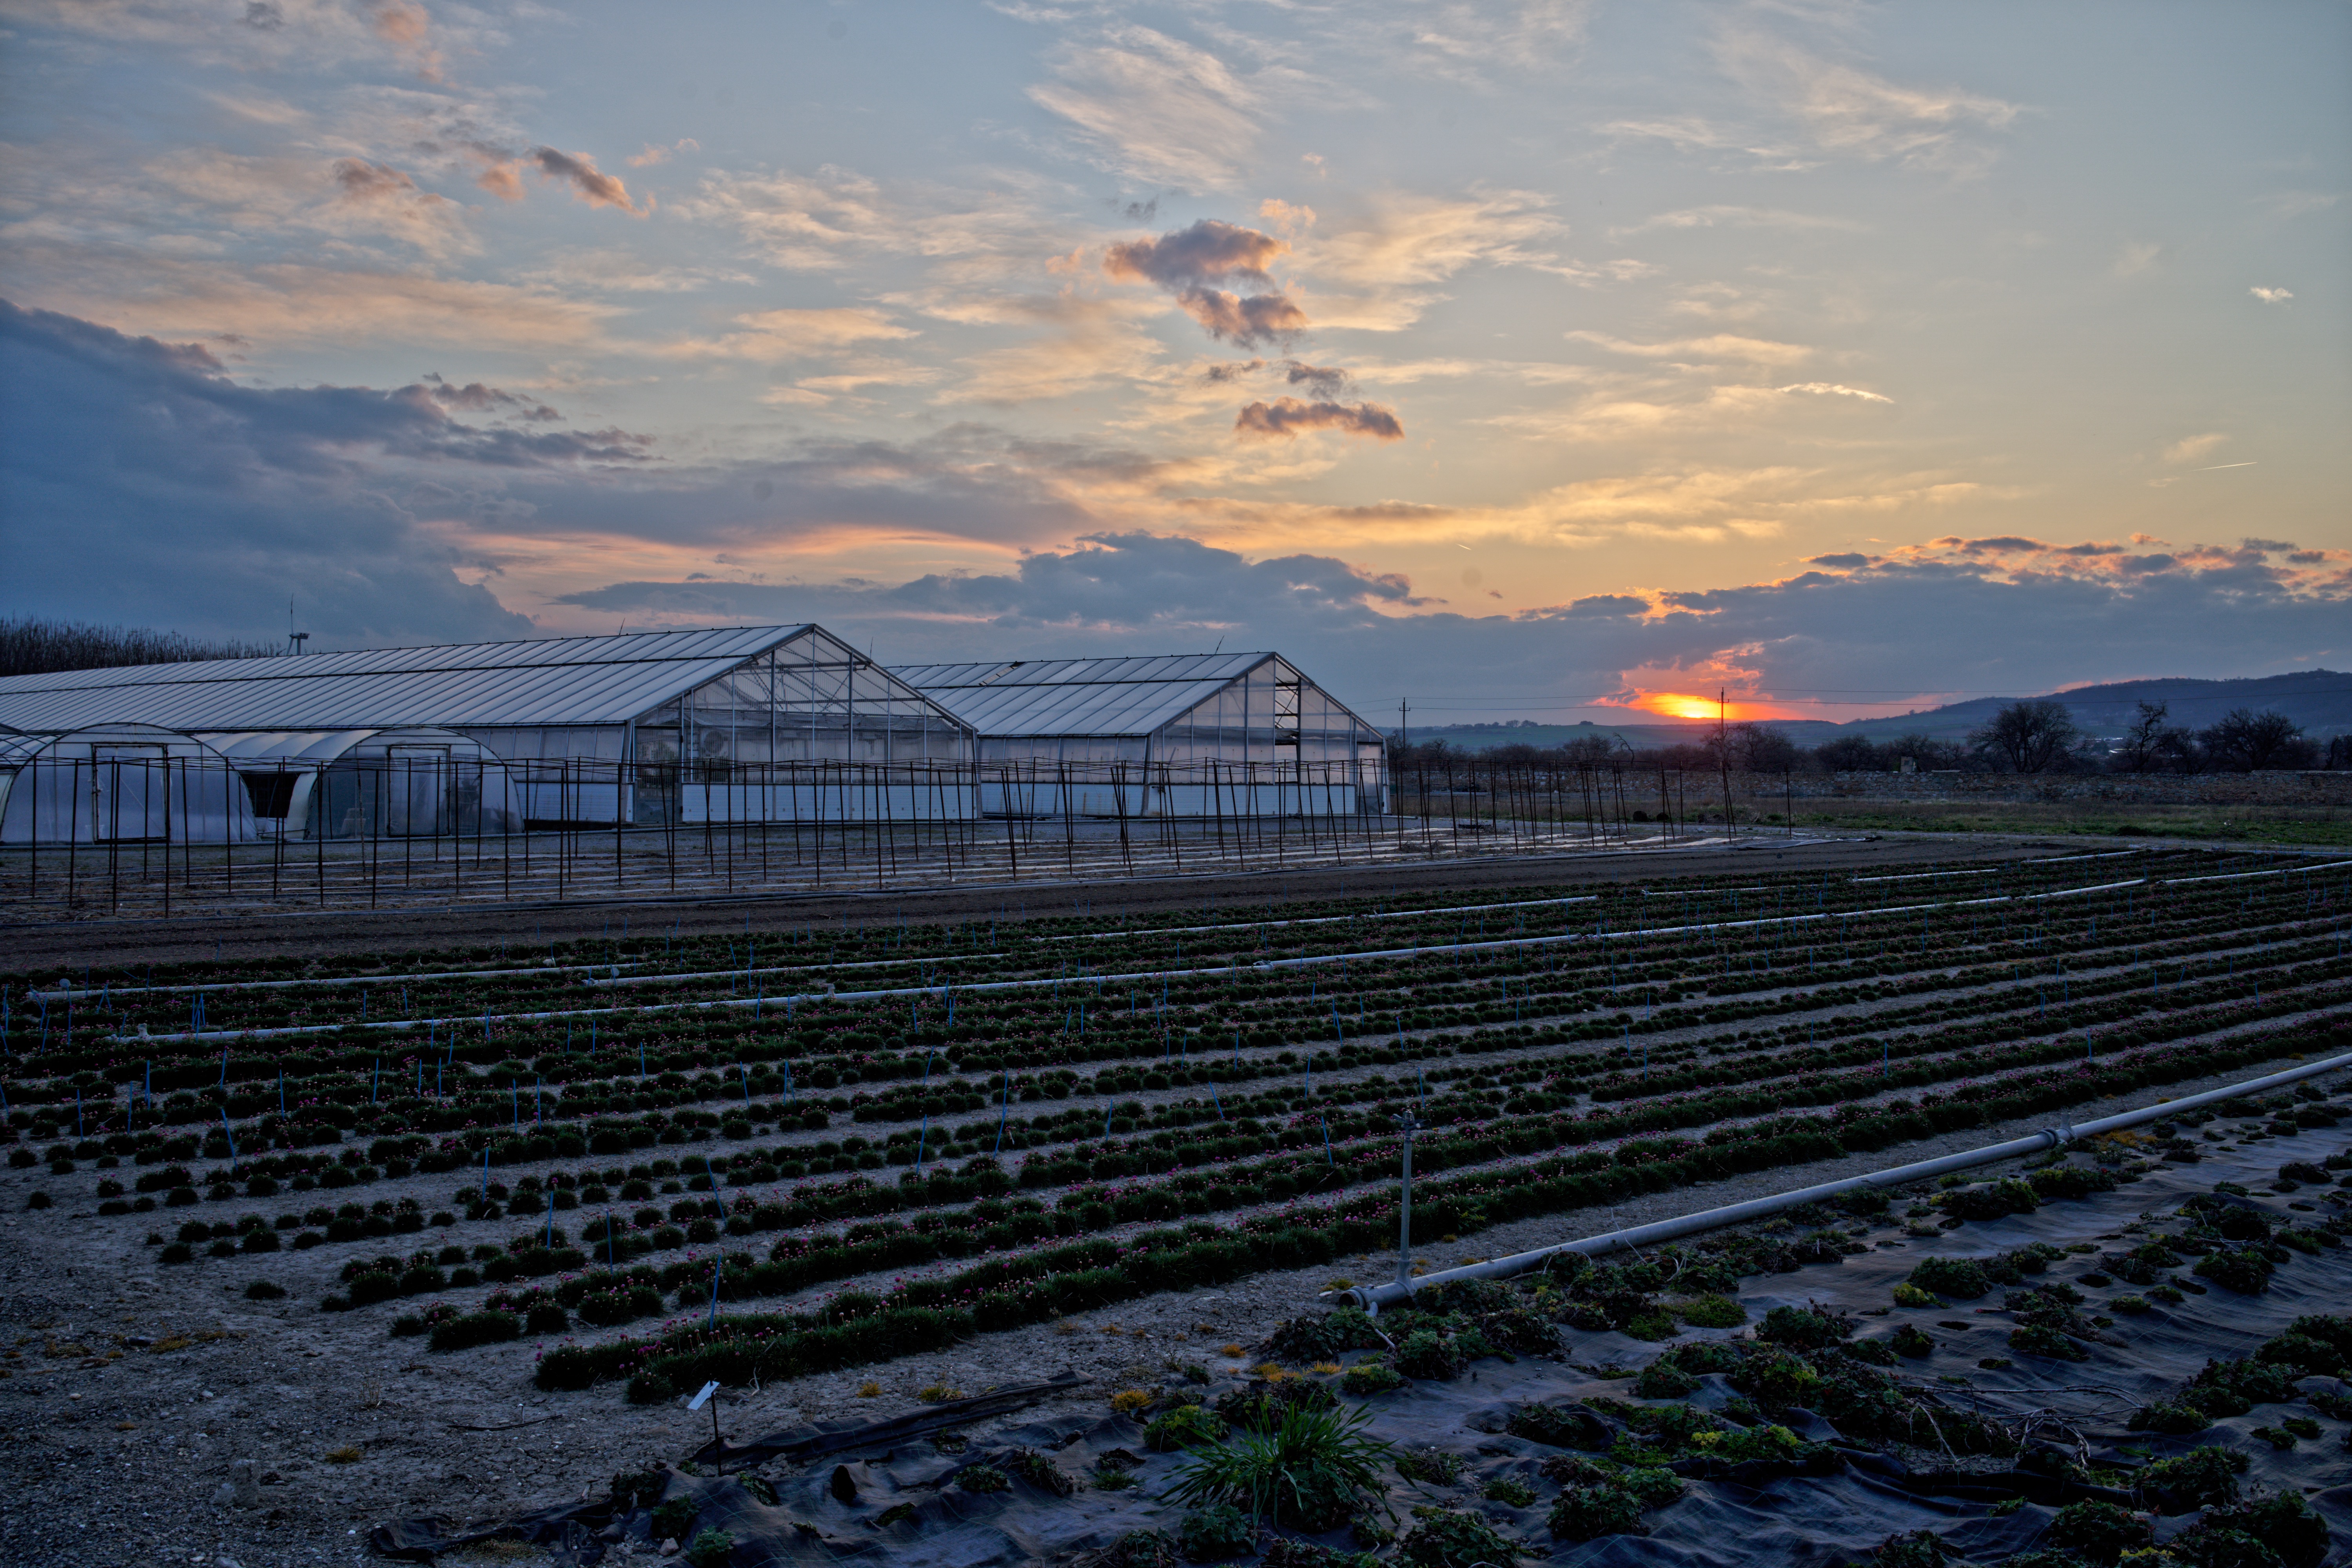
Notice the way I used multiple sliders, subtly correcting one another. The overlap is very helpful in getting a subtle tonal result. There’s no gradient masks or local adjustments. Here’s the result of that correction:
Based on this image, corrected almost entirely with the Selective Tone Sliders, it’s clear they work pretty well even if they don’t work exactly the way you are used to.
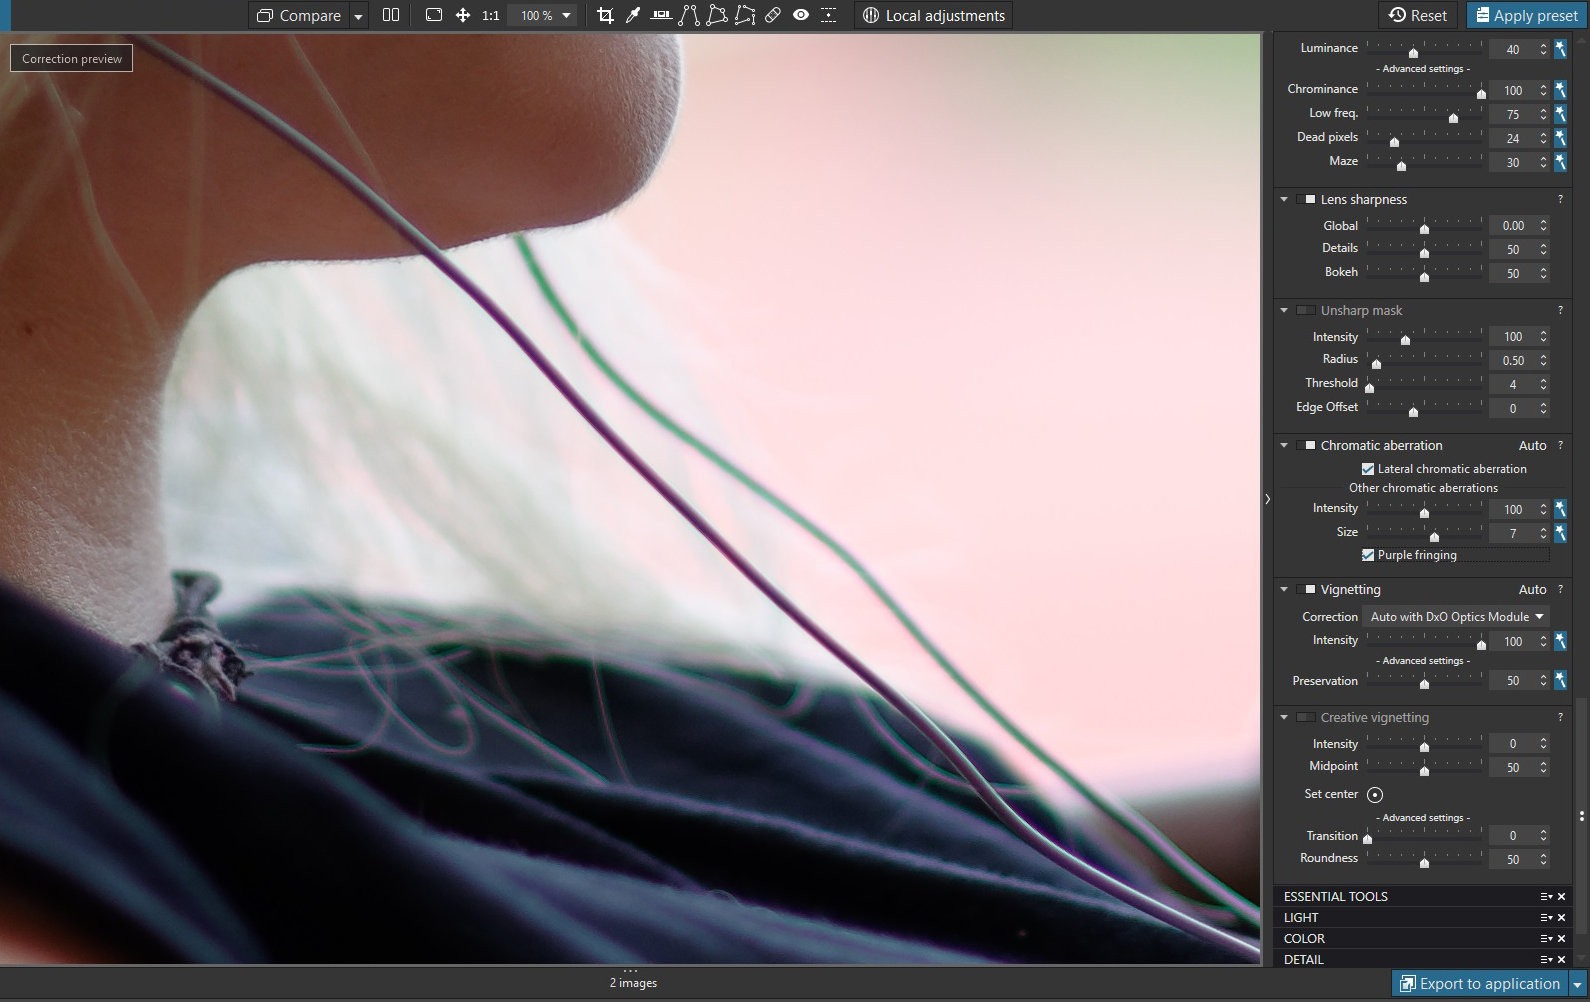
Regarding fringe; here you go,
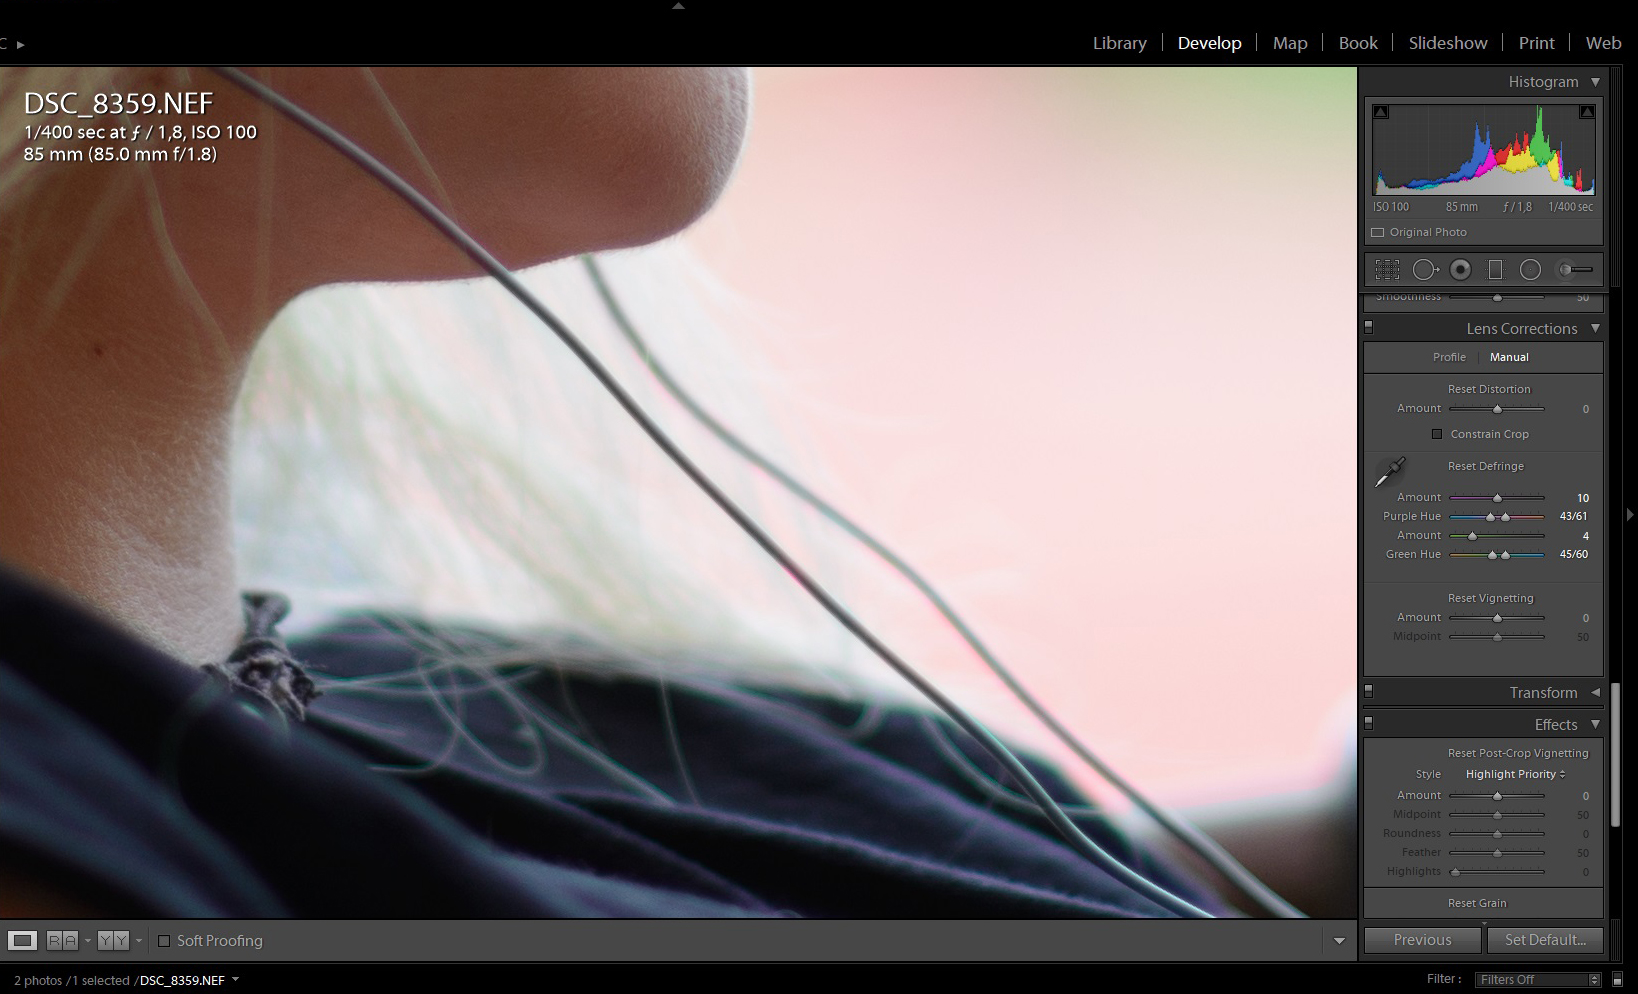
Look at the hadphones wires. DxO image is ‘‘DxO standard’’ profile. It couldn’t remove green fringe and Lightroom had no problem.
No other post processing has been done. In Lightroom just import on ‘‘Camera standard’’ profile and I used Defringe tool and in DxO ‘‘DxO standard’’ profile and I also clicked on ‘‘Purple fringing’’.
In LR it was a quick job. I could play a few seconds with defringing tool for even better result.
Whatever Lightroom is doing there is awful. There’s horrible discolouration all the way along the cables and the hair isn’t cured either. As there’s purple on one side and green on the other, I’m not sure it can be fully solved as neither Lightroom nor PhotoLab are getting the job done well here.
Could you upload the .NEF file? I won’t fix it and show you how to repair chromatic aberration as I don’t face much of it and chromatic aberration is rarely an issue for me, but Pascal or someone else might. I’d certainly be happy to learn how to deal effectively with very strong chromatic aberration in PhotoLab.
Pascal, how should I handle chromatic aberration on my vintage manual lenses? The way I deal with it now is checking which aperture yield ghosting and chromatic aberration and not using them. What happens if I do have an image with strong chromatic aberration with a vintage lens with no CPU information?
I’m not a specialist Alec
I think I know Chromatic Aberration depends on your lens, a large optical-aperture, the strength and inclination of light. Good !?
I think know the value is not important.
DxO helps you with the maggic wand.
You must correct it at minimal 75% zoom display to see the effect.
Go
Pascal
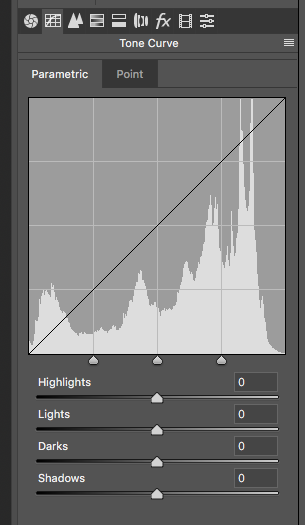
In Photoshop one can choose how the Parametric sliders affect an image (in PhotoLab the “Selective tone” sliders).
As we know images can vary so why not have the option to adjust the “roll off” of the various sliders rather than just a fixed setting determined by software engineers?
A screen shot from Photoshop. The pointers directly underneath the graph can adjust the effects of the sliders.
Yes, this subject of the adjustment range of the sliders, most notably, the highlights and shadows sliders, has been discussed in at least a few threads over the last year. I don’t believe the feature request you provided a link to articulates the problem well.
Consolidating the votes and the feature request threads make sense here. m9k’s request was just for the default extreme Lightroom calibration (I prefer the softer calibration in PhotoLab). Based on those Photoshop screenshots, there’s definitely scope here for some advances to the selective sliders. This kind of improvement falls squarely within the domain of a RAW development tool.
I’m not certain though how to integrate such controls though without making PhotoLab “fiddly” – the kind of application where you spend all your time calibrating instead of processing.
I would say give the users options and they will find the way for themselves.
In DxO you have the option to switch Smart Lighting from Uniform to Spot Weighted. You could have similar option in Selective tone – to switch from ‘‘as it is’’ to more selective sliders.
I am playing with DxO at the moment and the more I play with it the more I like it. Still there are some things I personally would improve:
-Split toning tool: at the moment you can only select seven colors (Sephia, Gold,…etc) but it would be neat if there was the same option to select colors as in LR.
-HSL tool: I miss some colors, especially Orange in HSL. I think there is not a lot of work to add those colors.
-Crop tool: I miss the function from LR to straighten the image – you grab the corner of a crop area and rotate it. It’s more simple then moving slider in Horizon tool.
-Copy correction settings: sometimes I don’t want to copy all the settings
-Local adjustments: If I use Brush those sliders are distracting - I would like to move them away from the brushed area.
At the moment I can send the file straight to Lightroom or Photoshop to get the features I personally want but why not make DxO even more powerfull.
Software needs to be improved constantly. There are always things to improve.
The downside of changing the operational range of the sliders will be that every image edited with the older range will probably automatically be re-adjusted as a result of the new parameters unless DXO implements something similar to Lightroom’s Process Version.
-Split toning you need film pack, I know it make no sense to have those slider there if you don’t even have film pack.
-HSL should have all colors with 3 tab like in Lr and other software.
-Crop tool doesn’t have straighten tool, its in your correction panel which you can adjust even in crop mode.
Agree that adjustment brush sliders would be nice if we could move them away, like a popup panel but that affect the selected point.