I normally use Apple’s own ColorSync Utiity to print externally from PL, having first exported to TIFF, resizing as required at 240ppi. I find this gives me more control and easier to use than the PL dialog.
I’ve just done a bit more research and found, in the manual, the print dialog with explanation.
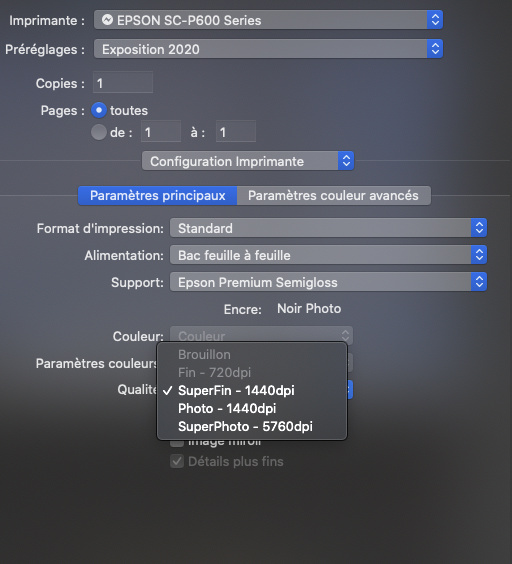
I have a Mac and here is the print dialog for my printer :
As you can see, on my computer, the setting for dpi is labelled as Qualité and is in the Printer Configuration section of the dialog.
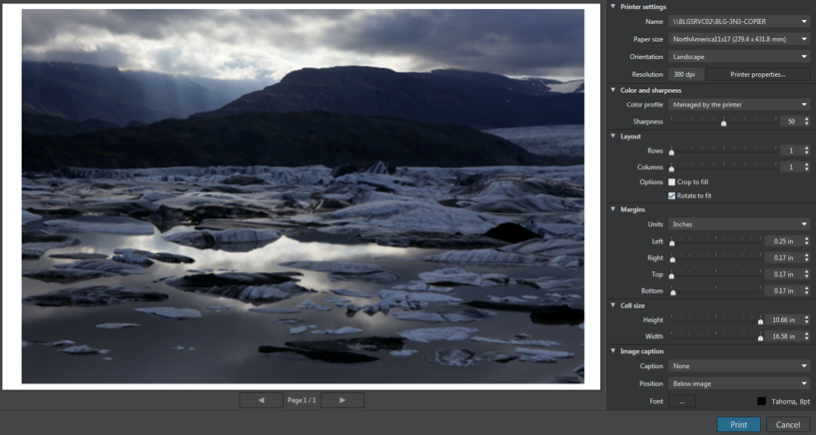
And here is a screenshot of the Windows dialog from the PL manual :
Here, you can see that the dpi setting is under the Printer settings section of the dialog.
This means that it is part of the printer’s behaviour and not part of the image itself. It refers to how dense you want the printer to lay down ink, (on mine) anywhere between “draft” quality and “SuperPhoto”.
If you are going to use the PL dialog to resize the image to fit on a particular size of paper, with certain margins, PL is going to choose a ppi that translates from the pixel size of the image to an area on the paper. This will be done totally irrespective of what quality dpi you choose for the printer.
Epson printers tend to have numbers like 1440, 2880, etc, whilst other manufacturers tend to base their printing resolutions on a multiple of 300. But I must emphasise that this has absolutely nothing to do with the finished size of the image on paper, purely the quantity of ink that gets laid down and the subsequent quality of colour and tonal variations in the final print.
When I print our photo club’s exhibitions, I tend to use “Superfin - 1440dpi” as a best compromise between quality and the amount of ink used and time taken to print.
As I said, I use an external printing utility and, thus, all images are prepared and sized on export at 240ppi to give me the required size to fit on the paper with the margins I want. Usually, for a landscape image, being printed on A3+ paper, to fit behind a mount board in a 50cm x 40cm frame, I export to TIFF with the longest side at 3638 pixels. This then fits (with a 2mm overlap) into an opening in the mount board of 380mm x 252mm. It’s extra work to use the external utility but, to my mind, when I am printing in bulk, for a specific frame size, it is a faster and easier workflow.
In summary, the dpi setting in the dialog is all about the quality of the printed image on a given paper surface; it doesn’t affect the image resolution or size, which, for you, using the PL dialog, will be calculated automatically as you choose the layout and margins you want on the paper size and quality of your choice.
Of course, the poorer the surface of the paper, the lower resolution (dpi) you will need, otherwise you can oversaturate the paper with ink, which not only looks horrible but, also, costs a lot more in ink 
On your printer, I would suggest using 1200dpi on a photographic quality paper.
As for colour and sharpness, if you don’t have a colour-managed workflow, where you have created ICC profiles for your screen and printer, you will only be able to use pre-created printer profiles or let the printer make a best guess at the right rendering. This could mean that the print doesn’t look like what you see on screen and you might end up reprinting a couple of times before you are satisfied.
Bearing in mind the cost of paper, but especially inks, it really is worthwhile spending out on a calibration tool for both your screen and printer and spending time creating profiles, one for each ink/paper combination. Then you would choose to let PL manage your colour by setting the colour profile drop down to “managed by PL” and choose the profile of your choice