Water, beach, and amusement park! Looks much more inviting than what I created. I also love all the colors.
Since you are obviously up quite a ways, shooting down on the scene, how did you manage that? An island away from the mainland? If I remember correctly, this was from one of you very early Nikons, with a small sensor. At first glance, I love all the apparent detail, everyplace I look. I’m guessing you took this very late in the afternoon?
When I started out with PhotoLab, just as with any editor I’ve learned, the interface seemed horribly confusing. Eventually I learned that most of this is because of my “Workspace”. Several people here sent me links to a workspace to try out, and with a little adjusting (each time creating a new Workspace so I could return easily to the previous one).
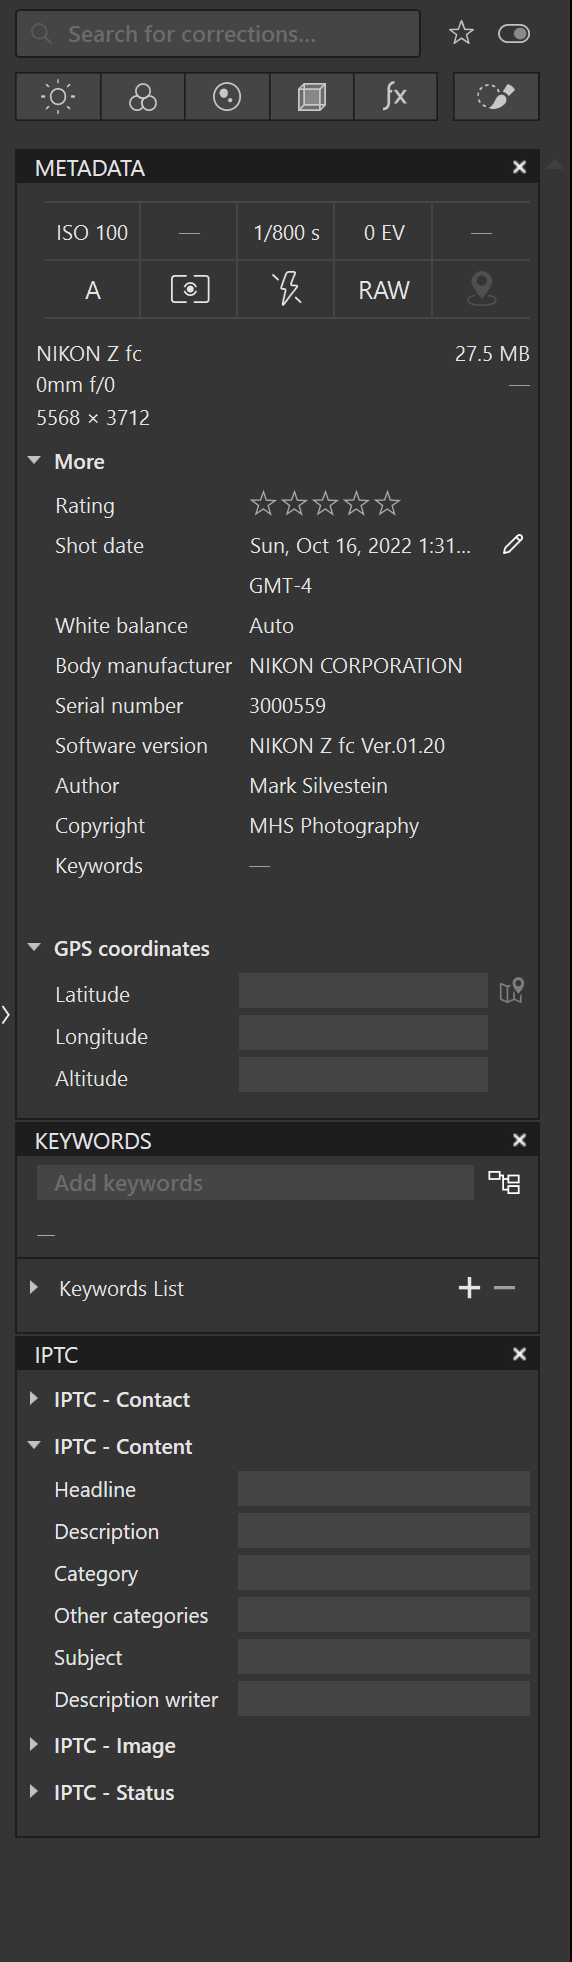
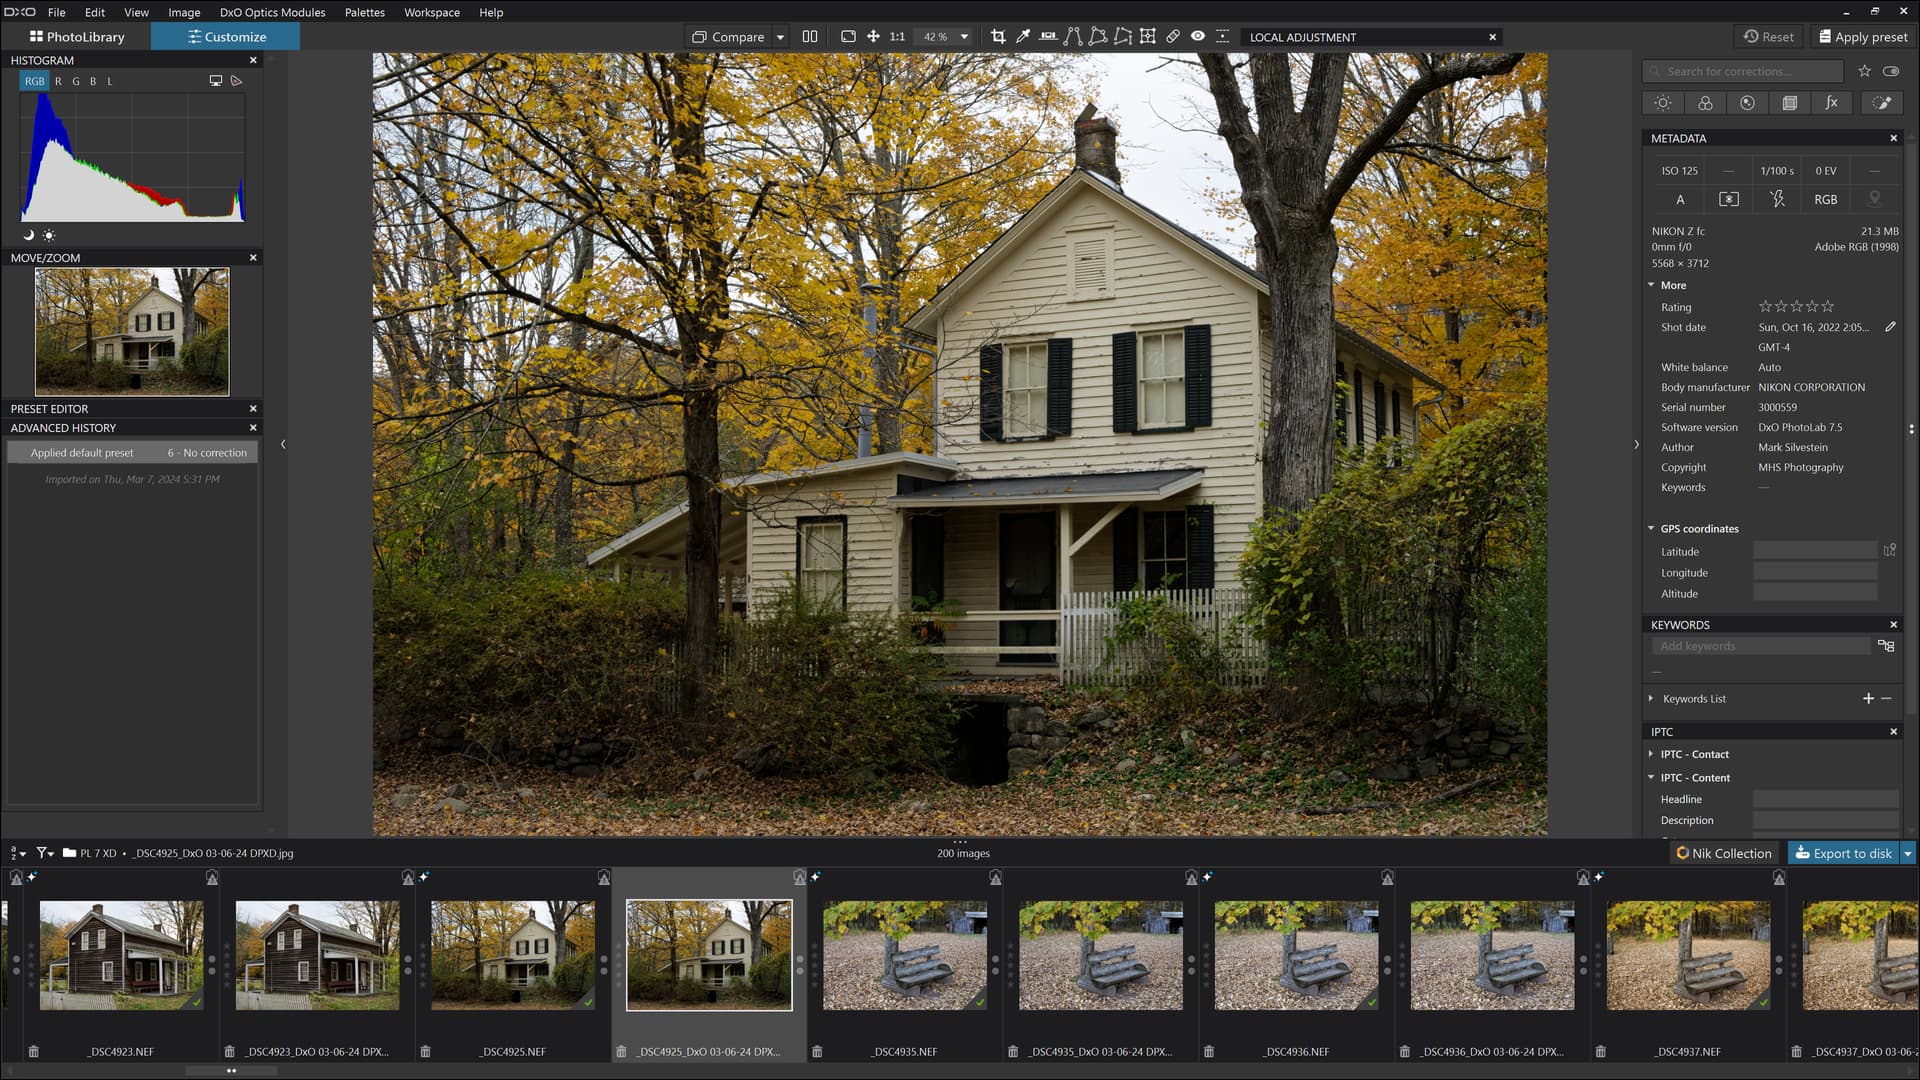
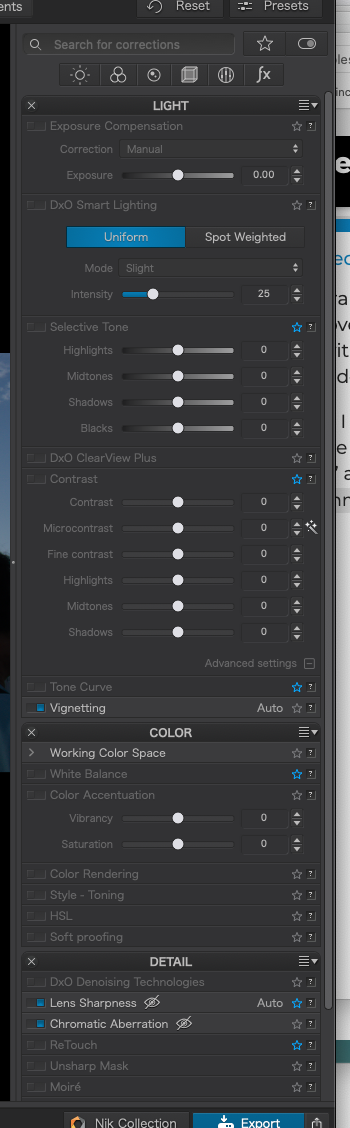
I’ve noticed that my left panel is mostly used for my Histogram. Almost everything else, including apps I bought, but rarely use, is in my right panel.
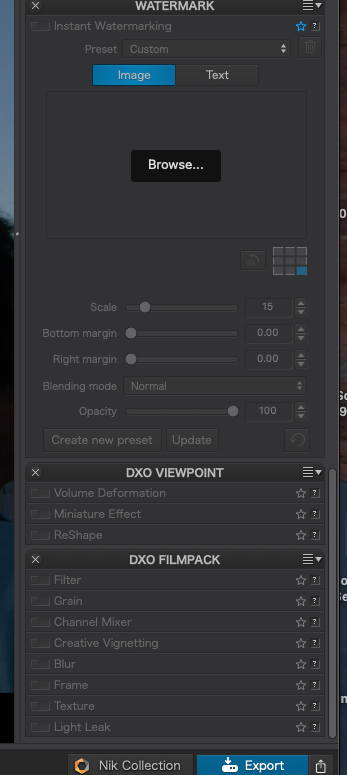
Would there be any issue or problem, if I move some things from the right panel to the left? I’m specifically thinking of DxO Viewpoint, and DxO Filmpack, and I’d also like to move Watermark and Clearview to my left panel.
Before I investigate how to do this, is there any good reason to NOT mess with things the way DxO set them up? For me, it would just simplify my interface. I thought the tools I use the most ought to be up near the top, but maybe there is a good reason for why they are in the default locations.
Also, am I the only one here using PhotoMechanic to get my images off my memory card and into the desired location for storage and editing? I find it a huge time saver, as I can quickly remove all my “junk” images.
This is a list of my workspaces. Several were sent to me by various users here, andI have that recorded somewhere in my notes, and old discussions here. Can I ask how you selected your preferences? What criteria did you use for what goes on the right, and what goes on the left, and what order to have the choices listed in?
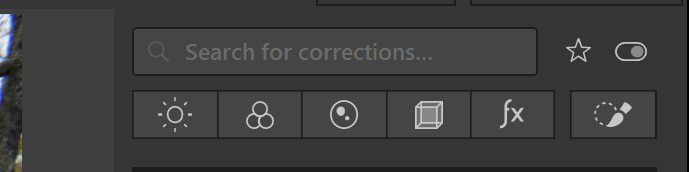
It was an ongoing effort with a lot of refinements that took several years to get to its current minimalist state around 3 years ago. I no longer use any custom palettes. In fact I currently only use seven of the standard palettes. I prefer to use the six smart workspace buttons on the top of the right panel for all my editing.
Smart Workspace
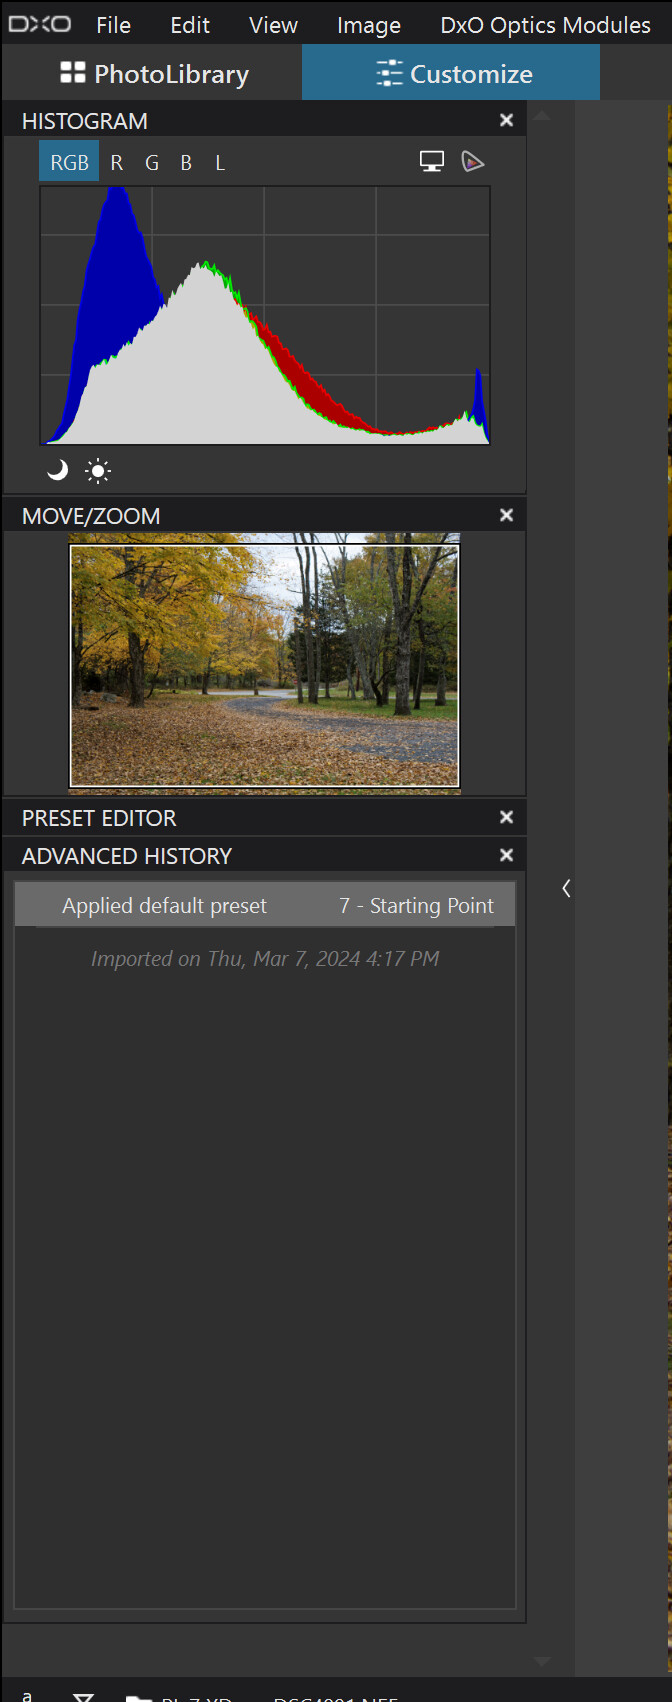
On the left panel I have the Histogram on top with the Move/Zoom just below it followed by the collapsed Preset Editor and the expanded Advanced History below that.
Altogether I have easy access to everything without the interface becoming too cluttered. I find the smart workspace buttons convenient to use for all my editing.
I like the simplicity; I think I need to create a new workspace, as a copy of what I have now, and then one by one, simplify things as you have done - or at least try to.
I assume one workspace will be adequate for all my cameras.
Since you have empty space beneath your right panel, I assume that’s all there is - nothing is hiding below what I see on the screen.
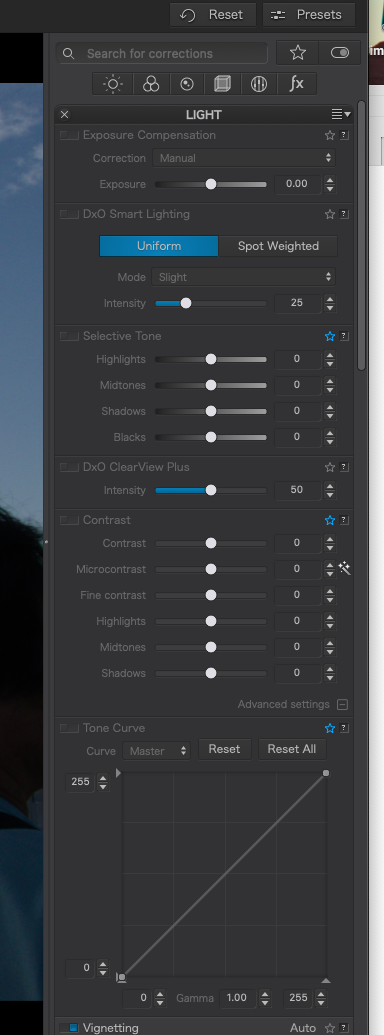
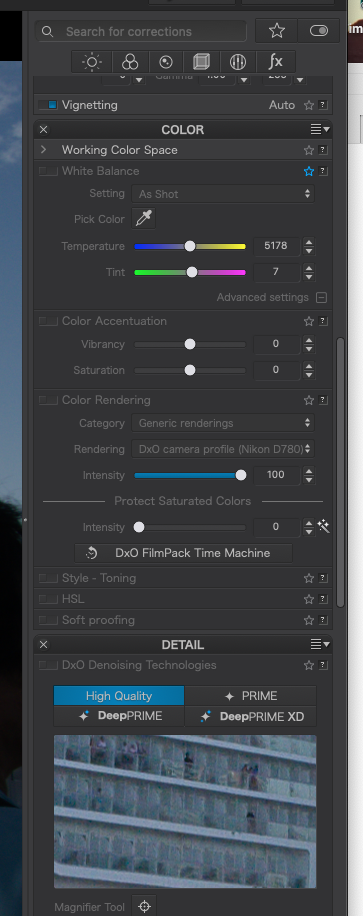
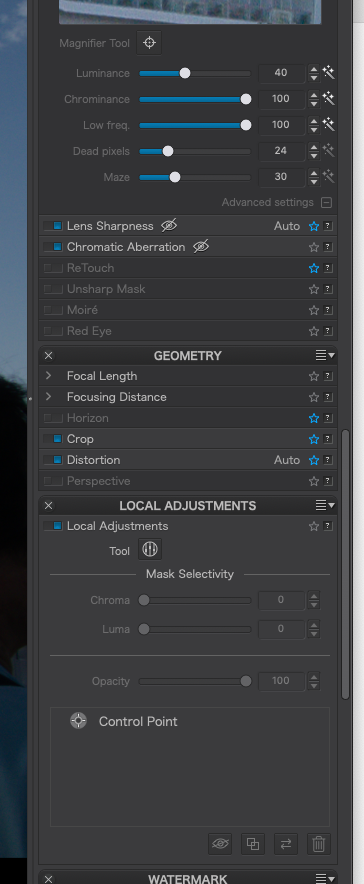
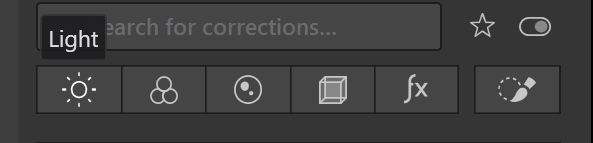
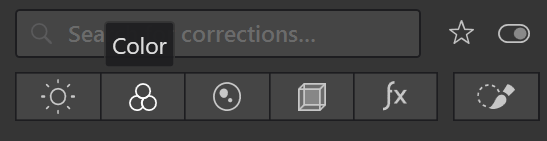
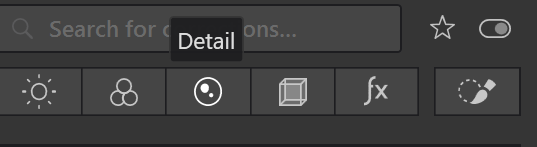
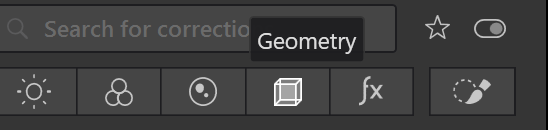
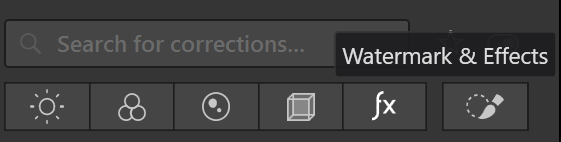
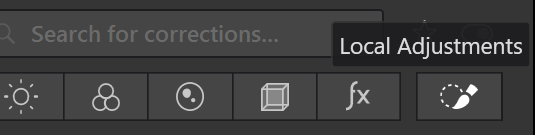
Your very long right panel contains eight palettes including Light, Color, Detail, Geometry, Local Adjustments, WaterMark, DXO Viewpoint, and DXO Filmpack. All the features of those eight palettes are available in the six smart workspace buttons on top of the right panel. Using those buttons allows you to display the individual palettes one at a time with less clutter.
The images below indicate what palette each of the smart workspace buttons represents. FilmPack and Viewpoint features are included in a couple of the buttons. Most of the FilmPack tools are in the fx button. and some of the Viewpoint tools are in the Geometry button but all of them are included in logical locations in those six buttons.
What you’re telling me (which was not at all obvious to me until just now) is that all those eight palettes can be removed, and I can find all the individual tools within one of the six smart workspace buttons on top of the right panel.
So, instead of opening palettes and leaving them open, I can close them after use, and then use one of the remaining five workspace buttons, closing each one after use.
Benefit - less “clutter”.
But I need to learn how to find each tool when needed.
Like when I was working on my motorcycles, after using each tool I put it back in the appropriate tool drawer in my tools cabinet. Everything stayed neat and clean, and I replaced tools after using them, then got out the next tool.
I think this will be a good change in how I edit. I never thought of it this way before…
Only one smart workspace button can be active a a time. Selecting a different button closes the previously selected one. You can also deselect all the buttons which is what I do when I want to see the Metadata and Keyword palettes in the right hand panel. Spend some time playing with these buttons and then you can decide whether you prefer using them instead of your current workspace.
Ctrl-click on the header of a tool panel or palette and select to collapse all. This reduces all tools to their headers, except for the tool, the header of which you used to collapse all tools.
As a temporary first step, I saved my current workspace with a new name, removed those things I “never” use, collapsed others, and ended up with a list that almost fits on one page.
I’m not sure I want to minimize things that I almost always use - like Detail, where I turn that on almost out of habit, “just in case”, and “tone curve” about which I’ve gotten the impression, right or wrong, from @Joanna, that this is one of my most important tools to get the most out of my images.
I’m going to leave some of those things turned on, as otherwise I’ll need to go hunting for them for almost every image I edit. But thank you a lot - what I see on my screen now is much simpler than what I had before, and everything I consider “essential” is easy to find.
One last question - it seems to me that any time I use Clear View Plus I am sure to be jumped on for doing so. Is it correct that the ONLY time to use that tool, is if/when I want to cut through haze? Seems to me that most times when I need to deal with fog or haze, that adds to my photo.
Not that it’s any big deal, but my birding photos need to wait until after Miami Beach’s “spring break” is over. Because of all the issues, traffic here is a nightmare, and a simple trip home now takes twice as long. If anyone cares, search for “Miami Beach Spring Break” to read about the insanity. Many streets are closed. Parking garages are closed, and available parking spots cost $100. Sidewalk seating for restaurants is closed, and there is a huge police presence anywhere I go. The goal is to make this area as miserable as possible, so the drunken goof-balls go someplace else next time. Before anyone asks, no, I don’t feel like documenting this madness. What I’m doing with some spare time is going out on my balcony, and practicing panning with, and holding, my longest tele lens, trying to turn my body into a tripod. One of my two new books on the D780 has arrived, and the other should be here this coming week.
I went out on my balcony this afternoon, just practicing how to “follow” any birds that came my way, while the camera was making like a machine gun. Elbows were dug into my body, and I pivoted my body from the waist. After a while, I thought I was doing reasonably well, trying my hardest to be smooth.
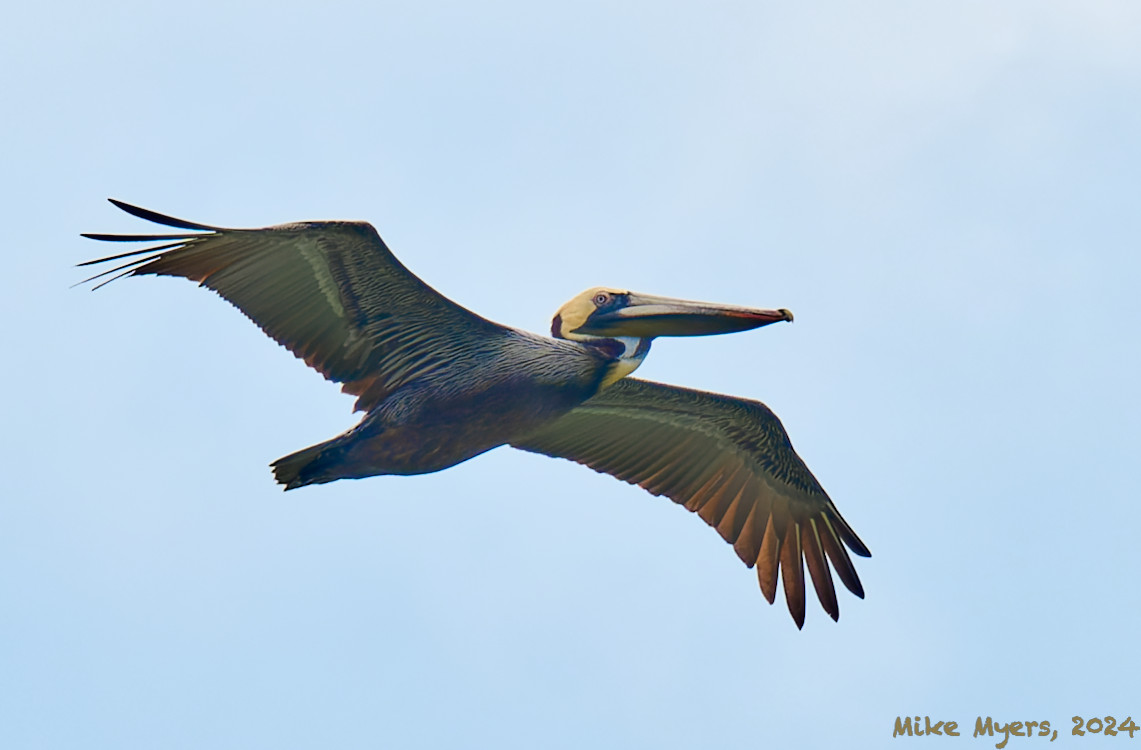
About then a pelican came by, in a long, sweeping turn to the left (West) as my gun, er, camera, was blasting away at it. I did this long after I figured any more photos would be worthless.
Three images came out “acceptable”, and I could bring out the colors and detail a little more with PhotoLab. The sky appeared blue to my eyes, so I fixed that too.
I doubt this is all that good of a photo, but it’s the first photo that I’ve taken with my Nikon 300 P lens that I like.
And now you are hoping that PhotoLab will help you make a silk purse out of yet another sow’s ear.
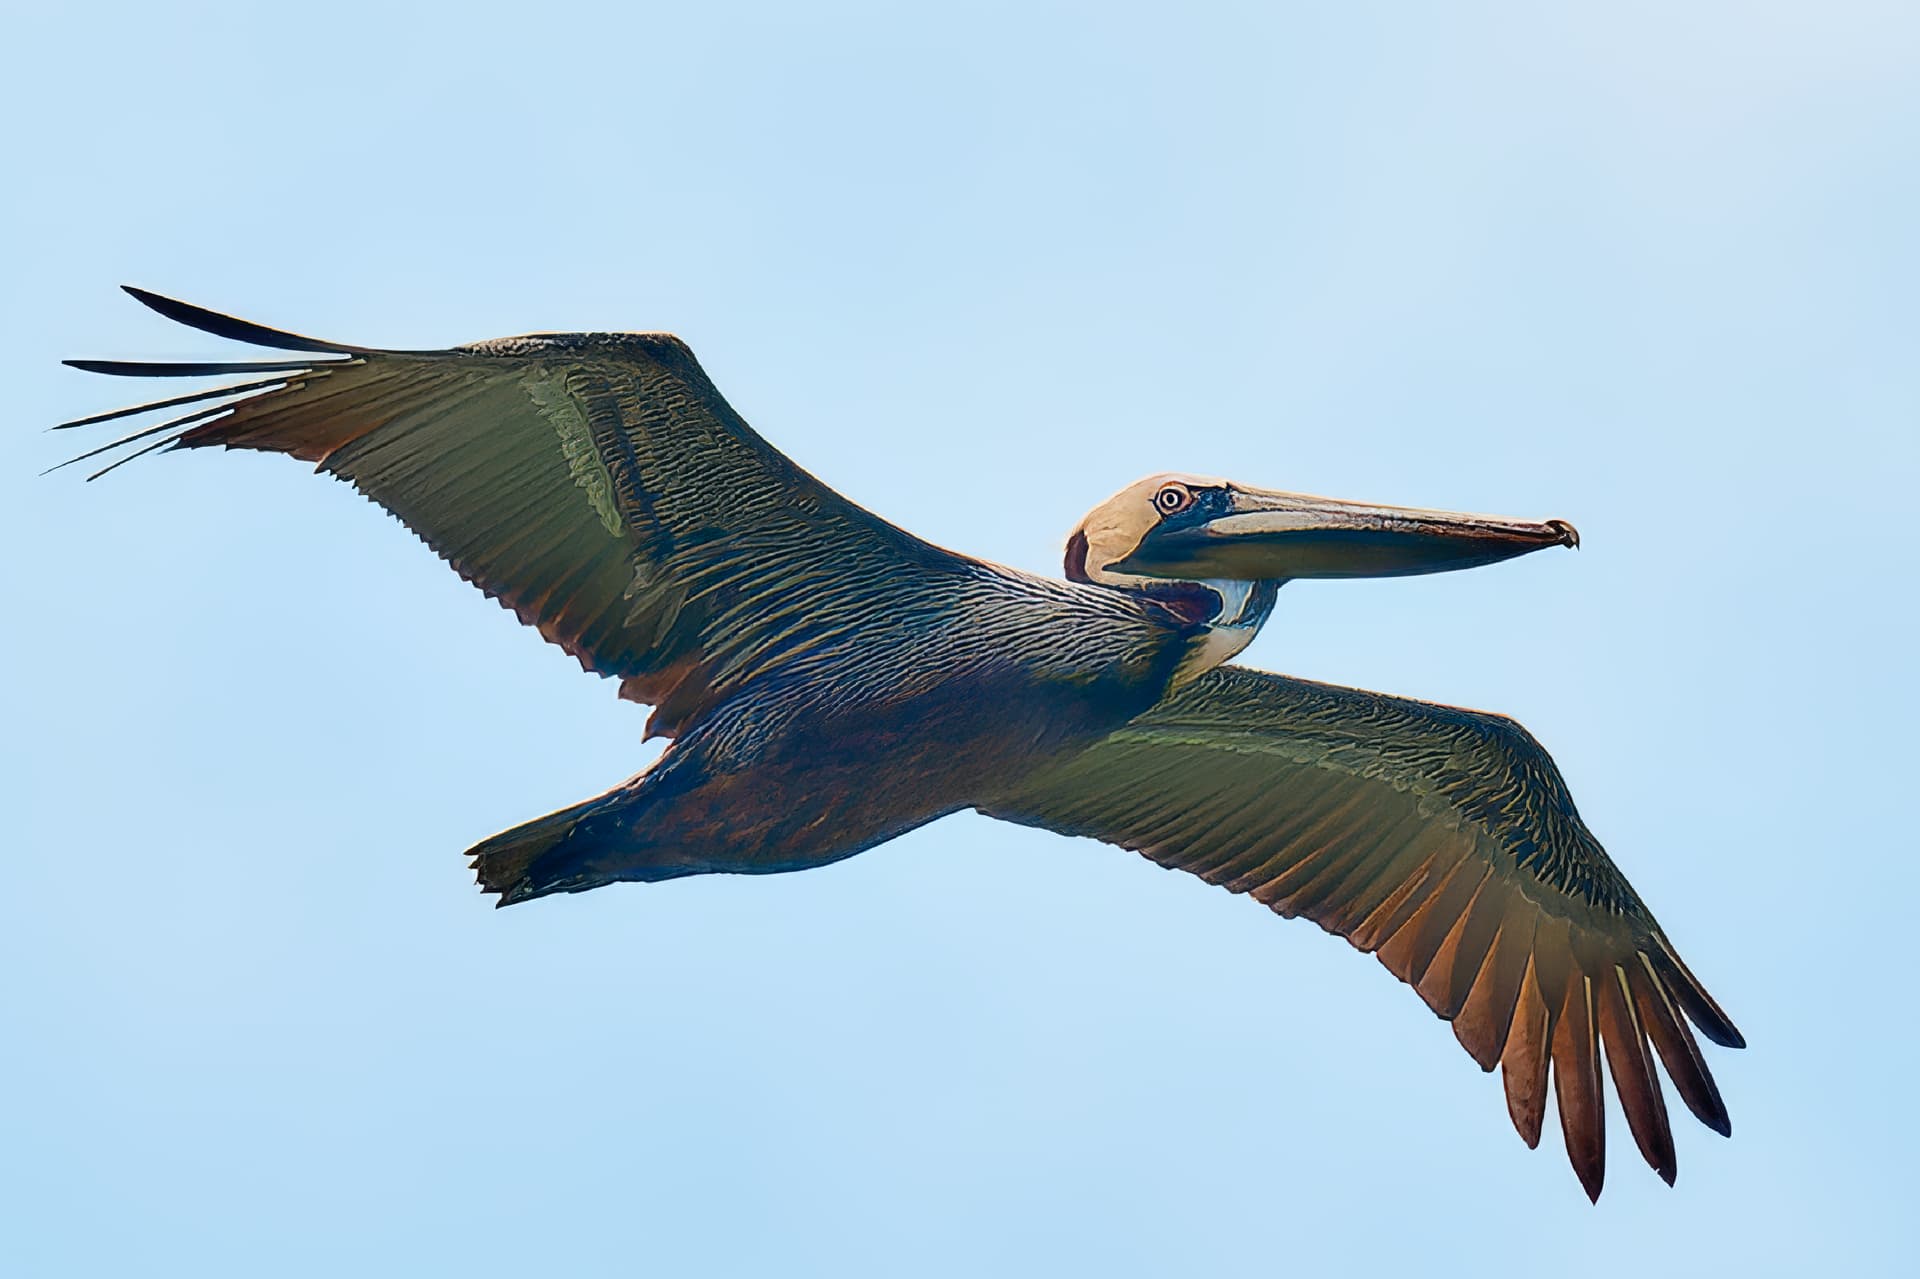
I had to use a 6x magnification in Topaz Photo AI in order to get a 30Mpx image but, that then revealed chromatic and possibly optical aberrations from your lens…
Depends on what was most important to me. My goal, which I’ve been practicing at, was to hold the camera steady enough that the image would be sharp. When I look at the bird’s eye, I am satisfied. Remember “Rome wasn’t made in a day.” Eventually, I hope to get an image that you are satisfied with, but for me it’s one step at a time. Also, my biggest problem in India was underexposing the bottom of the birds, so there was no detail, and no color. Despite your comments, I was, and am, quite pleased with this image - but obviously I’ve got a long ways to go.
As for not pressing the shutter button, most people on my mailing list thought the image was great. It might be a worthless image for framing, but in an email, it looked just fine.
I hope my next image is an improvement over this one, but getting “good” (not even sure if I’ll ever be able to do that) requires a lot more of everything.
One more thing - the image created by Topaz doesn’t look “real” to me. It’s crisp, and sharp, and clear, but almost too much so. If that’s the kind of end result I want (not sure) I’ve got a lot more work to do - but again, to my eyes, it seems “over-done”. Do you agree, or is that the kind of end result to aim for?
Practicing technique is good, but what technique are you trying to practice? What feedback are you requesting? @Joanna has already suggested “filling the frame” to get better photos. This photo isn’t close.
Are you testing shutter speed, various hand holding techniques to get sharper photos, etc?
Intentional practice, not random shots, will get you better results.
That is exactly what I was doing. I went out on my balcony, and followed every boat or bird to try to keep the camera from “wobbling” in my hands. This pelican came by about an hour after I started, and I tried to do exactly what I did while practicing. I figure it does no good to fill the frame, until I can hold the camera steadily.
I suspect it was helpful to use shutter priority, with the shutter speed set to 1/2000th.
For my purposes, this shot was perfect - and out of the 18 images I ended up with, from the first to the last were equally satisfactory.
I will certainly check out your two links, but for my purposes, the image I got was perfect - I’m still debating what I think about @Joanna’s image. At the same time I think it’s more beautiful, but less realistic.
The shots I took were very much intentional but I obviously need to zoom in a lot more.
Here’s a 100% crop of my first image, and my last, no editing:
By the way, it’s difficult for me to consider a 300mm lens as “medium length”. This is the longest lens I have ever owned, and my experience with a Sigma 600mm is that I’m not strong enough to hold it out in front of me, let alone holding it still. I think a monopod would be essential for me, yet one more thing to learn.
Thank you for the YouTube links. I’ll watch both of them after breakfast this morning.
Strange - you are suggesting “pre-visualizing”, while my goal right now seems to be just holding the camera steady while keeping the bird within the frame. Maybe I’ll (eventually) improve.
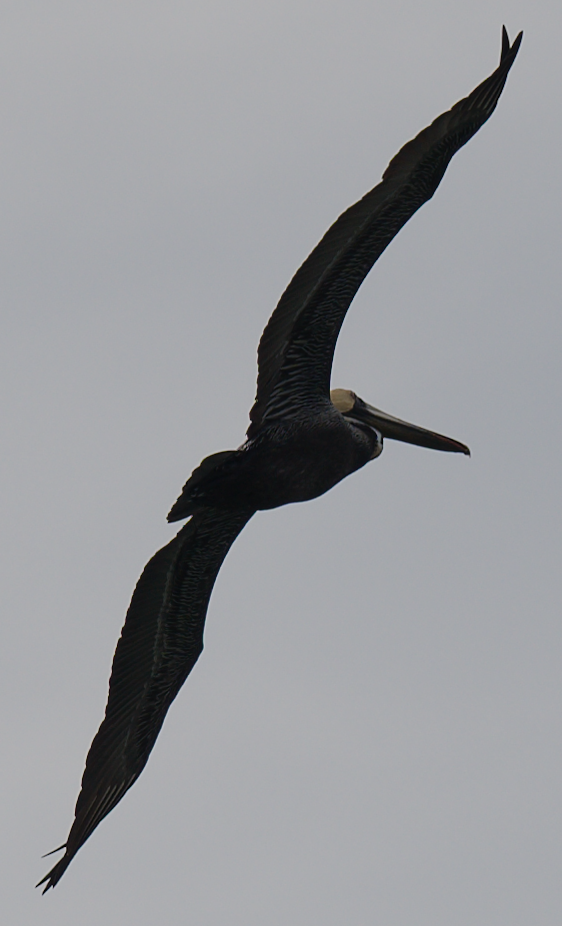
This image is horrible, but at some point in the future, I’d like get a photo like this, but photographed properly. This bird went over my head and out of sight behind my building.
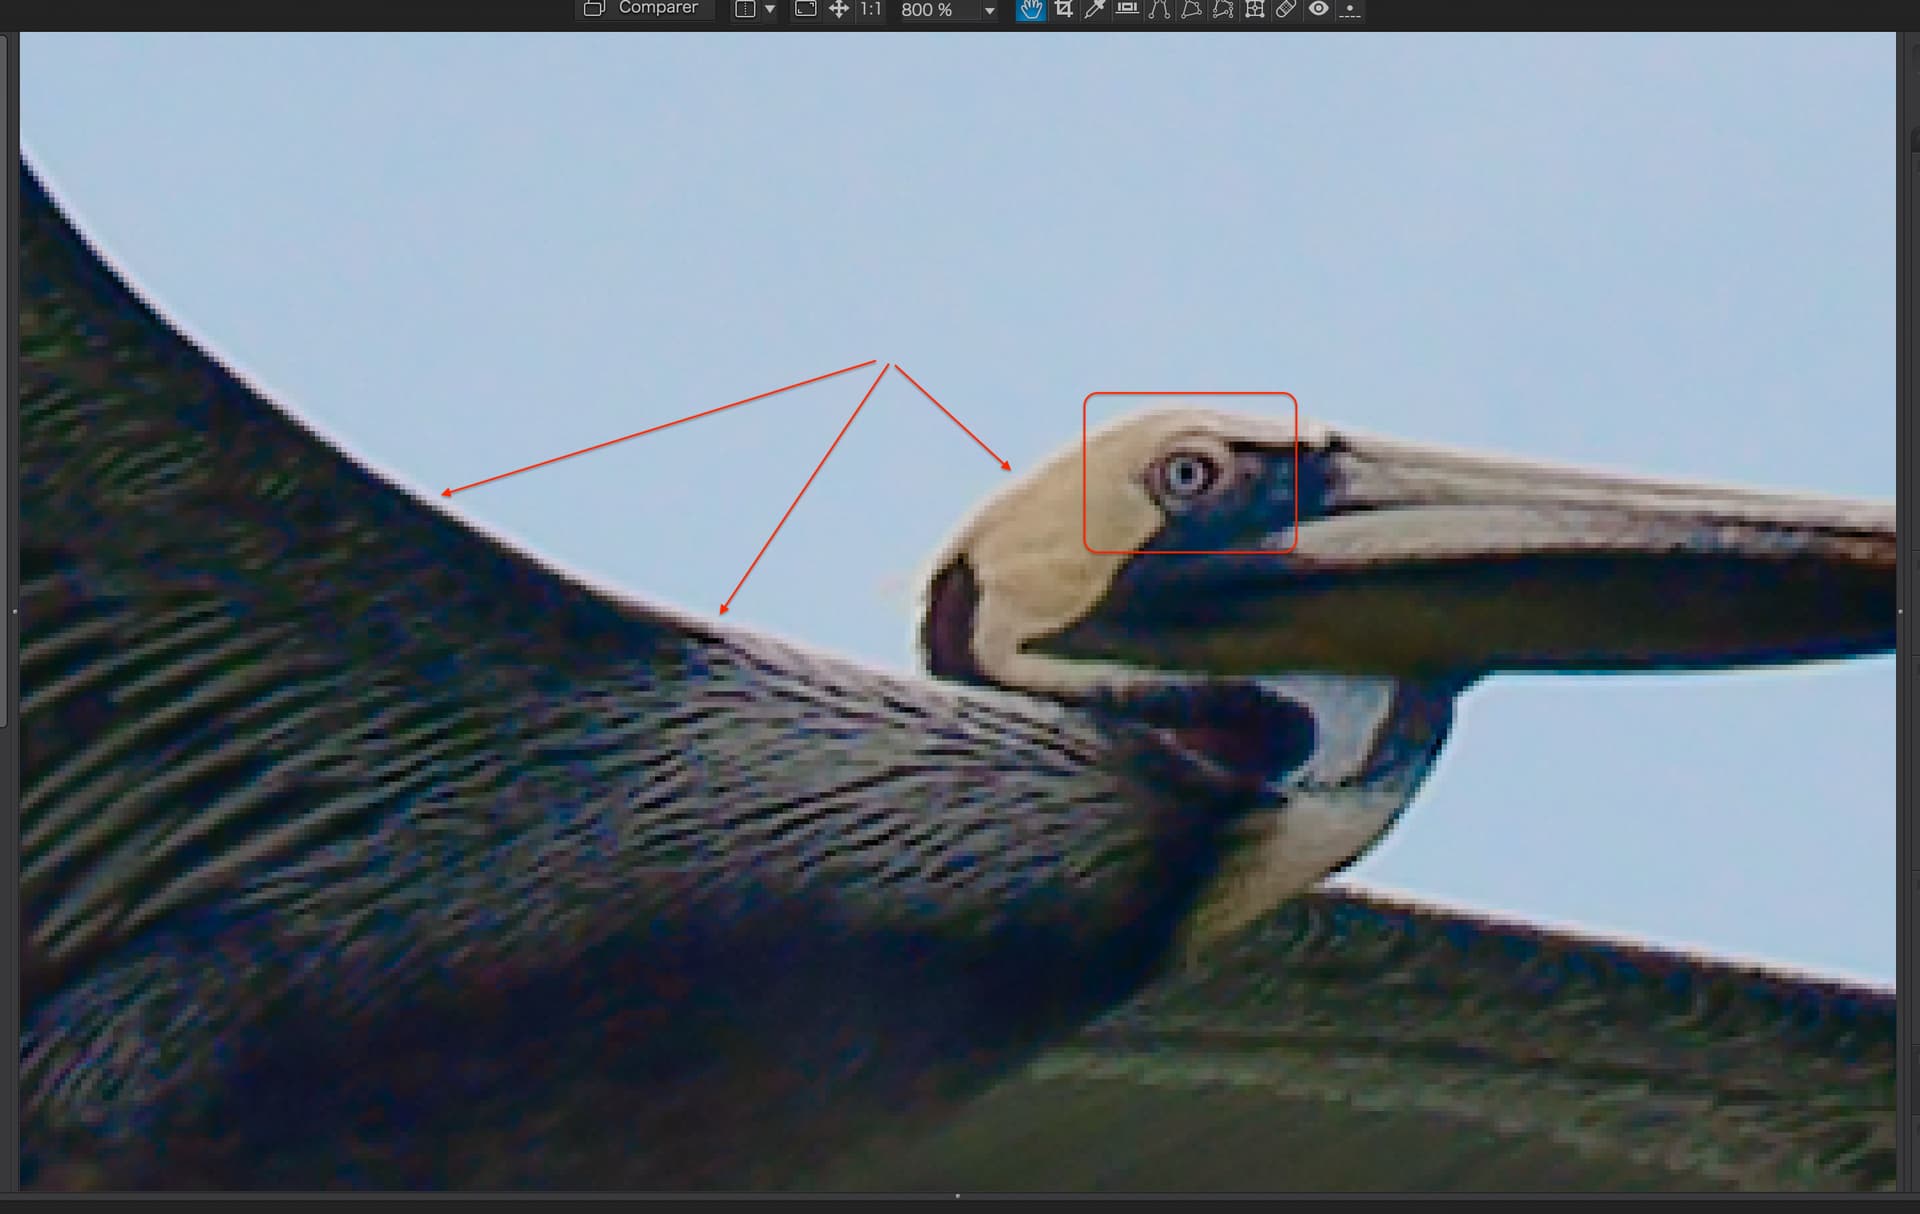
There are not enough pixels to render the eye shape as a curve and no amount of sharpening will ever improve this. In fact, what sharpening has been applied is already creating halos around anywhere where dark and light areas join.
My image from Topaz shows what happens when you try to get rid of these halos - you start to get that horrible “over-sharpened” “plastic” look.
I agree totally that that is not what you should be aiming at. It was an example of an image that should have been correctly framed in the camera, not cropped in post processing.
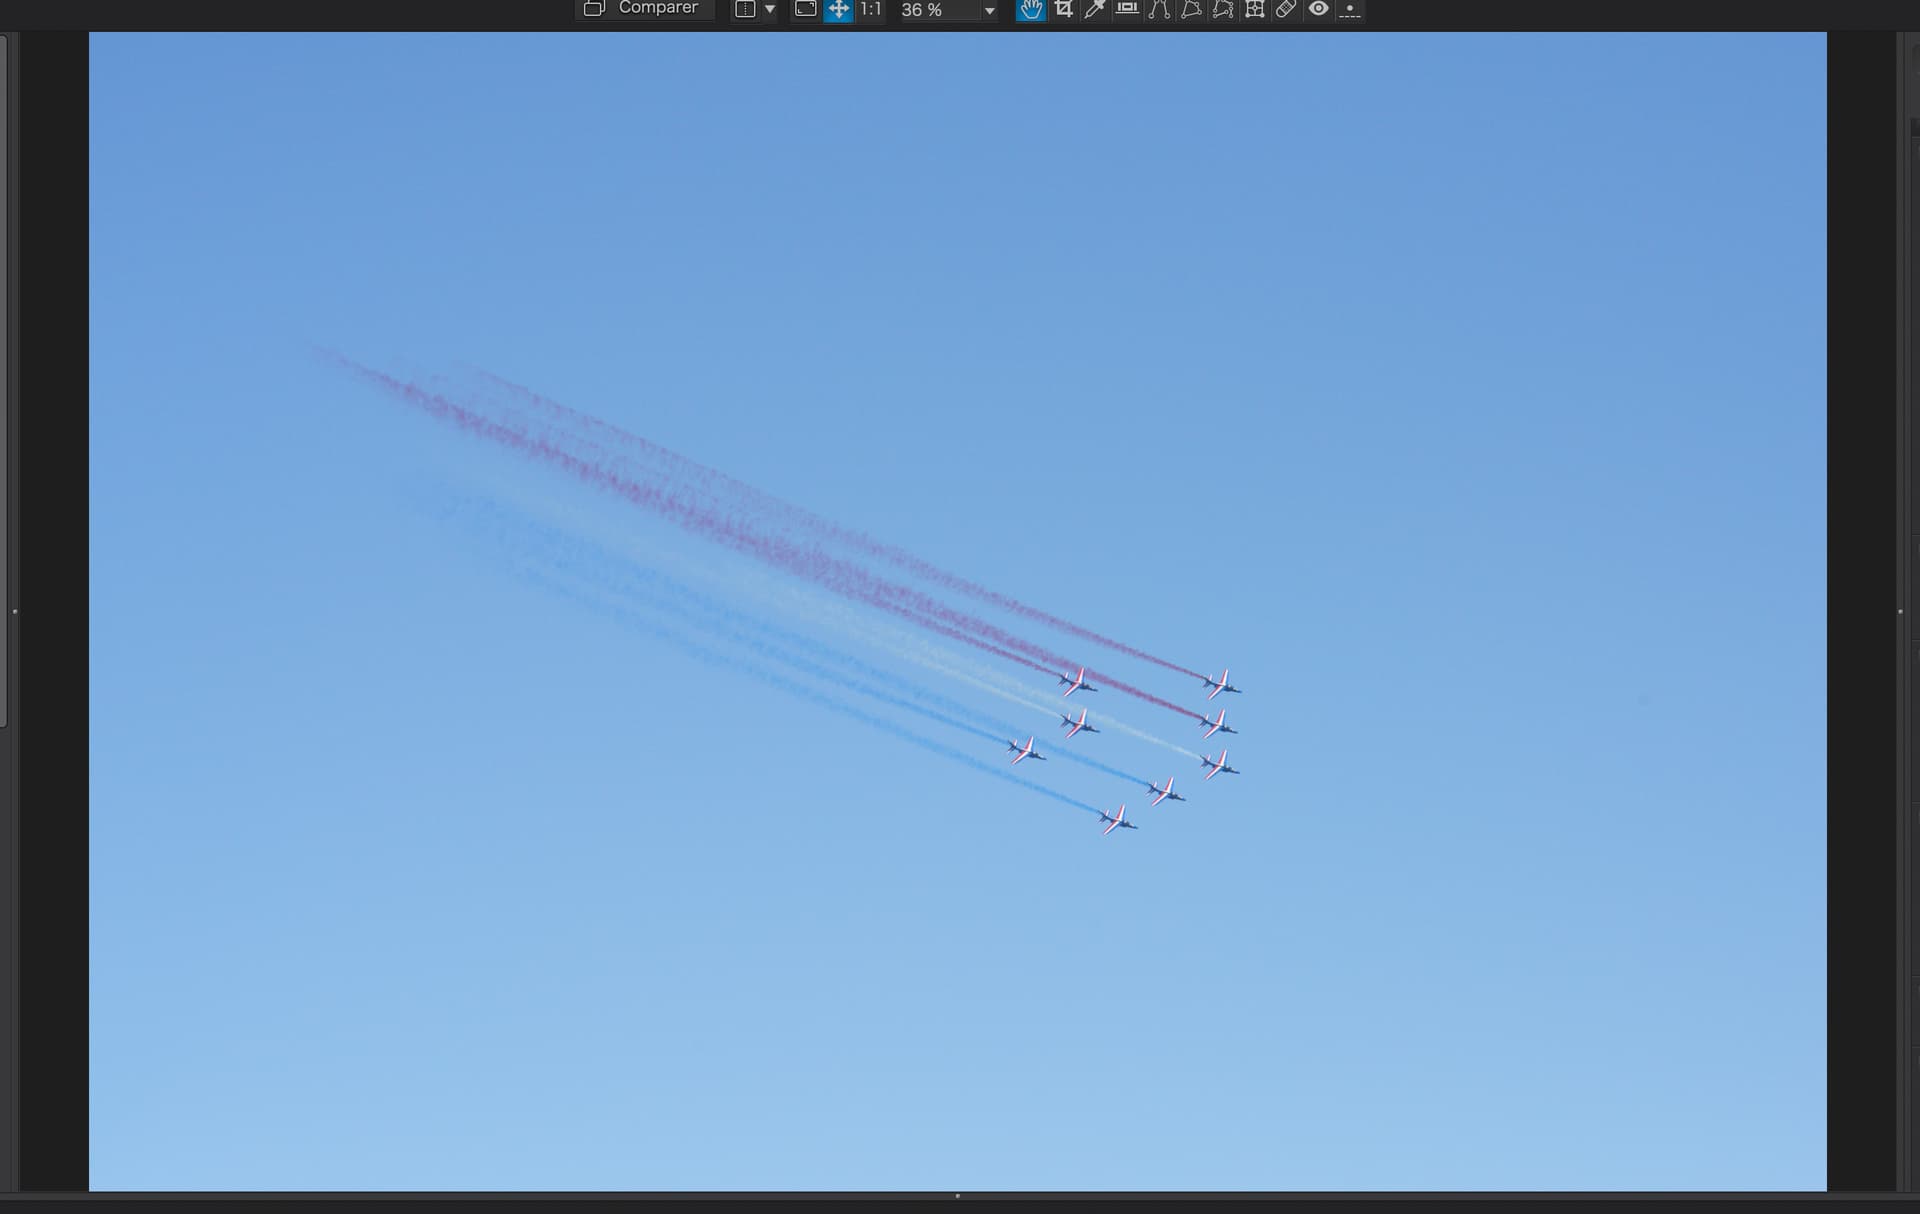
Cropping is editing. And, even with the 300mm focal length, the bird is no bigger in the frame than your previous shot at 175mm.
But, for the first one, you were zoomed in all the way.
Mike, let me say it again - if the subject doesn’t fill at least half the frame in the viewfinder, you might as well not press the shutter. Believe me, I have tried shots like this in the vain hope that I might make something out of them but they sit there in my library still unused.
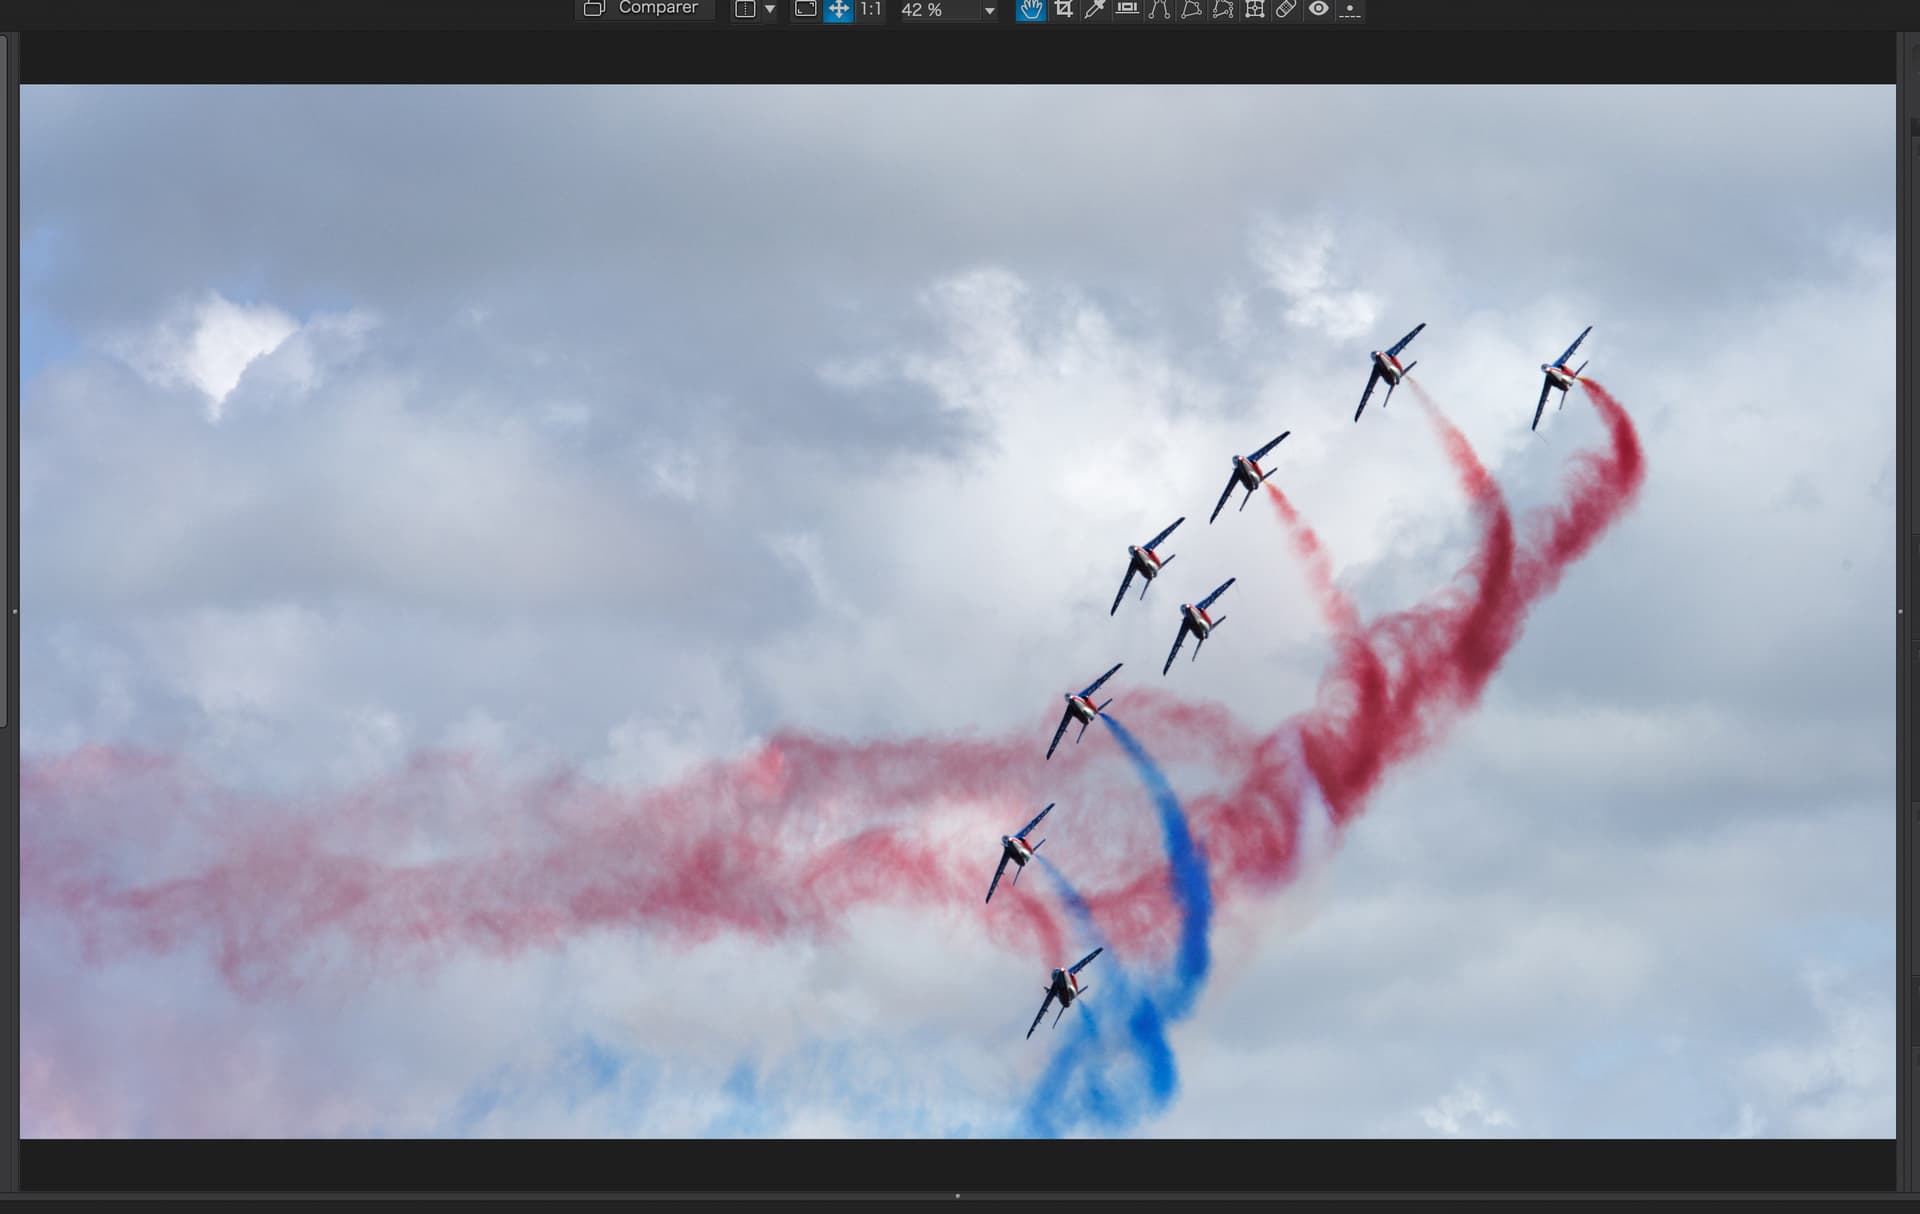
The only time a smaller subject can work is if it has some dynamic about it - like this image of “La Patrouille de France”…
… but I had to take over 600 shots and junk 550 to get that. Even now, there are still a lot more that are more private memory shots than worthwhile ones.
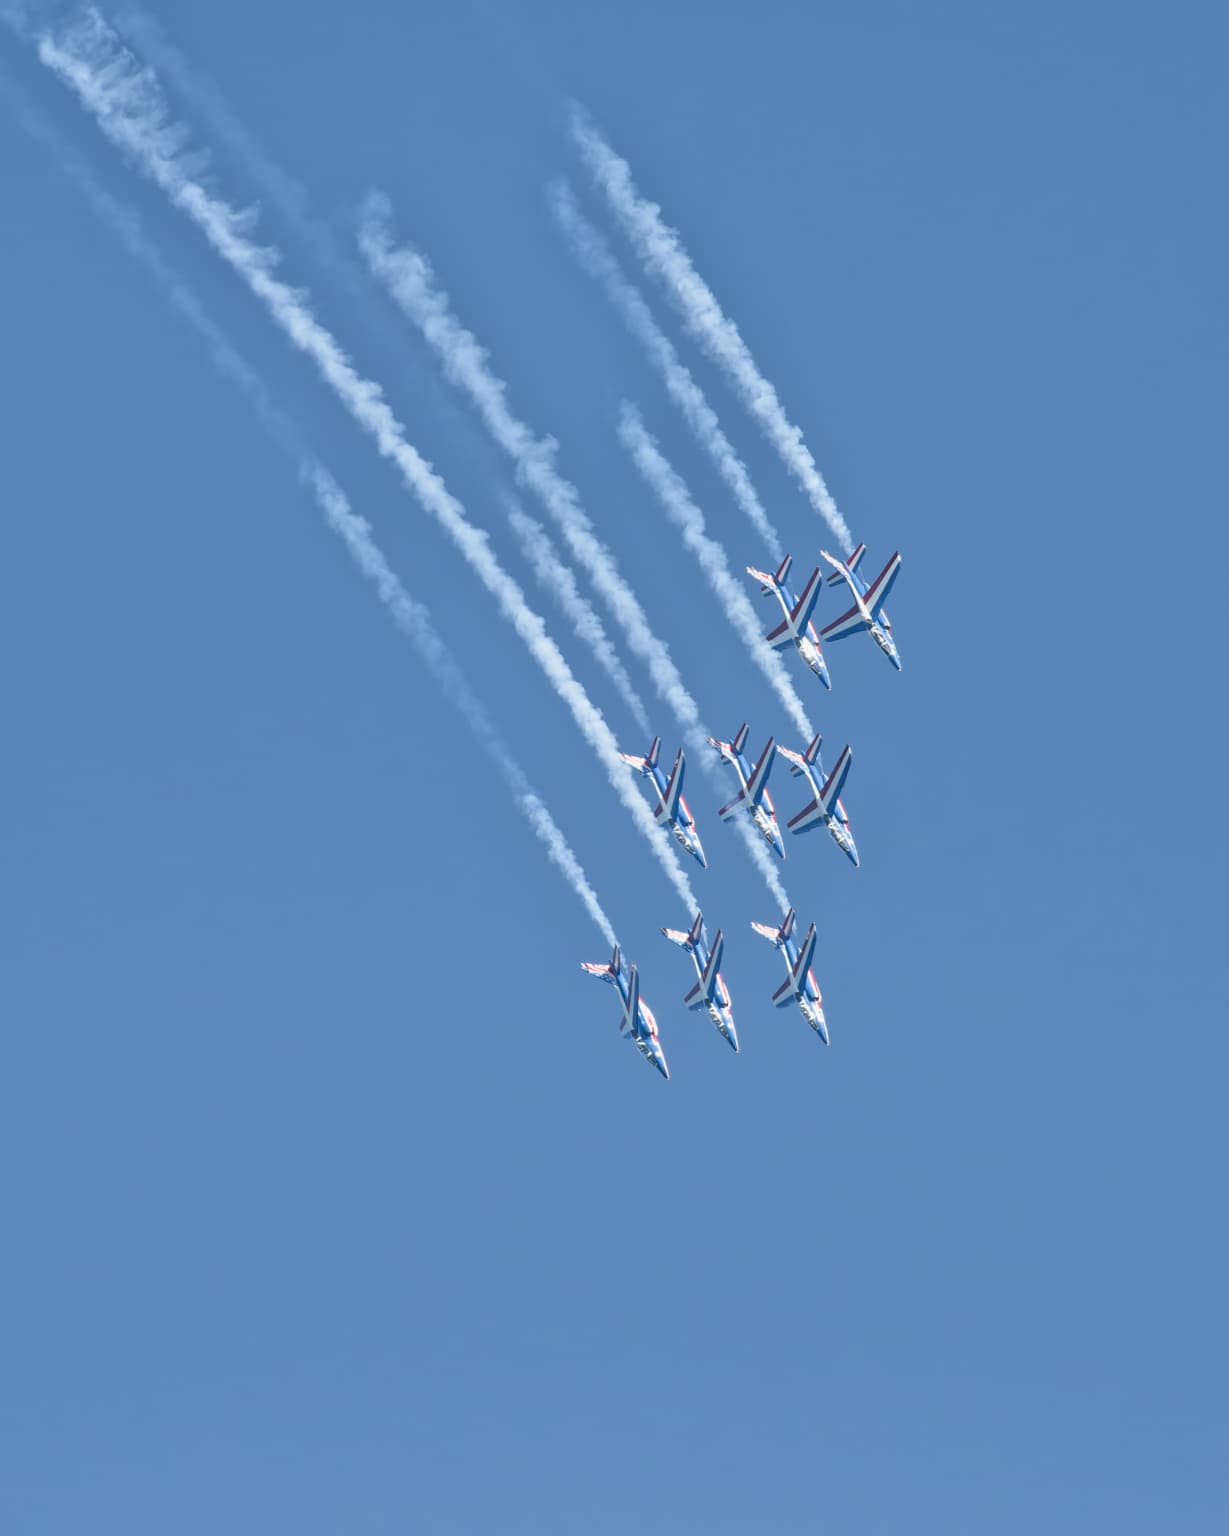
That entire shoot was taken with my 80-400mm, just in case thangs were too far away but, in fact, I’ve only got 15 shots at 400mm - the majority, like the previous uncropped shot were at 250mm on average.
My best shot of the day at 400mm has to be this one…
… even though it is a full height (4912px) centre crop from a landscape frame, I’m not sure whether this would really stand up to my normal print size of 20" x 16" mainly because there is a lack of sharpness caused by atmospheric haze.