Off-Topic - advice, experiences and examples, for images that will be processed in PhotoLab

That’s wrong. The histogram is based on the demosaiced values and is telling us about the image on an output device. The blinkies are those part of the histogram that exceed a min or max threshold. As a photographer I.m interested in the behaviour of that image on the output device.
In general the pixel values are the raw values corrected with a gamma correction and placed in a certain color space. Maybe some more items.

George

Greatly simplified, I think you’re suggesting I ignore the histogram (or us one from Fast Raw Viewer, which I just updated), and pay attention to the “blinkies”.

From what I think I’ve learned here, maybe I should open FRV in another window, and look at it before I start to edit. Maybe I should just close that. window in PhotoLab, and check the “blinkies” when I think I’m about finished with an image.

How much trouble would it be (or is it even possible) for PhotoLab to display a histogram like that from FRV?

My plan for now is to keep my eyes open for any wonderful scenes, excluding Biscayne Bay, and to look for some objects to photograph as @Joanna suggested. In Michigan, I’d have maybe visited some old farmhouses and barns, but there aren’t too many of those in Miami Beach.

I very much appreciate all the time people have spent here illustrating what is being discussed, not only for me, but for anyone following this discussion.

???
I don’t know what you mean.

And now tell me what help is that when shooting.

George

Since I don’t get to see that window until I open PhotoLab, it is obviously no help whatever in shooting.

Joanna suggested the histogram in PhotoLab is based on information from the jpg image, not from the raw image, which to me implies I should ignore it. I could just close the window, but then I wouldn’t have instant access to the “blinkies” for over/under exposure, which seem to be useful.

What I’ve learned from this, is I should instead use the histogram from Fast Raw Viewer, which apparently is based on RAW data.

When shooting… that’s another “can of worms”, some of which I used to resolve by letting the camera do more of the work, something seems to be frowned on in this forum. My own solution is to shoot the D780 as suggested by Joanna, shoot the Fuji allowing the camera to suggest an exposure, and for the Leica, I’ll decide what to do when/if I pick up my Leica again.

(History - until I joined this forum, and met all of you, I was quite pleased with (P)rogram mode. I guess “ignorance is bliss”, or something like that. Oh well. Now I think (P) mode is something a person gets addicted to. While I want to create beautiful images that mean something, I also want to capture “record” photos of things I’m interested in, and want to remember, and share with family and friends.

What I have decided is from now on to keep the “record photos” for myself, and try to only post beautiful images in this forum, assuming I’m capable of doing so - some people here think that is an impossibility. At times, I wonder. There are so many things in this world that I already can’t do…)

Where do you use that for?? What benefits does it has?

George

You don’t. Just learn to ignore it.

I’m not sure but the primary use I make of them is to ensure that I place the Smart Lighting rectangles over the darkest and brightest parts of the image…

Then I adjust the top and bottom of the Tone Curve to eliminate everything that’s left…

From experience, if I only need to reduce the top by 3 and/or increase the bottom by 3, then that tells me they are within range and it must just have been because the warnings are biased towards JPEG.

It’s not a science, but I find it helps when printing to not have pure white or pure black areas.

In all the years I have been using PL, my use of the histogram has been zero and my use of the warnings has been as above.

Because, for most people, it really doesn’t matter. I only really use FRV when teaching about dynamic range and the effects of under and over-exposure.

Let me give you a hint for your sanity. Stop looking into FRV! it’s only for nerds and pixel peepers (like me) to explain and demonstrate stuff.

When I first got an LF camera, I was amazed to find that it didn’t come with an instruction manual. Why? Because if you don’t know the principles of how the View Camera works, it’s not worth you buying one :sunglasses:

Likewise, the same applies to FRV. It needs setting up by someone who knows why and how it works before you can make any sense of it. Even then, I only ever use it on very rare occasions, when I’m feeling masochistic.

Yes to the first and don’t bother with the second.

This really is all that matters for the most part.

No, No, No

No, just ignore it

No. That is one of the first things you should check.

Neither of them are worth bothering about for the average user.

Neither is the histogram on the back of your camera.

You need to realise that, if you need things like that to tell you your exposure is wrong, you obviously don’t know your camera well enough. Tell me how you managed with colour transparency in a film camera?

For LF work, film is expensive, too expensive to do bracketing, so I learnt the dynamic range of my films and how much of that range I could get away with above and below the 0EV exposure.

For Fuji Velvia 100, it has 5 stops range, with 3 stops below 0EV and 2 stops above. Anything below -3EV will be blocked, anything above +2EV will need a ND grad filter to bring it into range.

But, you see, all this has nothing to do with using PhotoLab. It’s all to do with producing the most perfect exposure possible, so that you barely need to use post-production software.

Take another look at the LF images on our website Apart from removing dust spots, we very rarely ever needed to “edit” the scan.

As for what you said about shooting, stick to the D780, fully manual mode, spot metering, and get to know it until it becomes as automatic as breathing.
With one small exception, everything you wrote is easy enough for me to do. I haven’t used FRV in over a year, and had to update it when I used it yesterday. Very easy to go back to ignoring it, at least for now.

For cameras, for “real photography” as I’ll call it, I am already following your advice, but I’m not going to take my D780 with me when I go food shopping, or to my shooting range, or lots of other things including doctor visits. The small Fuji X100f is more practical, as I’d rather use what I call a “real” camera rather than my iPhone. Anyway, that’s another topic entirely. I’m also not going to let my Leica M10 and M8.2 sit around unused for many months at a time. Just like cars, cameras last longer if they are in use, than sitting in a drawer - IMHO.

Everything else you suggested - consider it done.

No longer relevant. I used to think those things were useful, but I guess I was wrong.

I don’t think I will EVER know any of my cameras fully. The D780 has a gazillion settings I have never used, or fully understand, and if I want to watch an hour’s long video for the D780 settings, I’ve already saved the link:
https://www.youtube.com/watch?v=hR4CE162H8w&t=5057s
Some day, when I have a lot of free time, I want to watch the full video. As for my D780, I mostly use it just like I did my D750.

About your question - years ago, with color slide film, I either used a hand-held meter (mostly Luna Pro) or the built in metering system in my cameras, or attached to my cameras. That, along with “Sunny-16”. I still have separate meters, mostly for use with my Leica cameras.

The warnings use a threshold. It’s even not related to the image sec. If you would have a raw histogram you’ll see the same.

George

Hey, you don’t need to. Just set it to manual everything and make sure you know how to meter and how to to adjust shutter speed, aperture, focus and ISO - forget everything else.

Then find out the dynamic range and how much of it you can get away with both above and below 0EV.

When you leave the house, set the ISO to something like 400, the shutter speed to 1/400sec and the aperture to f/16 if it is bright sunlight, f/11 if it is bright but cloudy or f/8 if it is dull. You should then be ready for quite a lot of shots (taken with the light) without the need to keep on metering. Otherwise, spot meter as we have discussed before.

Nah, don’t bother. As others have said, get out there and practise.

As you mentioned, just treat your D780 as you used to with your film cameras, except you have a great spot meter included.

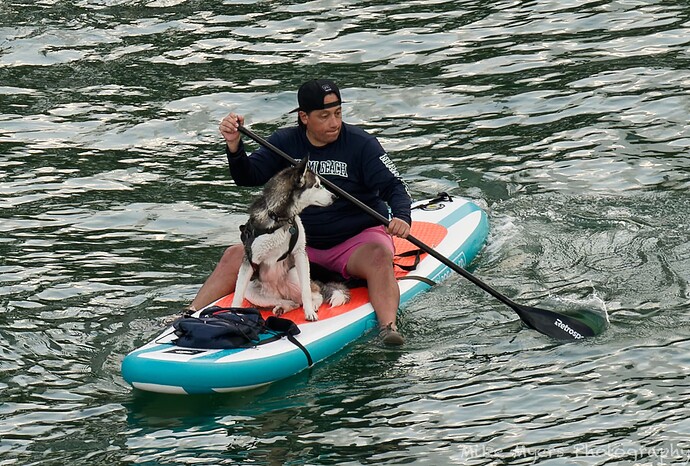
Ever since you wrote that, I’ve been “hunting”, but haven’t yet found anything I thought was interesting. Most of the boats I don’t have access to are zillion dollar yachts, with nothing exciting to me, and no way to get closer. I thought I would go on a walk, finding something suitable.

Then an hour ago I noticed a fellow out on a paddle board, with his dog. So, I got out my tripod and 300mm lens (wish I had a 600!!), and took quite a few images, hoping to get something that met three criteria:

  • The guy paddling needed to look good, captured as he paddled
  • The dog needed to look good, and interested.
  • I wanted some interesting surroundings, which only happened when the water was reflecting the sky towards the end.

Not much to do in PhotoLab - never looked at the histogram, but did notice the blinkies told me I needed to fix both ends of the tone curve. Very little to do in editing. I tried with and without Smart Lighting, and left it on.

It’s not going to win any contests.
I think it’s plenty interesting, and it was worth all the effort.

I suspect you’re all going to tell me it’s “a snapshot”; if so, so be it. I considered it to be a challenge, and was happy to get this one image that I liked (and 40 or so images that weren’t worth posting). Any time I thought I might have a good image, I took the photo, knowing I would need to sort out the best image(es) to find one I was satisfied with.

780_0906 | 2023-05-19.nef (30.1 MB)
780_0906 | 2023-05-19.nef.dop (14.6 KB)

Agreed. 1/400, ISO 400, f/16, f/11, or f/8 depending on daylight. Sounds like a good starting point to me.

Well, I went out to get bagels, but first set the D780 as you described. The exposure was a good starting point, as long as I was in bright sunlight. I captured several scenes that intrigued me, but at the same time, I was thinking that if I sent them to family and friends, they’d all be asking me why I took them. My answer was that at the time, I thought they were worth taking. Back to your suggestion though - why did you pick f/16 for a starting point?

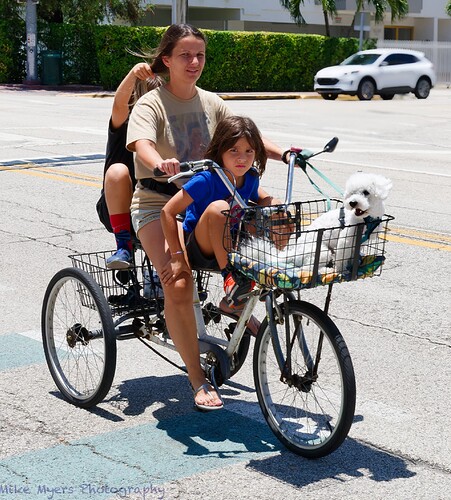
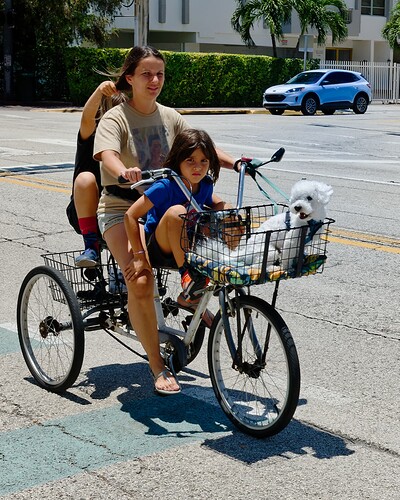
For the lady with kids and dog on a bike, I pretended I was shooting the white car in the background, but captured the image as she came into view. In retrospect, I should have panned, taking several more photos, but I didn’t want her to think I was taking photos of her… …but she was staring at me anyway, along with the small boy. As they went by, I was still looking at the car. The dog was constantly barking, and that’s what drew my attention in the first place. I liked the way she and her family came out, the shadow underneath, and the dog. I find the white car annoying. I used the new tool I just found to blur the car, as much as I felt comfortable with.

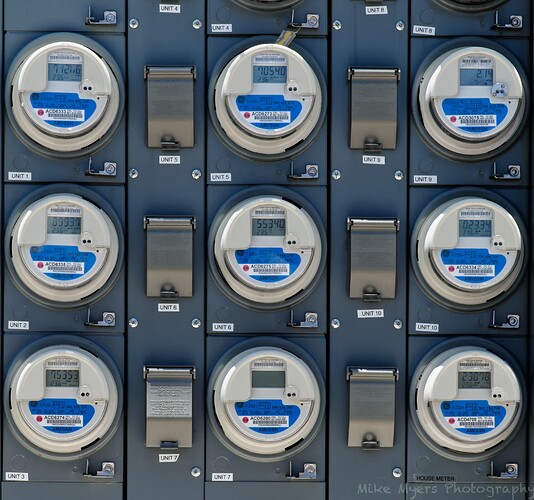
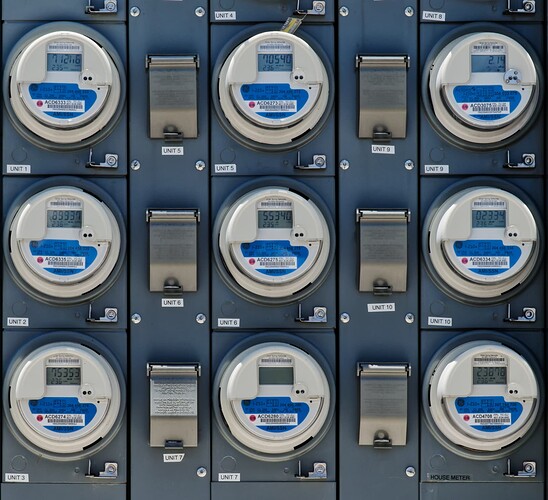
As to the meters, I saw them last week, but decided not to shoot them. When I saw them today, I decided to try. It’s the closest I could get to “boat related parts”, without the word “boat”.

I’ll post all the image files here, but I doubt anyone in the forum will be interested enough to work with them… @JoJu will never stop laughing at them.
780_0909 | 2023-05-20.nef (31.9 MB)
780_0909 | 2023-05-20.nef.dop (17.2 KB)

780_0914 | 2023-05-20.nef (26.4 MB)
780_0914 | 2023-05-20.nef.dop (14.3 KB)

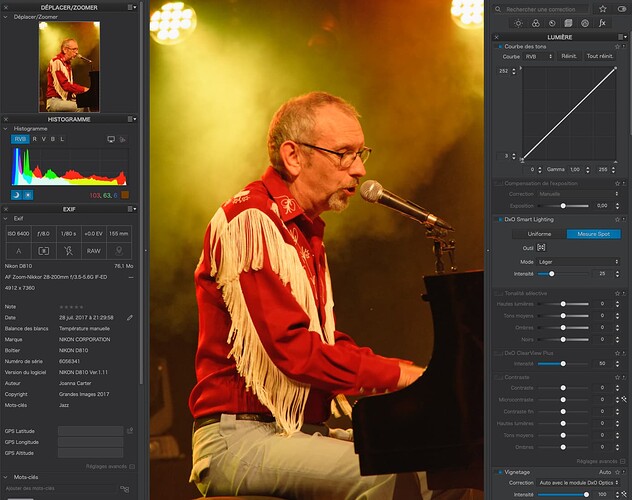
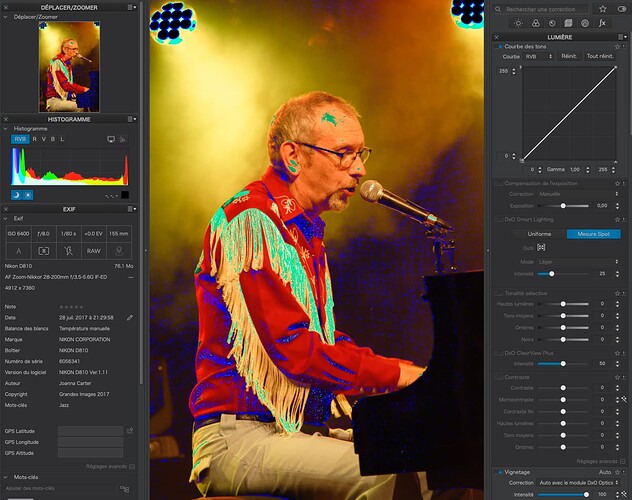
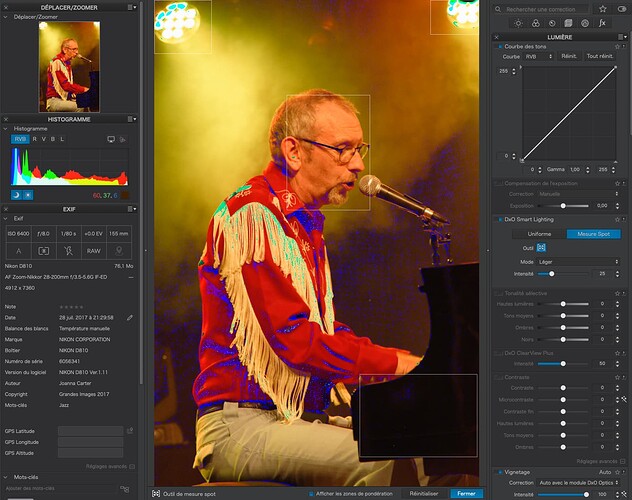
Just curious - in this image, why didn’t you make the piano noticeably lighter, as to me it looks to be pure black. Looking at your screen, the DxO Smart Lighting is set to 25. The image is still beautiful, and somehow the exposure worked just the way you wanted, but the side of the piano appears annoyingly dark to me.

What a lovely image though, and thanks for explaining/showing how you did it, but that question, and why you didn’t crop out the two annoying (to me) lights at the top I wonder about. I’m pretty sure everything (99.9%) of what you do is on purpose, but my very first thought would have been to get rid of those lights. If I cover them with my hand, the image is instantly improved. To me, that is.

Other than distracting me from what I think the heart of the image is, why did you want to include them?

1 Like

Sorry, I was going to give you a “real” (to me) explanation, but like so many other things here, I’ve learned to do things differently. I used to think a histogram that was “distributed” from left to right indicated that I might have a good exposure, but looking at Joanna’s samples, that answer is useless.

In the past, I learned to see the histogram in my camera, as I was capturing an image. If my histogram ran off to either side, I used to take that as a hint that my exposure was likely wrong. All my cameras are now still set to show me a histogram if I select that view. I feel once again that someone pulled the legs out from under me. That happens a lot in this forum. I think that’s good.

From @Joanna

But then I learned this was also from the ‘jpg’ image, and it’s not “accurate” if I’m shooting in RAW. That, and if everything is jammed against one edge or another, that doesn’t mean the exposure is “wrong”.

I haven’t yet turned off all the histograms in my cameras. To be honest, I’m not sure what to think about them now. If my camera is on a tripod, I have time to think about these things, and maybe try different exposures (just in case). Again, to be honest, I’m beginning to feel overwhelmed by all these new thoughts. They mostly make sense when I’m at my computer, but not as much as I’m holding the camera up to my eye. I think “faster” than I used to, but I’m still slow.

One thing is sure though - the more I “do”, rather than “read”, the more I “learn”. Real “understanding” seems to come from “trial and error”, “doing”.

and

What are you saying now??

George

You’re right there! Good job you don’t want to make a poster out of it. 1650 x 1100 is only going to make a 6" x 4" print unless you run it through something like Topaz Photo AI. Even then, just getting it to 17.5" x 12" gives horrendous results…


Because the “rule” is called Sunny 16 and I wanted to show you that, although not ideal, you at least captured a well exposed image without having to think about adjusting the camera.
In fact, this image was perfectly exposed and I am at a loss to see why you rendered it over-exposed by increasing the exposure compensation by 1 stop?

Here’s my version…

780_0909 | 2023-05-20.nef.dop (47,8 Ko)

Notice how the texture has returned to the road surface, the dog’s fur has more detail - oh, and, despite the fact that you contrived to get a post growing out of the woman’s head, I darkened the other post on the left.

When you want to brighten an image, don’t raise the exposure on already bright highlights. That is where you can use the Tone Curve to not only bring out more detail in the shadows but, also, avoid the terrible greyish look that lifting exposure can give.

The blur you applied to the car just looked like false blur, so I removed it and changed the colour of the car to tone in with the child’s blue top, in order to make it less obvious.


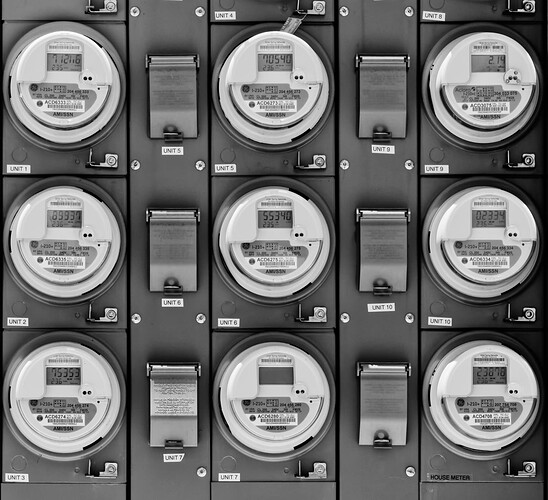
Unfortunately, for the meters, even though they were in the shade, you not only kept the shutter speed and ISO the same as for bright sunshine, you also turned the aperture in the wrong direction, thus giving you an under-exposure of 2⅔ stops. Don’t forget my hint of f/8 for dull lighting or, better still, since the subject wasn’t about to disappear from sight, take the time to take a proper exposure reading. The Sunny 16 is only meant to be an “emergency” setting for those moments when you don’t have the time.

Two versions - colour…

B&W…

780_0914 | 2023-05-20.nef.dop (57,4 Ko)


Because it is almost pure black but there are still reflections if you look carefully. The last thing you want to do with backlit shadows is to lighten them too much - then they start to look like a very badly done HDR.

Yes, together with the zones, that helped equalise the exposure from highlight to shadow.

But correctly exposed and processed so that it looks like it did when I took the shot and it doesn’t distract too much from the main subject.

Because they form part of the composition I arranged when I took the shot and they give atmosphere to the shot.


Just remember back to when cameras didn’t have all these fancy gizmos and you had to get it right or be disappointed when the negs came back from the lab. In those days, you didn’t need a histogram or blinkies - instead you learned by experience and failed shots and got better as time went on.

See what I mean?

And they also explain the coloured shadows on his shirt, as coloured LED light was used to illuminate a live gig. I’m glad you did show them. Even if they generate less of the typical stagelight caused atomsphere elder people (talking about me) are used to and the colours often are more pale than popping.

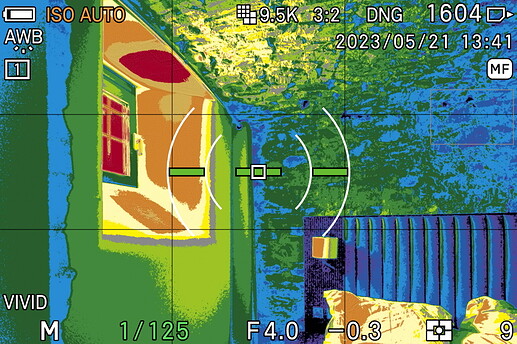
But now they have. The only thing we need to know is that the camera’s histogram came to address JPG exposure insecurities. Just like all the bracketing “spray and pray” stuff. RAW-shooters don’t need most of it, I agree. Kind of like using a Polaroid back in the days of film era to avoid costly mistakes. And if a histogram is already judged as “fancy gizmo” then what is this?

Right, a screenshot from a camera which can do screenshots. And these false colors just show me to which region I need to watch out. The more red, the more blown out highlights, the more dark-blue/black the more hard to recover shadows.

That’s not always easy to be seen, very especially on a DSLR or a film camera, into which you try to mutate your digital camera at all times, dear @Joanna. Not knowing the basics of photography is bad. And it can be demonstrated compared to film. But not knowing what digital sensors, AF and the other “gizmos” eventually can do to make the process easier, more reliable and sometimes even more enjoyable, is equally bad.

What and especially how you do your photography, leads to excellent results. But is not the only way to get them. :wink:

Just that I’ve left everything the way it was set before. The D780 has many “views” that I can scroll through of the image I just captured, and I left the views with a histogram in place. I no longer “trust” them the way I used to. I have the ability to select each view (or not) as I scroll through them. I see no need to change them yet. Ditto for the Fuji - it too is set to display a histogram. Also, the M10. I was g going to find a way to de-activate all of them, but I just left things the way they are set now, even though I no longer trust them as I used to.

@mikemyers,

If you still have a handheld light metre give this a try. Take a reading off the back of your hand providing it is in the same sunlight lighting conditions as the subject. Do it in bright sunlight, hazy sunlight and dull sunlight and you will find that @Joanna is pretty well spot on with her suggestions of the aperture setting. This is something I used to do in my film days. I also used to do it with with my Mamiya camera which had a spot metre in it. Not so easy nowadays with modern day cameras is the focusing is now automatic unless you can switch it to manual.