Off-Topic - advice, experiences and examples, for images that will be processed in PhotoLab

No need to be sorry, but it’s going to take me a lot of time to digest all this. I don’t have or use Silkypix, and the last thing I need now is yet additional software to further complicate my life.

My immediate plan is to stop using any of these additional features until when/if I think I understand them. Better to not use them at all, than to use them incorrectly.

I’d like to back up a little, and re-group, and not use any tools I’m not comfortable with.

I took this photo a few days ago. I was intrigued by the shapes of the canisters, with all the vegetation growing around them. I know there’s lots of bright orange in them, which attracted me to the image, but I decided to make them gray-scale instead, so the color didn’t take over the whole image. I didn’t pay enough attention to aligning the camera, as the traffic light changed, and everyone, me included, crossed the road. I didn’t think I would ever use this image anyway. The lens correction took away some picture area, and my non-level camera orientation took away more. It was sort of a grab shot, again, for no particular reason. Shoot first, think later.

I figured I would edit it, not using any tools that I wasn’t confident in using. I straightened and cropped the image, to look acceptable to me. Color rendering was changed to B&W, and once again the Fuji Neopan Acros 100 instantly made it perfect to my way of thinking. It looked a little more “flat” than I wanted, so I use the S-curve on the Tone Curve to take care of that. The foreground was plenty contrasty and sharp, and the background was a little out of focus, which is what I wanted. The histogram indicates the exposure was good, so no changes. I ignored the tools I used to play with before, as when I look at the image, I don’t see anything I want to change or correct. Most of the plants are lighter than what I might have wanted, but they go nicely against the dark “canisters”.

No extra contrast, no Smart Lighting, no ClearView Plus, and just for the heck of it, no watermark. Deep Prime is on of course, as I always use it, regardless of whether I think I need it or not. At this point, I stopped.

The only reason I’m posting it, is to get feed back regarding what I did (or didn’t do). I don’t see the need for any of the special editing tools I’m ignoring, For what I hoped to capture, I’m pleased with the image, even if it’s a “nothing” photograph. It’s good for editing practice with the tools I do feel comfortable with. I don’t see any reason to delete it - maybe it’s an example now of “basic editing”.

780_0633 | 2023-04-29.nef (32.0 MB)
780_0633 | 2023-04-29.nef.dop (13.2 KB)

Click on that want looking button.

No i used Silkypix to show you what clarity and dehaze should be doing.
I showed you the manual so you can read about it.
And i showed you the different outcomes at max adjustment of all kind of sliders on the same image. That’s what you need to do. Select images in a folder which you use in order to test a assumption. (it’s the same image everytime so the different out come is caused by different adjustments. :wink:)
So if you think it works like a certainway test that on a known image see if it’s indeed works like you thought.

@mikemyers

  • again – you need to experiment (a lot) to get to know the tools, not by avoiding them

  • then reflecting about your pic, before you throw all kind of on it, saves you time and keeps you ‘creative’

1 Like

So true.

Then you will be severely limited in the quality of adjustments you can make.

  • Contrast - affects the entire image and is just a basic tool to increase or decrease contrast globally.
  • Micro-contrast - affects the entire image by introducing or removing local contrast where it is either lacking or excessive.
  • Fine Contrast - affects the entire image by increasing or removing local contrast, but to a much lesser degree than Micro-contrast.

Only using basic Contrast can give you an image that is overall contrasty but which will lack detail, especially in the shadow and highlight areas. Fine Contrast will enhance detail in either the whole image or just shadows, highlights or mid-tones.

Part of image with nothing added…

With Contrast at +100…

With ClearView Plus at +100…

With Micro-contrast at +100…

With Fine contrast at +100…

With Shadow Fine Contrast at +100…

Note how only the darker tones are sharper and the dust spot on the sensor is nowhere near as obvious, because it is not a shadow tone.

@mikemyers

You captured a tree in between colorful plants – and your brain played tricks on you
( often, we tend to ‘recognize’ patterns, faces and such ).

Then you enhanced the monster’s face (a bit), kept it in the colourful surroundings
… and stayed close to the ‘journalistic’ approach, which is a pity.

I think, you could have ‘freed’ your mind and gone more experimental
– see what @herman did …


something different ( no masterpiece, but it might inspire you )


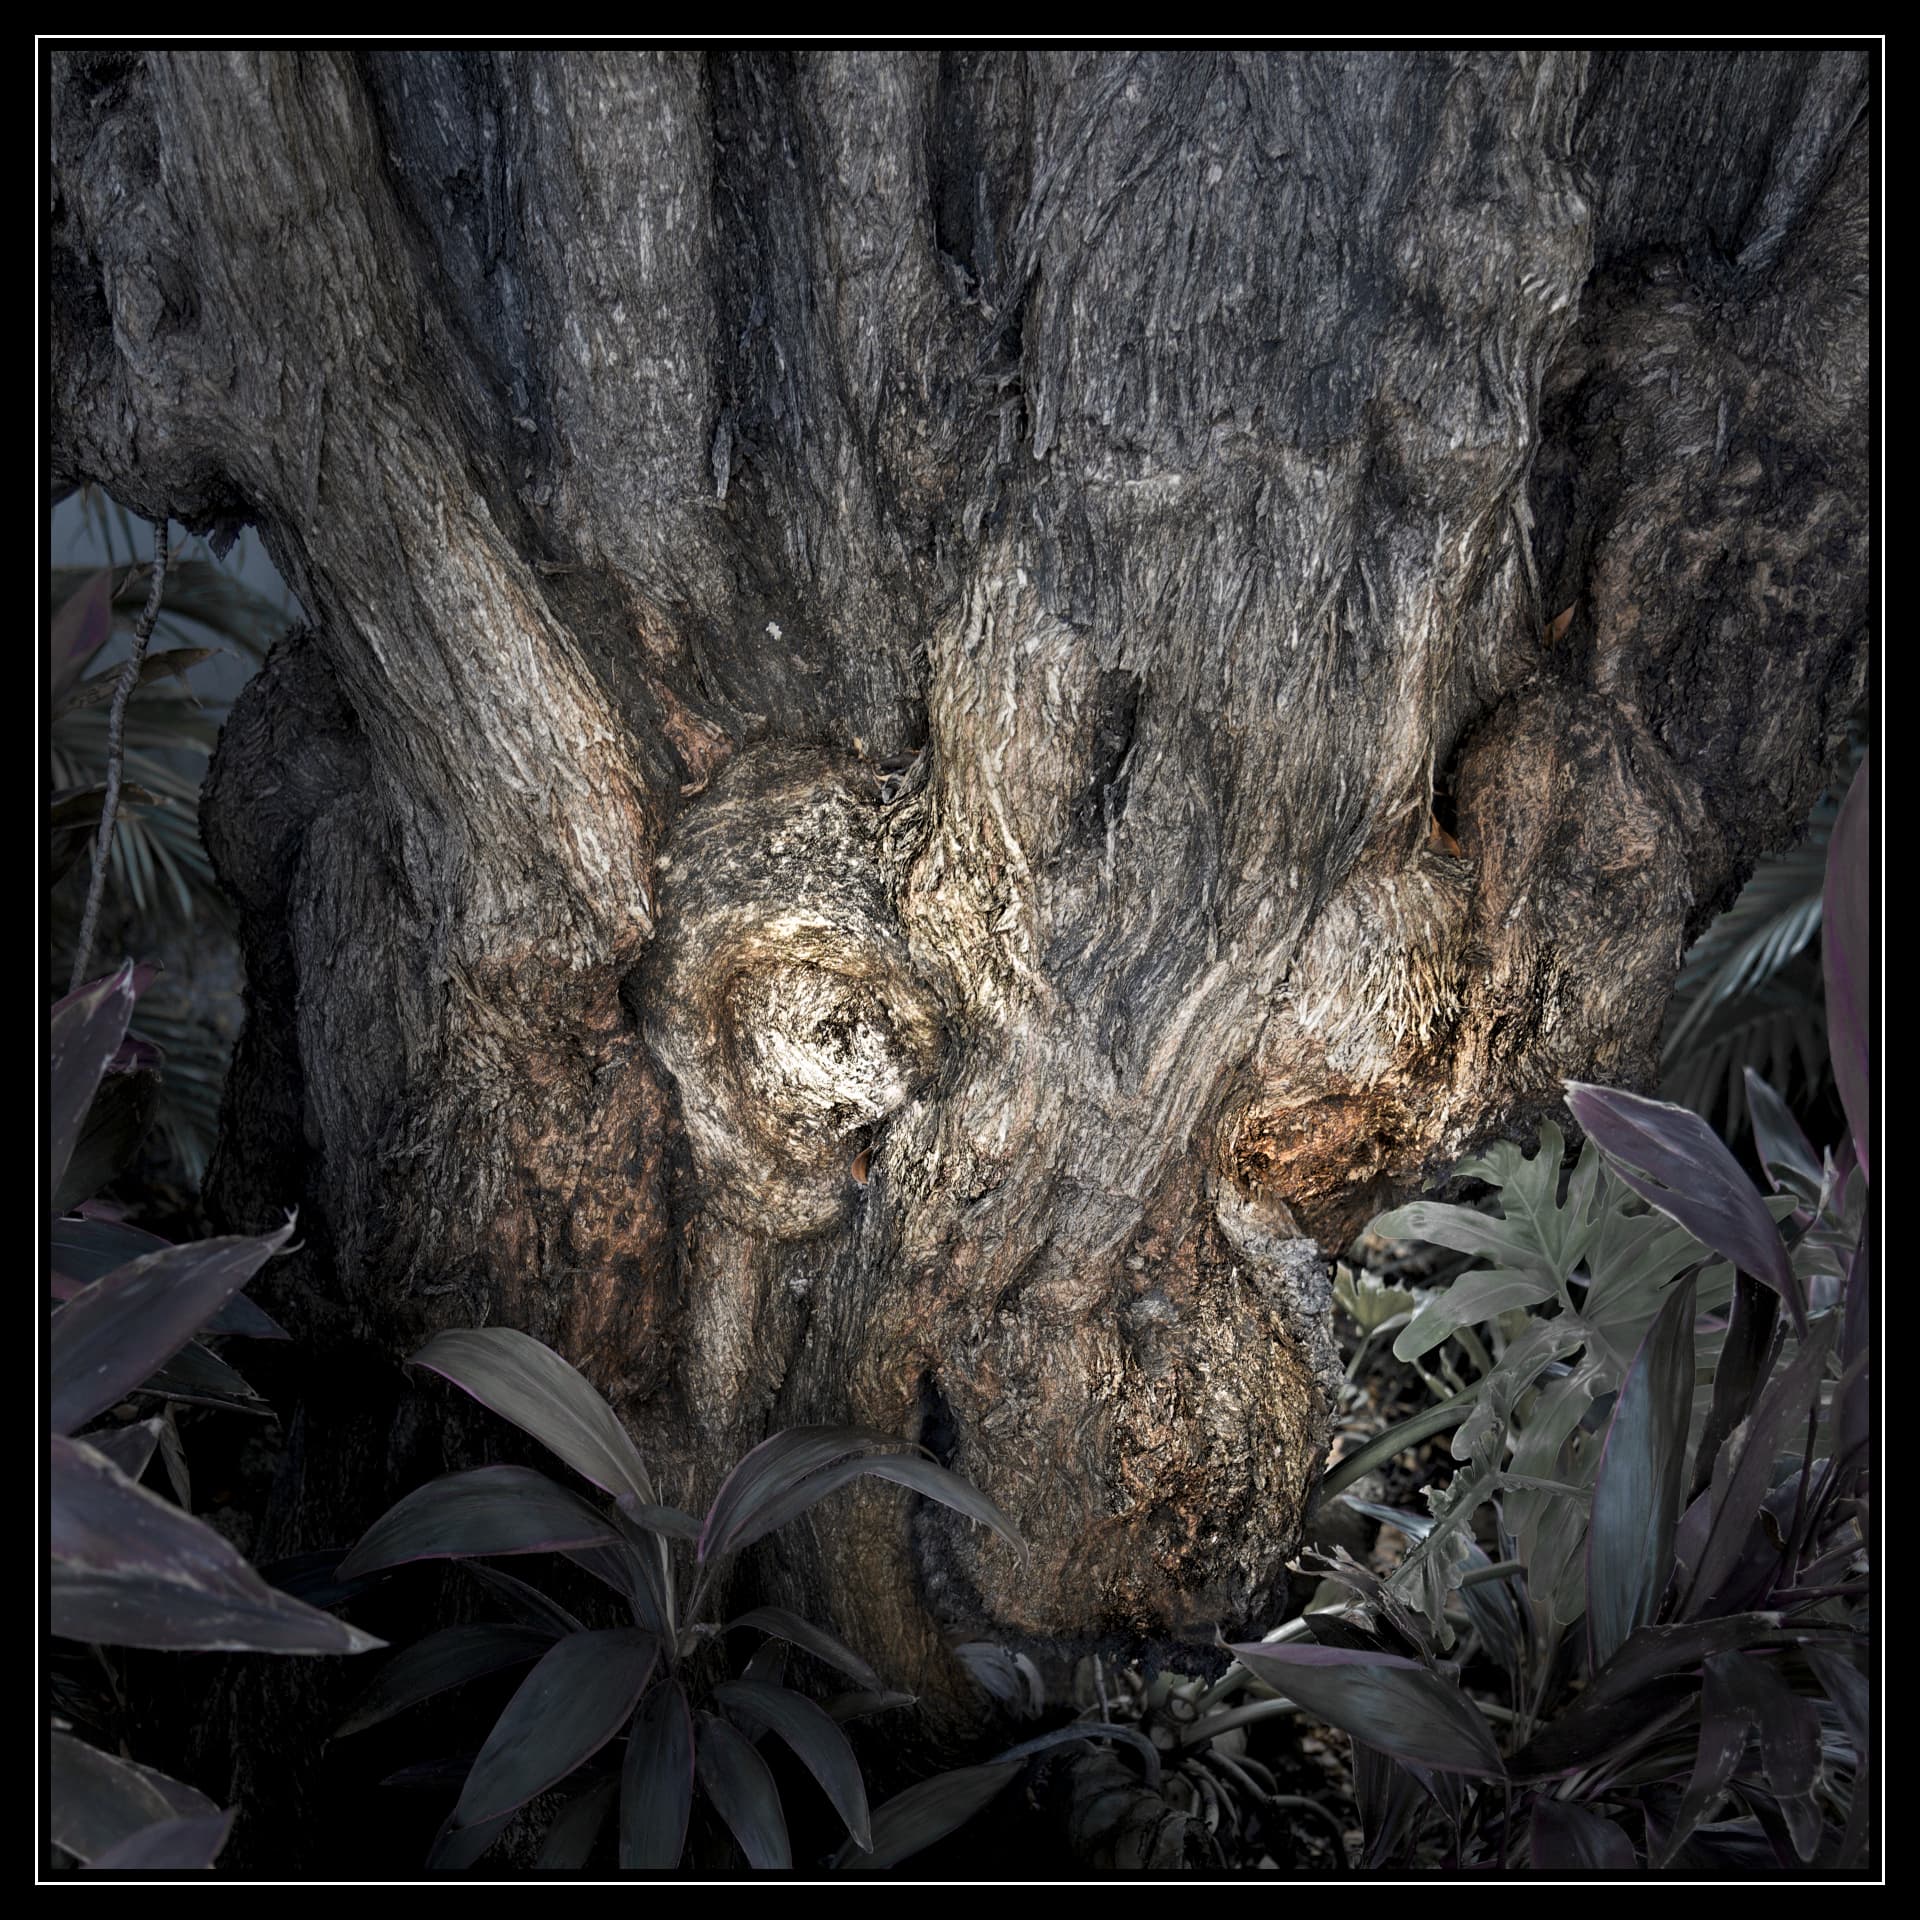
VC1 → 780_0646 2023-04-29.nef.dop (1,8 MB)

a few notes

  • cropped to square
  • changed perspective → to bring out the ‘hair’
  • muted the colours (partly B&W …) → to not distract from the subject
  • changed the lighting
  • adjusted contrast and such
  • re-coloured (!) the face and the surroundings
    → dark & cold tends to fade back, while warm seems to come forward …

.
While those LAs appear in some order, I didn’t follow a ‘linear’ approach
( jumped forward and backwards in between them ).

1 Like

With the exception of “Silkypix”, that is what I intend to do, to learn these things. I expect I’ll do that on my own, and eventually start using these tools properly, based on what I find out. Thank you for going to all the trouble to get me started. Again.

I agree with that, and I have no intention of throwing anything at my images and posting them here. I have no intention of using those new (to me) tools until I understand them. Like I wrote earlier: “My immediate plan is to stop using any of these additional features until when/if I think I understand them. Better to not use them at all, than to use them incorrectly.”

Sorry @Wolfgang, I will do as you say, but for images I post here from now on, I do plan to avoid tools that I don’t yet understand. It’s not going to happen over night. At some point, when I think I understand, I will explain in a post what I did, and why I thought it was the right thing to do. No guarantees.

…and since nobody has said anything I might have done wrong in the image I just posted, I assume that the editing was acceptable, even if it’s not that exciting a photo to begin with.

Thank you for the sample photos. I agree, I’ll be limited, but only until I learn those adjustments, and can properly use them.

Interesting to compare them, and especially compare the differences.

My version:

Both are nice.
Personally, I prefer my version.
I like the concept of a nasty monster intruding into a real-looking scene.

Neither is “better” or “worser”; both are interesting.

It’s like being “right-handed” or “left-handed”. We are all different.

But, as @Wolfgang says, you need to play, practise and experiment with them in order to learn them.

If you don’t do that, you will never grasp them because you will need to use them differently, depending on the image.

There is no one way to use them to learn. It’s far more intuitive and artistic than that.

That’s a very good argument for me to continue using them, maybe explaining what I hoped to achieve with them. I changed my mind.

As to thinking about things ahead of time, I almost always know if I want a vertical or horizontal format. In the past, I rarely considered B&W unless my goal was to capture a B&W image. Lately I find myself thinking about both possibilities when I capture an image. I try to imagine the scene in B&W, but it’s difficult.

I think both comparing results, as was done up above, and also just learning on the go, are helpful.

I find what you wrote very helpful. The words I highlighted make it clear to me, infinitely more so than how I felt a couple of weeks ago.

You mean, he can’t just plug in his pinkie into a USB socket and upload ALL TOOLS and their USE into his brain? :face_with_peeking_eye: That’s shocking :flushed:. Kind of :crazy_face: But hey, he’s doing official “photography”? At least, that’s what the watermarks says. :partying_face:

:movie_camera: Has there already been a request by Netflix to get the serial rights? :tv: I’m expecting it any day.

shhhh… that was supposed to be confidential and top secret.

whispering now I understand better your concerns about AI… don’t worry, I won’t tell anyone :shushing_face:

My AI connection (Chat GPt 4) translated your words: “So let me see if I understand this correctly - you’re saying that he can’t simply connect his finger to a USB port and instantly acquire all the knowledge and skills associated with using every tool available? That revelation is quite surprising and somewhat unbelievable. Nevertheless, he’s apparently engaged in official photography, according to the watermarks on his work. Let’s celebrate this achievement! :tada:”.

USB seems rather old fashioned, don’t you think?

Looking at the 6 images you created, viewing them at 100%, it became obvious as to which ones improved the original, or degraded it.

One quick question - when I do something like this, and I want to go back and try another effect, would you advice de-selecting the previous change, or going back in the “history” to before it had been made?

Hi Joanna,

I didn’t read this whole thread because too long and absolutly impossible to follow because of it.
So I allow myself to ask a question for which the answer has maybe already been given or is obvious.

Here you talk about visible dusts spots on sensor (a problem for landscape photographers). And you use a D850 as I do.
So could you point me on the other settings you did on this same post what is produce by dust and what is produced by noise (maybe there is no noise and only dust).

It maybe help me to check my sensor.

Thank you.

I think if you don’t like netlix, you musn’t look at it.
I don’t like netflix, tv neither, and i’ve throw my tv away since the 80’s.

You know it is possible to wean yourself from all your addictions with a little willpower.

Well, “oldfashioned” are couple of other things in this thread. But if the knowledge jumps quicker into your head by sticking a wireless antenna in your ear, equally cool.

Doesn’t the D850 have an internal setting for “sensor cleaning”?
" How do you clean the image sensor on a d850?

D850 TIPS - Image Sensor Cleaning | Technical Solutions ...

Select Clean image sensor in the setup menu, then highlight Clean now and press to begin image sensor cleaning. While cleaning is in progress, will flash in the control panel and no other operations can be performed. Do not remove or disconnect the power source until cleaning ends and the setup menu is displayed.

I’ll need to check if they included this with my D780.