Luminosity Masks

People have different needs in their photo processing so my needs are not going to mesh well with those of some others, but personally I use PL for a number of reasons.

  1. I don’t need, nor want, a DAM. It does not bother me that PL has the beginnings of one, but I have no need for one and do not see any such need in the future. If Dxo wishes to add a full functional DAM to PL it will not bother me at all except that it will take away time and talent from other functionality.

  2. PL not only works well on my system, but it is very, very fast so I see no need for hardware acceleration. I am only using a MacBook Pro, so I do not even have a particularly fast system, but have no performance issues with PL.

  3. Adjustments on my system show up very, very quickly, pretty much in “real time”.

  4. I see nothing wrong with adding new functionality and, in fact, think that if PL does not keep up with the competition it will wither and die.

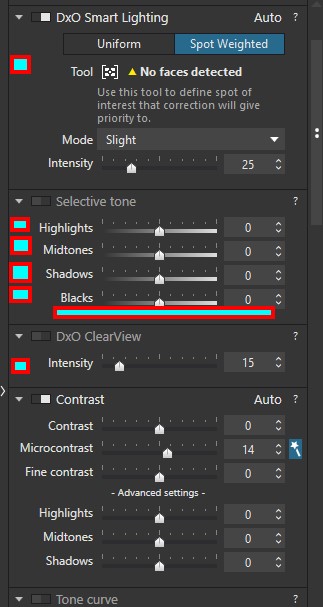
In my view there are only 3 top tier workflow tools on the Mac - LR, CaptureOne and PhotoLab. I have CaptureOne (version 11) and Lightroom CC, but I use PhotoLab because I consider it better than the other two, but I sorely miss built-in Luminosity Mask functionality in my processing. Lightroom and CaptureOne have it, only PL does not. The general rule is keep up with the competition or suffer the consequences.

Personally I would love to see luminosity masking added to PhotoLab and the sooner the better. Software that does not meet the needs and constraints of the market will fail and I think that the clock is ticking. Please bear in mind that I am not referring to my needs, but to the available functionality in competing software of the same quality.

Obviously YMMV.

2 Likes

Mike,

would you be so kind to show me, us, some examples why luminosity masks is so powerfull?
( i am not a experienced user of masking and find the local toolbox of dpl stil have dark corners to explore for me.)

i am just curious about your skill in this why it is important and why you need this .

Peter.

1 Like

Just in short:

  • no, I didn’t really miss LM yet. (There’s always another way, with eventually more effort…)
  • but yes, I’d definitely appreciate them. :slight_smile: 
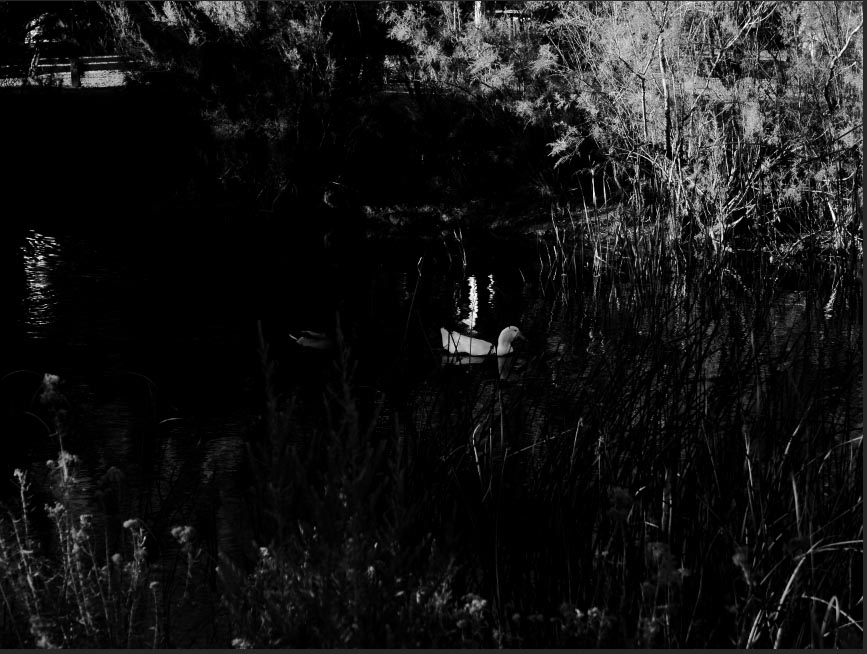
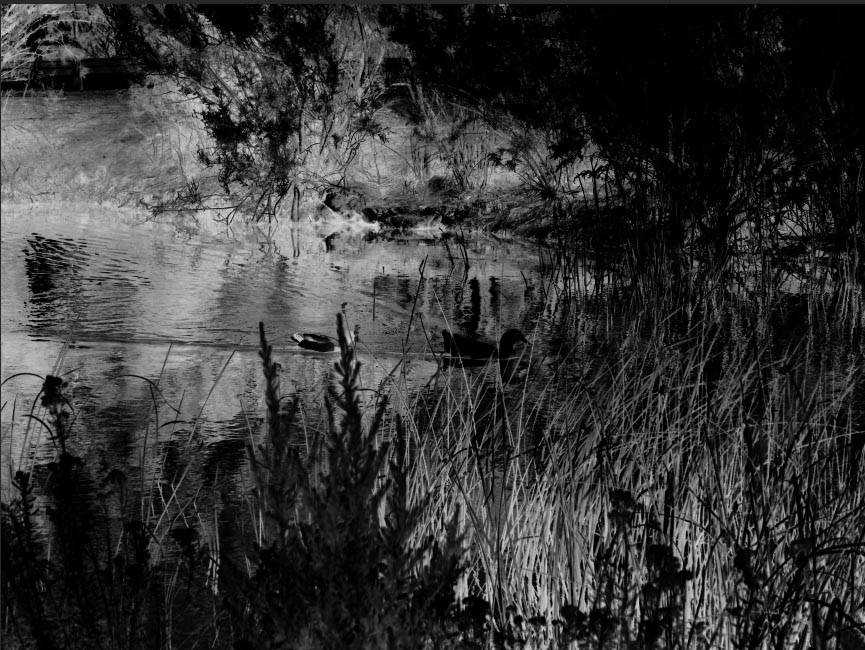
(Could’ve already used them several times…)
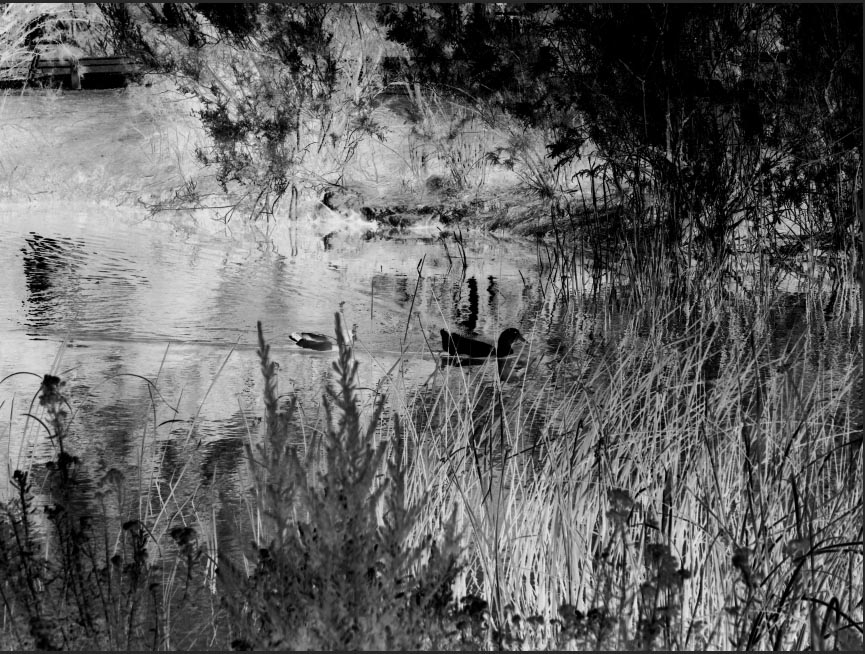
I agree that this should be a tool under local adjustments if it’s implemented.

Tilmann

1 Like

Peter, there are so many ways to use Luminosity masking from working with the ranges to create complex masks to all sorts of edits where light values can create a filter to the effect. If you want to get an idea I would recommend you view some of the many free Adobe or ON1 tutorials on YouTube. I believe that this and colour range masking are the most powerful masking options available. U Point can get close to colour range but imo is not the best implementation of it.

1 Like

Hi Colin, yes i will watch a youtube, but what i ment was a example where you use DPL’s toolbox and compare this with a Luminosity Mask tool to compare the results. This way @MikeFromMesa can show/visualize what DPL is missing. Because watching a on solution tutorial isn’t revealing missing stuf in a other only how that tool works. And specialy that part i am interesting in.
i am keen to use one toolbox (DPL for me in this case) as good as possible instead of using a buckload of toolsets partly because of not understanding the usage properly. :grinning:
If i understand the lack of something i can figure out a workaround or search for a small single toolset to complete my toolbox.
I know there are people who use this app for that, that app for this, and in case of serious thing the other app. but hence if i remember all the things in one app how to use properly i will be happy. :sweat_smile:

Watching this i can think of a simple but very handy addition in DPL;
Because the sliders for different corrections (highlight/shadow/midtone/black) are in essence a “mask” why not show that if asked?


I painted some boxes to show what i mean.
Just add a checkbox which reveales the selection/ effective area of this particuliar area. like you can in local adjustments with “M” This way you use the masking of the application.
And if they also bring a “feathering slider” in to the tool, you can fine tune its border between the next slider. more feathering means the both are effecting the same part , less feathering means harder edge of the masking.

Not sure if its easy to do but the underlaying masking algoritm is already there just show by command is needed.

(edit: this luminosity tutorial watching shows my why i don’t use Photoshop CC: too complex for me i would be lost inside for ever searching for the right handle to get what i want…)

I am not an expert either, but consider the following example.

You have a photo with a bright background, perhaps a sky, and a dark foreground, but objects in the foreground stick up high enough to blot out part of the sky. Perhaps they are buildings or trees or shrubs, perhaps something else. The sky itself has clouds, perhaps white or grey, and the sky is not evenly colored. You want to adjust the sky and only the sky, and you want to try to even out the sky color, but if you use a graduated filter you will also adjust those things sticking up into the sky and the clouds. If you try to adjust only the blues you are likely to exaggerate the difference in sky colors, not reduce the differences.

A luminosity mask would give you a mask with the brighter colors allowing more of an adjustment than the darker ones and thus a vibrance or saturation adjustment would affect the lighter color of the sky more than the darker color because the mask is based on the brightness values of the colors. Since the mask is graduated by the amount of brightness more of an adjustment would be made on the brighter areas, thereby making it easier to even out the sky colors.

Similarly you can create a luminosity mask to adjust only the darks simply by creating a lightness mask and then inverting it, thus allowing you to adjust only the darker areas. Again, you can target the adjustment to only specific colors and only in the darker areas so it is much more precise than using the shadows adjustment which would adjust all shadows in the image.

With a luminosity mask you basically can target any adjustment - exposure, contrast, HSL, colors, curves, pretty much anything - at a specific set of areas based on their lightness or darkness, and since the transitions from light to dark are graduated the adjustments look natural.

When I first started using LM it changed the way I edit photos. Prior to this I used PL almost exclusively and only used Photoshop rarely. Now I probably send half or more of my photos to PS to do the luminosity masking and it would help speed up my processing enormously to have that ability in PL itself. As I mentioned both of its major competitors, Lightroom and CaptureOne, now have this functionality and it is tempting to move to one of them. Well, I dislike LR so if I did move it would be to CaptureOne. I don’t want to do that because I like PhotoLab, and hence my original post.

Hope this helps.

2 Likes

One more thing. Since a luminosity mask is basically only a black and white photo, where the whites allow more of an adjustment than the blacks, most tools allow you to adjust the mask in such a way as to control what luminosity marks where the mask goes from mostly allowing a change to mostly disallowing a change. Thus you can easily narrow or widen the areas where changes can be made and, if you wish, completely prevent changes. Luminosity masks thus allow you to use them as brightness masks or, if you wish, as simple cut-out masks.

1 Like

Here are some examples of luminosity masks. I have selected a photo taken at one of the local parks. It does not need luminosity masking, but it has a selection of bright and dark areas and I thought it might help you to see what I was writing about. The upper right part of the photo is a bit over exposed, and this is a good way to target that.

Original photo.

Here is one luminosity mask for this photo. It is probably a bit too broad for the adjustments someone might want to make.

The lighter areas allow for more adjustment while the darker ones prevent adjustment. Pure while allows for all adjustments to show, pure black prevents any adjustments from showing.

Here is a luminosity mask intended to narrow the areas for adjustment. This might be a good mask to address the over exposure.

And another, even more restrictive, might be a bit better.

The nice thing about luminosity masks is that they are only digital B&W photos and can be further adjusted as needed. Here you could easily fill in the duck with some black color and then only adjust some of the background plants.

And here you can see inverting the masks to allow adjustments to the darks:

And even more.

As I mentioned, this photo did not really need luminosity masking but the top right area is a bit over exposed and using a mask like LM2 or LM3 would help to adjust almost only that area. I hope this helps some.

2 Likes

I was also thinking about examples where U-Points are not good enough. But these two examples can be handled with U-Points pretty well.

A U-Point-mask inversion would cover the remaining use cases, but there is already a feature request for it: Invert Mask capability

1 Like

Peter, look at Luminosity in apps like Lr and PhotoRaw it is a far simpler approach that in Photoshop. I never do Luminosity in Ps, always in Lr. I never do (or try to do) this in PL either, it is just too cumbersome and I am not a huge fan of U Point as it stands anyway. Yes it can be useful and quick but Lr’s range masking (luminosity and colour) is far superior. Use it inside the radial filter in combination with the range selection tools (dropper for colour and a slide for Luminosity) and you have a very powerful masking tool and one where the resulting mask can be inverted if needed. The functions can also be used with the brush and the gradient.

Please understand that I never said that luminosity masking provides functionality that can not be duplicated or approximated in other ways. For me it is a question of ease of use speed of adjustments. Many of the adjustments in Photo Lab can be done in several ways. For example you can adjust shadows using the Shadows slider as well as the Curves adjustment. You can dehaze using the Clear View adjustment or by a combination of contrast, exposure and brightness. For me it always turns out to be a question of ease of use and the time it takes to do the work.

If the area to be adjusted is in one simple small area than U-Points can probably do the job. If the area to be adjusted exists in multiple separated areas it is much more difficult. If the area is large the U-Point may encompass the entire image because the U-Point functionality does not all control points to be ellipses, only circles. All of these are real or potential limitations so, for me, luminosity masking would be a valuable and worth while addition.

2 Likes

I believe you instantly.
As i not use or posses LR i can’t test this out my self. But
maybe it helps to make a request with a clip example or like @MikeFromMesa did?

I am sure the devs know where they are going and they have their list that we voted on. I see no point in sending more requests that way at the moment. I entered into this debate on an academic basis rather than in an attempt to influence the development of PL. I guess the decision has to made whether to progress what is a very good raw developer to the next level where it will be in competition with the likes of Adobe or whether just to improve the base product as a ground level raw development tool that plays well with outside apps.

1 Like

((oftopic)strange your avatar and others is messed up as a non visible image happend when we both where editing/repleying on this thread 4 hours ago.)

When i see your examples, thanks by the way, i understand its basic principle.
And i understand if the “problem” is shatterd over the image multiple controlpoints can’t bring the same control as a global mask for only this luminosity % or a specific color.

How do you think can DXO PL be improved in a simple effective matter?

How about my suggestion to add a checkbox “Show mask” on the present tools to show the influence area of that slider? would that be helping in a certain matter?
the underneath lying algorithm is basicly a mask as i learned from that tutorial. So why not use that? And bring a “simple” addition to it as in “show present mask” button for each slider. (effective show influence area.)

Or a extra tab which has a possibility to open a window in Selective Tone tool which reveals a possibility to add a luminosity presentage and show a mask like they have in local adjustment and open after that a menu as in control points in local adj. to manipulate the selected.

i think if the implementation is “easy enough” it can be a interesting new feature.

(i think DxO’s backlog is filled up rather well by us user requests :wink: but aim high and see where you end up… :grinning:)

1 Like

add a checkbox “Show mask”

I think that would be very helpful. I would be nice to see what would be affected by a slider change.

> extra tab

Also a very good idea.

> i think if the implementation is “easy enough”

I don’t know about that.

I spent 25 years in the software industry, designing and implementing software and the truest statement I ever heard when doing that work was that “Nothing is impossible to the person who does not have to do the work”. Without knowing what the code base is like, or what the internal design is like it is impossible to say how easy or difficult a change may be.

Five years ago I asked for a function change that would allow externally edited images to show the external changes. That is, I wanted to be able to send an image from PL to Photoshop or some other external pixel editor, change it, save it back and have PL (then Optics Pro, of course) show the changes in the saved thumbnail and image. It has taken 5 years for that request, made multiple times, to show up in an actual release (I am told it will be in the next update) and I can only assume that the time lag is because it was difficult to make.

I never try to second-guess the developers.

> i think DxO’s backlog is filled up rather well by us user requests

I think that is right.

1 Like

Mike, you’ve persuaded me that luminance masking for local adjustments (luminous masking looks like a logical extension of the U-point technology) is a natural part of PhotoLab’s core mission (the world’s highest quality and most efficient RAW developer)

We’re on the same page here. When tools like luminance masking which would radically enhance RAW development have not been added due to limited development hours, watching DxO go off mission with a DAM solution which could absorb almost unlimited hours worries me deeply.

Agreed. Luminous masking has my vote for a new feature.

I’m often working with large files (Canon 5DS R). They seem to process okay (but not with real time sliders) on my 12 core Mac Pro with a Radeon RX 580 with 128 GB of memory and not so well on my 6 core Mac Pro with 32 GB of memory and an Nvidia GTX 980. Real time sliders for both normal files (26 MP) and large files (50 MP+) should be a priority for DxO PhotoLab as the kind of people who buy €300 RAW tools are just the kind of people to own A7R, 5DS and D850 type cameras with medium format and 100 MP files on the horizon (hopefully not for me).

2 Likes

Of course the size of raw files being used will have a large impact on processing time and the fact is that my raw images are only 20MP (Olympus E-M1.2). A 50MP raw image will take considerably longer time to process. My previous camera was a Canon 5D3 and its images were also relatively small at about 25MP so I would expect your system to be slower handling the larger images.

It would be interesting to see if a machine like mine (MacBook Pro, 32GB ram, i9 chip) would also be slow processing your raw images. If I can find them I will download some sample 5DS R raw images and see how they process on my MBP. I assume there might be some samples on DPReview.

As for luminosity masking, I have become so used to doing that type of masking in my processing that I have been willing to re-subscribe to Photoshop just to have access to LM. If PhotoLab added it I would drop my PS subscription since I only have it for that one piece of functionality, however I am not holding my breath. I know the developers are busy with other stuff and I would next expect to see anything like that in PL, even if they announced they were going to add it, until the next major update. As it is I would not expect to see it before the 2nd or 3rd major update.

I have been considering buying CaptureOne version 12 because it is almost as good a raw converter as in PL and it does have luminosity masking.

2 Likes

Ive bin thinking about this specific feature and in essence they already are using this technique. All selective tone sliders are in fact “luminosity masks” presets.
So implemention of this feature you like isn’t that “hard to write” :innocent:

Thus adding a extra tab in which you can add one or more “made by user” sliders and your “done” (only aditional thing to make is a “mask image” button to see which slider is effecting what.)

1 Like

There’s very high maintenance costs with CaptureOne. You have to rebuy the whole program every year. The workflow is awful as well (you have to use CaptureOne’s selection structure, with four artificial folders, you can’t just process RAWs the way we can with DxO PhotoLab). Yes, the colour tools are amazing but the noise tools are hopeless in comparison to PhotoLab. I’ll try to publish some head to head comparisons with PhotoLab for you.

When I trialed Photoshop CC 2018 for two months (thanks Canon) recently, the high noise Photoshop versions turned out surprisingly well (just a bit better than CS6) with tasty colours. I liked the workflow better than C1, where you can attack one image at a time. Lightroom looked almost as good as Photoshop if I didn’t need pixel editing functionality.

All three tools are very powerful though in the right hands. DxO PhotoLab is the fastest path to the best looking images and has by far the easiest workflow and shortest learning curve.

I disagree.

Yes, the U-Point gives you a mask but you have no way to vary the intensity or range of the mask. You can not tell PL to increase or decrease the range of highlights or shadows. You can not invert the mask (at least not yet) and it seems t o me that the masking itself is based on color differences, not luminosity. I may be wrong about that, but that is what some testing led me to believe.

Further, it only masks one central point rather than doing the entire image. Yes, again, you can make the circle big, but it still seems to be sensitive to the central color with no way to adjust it.

I love PhotoLab and have been using Optics Pro and it for perhaps 7 or 8 years now. I want to be able to continue using it but worry that it will either “go away” or stop being such a good raw converter if it does not keep up with the competitio.

One other thing it is missing is a decent color adjustment. It used to have the Multi-Point color adjustment (on the Mac) and while I thought that was not up to the quality of competing products (especially the Color Editor in CaptureOne) it was at least something. Now it is gone and, as far as I know, never existed on the Windows version.

I am not trying to “bad mouth” PhotoLab. As I said, I love it, but I just want it to be competitive so it is still around in 5 years.

3 Likes