I think this is where you might try “previsualising” the kind of image you intend to create and try not to be swayed by what you saw, remembering that your eyes can see so much more than the sensor and that the RAW file can record.
I believe the trick is to always assume that what you see when you first open the file is wrong, mainly because what you see is the result of a machine process to visualise the raw data. It is unusual for the demosaïced image to be “perfect” - but it does happen occasionally
Never think that. You are just as capable of doing better than anyone else. It just takes practice
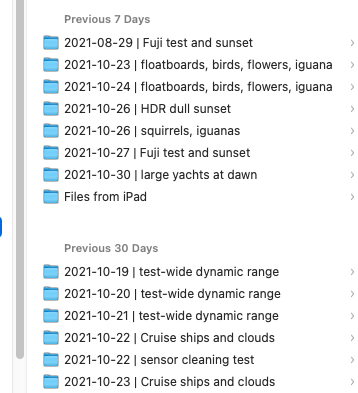
I’ve been using Photo Mechanic to transfer my (organized) images and files onto my Windows, and now Apple, computers, for ages. It results in files and folders looking like this:
Everything is neat and orderly, dates to the left, and details to the right.
I wasn’t aware of any problems until now, either on Windows or on Mac, but things may have changed.
I changed the order for images, as I’m usually searching for the file name first, compared with folders where I start by searching by date.
PhotoMechanic “ingests” all my images from an SD card, and then I can select which ones to keep, and which ones to delete. When I’m done, I have a folder full of images that I think may be useful, and all the “trash” has already been deleted.
What I still need to do, is to find a good way to use “keywords”. Lightroom had their way. PhotoMechanic now has a different way. I think that PhotoLab has yet another way.
As soon as I have time, I need to learn how PhotoLab does it, and decide if that will do everything I need. That’s a question I’ll probably ask about in a week or two, once I try to read about it wherever DxO has that information.
If I had thought about this long enough, I might have realized that, but it became completely clear once I read the above!
Something else that is completely new to me! What was that line, about one picture being better than a thousand words?
This, along with what preceded it, and what followed it, is again something I knew NOTHING about, but now, it seems so simple! Gack!!! …and Amazing!
Another gem of advice!
I need to stop, and go out on the balcony, and just relax for a while. For me, it takes time before all this settles in, and I can use it effectively. …and to re-read this again tomorrow.
Yes, there are many ways to edit metadata, as many as there are apps that do it… PhotoMechanic made a good impression when I tested it a few weeks ago. If PM is your first step in your workflow, I’d use PM as the metadata handler and use PhotoLab for everything else. Using exactly one app for metadata will save you a lot of trouble, no matter if it is PhotoMechanic, Lightroom or PhotoLab.
I think that’s excellent advice. I no longer use Lightroom, but all my Lightroom stuff is “history”. I still have copies of what I did before I upgraded to the rent-a-lightroom plan. But I have no plans to go back to Lightroom, and even if I lose my old editing work, I still have all my images.
I did buy the latest version of Photo Mechanic, that has all their new add-ons, so I’m ready.
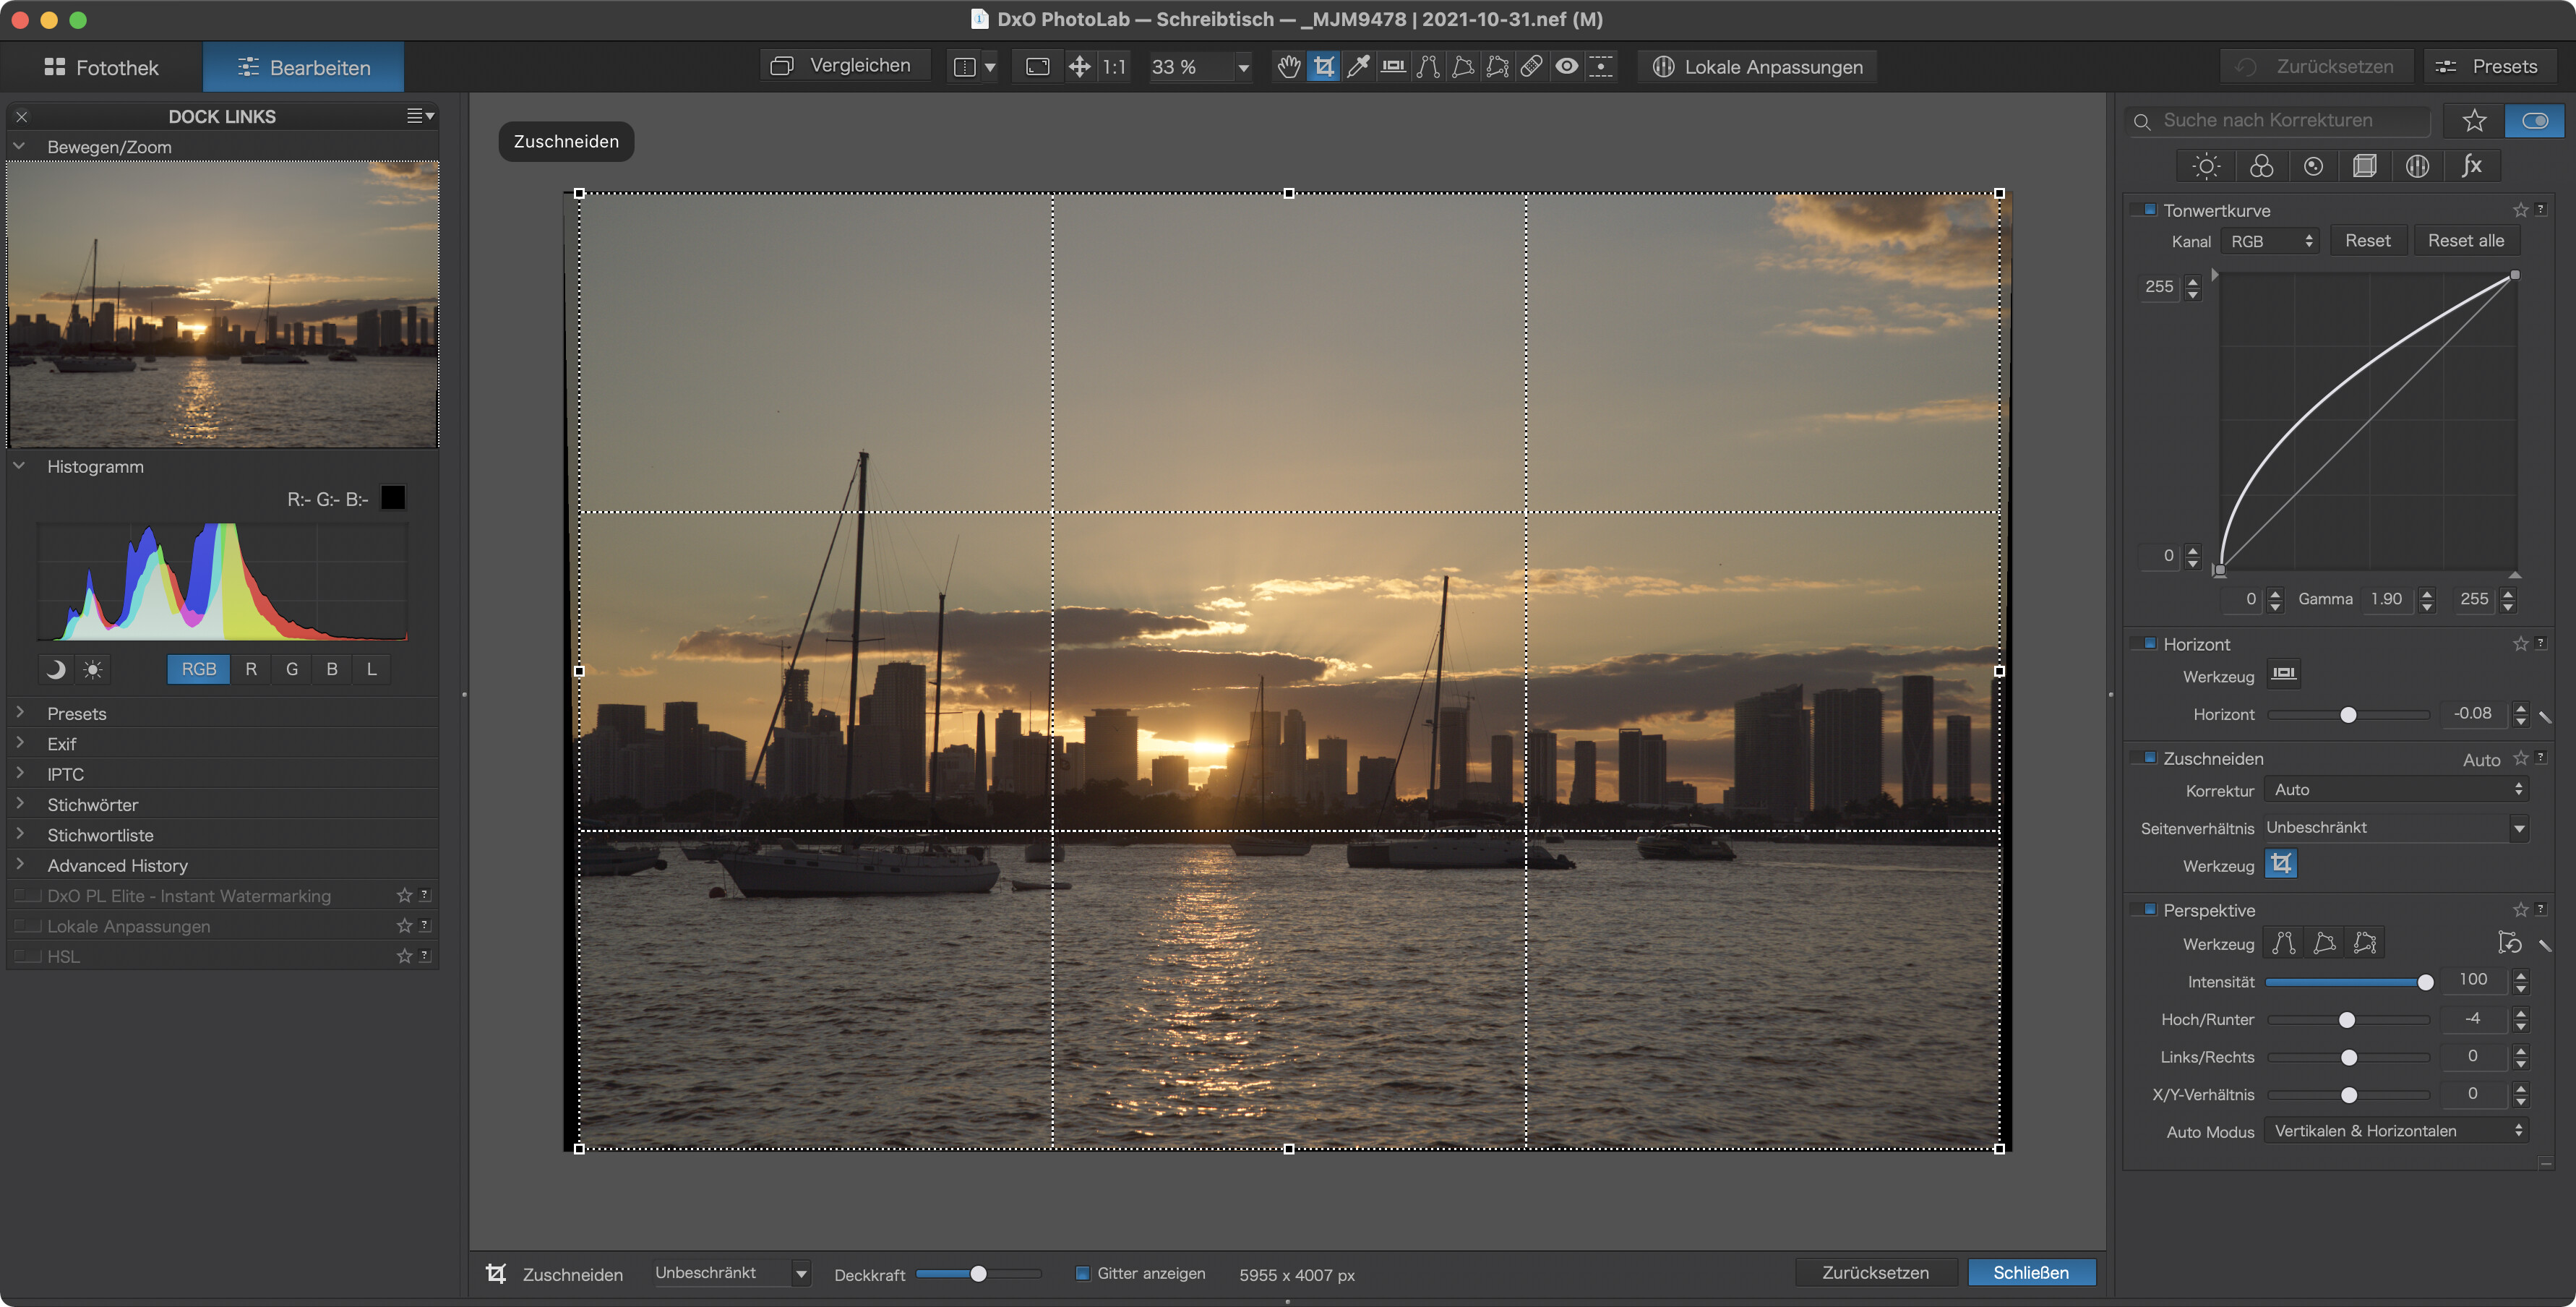
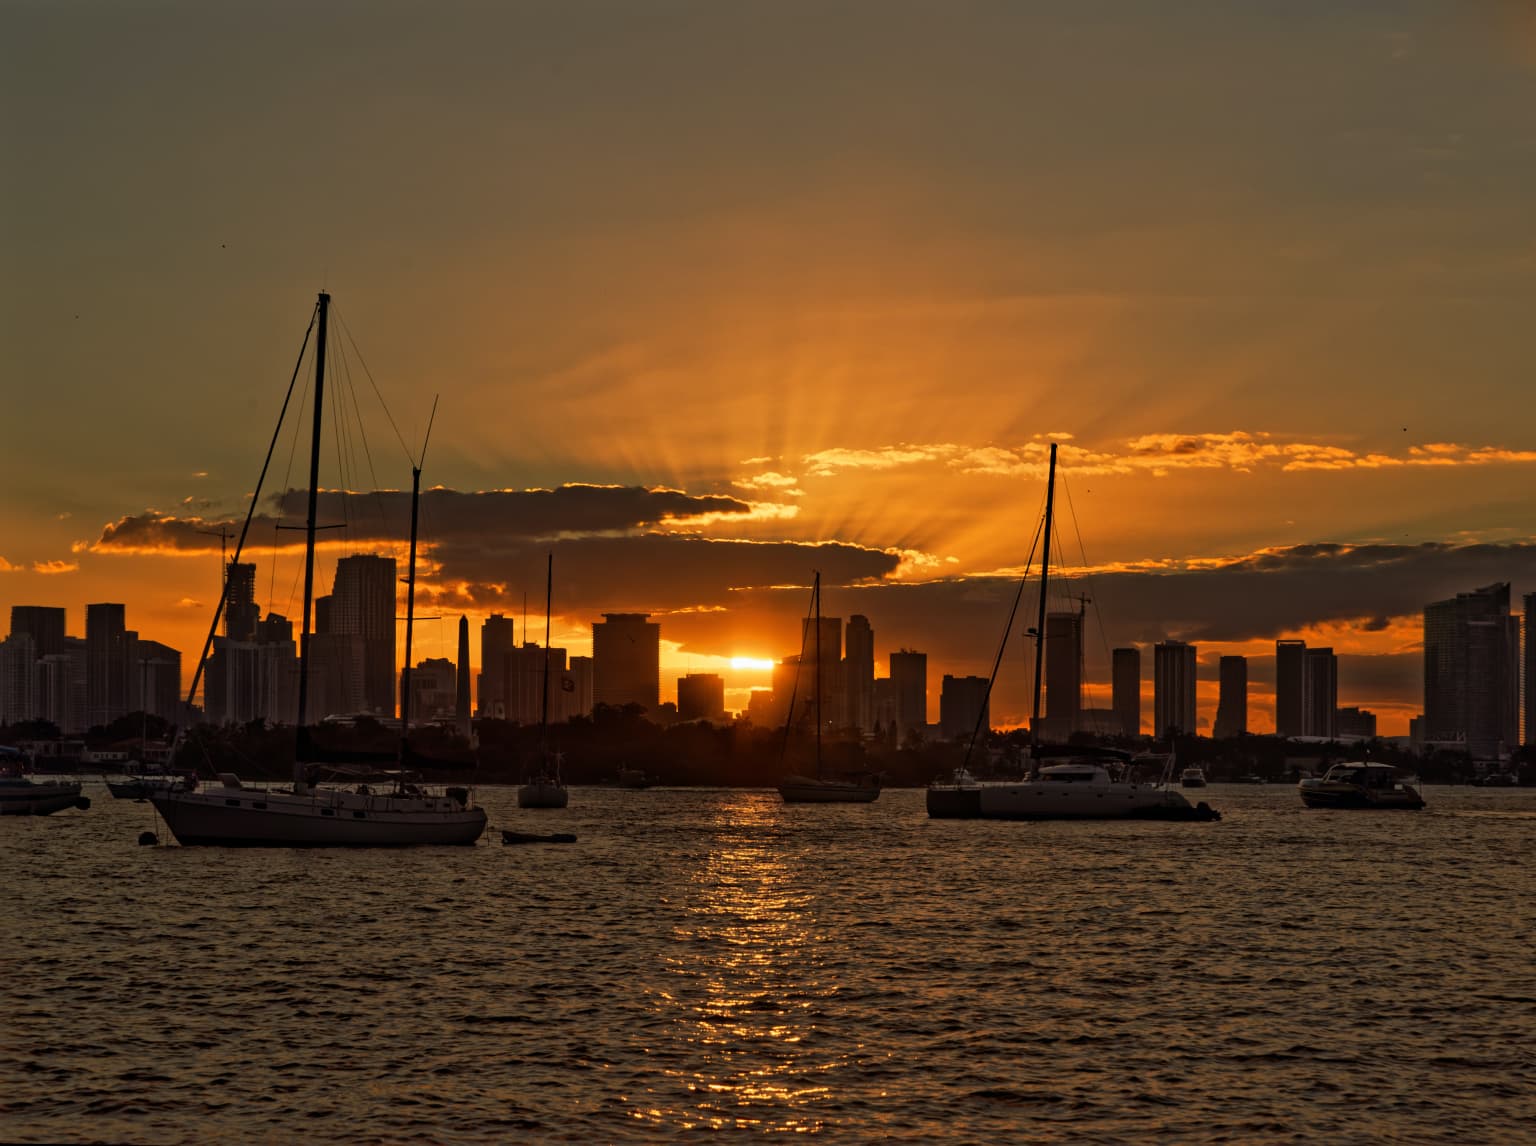
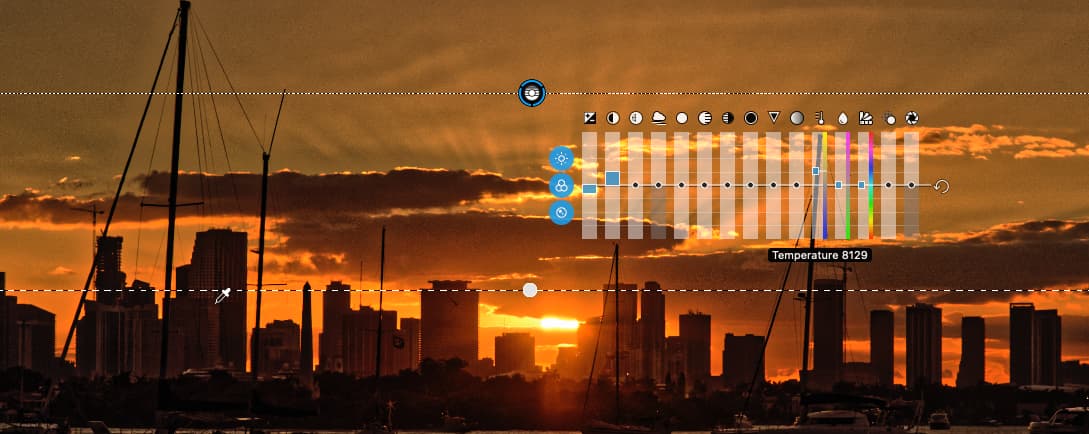
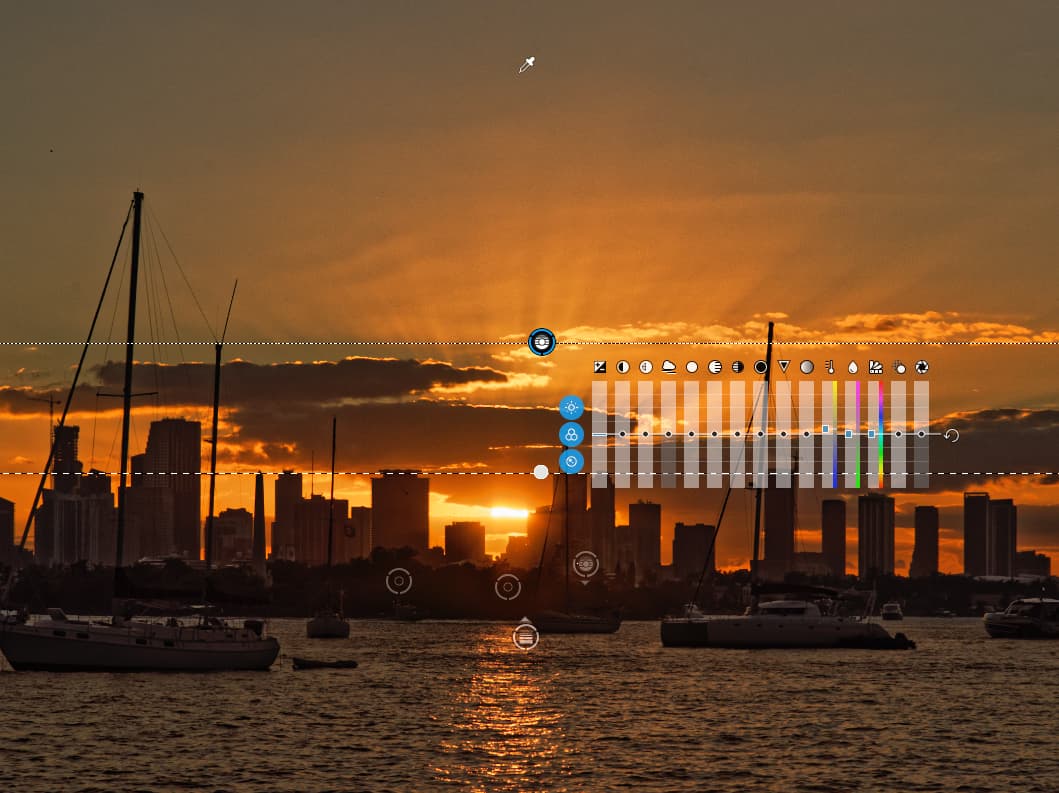
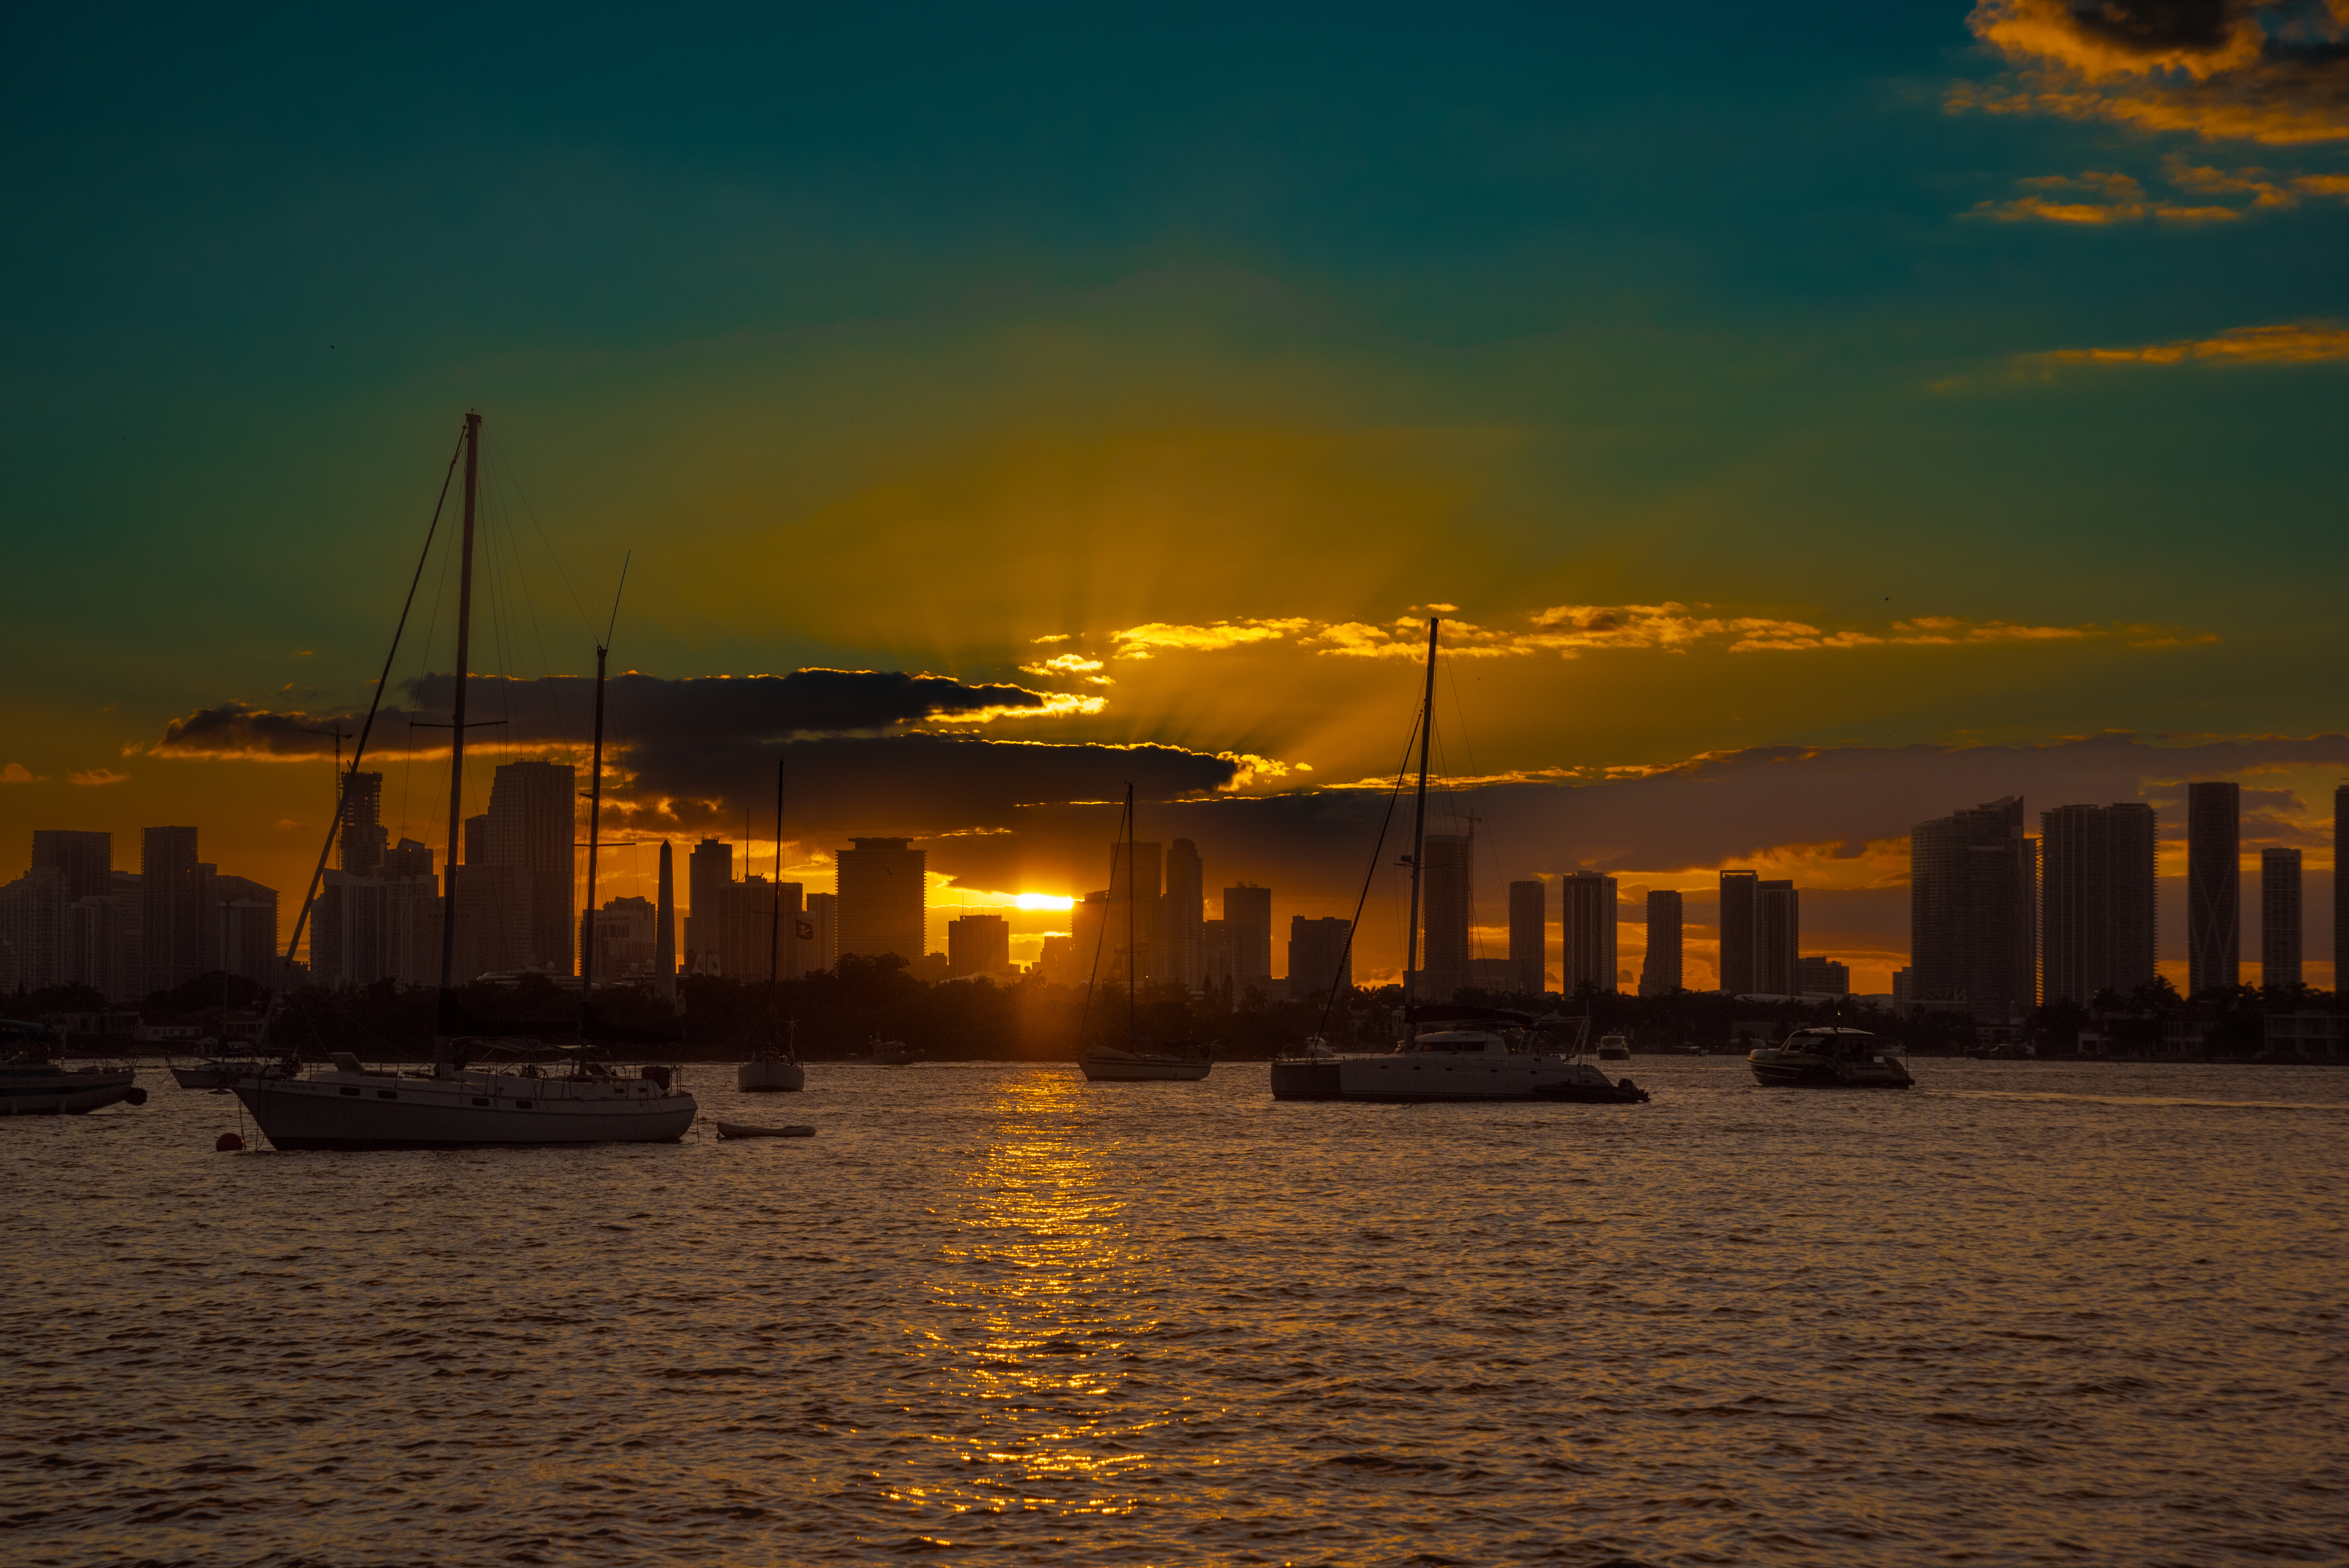
Time to see if I’m learning. According to PL5 there is no clipping, although I had to work on the sun to accomplish that. I spent the last half of my editing trying to bring out the radial lines coming out from the sun, after which I made the photo warmer, to match what I felt, although the sky was more blue than what I have created. The export to disk worked - I thought I was going to have a problem with that again, but no complaints from PL5. I like the way the buildings came out, and that I can still see some color in the boats, and I took the photo just as the sun was peeking out from behind some clouds, which worked fine. A split second later, it was too bright.
I like the end result, but I don’t like the way I got to it, with a lot of trial and error. I thought about cropping off the top of the image, but I decided to leave it, as it balances out my watermark.
I should add that I don’t understand the patterns in the sky. I’m used to seeing the radial lines, even if it is so difficult to capture them, but here I also see horizontal lines interacting with the radial lines.
I’m also not sure if I have the horizon level, but if I change the horizon so it’s lower at the left, the buildings lean to the left. I think it’s an optical delusion, and it’s really level, even though it looks otherwise.
As per our discussion, I set the aperture to f/10, Manual, and I raised the ISO to 500, which I now see I didn’t need to as the shutter ended up at 1/2500 second. I tried to keep the meter centered while aiming at the sun, but in retrospect, I had center weighted turned on, not ‘spot’. Me bad.
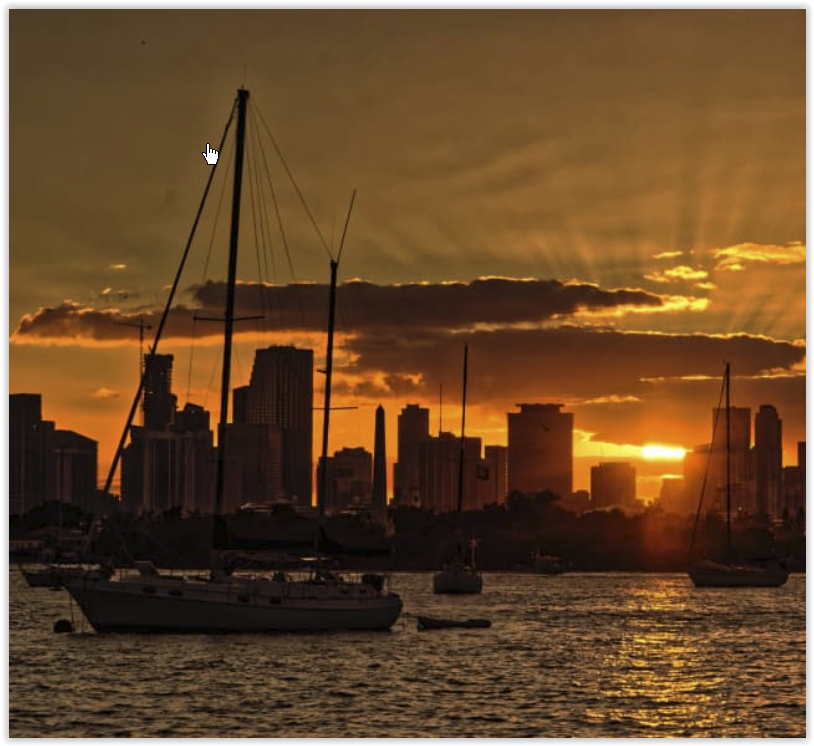
Now that I think it’s done, I love it. I’m sure Joanna and Wolfgang, and maybe others, will show me what I messed up or missed.
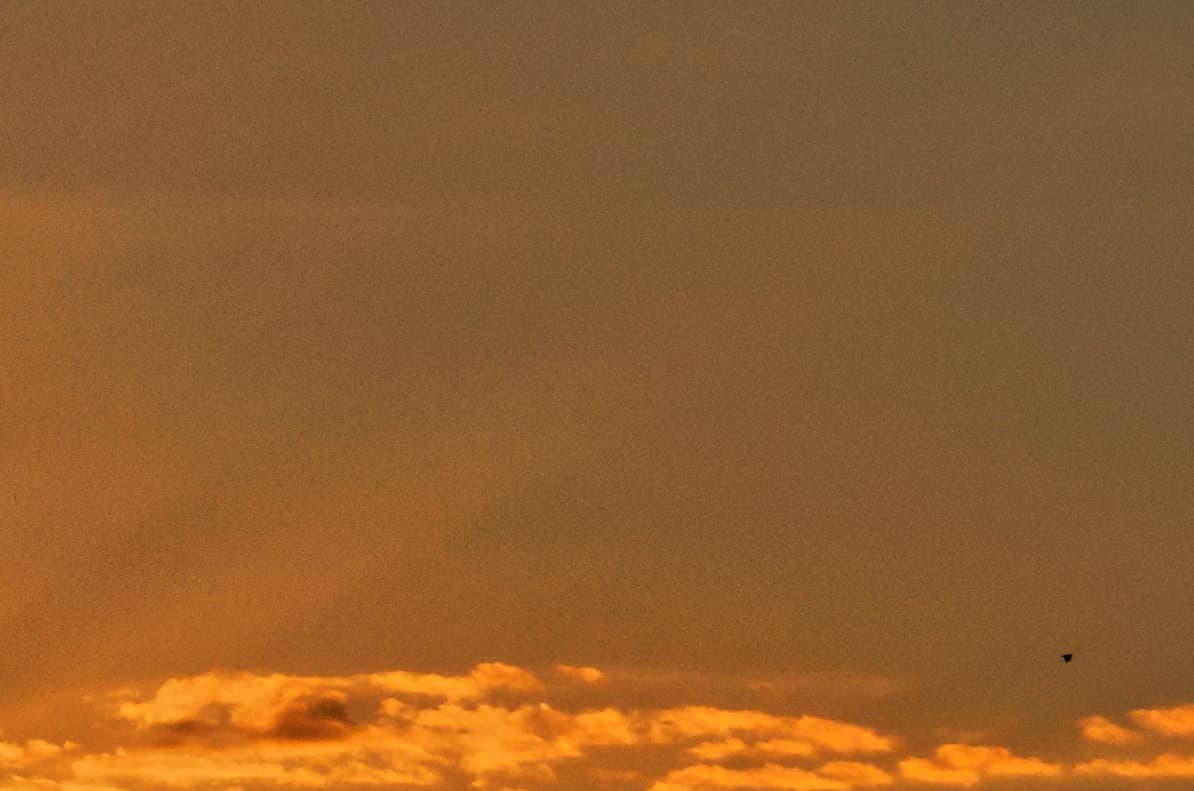
There is also a bird in front of the buildings, that nobody will ever notice, and I suspect some other specs may be sensor dirt, not birds. I need to check this out in a test shot, but that’s for tomorrow.
Setting the horizon level is almost impossible here because we see no horizon. In cases like these, we can use the buildings as reference instead, they are strictly vertical in most cases.
If we draw center lines (disable crop, set grid spacing to 999 and switch the grid on), the center of the grid marks the optical center/axis. vertical lines should be vertical near the center line. Vertical lines near the image edges, but located near the middle horizontal grid line should be vertical too - or leaning symmetrically (inwards or outwards).
As far as I can see, you pointed the camera upwards. The leftmost building seems to lean inwards, while the rightmost building looks straight. You could use the two lines tool (which is difficult to use in such circumstances) to fix this - or the perspective tool and the slider that corrects verticals. Some slight CCW rotation is needed too.
Here’s what I get:
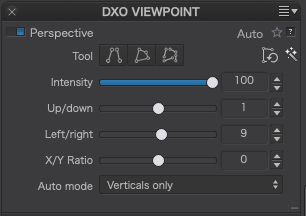
Note that I bulged the tone curve to better see horizontal and perspective corrections. Rotational correction: -0.08. Vertical correction: -4. I also set the crop to better show the rotational and perspective “leftovers”. A somewhat brighter than default background helps to see this better too. _MJM9478 | 2021-10-31.nef.dop (11.8 KB)
Yes, I wanted to capture more of the sky, so I aimed the camera slightly upwards. I never thought that slight amount would be noticeable on the image, but you’ve proved that it is.
I guess the moral for me to remember is keep the camera level, meaning the “base” of the city buildings should be centered vertically in the image.
I’ll have to find the perspective tool later today, and figure out how to use it. The slight rotation is what bothered me while looking at the image - as you noted, I need to correct that first, before I work on the perspective. Maybe Nikon could add an electronic “bubble level” to help people avoid this. I wonder if it comes with the Z9?
No mechanical shutter, no mirror flopping around, lots of on-screen data, perhaps including a bubble level, and perfect focusing on an “eye” when desired… When I read this article from The Verge, I see a major change in the works for all professional cameras, and Leica’s new M11 is already “obsolete” even though it won’t be released for another week or so. To accomplish Joanna’s technique to not clip the highlights, even that could be controlled electronically with the new system, if a camera manufacturer chose to do so.
In the meantime, by following Joanna’s suggestions, I actually have included (part of) the sun, without clipping - I’m amazed that it worked so well. I love the sky, but notice that in your lighter version, the special effects in the sky are washed out. If I do this again, I will do your corrections first, before I do anything else. Thank you!
No. the answer is to realise that you have the same ability as a view camera to apply lens shifts, but in PhotoLab instead of in camera. Keeping the camera level in this case would have meant a poorly composed, out of balance, image.
Seriously though, that kind of clipping is unavoidable with the sun in shot and the truth is that you exposed as well as was possible to be able to deal with it with a minimum of correction to the tone curve.
I need to remind you to select larger areas for the Smart Lighting zones. It’s not just a matter of choosing the darkest and lightest areas, you need to give the tool a bit of context to work with but selecting the immediate area around it.
I’m not sure why you created a Control Line for the sky but selected one of the buildings with the pipette when it was the sky you wanted to change.
As you will see, I also added a subtle Control Point to the buildings to try to control the flare and a standard grad filter on the water.
Just as a footnote, in the early days, you used to be really concerned about “crunchy” water and clouds. I notice that this has changed but now I find you are making things even crunchier than I would
So many thoughts, so let me ask you about one at a time.
I went directly to Biscayne Bay after taking my Halloween photos, so no tripod, not much of anything. If I want to be serious about this, I need to bring a tripod. I also need to level the camera perfectly, so it isn’t canted one way or the other. I didn’t even think about the D750’s built-in level tool, but when the camera is on the tripod, that will be great. Hand-held, not so much, too many things going on at once, and I know I can “fix” errors in PhotoLab. So, my question for you now, is whether I should make the camera perfectly level in all directions, and zoom out slightly so I can crop to what I want later, or should I aim the camera up slightly, knowing I can fix it with the perspective tools as you have shown (and which I never even thought about until you brought it up)? My gut feeling is keep the camera level, and with such a small amount of cropping, do that instead of the perspective tool. (Or, buy a proper view camera.)
About the bubble level, I’ve started taking the Nikon D750 manual with me when I go places, and in may free time, reading it starting at the beginning. I also bought a book on the D750, which I haven’t started to read yet. With what you’ve shown me, I can start doing it this way (but unless the camera is on a tripod, I doubt I’ll be using “Live View”). In any case, instead of concentrating on the image, I need to start concentrating on the tools, and then the image. With tripod AND Live View, everything will get easier.
I’m confused - if I can remove that clipping in PhotoLab, isn’t that effectively what I might have done in lowering the exposure? I did see this in the camera, but not so much as I see in your photo.
For me, everything is a compromise, and I’m pleased that you accepted what I did. Given time to think, I might have left the camera settings as they were, but for dropping the ISO to 100, so two more stops of underexposure, but every millisecond I delayed meant more and more of the sun was coming out from behind the cloud. I don’t think that fast, let alone think and act that fast, but next time I’ll be remembering what you said, and deliberately under-expose some more. (I haven’t tried bracketing, but I’m very tempted!).
I mis-understood. I made the area as large as I could, without including “wasted” stuff. I’ll try it your way next time, and have a larger area, that includes the very bright area I was interested in.
I kept changing my mind, as I was editing, and the image was improving little by little. In retrospect, I wish I had stopped, made a VC, and tried things differently. As it was, I moved the “pipette” around, and the spot where I left it seemed to make the sky much nicer - the radial lines started to appear. I guess it was doing the wrong thing at the wrong time in the wrong place, but I liked the improvement in the image.
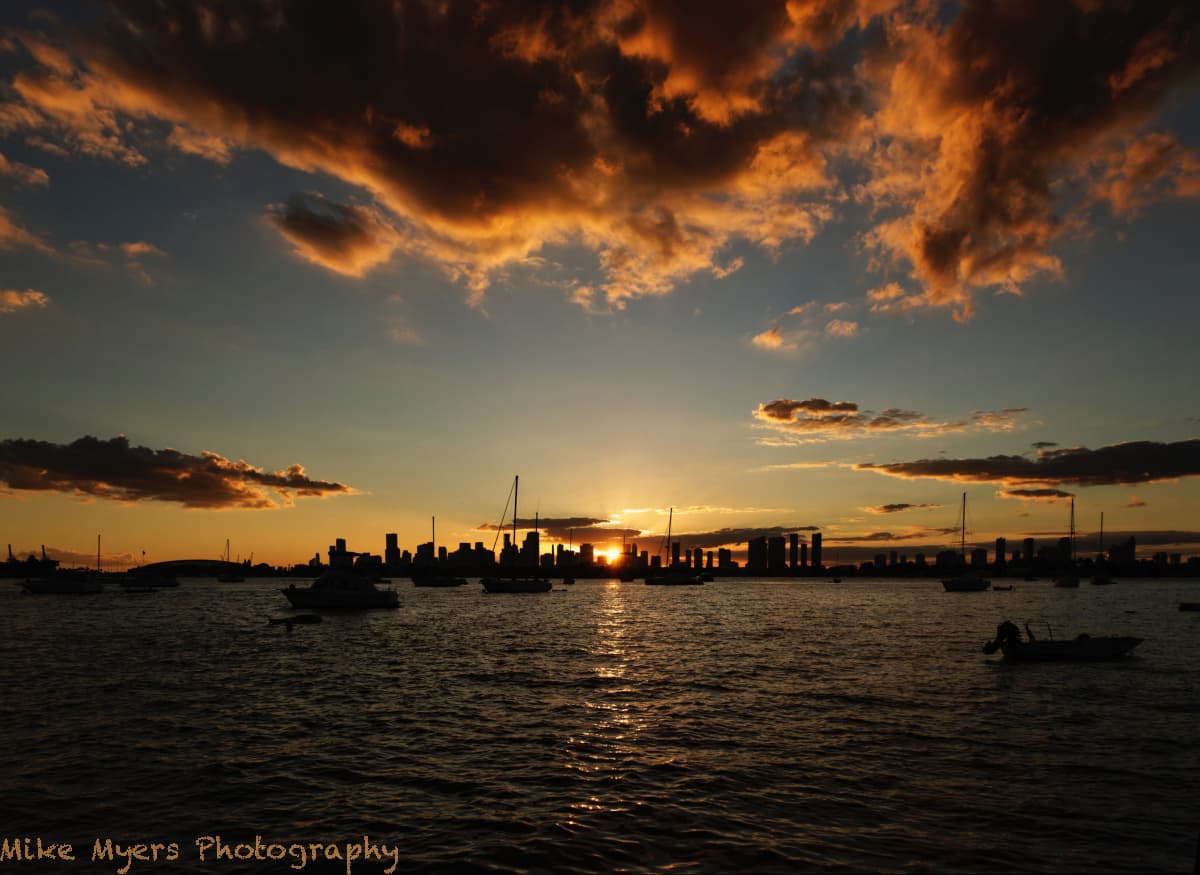
One last thing - I prefer the sky in the final image I posted, to the sky in the image you finished with. The radial lines stand out more in my image, and they are not so noticeable in your image. I’m guessing this is because your sky is “lighter”?
Added later - I agree about removing the clouds at the top right corner, but when I see the image without them, it feels “unbalanced”. Maybe it’s my imagination, but without them, the image feels somehow “uncomfortable”. That added “stuff” at the top right makes the image feel balanced to me, but I would have a very hard time describing “why”. It’s just something I “feel”.
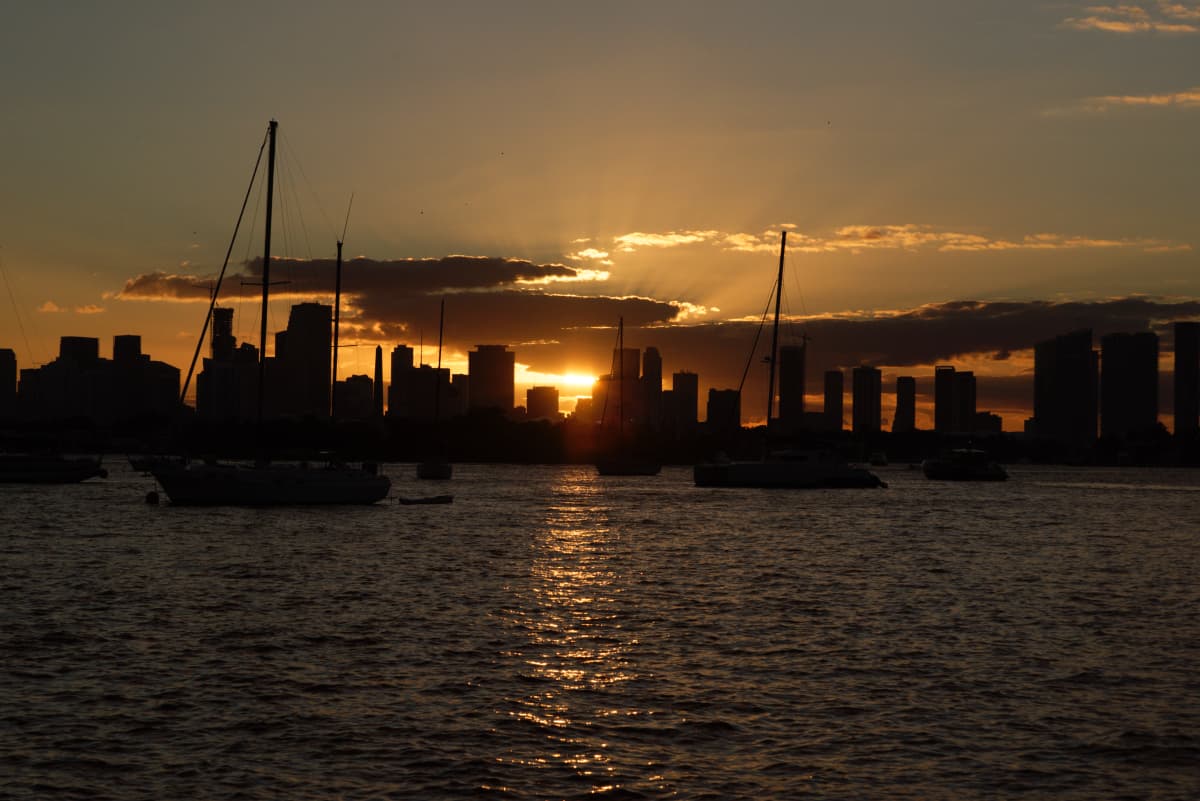
I agree with you - From now on, I will be careful NOT to edit the water. It does look more realistic in the un-edited photo.
How about the sky? Was I “wrong” to make the sunbeams so obvious? Maybe I over-did it?
Of course, that could lead to why the buildings are seen so clearly in the edited images, but in the un-edited image I just posted, they are all black silhouettes in front of a colorful sky.
How much editing is “just right”, and when does it become “too much”?
I’m beginning to think that I crossed that line, and Joanna stopped short of crossing it.
Mike, I got since long that you wanted to show the sunbeams, which for sure is a nice additon to the sunset!
Just don’t use Microcontrast (at least not that much) for the sky. Sky (air) doesn’t have texture at all.
I know, some people like to enhance clouds and stuff (I don’t), but try Fine Contrast w/ it’s additional setting for it.
Otherwise I didn’t want to comment – it’s your picture and you decide how to present it.
Personally, I prefer to frame the shot at whatever vertical angle it takes and then adjust it using perspective corrections in PhotoLab after, not forgetting to allow room for the inevitable crop after the perspective correction.
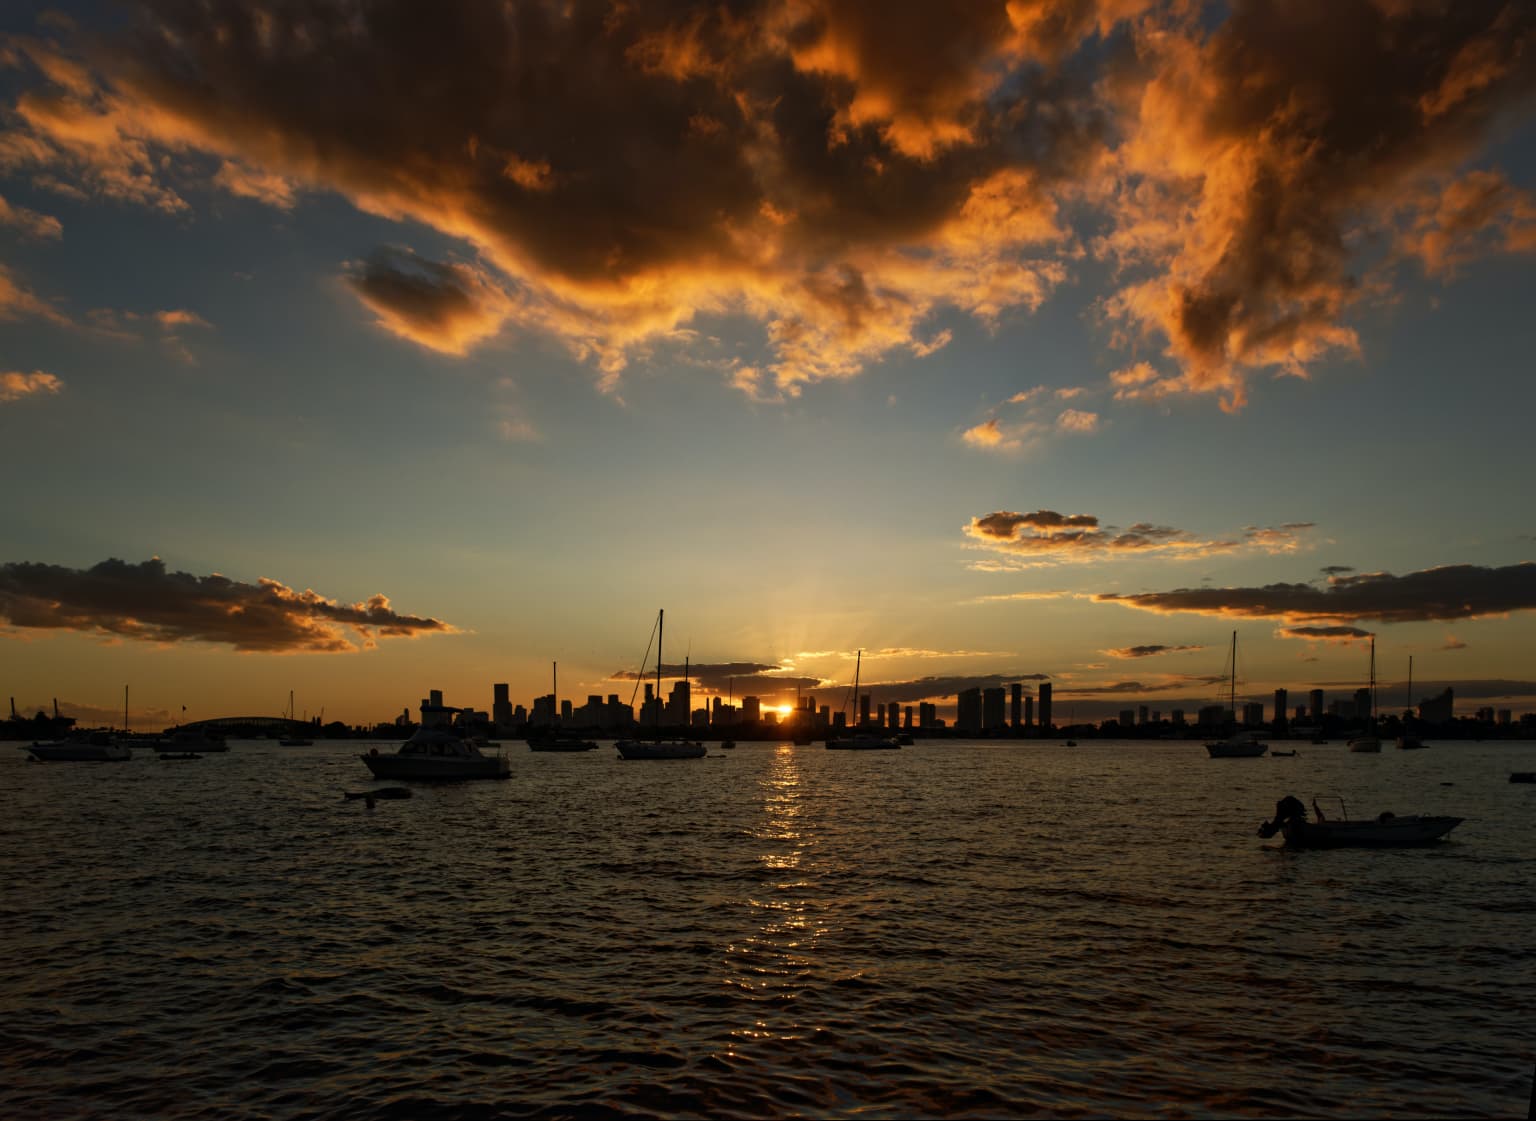
I deliberately removed all adjustments and just took a screenshot of the image in PL with the exposure warnings on. It looks severe but, in fact, if it only takes 2 or 3 points in the tone curve to get rid of them, it’s nothing to worry about as the indicators can sometimes be too sensitive, especially when dealing with heavily saturated colours.
Stop fretting! You got a very good exposure the worked well in PhotoLab. That’s what counts.
The pipette isn’t there for changing appearance, but for selecting the area to change. Once you have the selection right, then you can hide the mask and start making adjustments.
You need to start by showing the mask then adjusting the selectivity to get the area that you want to change as white as possible, and it is important that the pipette goes in the area the you want to change.
Mike, your crepuscular rays are clearer but I wouldn’t like to print your version too large because, as Wolfgang says, too much Microcontrast doesn’t do an image any favours when you want smooth skies of smoother water.
This photo was taken slightly later, but I switched to 24mm. I think the horizon is now flat, and the “Force Parallel” tool now has the buildings standing straight up. I used Exposure Compensation, setting it at 1.67, which got the Histogram centered better. I lost the sun rays, but gained more clouds. I used Fine Contrast, so the water hopefully still looks natural. I worked with the Tone Curve until things looked nice to me, and my “Clipping Warnings” remained off. I crossed my fingers and selected DeepPRIME which worked with no problem. I adjusted White Balance to just slightly warmer, 5819K. I tried to increase Vibrancy, but the Clipping Warnings came back on - I finally left it at -4.
Overall, I like this view because of the clouds, now lit up by the Sunset, but the SunRays are barely visible.
To me, it’s pretty, but I prefer the closer-in view with the SunRays. It is more, well, exciting. But this proves Wolfgang is right, the water is definitely better in this view, and no longer looks “processed”. One more lesson learned.
The crepuscular rays are there to be had, it just required a bit more jiggery-pokery with Control Lines and a Control Point to get them to be more obvious…
Hi Joanna, I am following your discussion in order to learn. There seems to be sort of a “.dop versioning” but I do not find it (WIN) I’d be happy to get advice. Thanks.