Editing high dynamic range images in PhotoLab 5

Yes, I missed that - incredible! I thought all the tools, and the knowledge of how to use them were lost forever. I don’t think anyone in the USA has ever built a “new” steam locomotive like the ones that were in use half a century ago.

I remember you posted a link - I will check it out. I’m home again, very sleepy, and with a lot of images yet to be processed.

What I thought I might do, is go to the train station near Ft. Lauderdale, set up a tripod, and try to get a decent shot of one or two of the current trains that go through there. I’m not sure if they’ll let me take photos, kick me out, or have me arrested - I guess I better ask for permission at the ticket office before setting up a tripod.

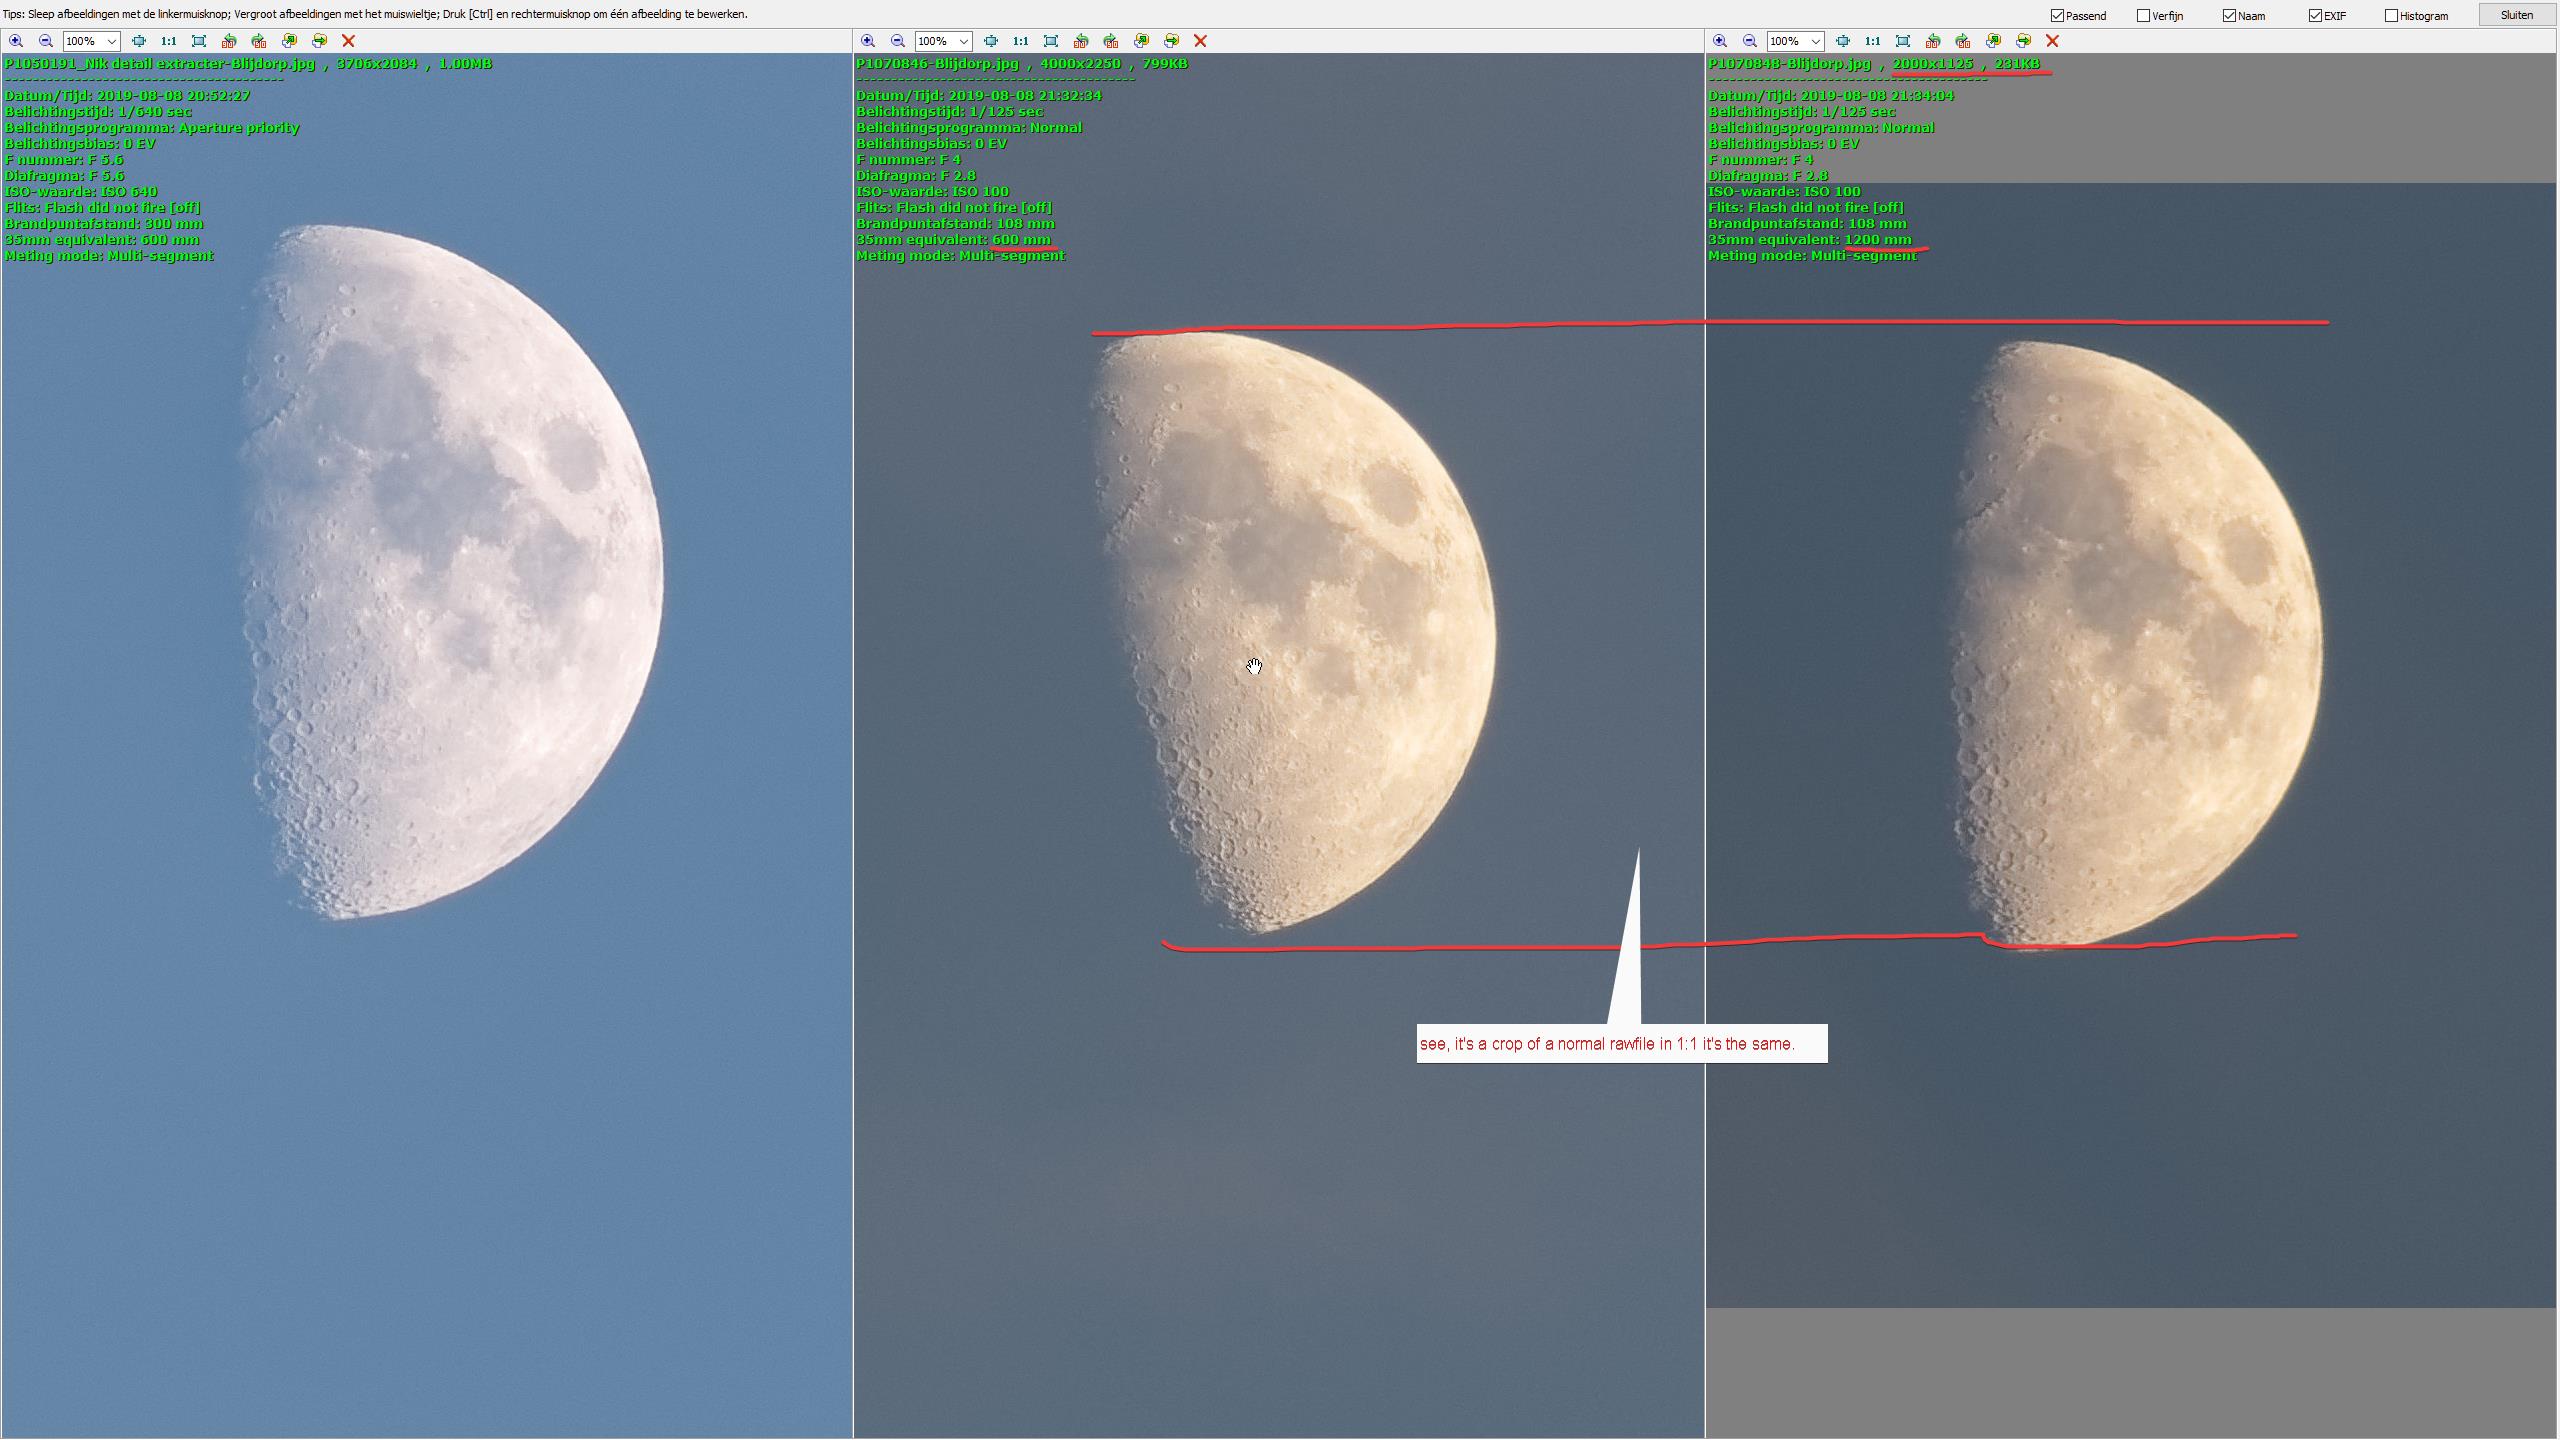
I can try to do something similar as the moon passes over Miami as it is setting. I’ll need to figure out how much time between shots. I just heard back from Nikon, my D750 is repaired, and as soon as they finish the paperwork, they will be shipping it back to me.

Is this what you did with the D850:
In the photo shooting menu, select “Multiple Exposure”. For the multiple exposure mode, select “On (single photo)” or "On (series). If you select “On (single photo)”, after completing one multiple exposure, the camera will reset to the normal shooting mode. To take a series of multiple exposures, select “On (series)”.

From what you wrote, I can only take three shots at most - bummer. I’ve got a friend who owns a Z camera - I need to ask if I can visit him and check it out. Maybe even this week.

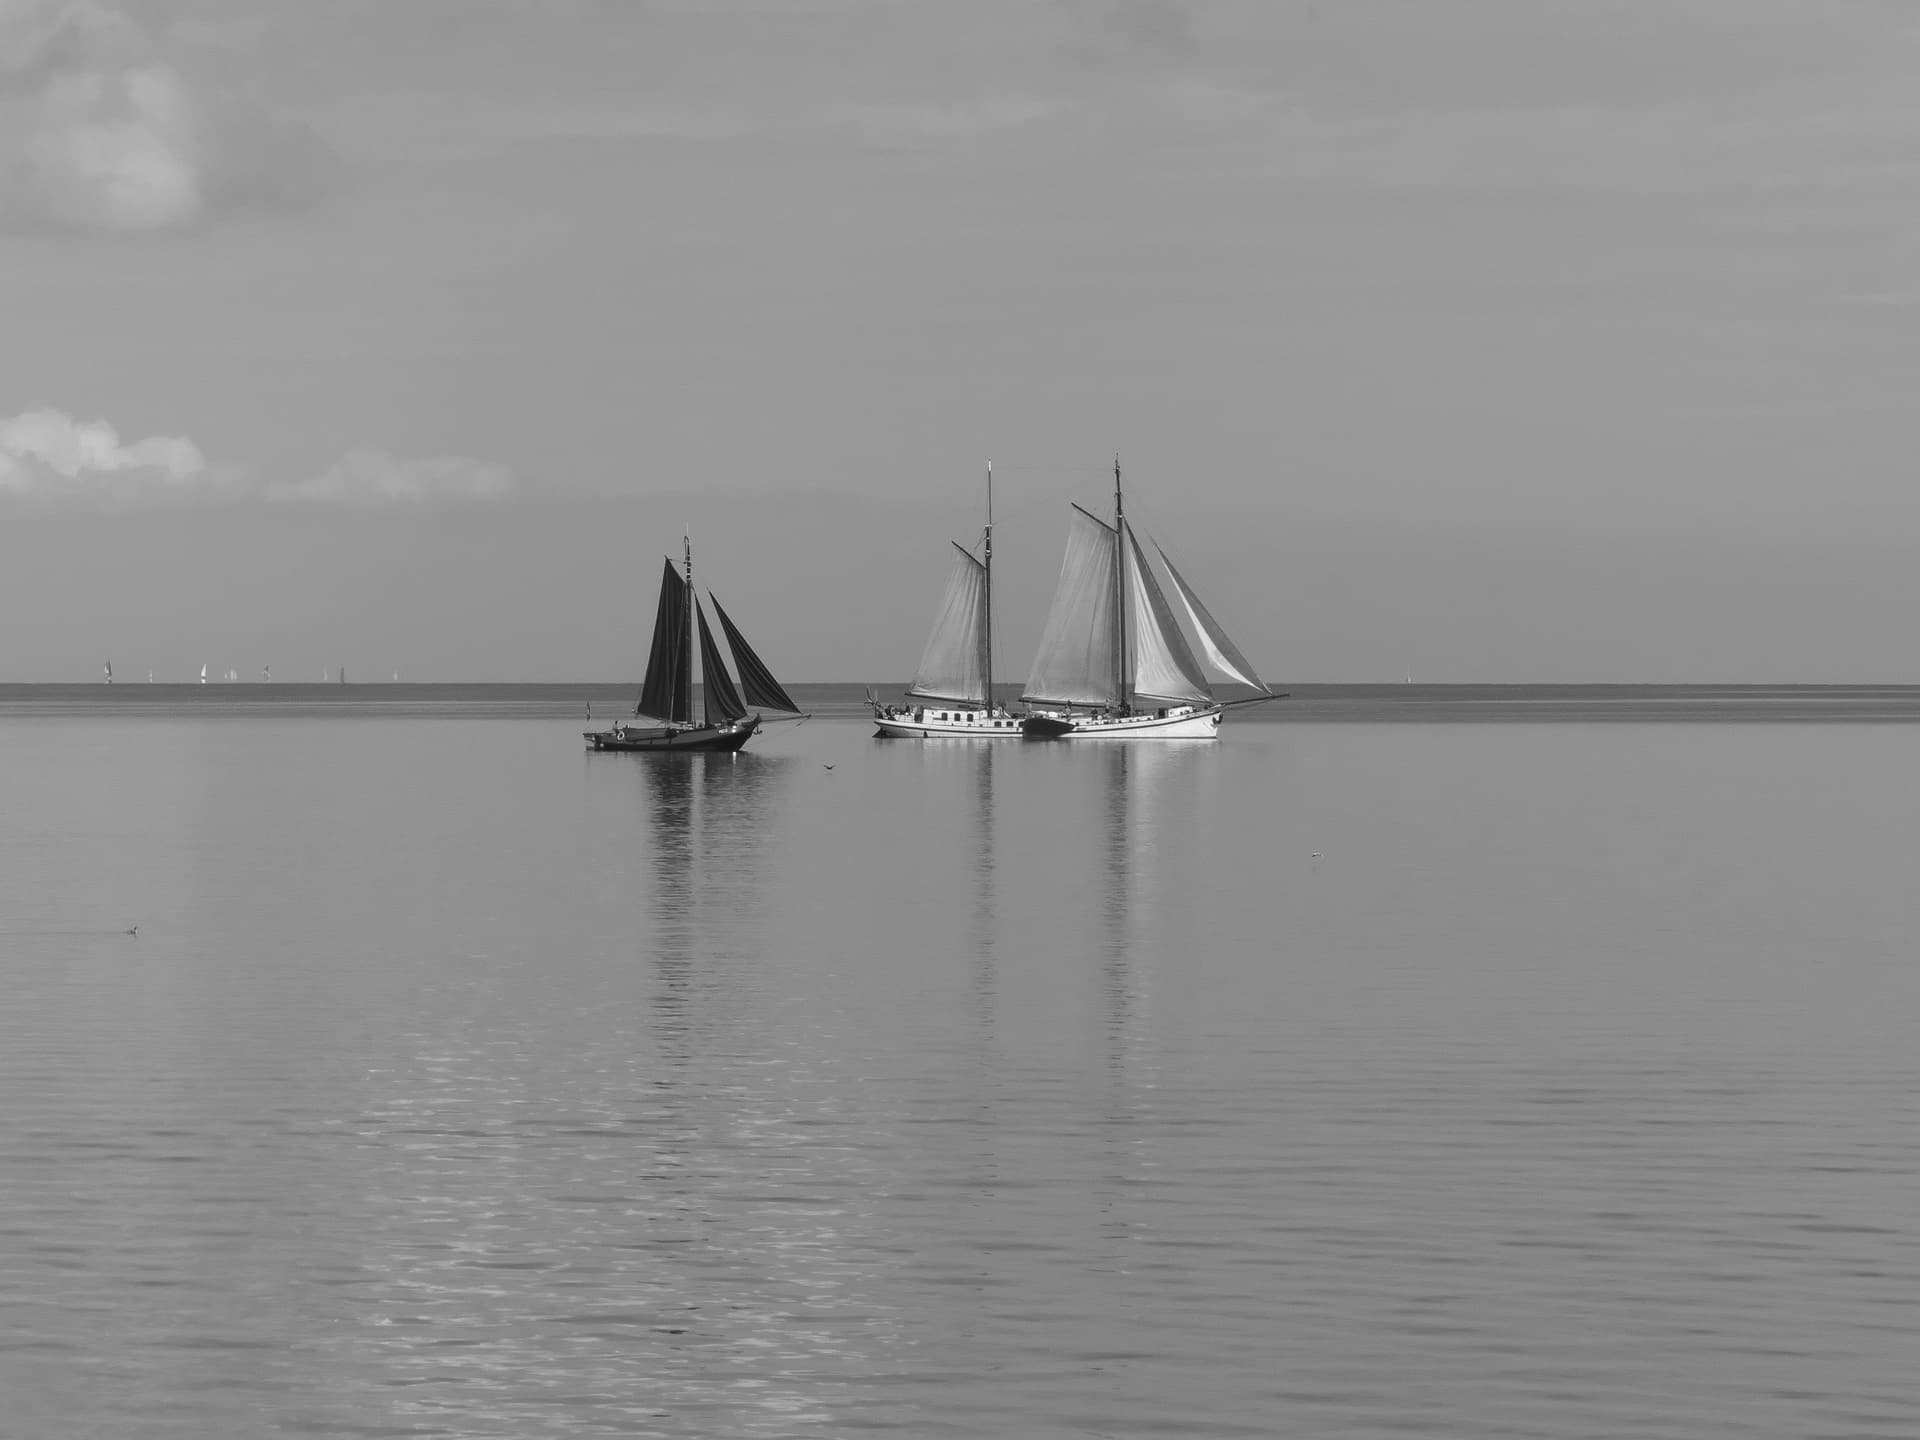
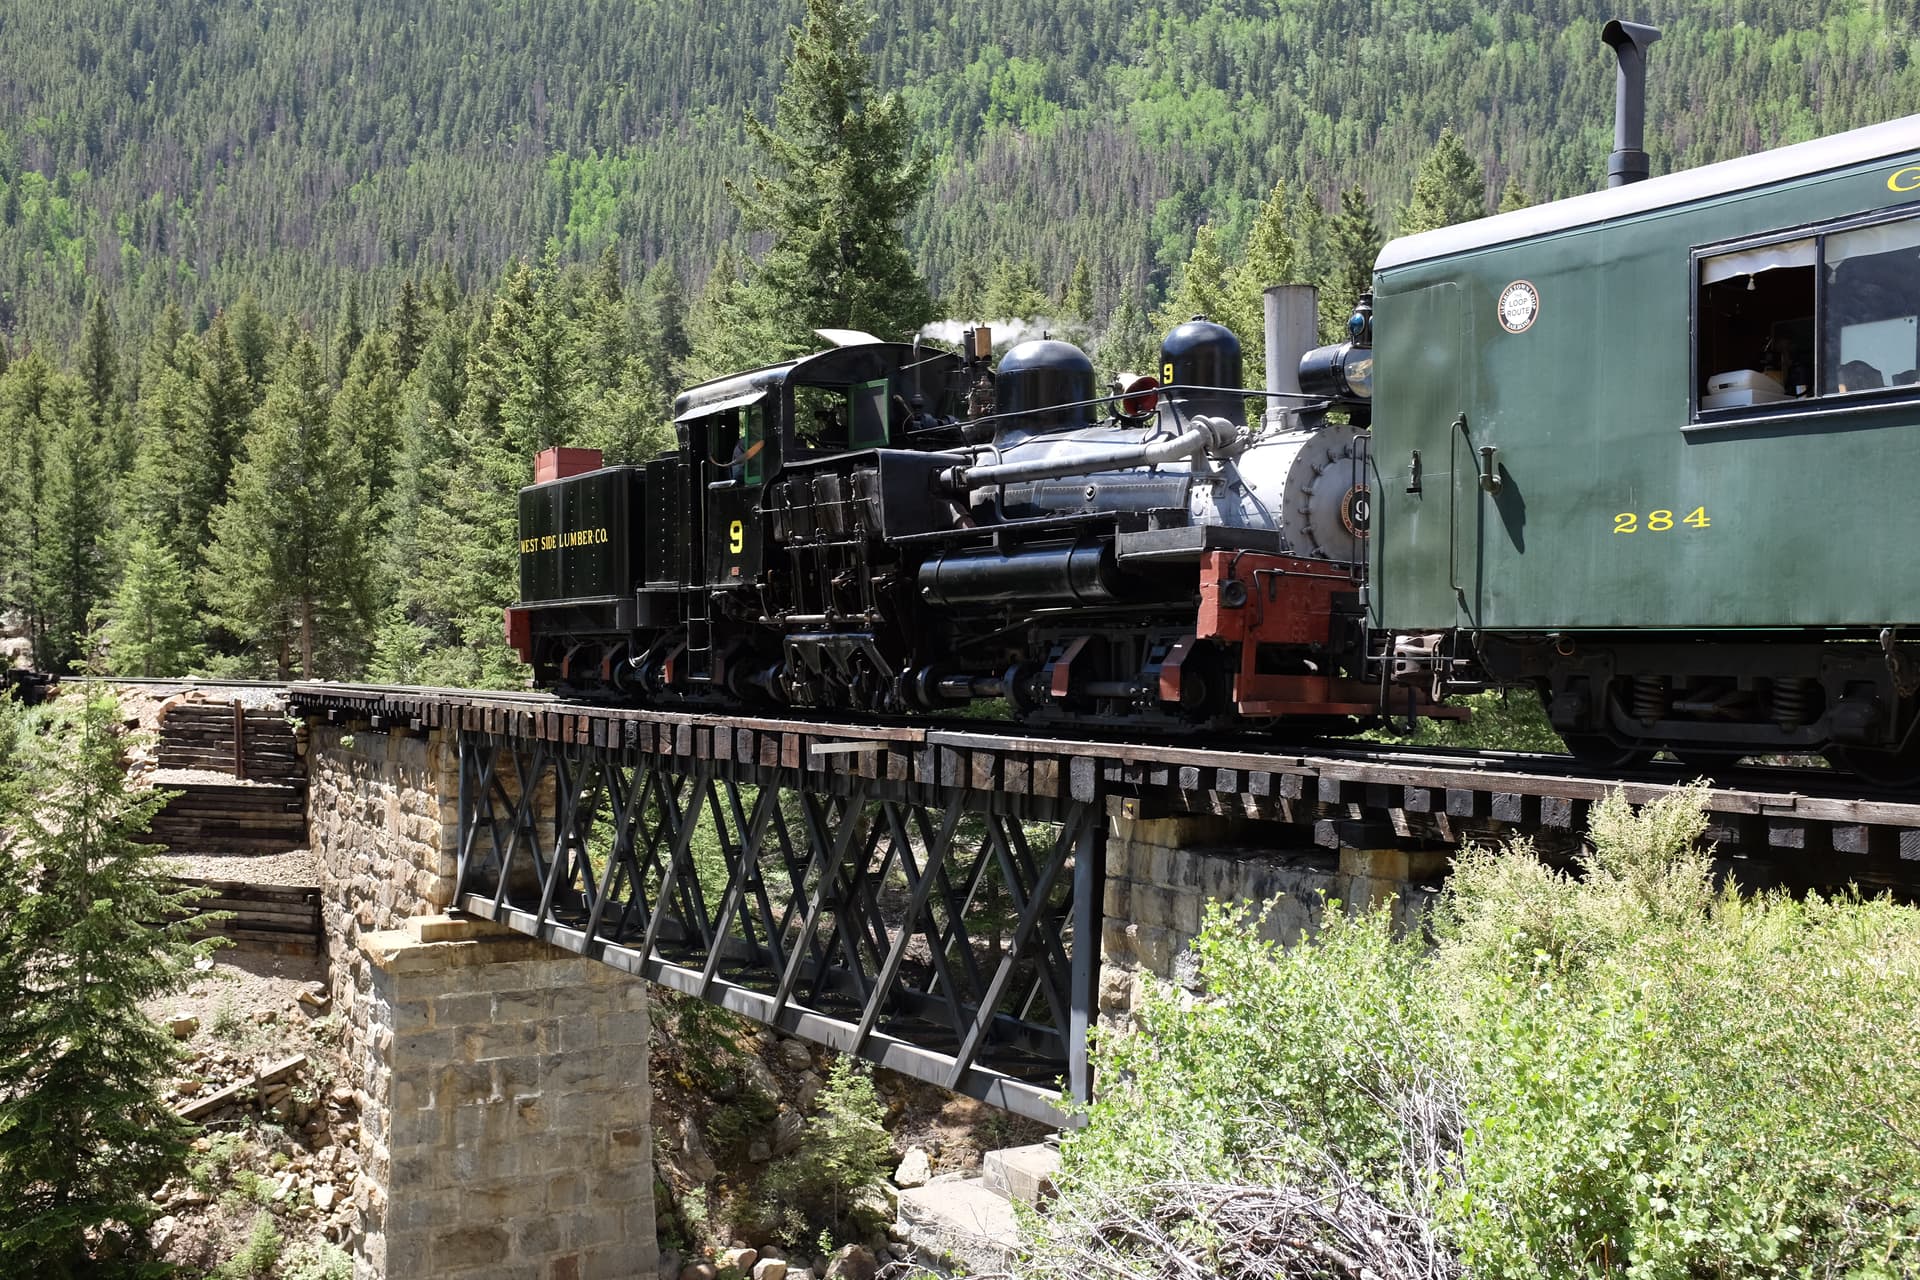
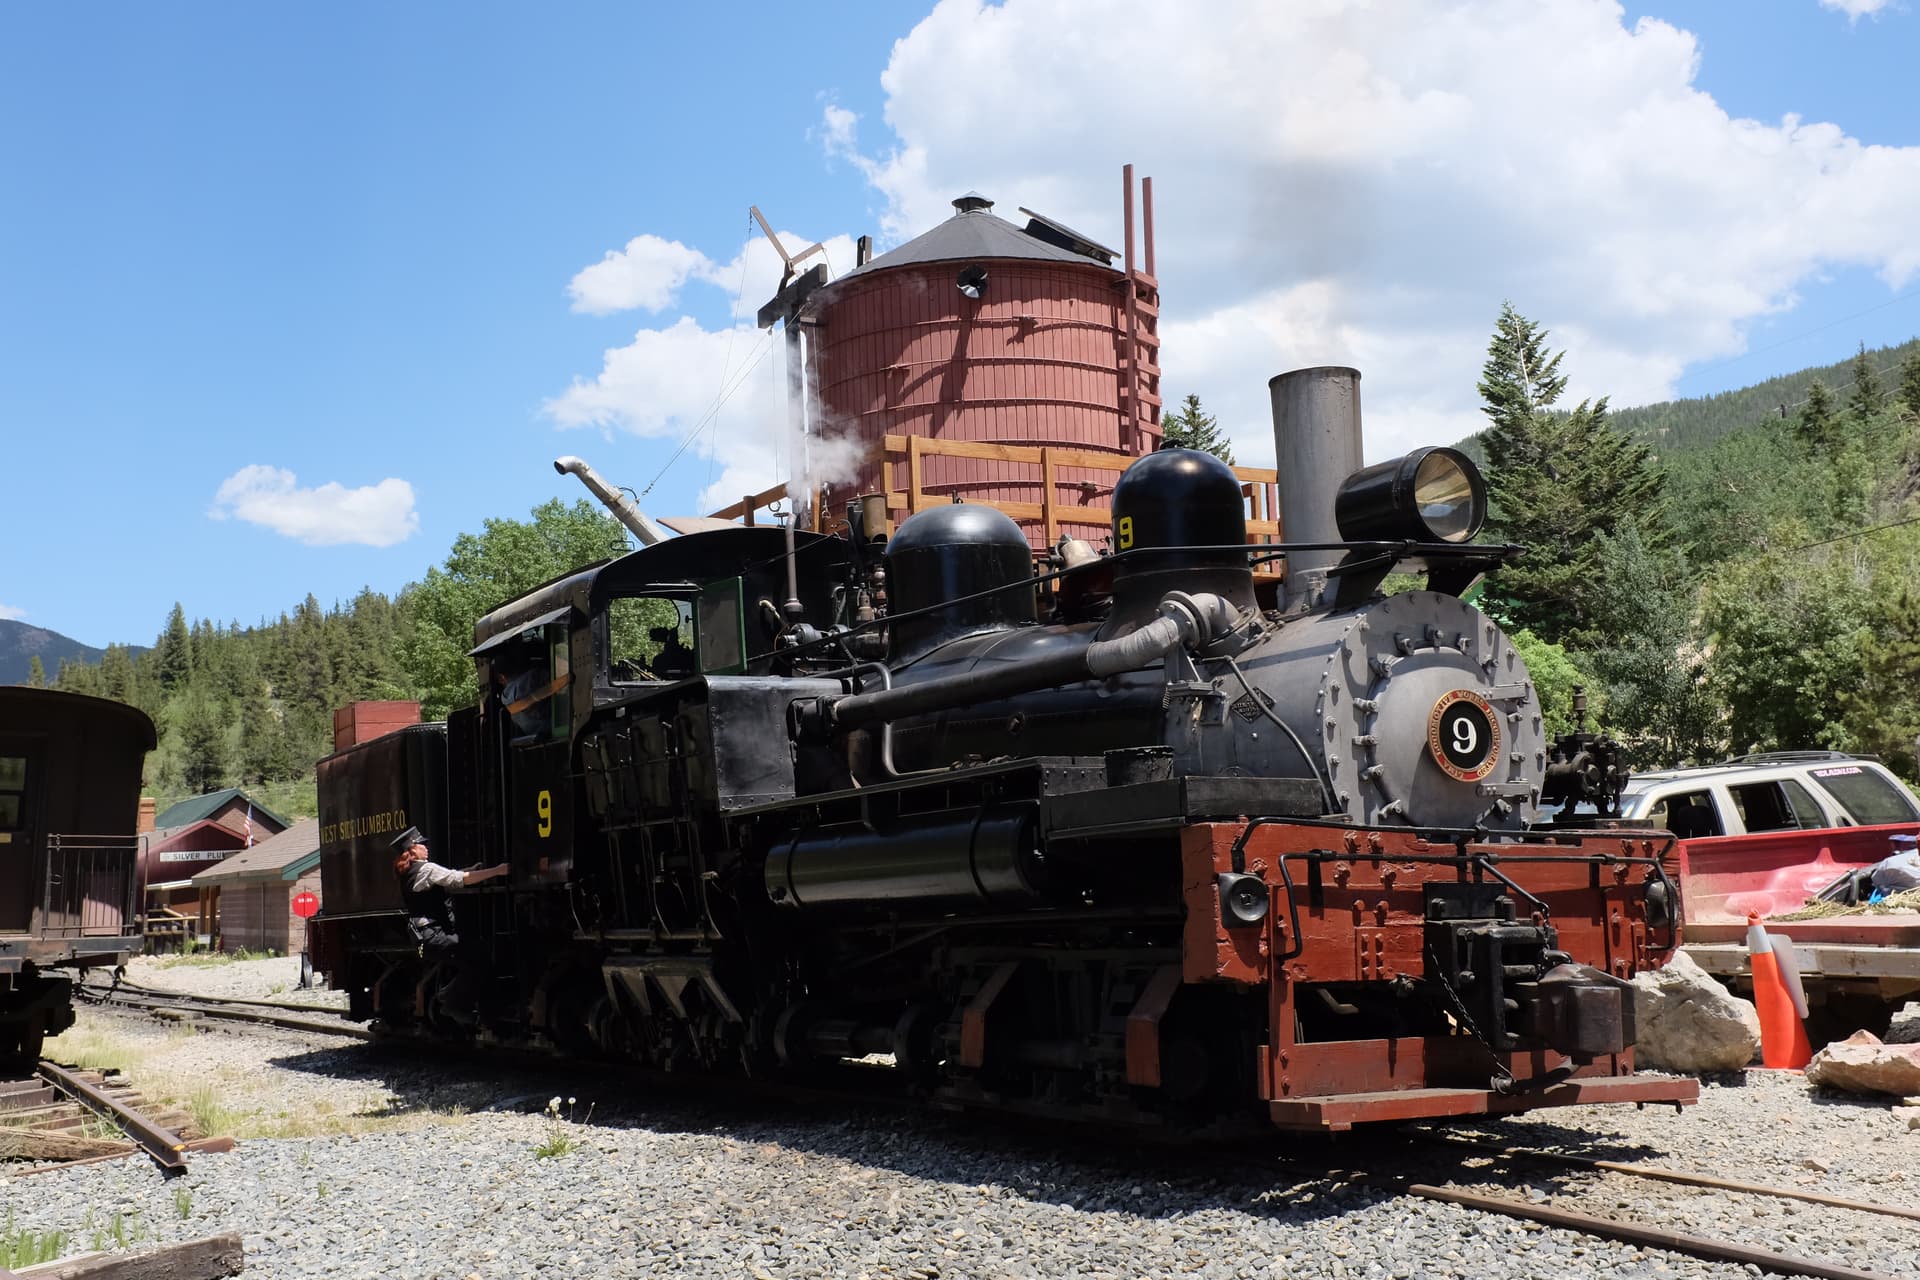
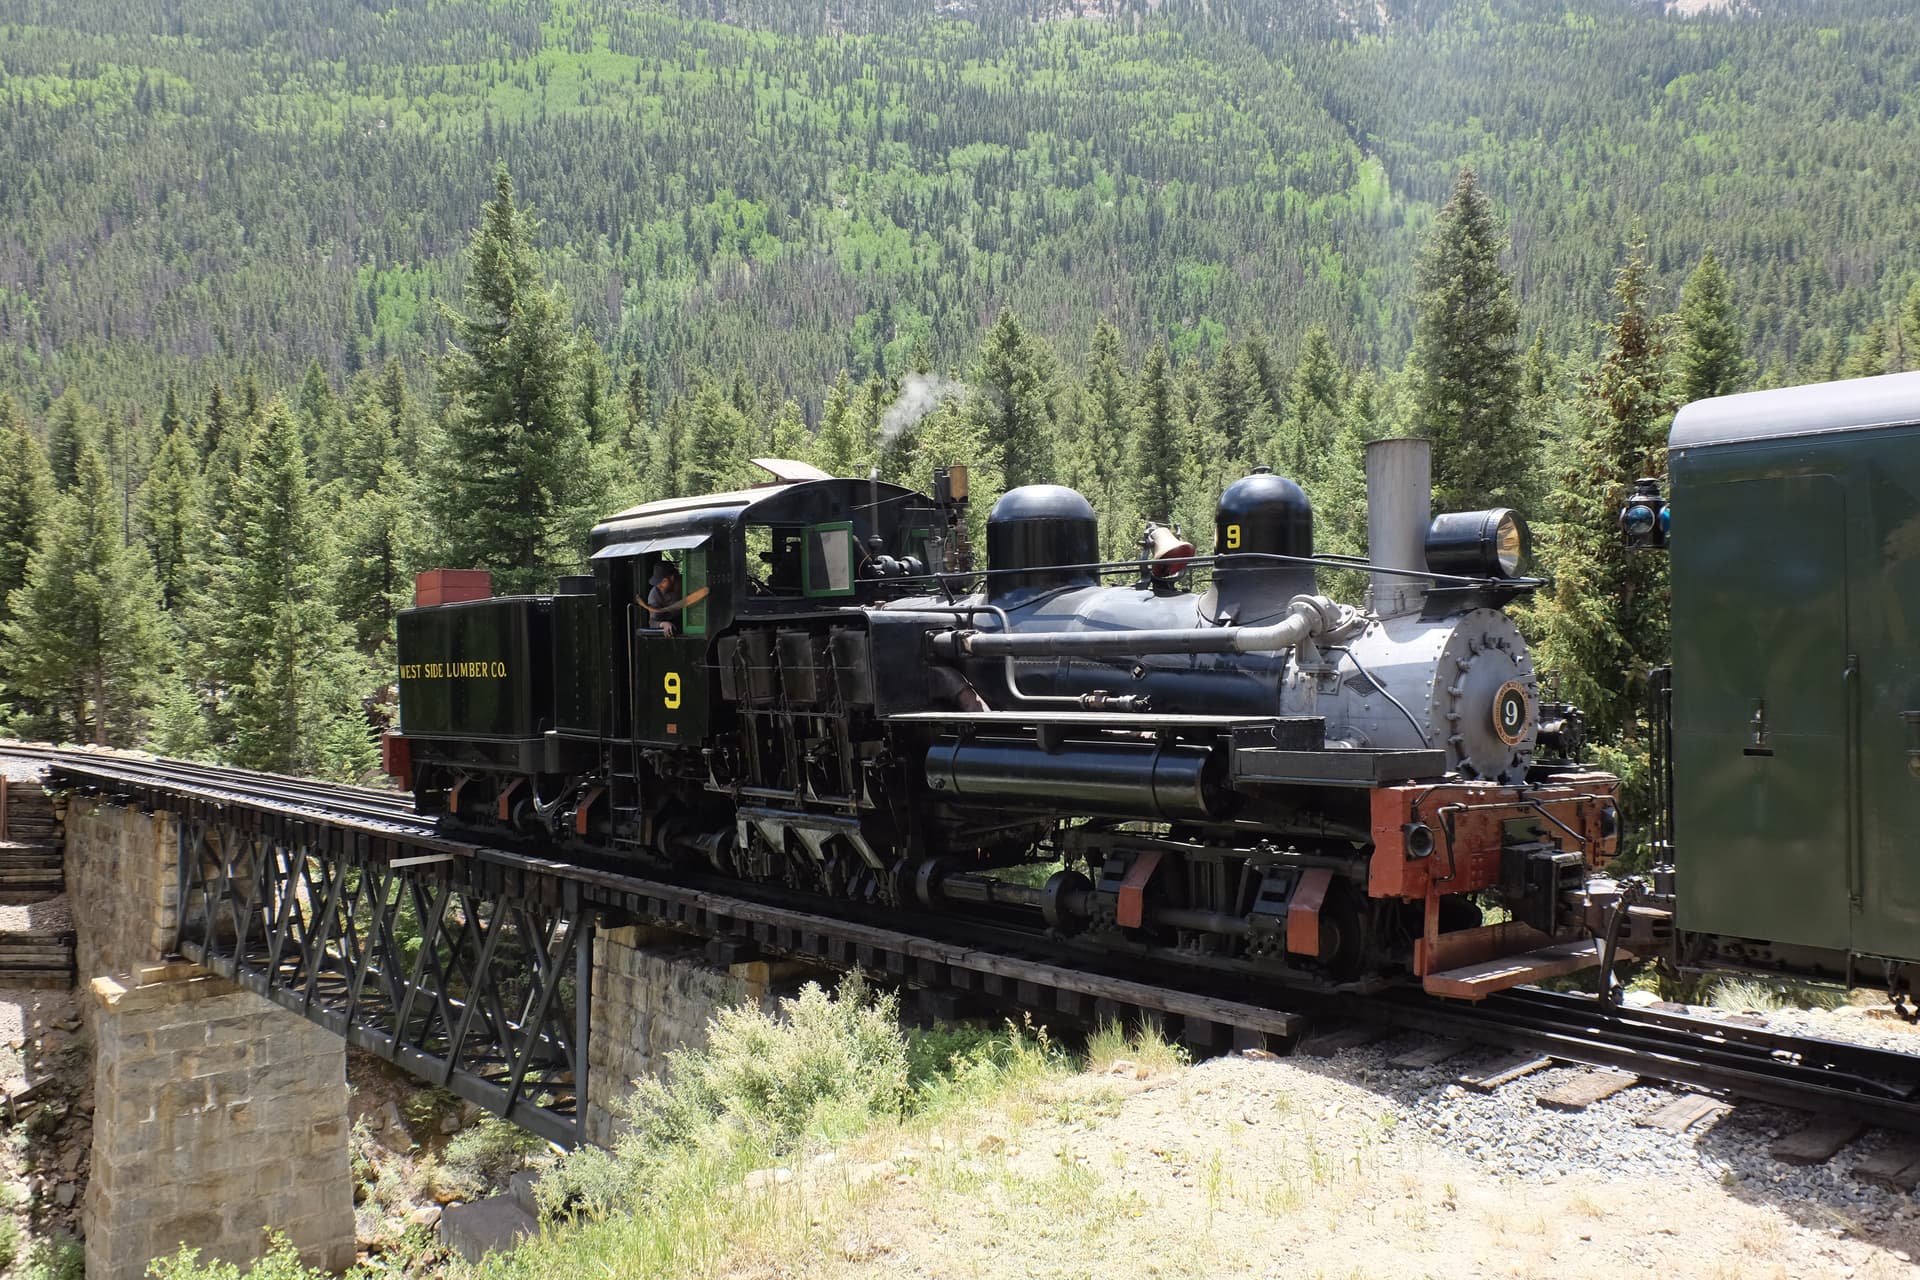
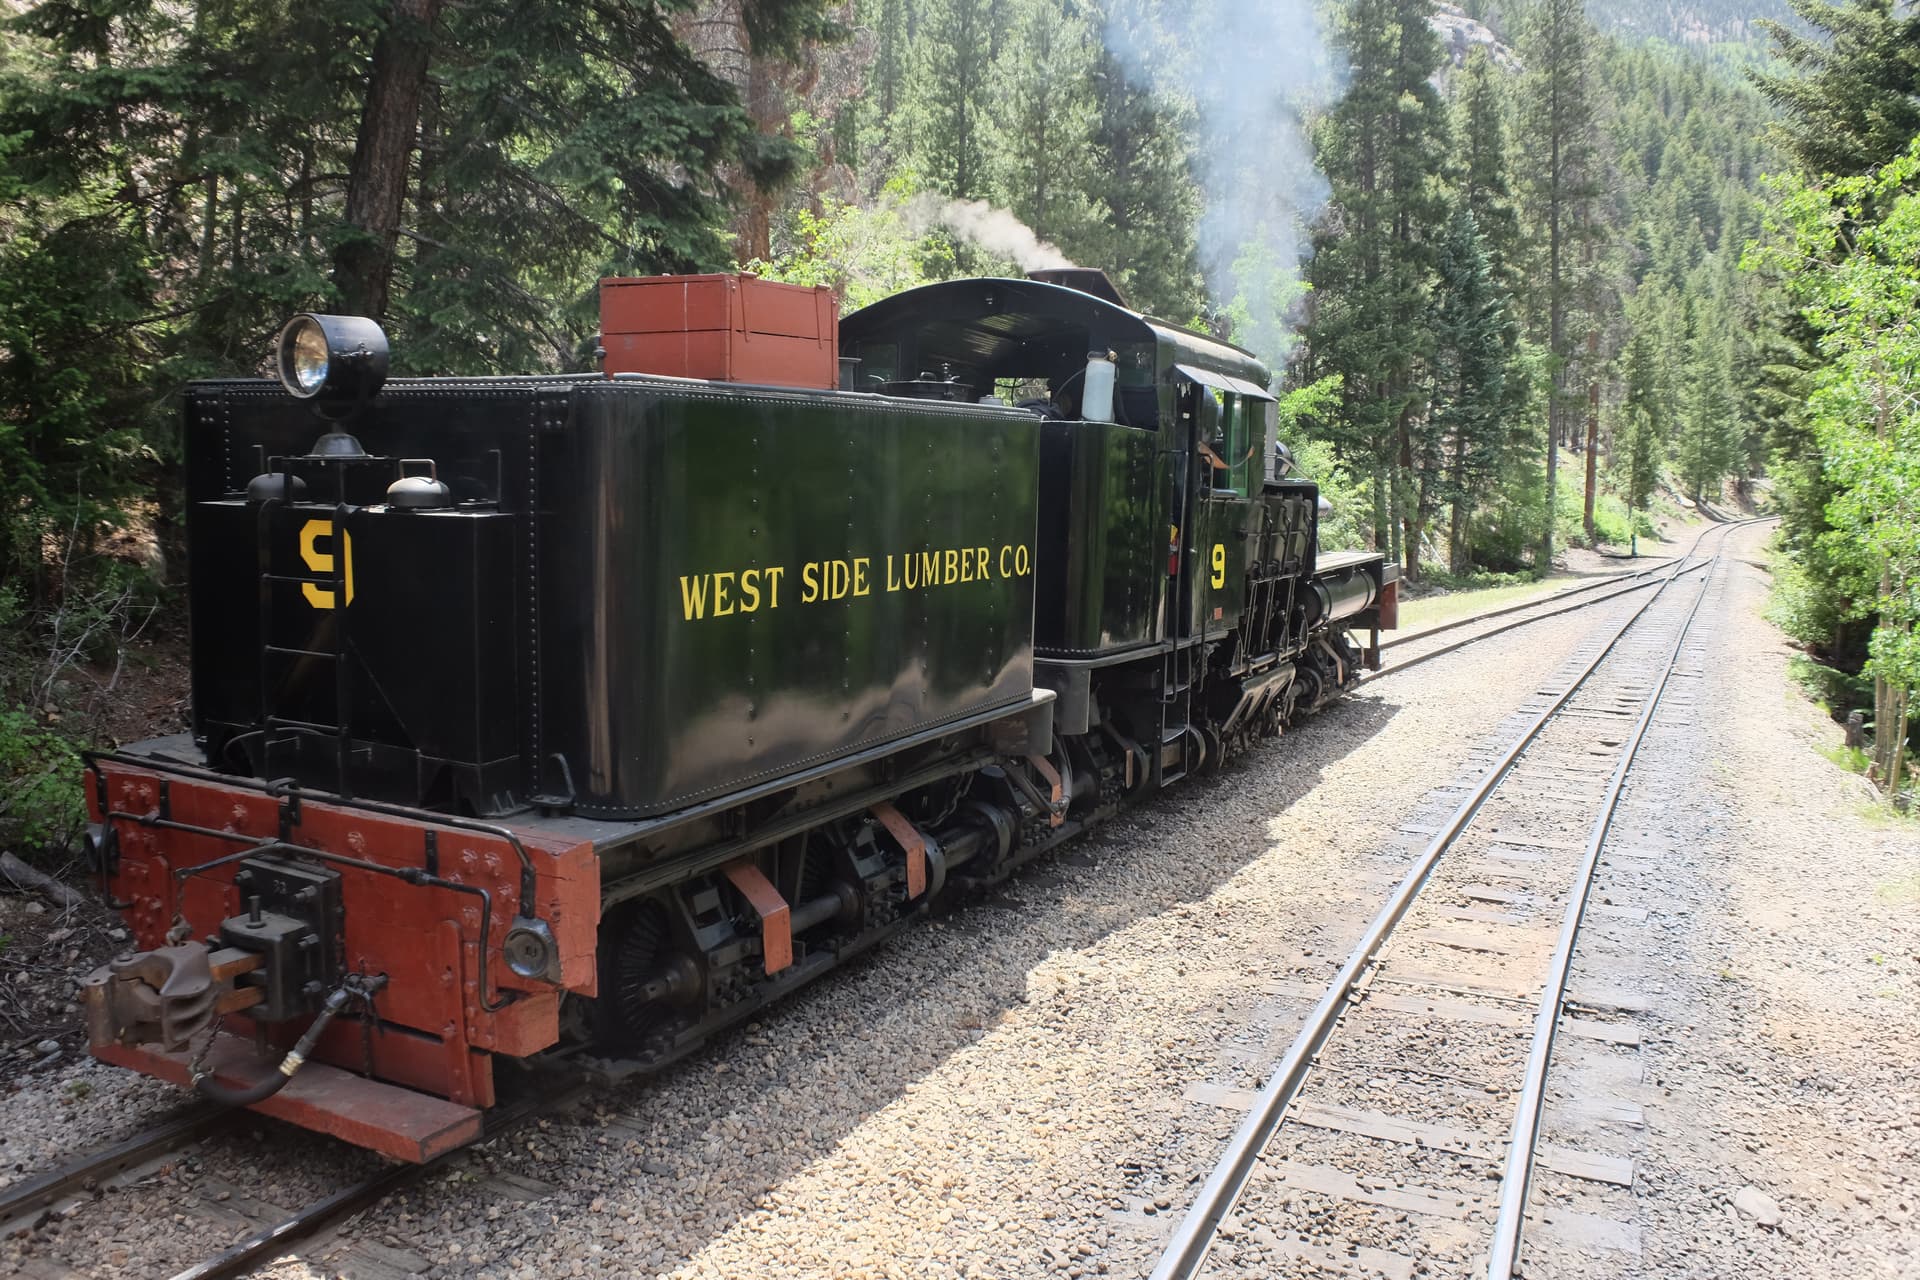
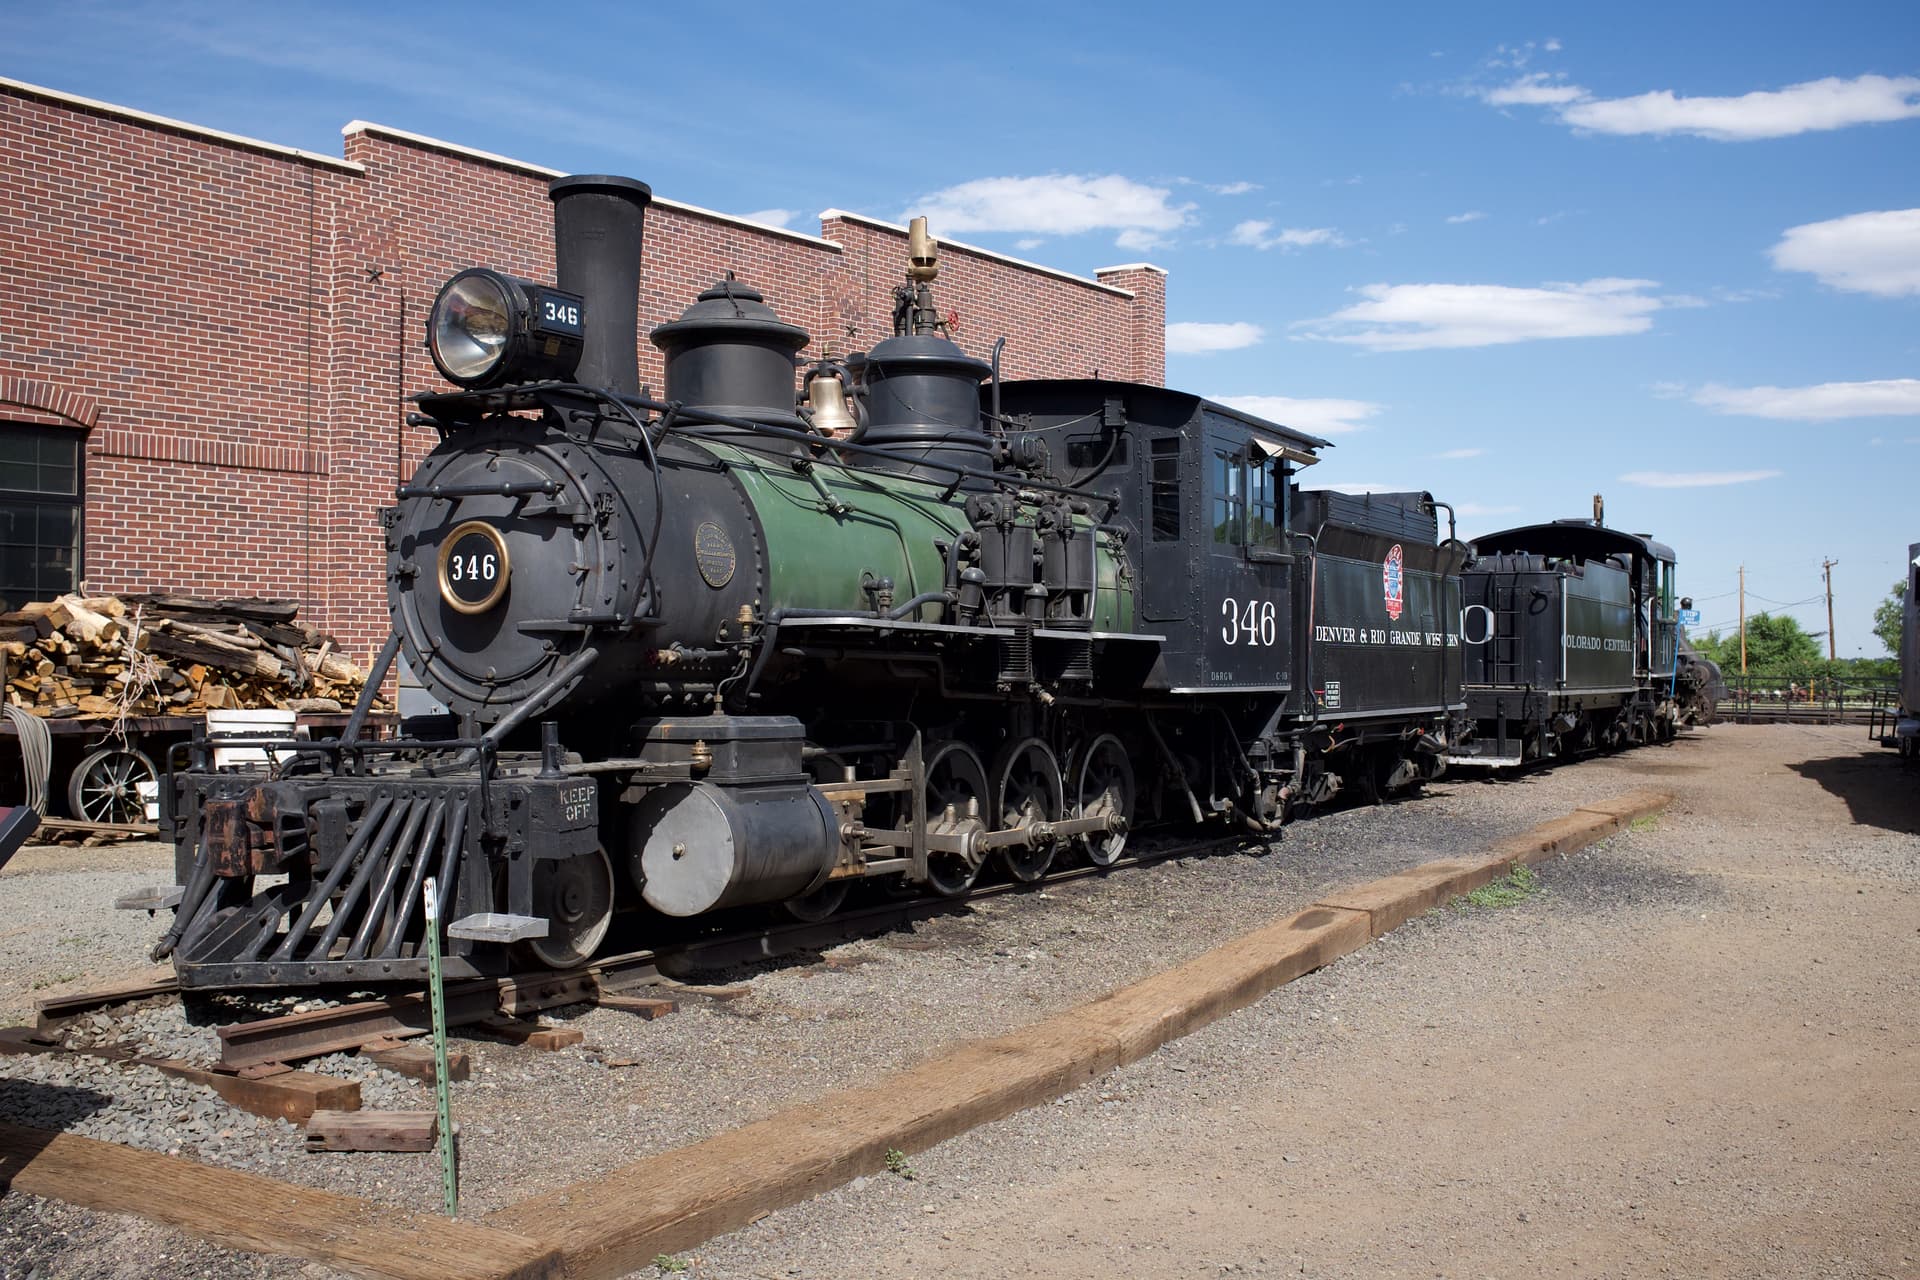
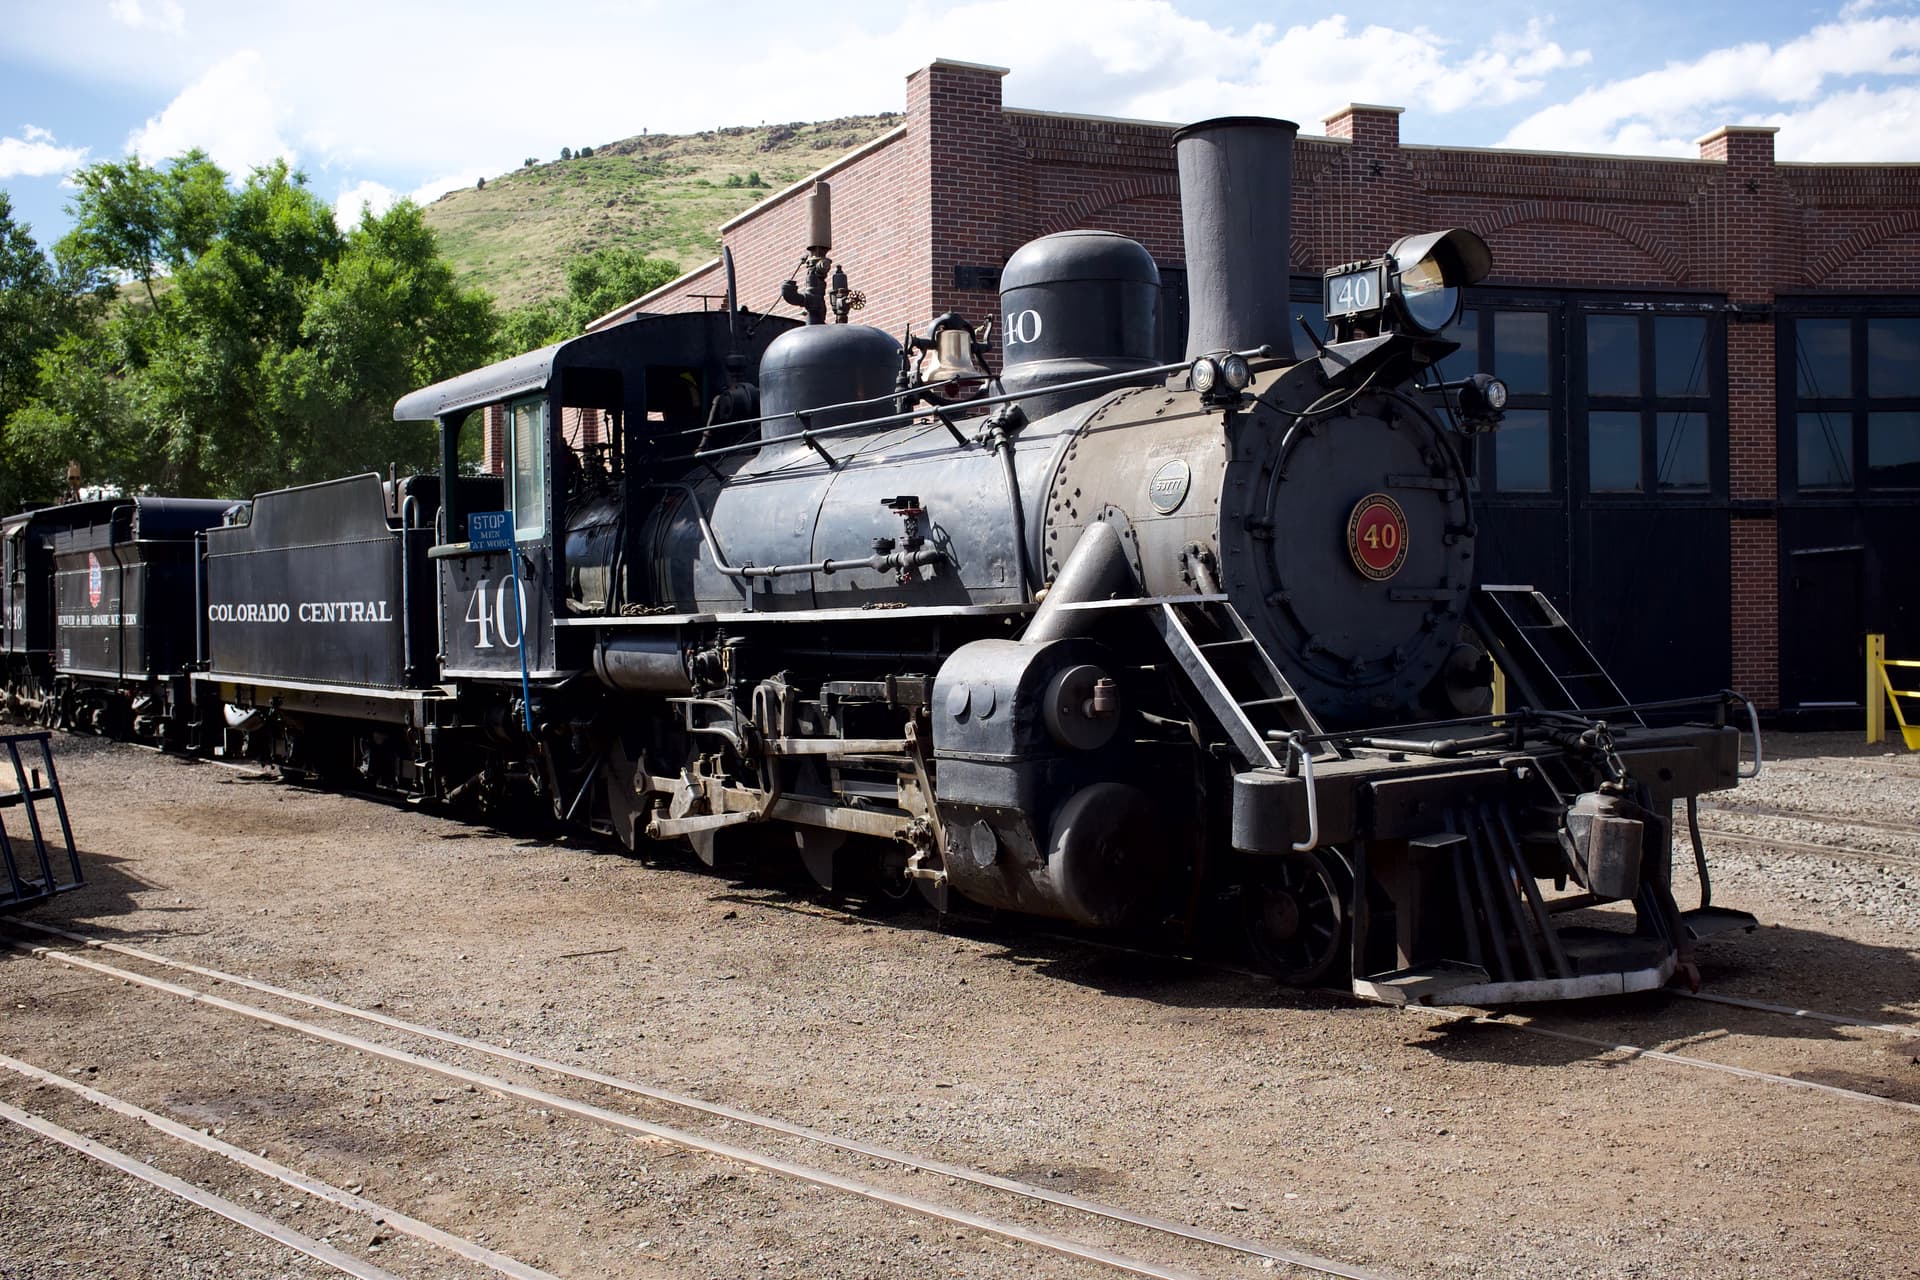
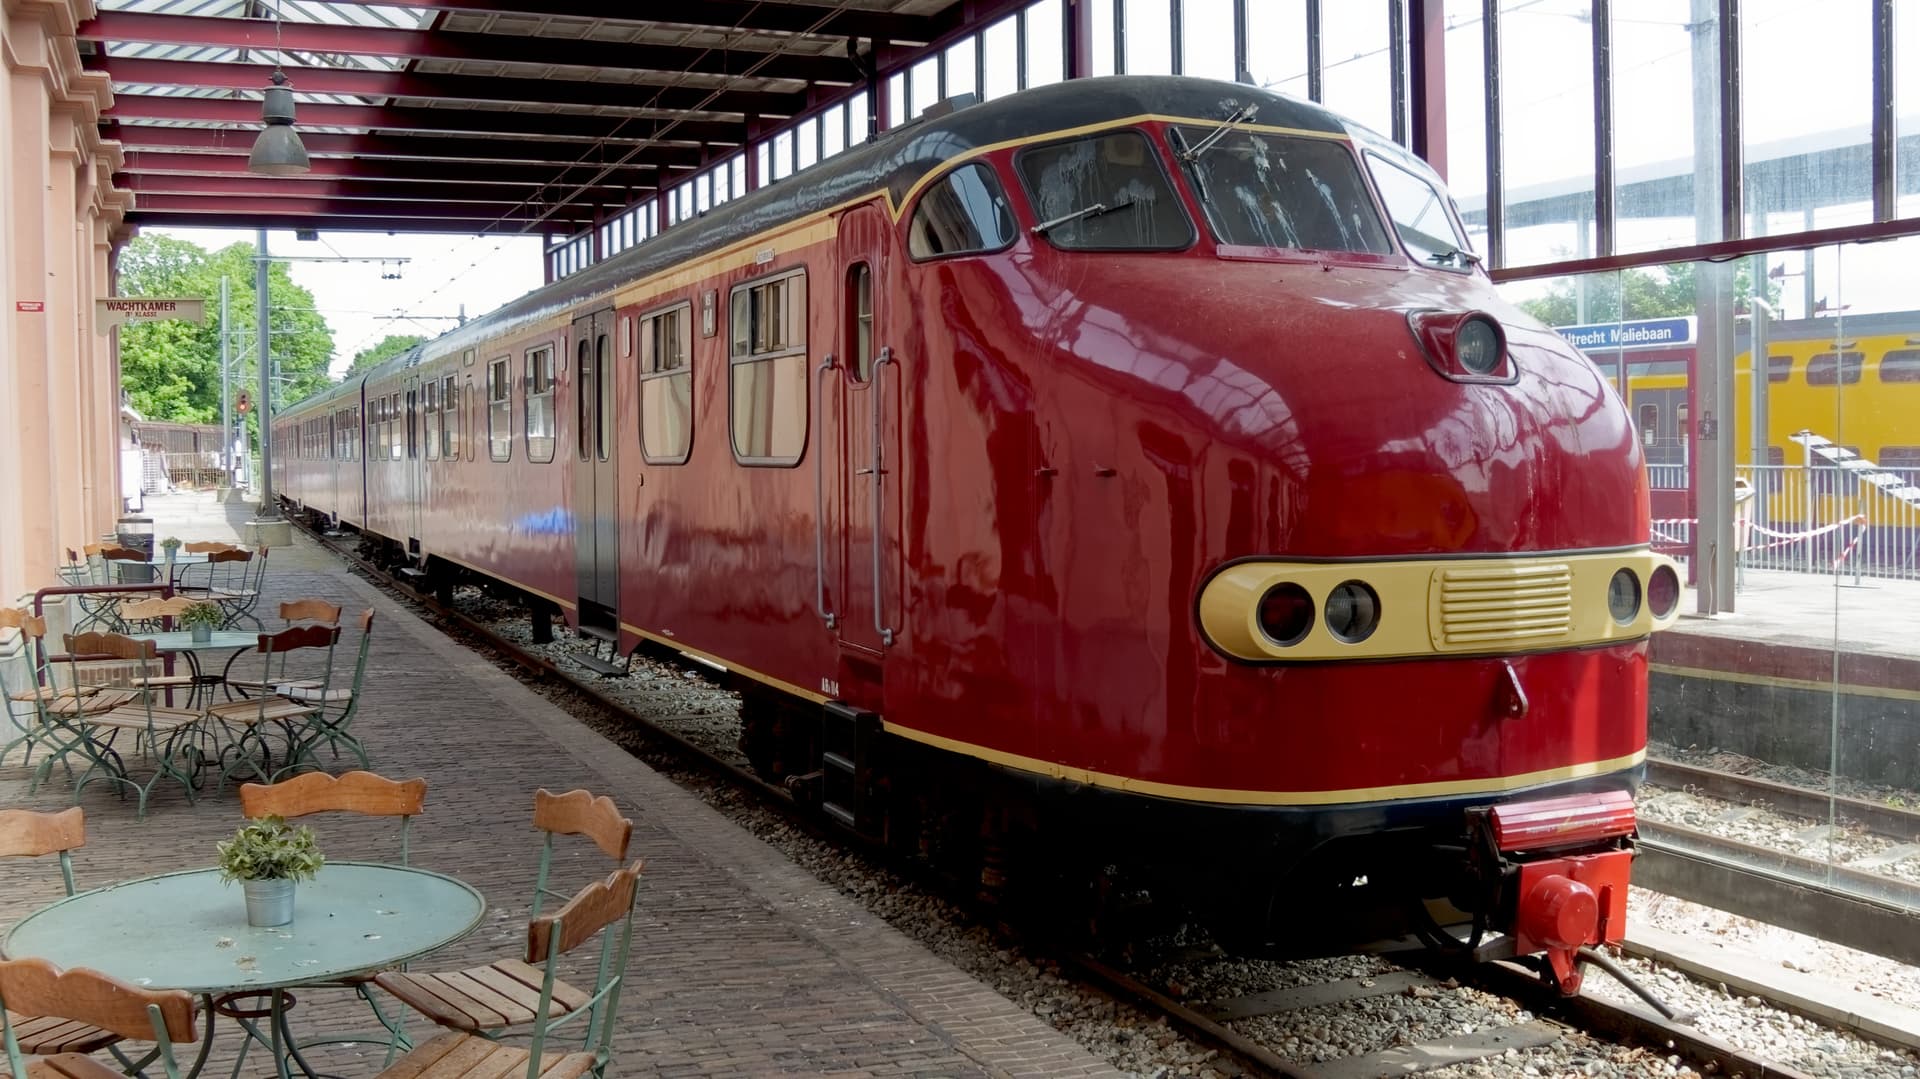
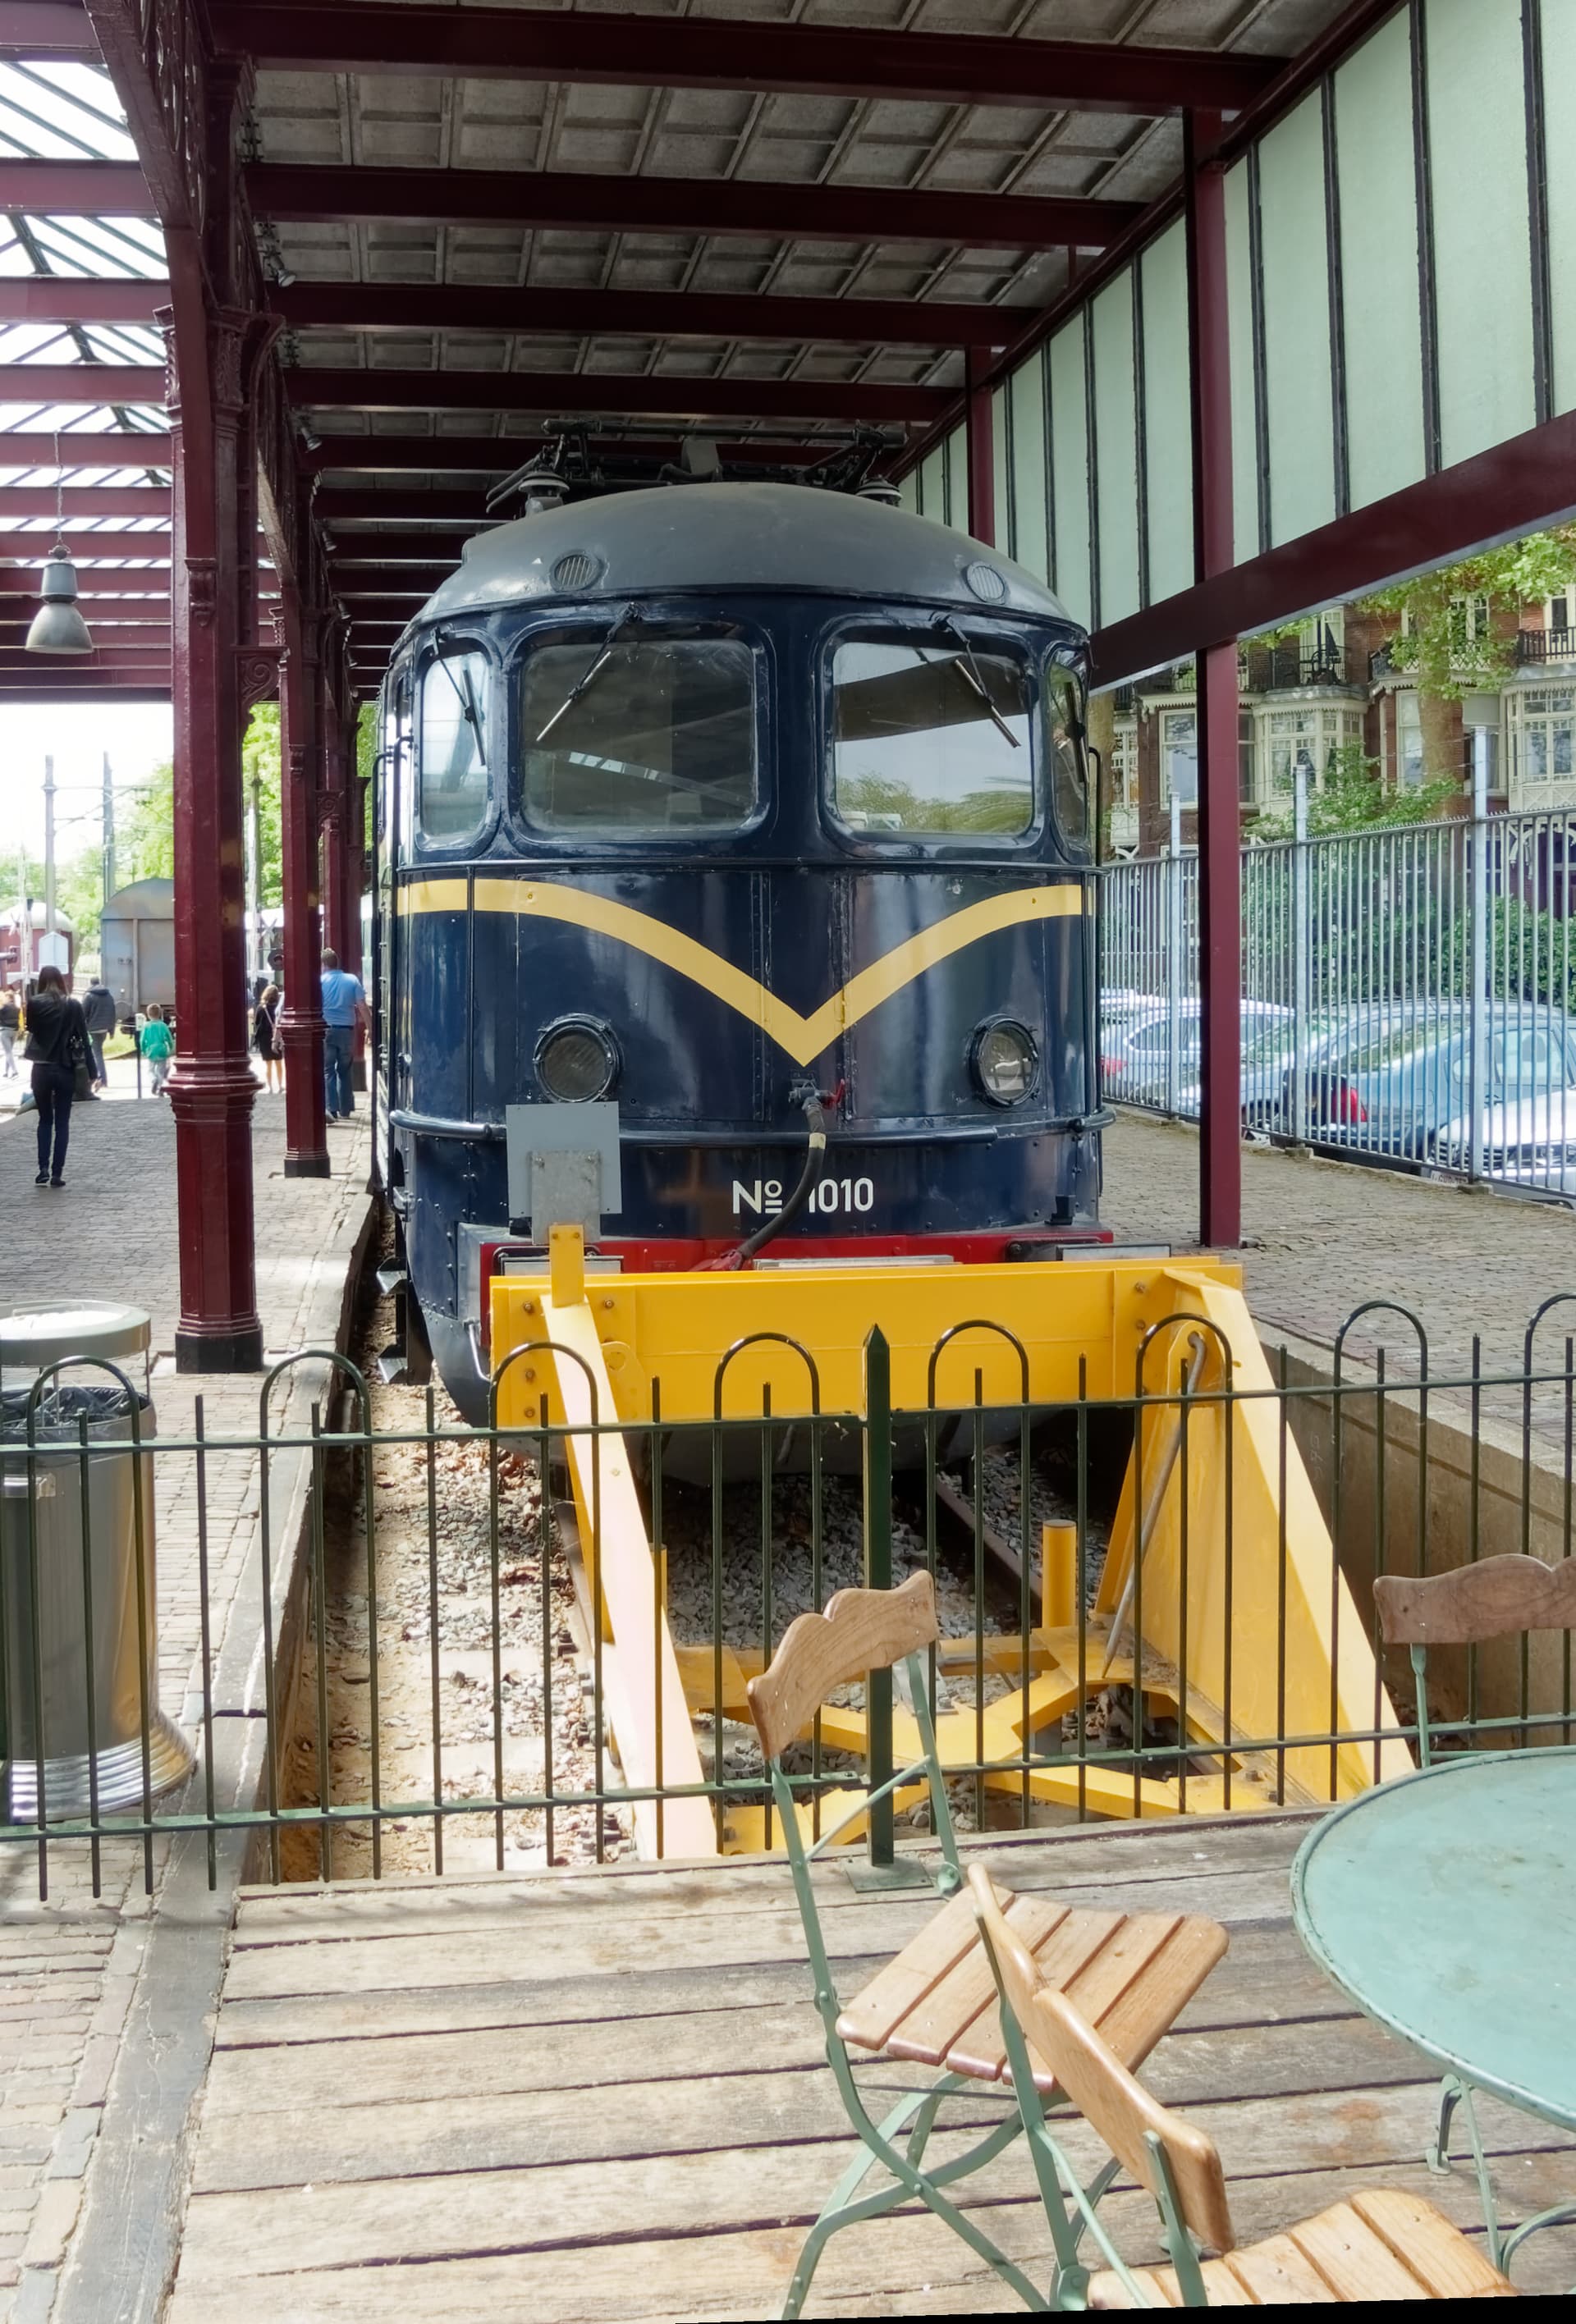
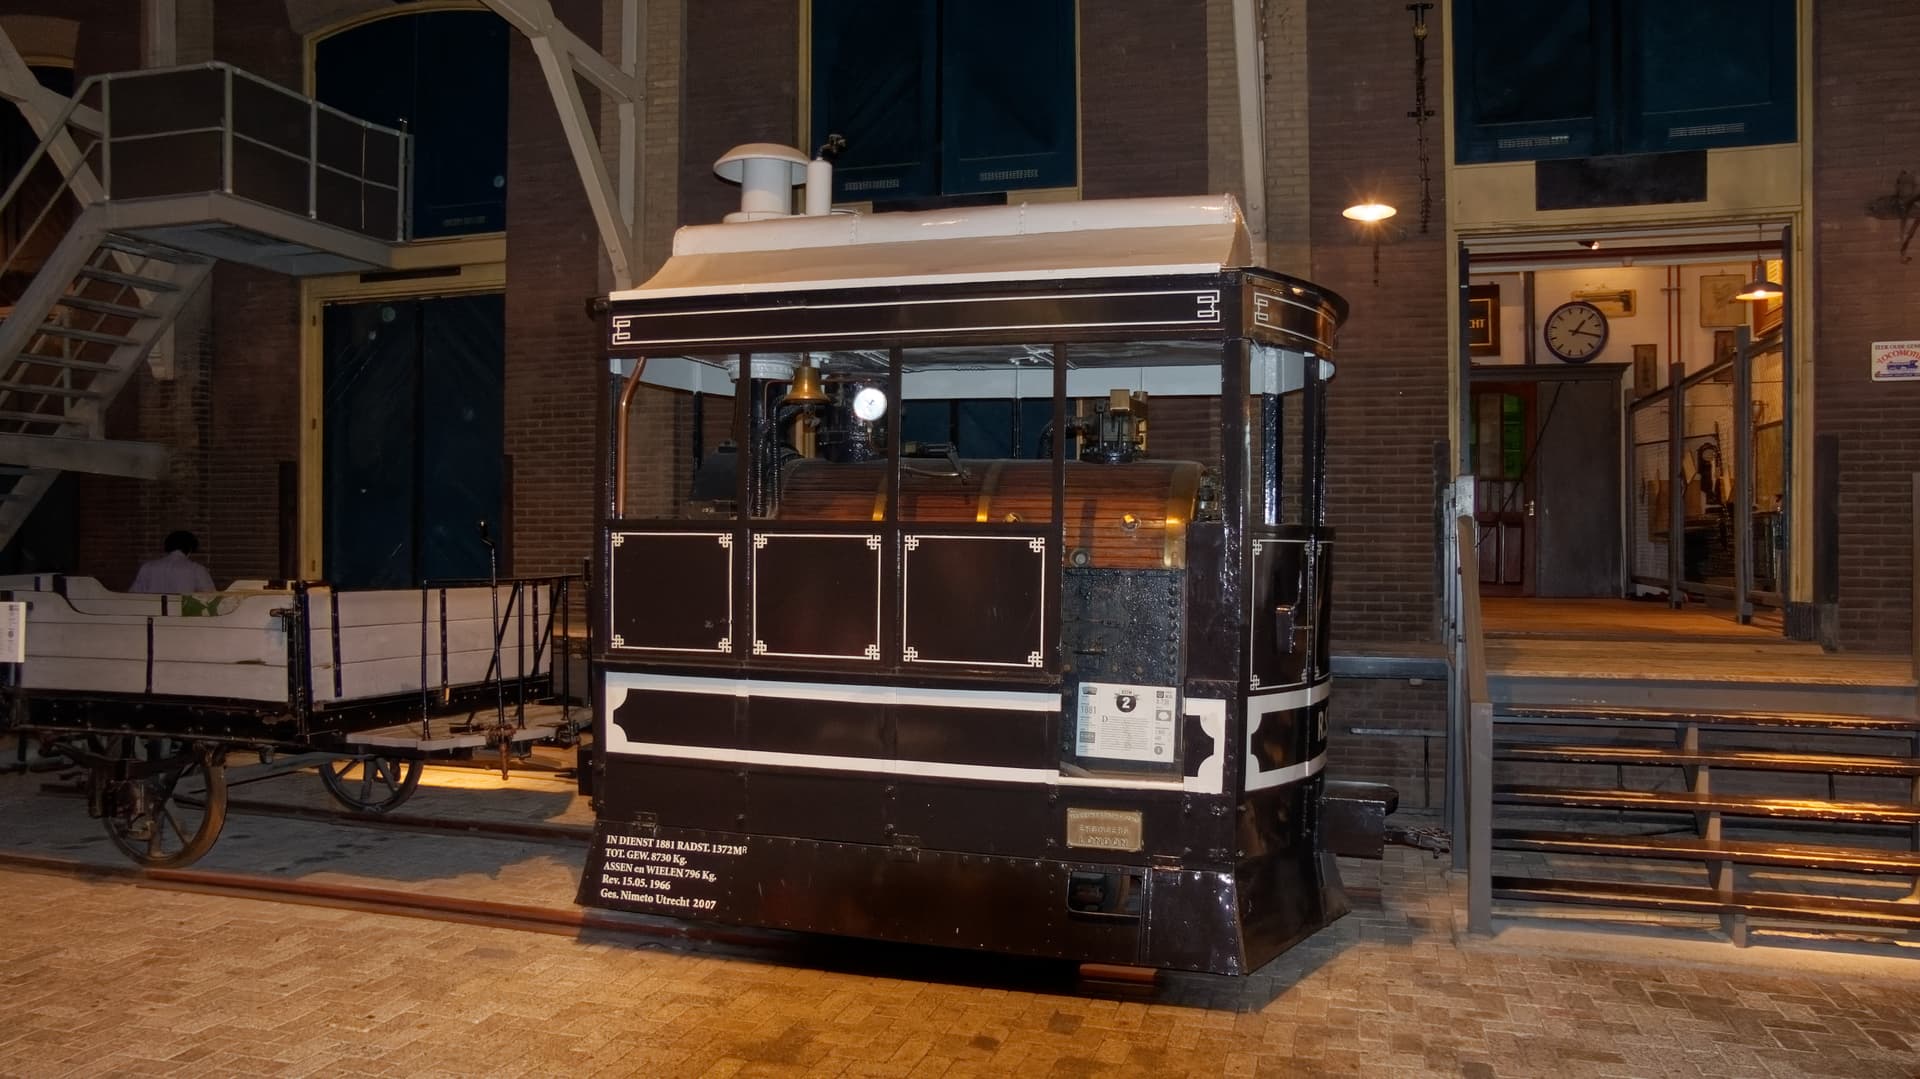
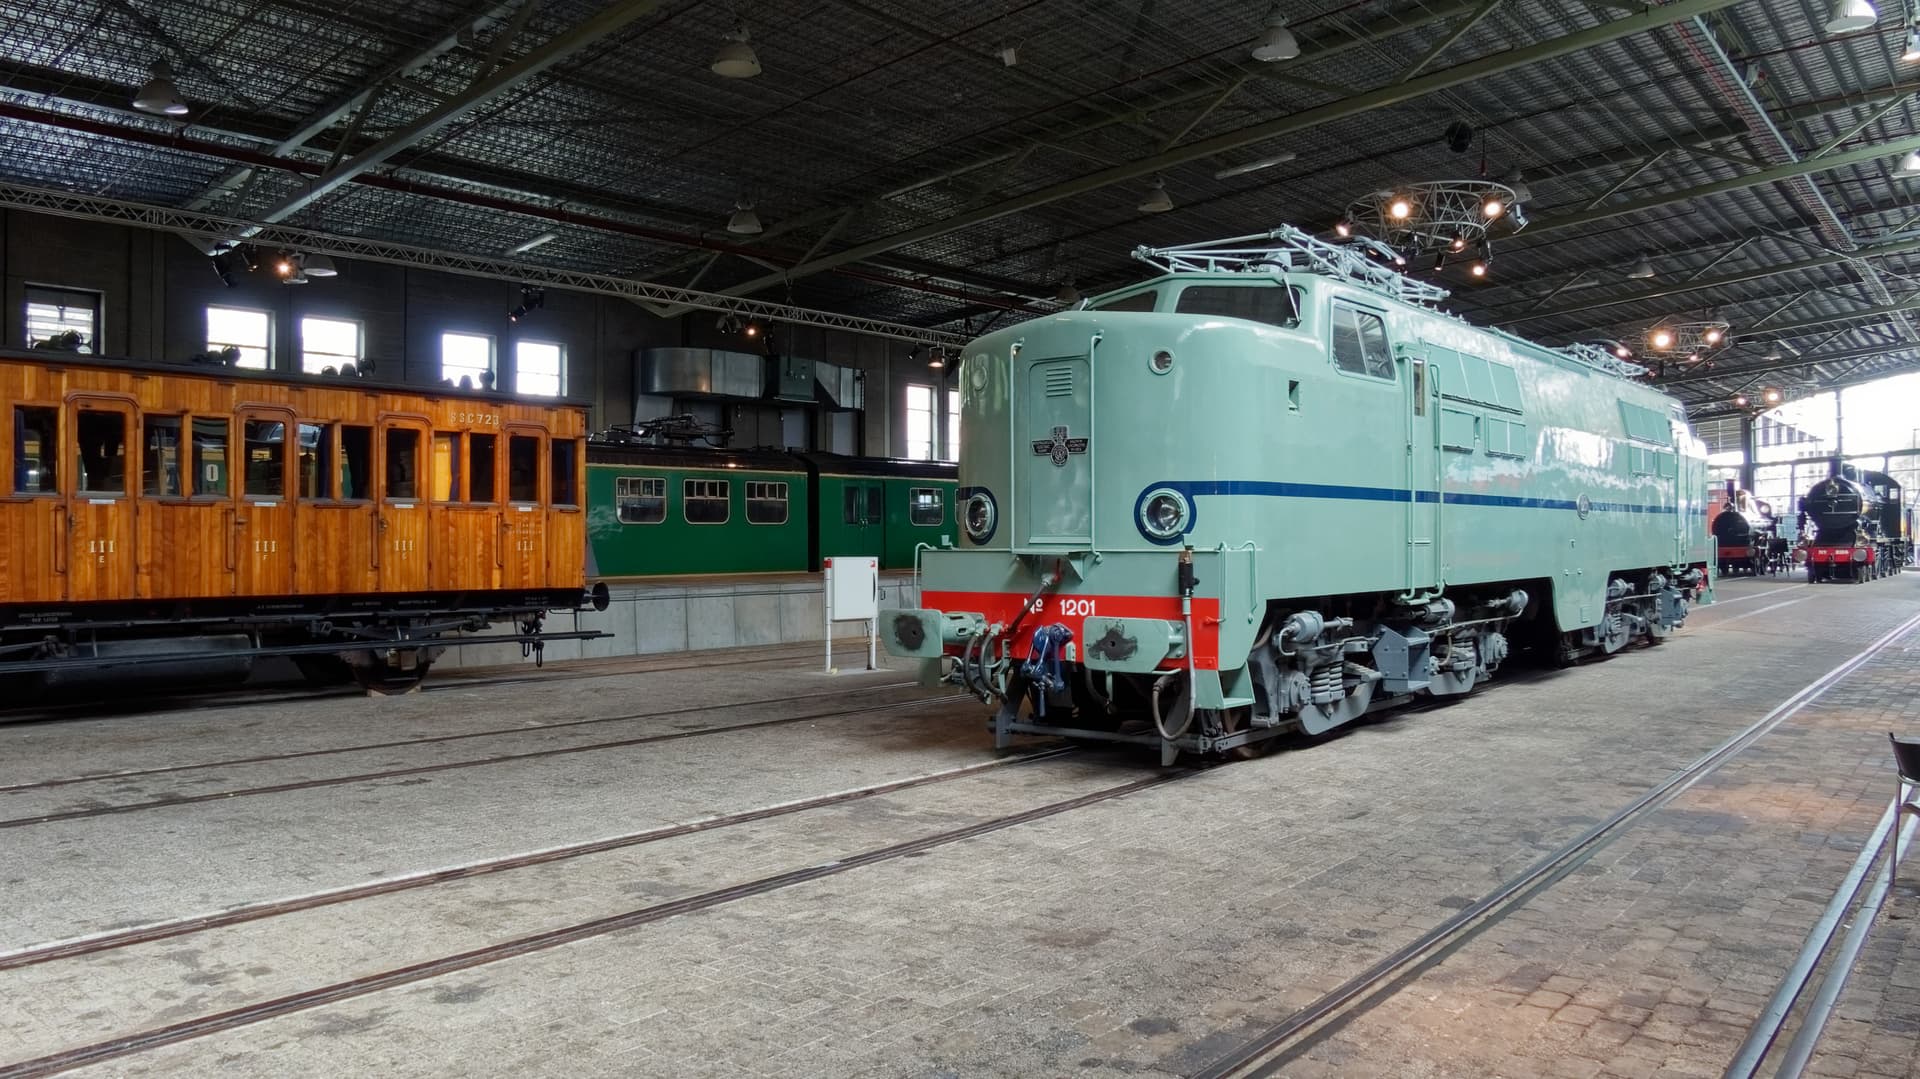
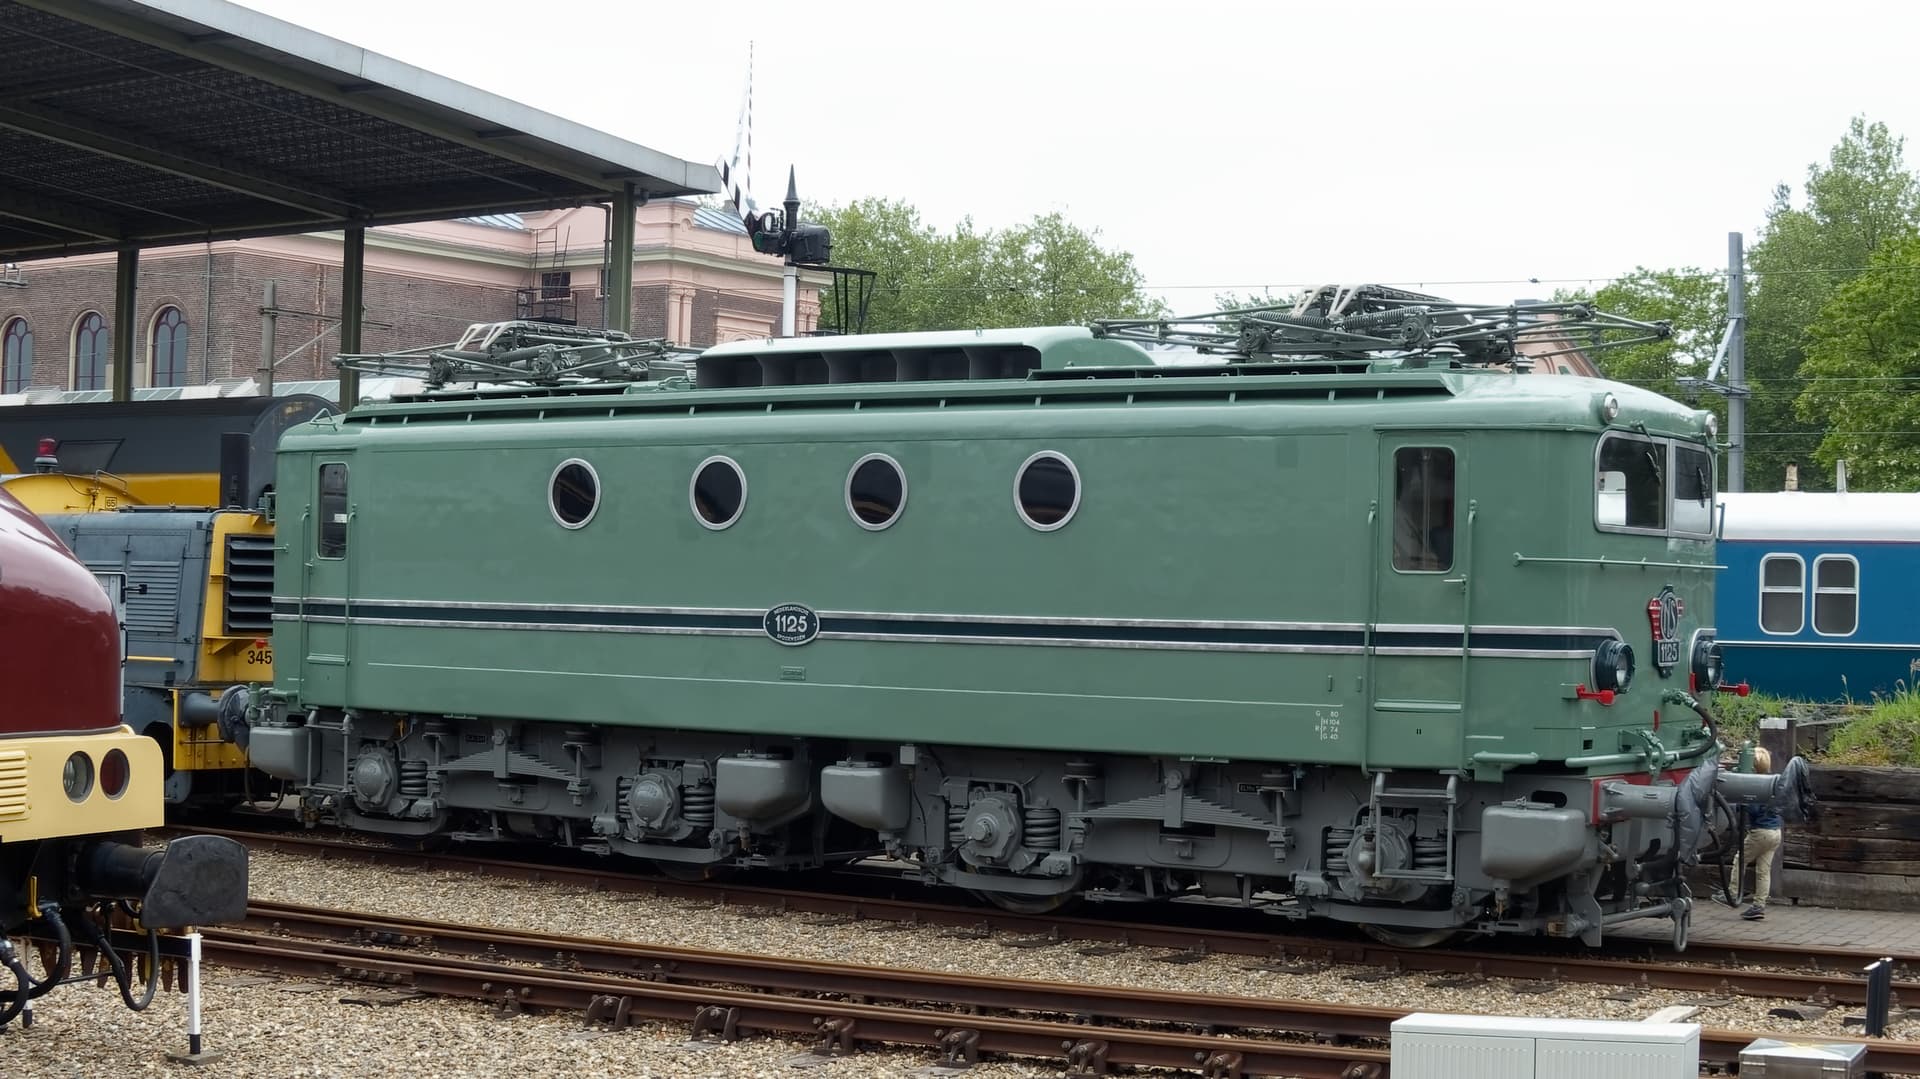
Well, that makes them more appealing, but I guess I need to shoot in B&W. I took photos of narrow gauge steam locomotives in Colorado - I need to check this out. I like locomotives that are mostly the same as when they were in use in the 1940’s or so. When they get painted up in gaudy colors (to me) I’m no longer interested. Looking at your photo up above, I suspect it might look much better (to me) either in B&W, or perhaps Using PhotoLab to dull the colors. The more I look at your image, the more I like it. Did you shoot it in. ‘raw’? Is there any more detail in/behind the steam? Very nice!!

Thanks for posting this; a nice summary.

BTW, note that proper usage of the Kelvin scale is to just use the numbers with a ‘K’ (i.e., no ‘degree’ symbol).

specially for @Joanna :slight_smile:
spoorwegmuseum Utrecht:


enjoy

2 Likes

Not sure how to write this. I don’t want to start out by copying what others have done - I’d rather have an open mind and do what I think is appropriate, and gradually learn how to improve.

Cropping is very frustrating, as every little bit I crop removes information that was captured in the image. In my case, I was already cropping in my mind, trying to get something I like captured by the sensor. In my warped way of thinking about this, the only limitation is how large the final image can be.

I appreciate how Joanna can maximize the sensor and image to get the best possible end result - but what to do when this is not possible? Suppose for physical reasons, you can’t get close enough, or use a lens that is long enough, to fill the sensor with the desired image. I’m constantly running into that situation. My answer is to “just do the best I can”. Maybe I’ll eventually get more lenses and a larger camera bag…

Of course now, having seen how Joanna used PL5 to “remove” the clutter in the background, I’m thrilled with how she got a lovely (to me) photo out of the small amount of “bird” I managed to capture. I think one of the biggest rules of bird photography is to use a long lens - and 135mm ain’t a gonna accomplish this. My brother used a 300mm, on his Df, and he managed to get closer than I could, and the only problem I see in his images is that he used a very simple/inexpensive/light-weight Nikon 70-300 that I bought many years ago only because my 80-200 was getting too heavy for me.

I managed to get better photos of a pair of Sandhill Cranes that trusted me enough to allow me to get very, very close. I’ll work on those photos in a few days.

The Hawk was much more cautious - but in my opinion (@Joanna @Wolfgang @OXiDant @platypus and you, @KameraD ) will surely tell me I am wrong, the only thing I “lost” by using an inappropriate camera and lens for my Hawk photos, was the ability to make a large print. What Joanna did to it is “stunning” in my mind, and I never expected to even be able to get this much of a photo:

Until now, I never even considered Using PhotoLab to improve my image this way. If it works on my small image, it should work on better/larger images.

I think @Joanna could start a new discussion here, using my before/after images, and her method of using control lines to turn a so-so photograph into something much more beautiful. I already tried to get a blurry background, by not stopping down too much on my 135, but Joanna took this to what I would call “perfection”.

I think this and the other train related images are fascinating - I’m not sure if this is a railroad museum, or operating railroad equipment. Either way, you are lucky to have such a fascinating place nearby, and to be able to walk around wherever you want to take photos.j

My thoughts are that if they allow you do do so, you could set up a tripod and try for perfect photos for each of these images. One accessory that may or may not help is a polarizing filter, which can possibly remove the reflections on several photos, such as the first. If it were me, I would then do a lot of cropping, especially for images like the fourth one from the top, where the light blue electric engine is clearly the subject of the photos, and the steam engines behind it add to the photo. This makes me feel at least part of this area is a railroad museum. Again, about the polarizing filter. Wow, such a wonderful place.

So nice!!! and you got such interesting photos, and the colors are so bright and clear. I’ve been to a railroad museum in Colorado, and walked around with my camera, and for most of my photos my first, second, and third photos weren’t good enough for me, and it was a struggle to get something I was satisfied with.

Thank you for posting these!!! In my next life, maybe I’ll be able to visit.

Yes, it’s that simple – the better your pic, the less you have to do in post.

Had tried something quite similar as @Joanna, but didn’t bother to publish.
Moved my version to VC3 → L1003792 2021-12-07.dng.dop (362,6 KB)

Thanks, and yes, I totally, completely agree, whenever possible. My own “command” to myself is:
“Get it right in the camera, instead of trying to fix it later”.

In the real world, that’s not always possible. Sometimes things happen so quickly that I need to get a “grab shot”, sometimes along the lines of “spray and pray”, hoping to get what I want. I can give myself the best shot at a good photo by predicting what exposure might be best (including what shutter speed and what aperture are needed, and changing the ISO as needed to accommodate), and doing whatever I can to optimize what “else” is in the photo. I’m ashamed to say it, but “burst mode” is one of the tricks I use, as it gives me a choice of possible images when things are moving too quickly for me to evaluate. That, or let myself go into a “zone” where I don’t think too much, just react to what I’m seeing.

Am downloading your DOP file now. That brings up a new “problem” for me, as I’m back to using my desktop, and the past ten day’s worth of images are on my laptop…

…and the memory card, unless you’ve erased it regularly…

These are made with my old camera fz200, tiny sensor not enough DR and les skils back in 2016 i think, found them unprocessed because i knew i was there in this museum but couldent find them in my jpeg archieve. So processed them yesterday. :blush:
So my present processingskills and dxoplv5 are saved the day…:yum:

It’s a proper museum, i think they can drive, role, but are mostly stationairy

I think we go again soon just for fun. Drive the car to that place and have a nice day, (90% is roofed so no problem with rain. :sunglasses:)
Polarising filter i do have now so could be fun to use.

The first to are used every day in the summer, start with a classic ferry from Enkhuizen boating to Medemblik boarding that small train, and be driven on the old track to Hoorn, entering a small museum of old trains, then walk to the new modern tracks step in the modern train to Enkhuizen and step in your car again to go home.
Beautifull trip if the weather is good. Lots of classic sailing boats on the lake which you can photograph.
Also one i think we do next summer again.
Nice lazy day , food , sighseeing wile driven, floated by people, sun and peace.
Great! you get back in the slow days of 1960…:grin:.

Nope - one of my rules is to download photos to my computer as soon as possible after taking them, and another rule, as soon as the memory card is returned to the camera, it gets formatted in-camera.

(At times I’ve forgotten, and then I end up next time re-downloading the old images, along with new images. If I format the card immediately after returning it to the camera, this is less likely to happen.)

It sounds like a lovely place to spend some time, relax, and enjoy the visit.
A polarizing filter does many amazing things - just hold it up in front of your eyes while looking at a car with reflections, and as you turn the filter, the reflections might vanish!

One of the bad things about getting old is forgetfulness. I think I have three polarizing filters, two from my Nikon cameras long ago, and one which I used with my Fuji recently. I can only find one from the Nikon, which doesn’t turn freely (not good to drop one of these filters, which then gets “locked” in its mount), the other from my Nikon is lost somewhere in my apartment, and the one for my Fuji also has mysteriously vanished. Time to go through all my stuff. I also have an ancient Leica polarizing filter in a special mount - the mount allows the filter to “pivot” away from being in front of the lens, to where it’s in front of my viewfinder, 180 degrees away from where it started. I can then rotate the filter while looking through my viewfinder, and at the perfect spot, pivot the filter 180 degrees until it’s back in front of my lens, already configured for the photo. Great idea for a Leica, but it only fits onto my collapsible 50mm Summicron lens from the 1960’s.

https://www.adorama.com/lcplul.html?gclid=Cj0KCQiAnuGNBhCPARIsACbnLzqIZE4llnv4kYmz62wx52jP0IAj0IkGkXZHZktC1t0BJE80F4_hwZYaAmYSEALw_wcB&gclsrc=aw.ds&utm_source=nmpi-google-dsa

I bought mine used from B&H many years ago, for much less money than what you see in the above link.

about getting old, time fly’s geesh it was 2015!


the original “zuiderzee” ferry. (before the Flevopolder and other pieces of the IJselmeer was drained for land)

no diner served sadly. (i would love a 3 double bacon and cheese eggs on farmers bread (uitsmijter spek en kaas uitjes meegebakken 3 dooiers( voor de dutch readers)) and beer like Texels Skumkoppe wile sitting in the lounce… :heart_eyes: :drooling_face:
Yep i know what i do this spring/summer when covid is gone (enough) :stuck_out_tongue_winking_eye:

lots of the “Bruine Vloot” are sailing here with passengers and are for hire in summertime. your can help if you like sailing or just enjoy the sailingmotion.


my present camera is from 2017 already. still kicking strong.

About filters just try K&F concept filters. (very cheap against there quality) if you drop those you just buy a new one.
watch some reviews on youtube and i think you like it.

2 Likes

If I lived close enough, and if I could afford it, I would go out on these ships/boats (??) quite often. Lovely photo opportunities, but not sure how I would photograph they at sea?

I like the reflections you captured in the water. My favorite is the next to last image, but I would crop some from the top and the left side, and bring out some detail in the large dark mystery object in the middle of the image. Once I enlarged it, I was surprised at all the detail in this image. Would look beautiful hanging on a wall. The ship in the photo above this one is very similar, but not the same.

That’s my first experience with trains :grinning_face_with_smiling_eyes:

My first Märklin HO

1 Like

Lovely - I’ll need to find my photo of my Lionel train set from when I was a kid…

Since we’re posting railroad images, here are a few of the jpg images I took:
(I shot in "RAF + JPG)

…and here is my own Lionel Train Set when I was growing up:

1 Like

Meanwhile, I have a predicament - I’m not going to dump my Leica M8, even if it might be the rational thing to do, and I don’t want to always walk around with my M10 or my Nikons. Having learned how to edit my M8 photos in DarkTable, that’s what I started doing - but I would prefer to use PhotoLab, which won’t accept the “dng” images from the M8.

Plan #1, which I used to do - edit the images in DarkTable to get some of the hard work done, and then export as a TIFF image which PL5 might accept (unless it is too large, and I can’t find any way to export to a “compressed tiff file”), and do my final editing in PL5, or

Plan #2. use DarkTable or Apple’s Finder to convert the dng images to TIFF, and do everything in PhotoLab.

My question is, if I do any of the above, is there anything I really ought to do while the raw files are still in dng format, before I convert them to TIFF?

(If I had my druthers, I wish PhotoLab would accept images from unknown cameras, and just give a warning that since PhotoLab doesn’t recognize the camer, no corrections are being made.)

As soon as you leave RAW images, you lose the ability to recover shadows and highlights to the same extent.

Certainly, if you get to know your M8 well enough, you don’t even need to use RAW files if you are not planning on editing them as RAW - just learn the limitations of the M8 and shoot JPEG. IOW, don’t shoot high contrast shots and learn to position your exposure to avoid blowing highlight.

Come on, if we can shoot 5 stop colour transparency film, why not use the same techniques to shoot 8-10 stop JPEGs?

It isn’t a sea. Any more at least.

I think you can easily change to englisch.

All those sailing images are shot from the Friesland ferry. The fz200 has a 24-600mm f2.8 zoom and 12mp sensor, and a setting called izoom which is a cropped rawfile (yes it crops in the rawfile so the lens becomes a 1200mm efl around 48x zoom.
It’s just image quality wise enough after processing. But anymore cropping must be done carefully.
I tested my 14140mm(280mm efl) against it, around 560mm efl equivalence (cropping until viewing angle is the same is where it is equal.
Now i have a 300mm (600mm efl) on my g80. 16mp. Cropfactor 2 against FF.
I can cropp in that file to a viewing angle of 800mm-1000mm efl before i hit the croppingthreshold.(in cold air that is)

The 346 locomotive image looks the most as working and has the best viewingangle.
The others are nice too.
edit:
add some images of both lenses.


see this tiny sensor is quite powerfull in it’s 24xzoom f2.8 So details are quite nice.
now the 100-300mm lens at colder moments march:


the centre is wide open at f5.6 the sharpest even at blunt max300mm (know that from 270mm it drops a bit.
Stil in real life shooting f7.1 is better because of DoF and corner sharpness. this is a m43 100-300mm aka 200-600mm efl.
if you see this in the end the m43 is newer better sharper, but that fz200 bridge punched well above its weight at that time.

So FullFrame is in this case of focal length a back killer and financial bleeder with lenses and for just a hobby a m43 g9 20mp with a PL100-400mm f4-6.3 much (even better then my images) easier to handle to finance and to carry.

When the original M8 was released, all I read was terrible reviews as to the jpg images, and the need to shoot in ‘raw’ to get the best results. For example, from here:
https://www.dpreview.com/forums/thread/3758272
Unlike later Leica cameras, like the M (240), the M8 and M9 do not have good JPEG engines; the in-camera demosaicing process is not carried out too well, leading to images that are over-sharpened with less subtle colours.

I would not willingly shoot colour JPEGs on the M8/M9 or X1, but B&W can look okay. I especially like the B&W JPEGs produced by the X1. The M Mono produces outstanding JPEGs - because no demosaicing is needed - demonstrating the limitations of the M8/M9’s in-camera processing.

I still find that M8/M9 DNG files are processed best by Capture One; Cap One seems to do an especially good job with CCD sensors, and the difference shows.

However, after reading your post, I just re-read most of that thread, and maybe M8 jpg images are not as bad as I was led to believe. You’re right, I should try M8 jpg images myself and then see what the results are.

I agree with what you wrote, but this was Leica’s first attempt at a digital sensor, and I figured I should play it safe, especially as I was already changing to shooting in RAW most of the time anyway, with all my cameras. I suspect you’re giving the M8 more credit than it deserves, as Leica clearly didn’t understand properly what they were doing - which is a potential problem for many people because of the lack of the IR blocking filter.

Easy enough to test - I’ll shoot some M8 images in ‘jpg’, process in PL5, and see how they turn out.

(I have no plans to use my M8 as a camera for “serious photography”, but just to have it with me most of the time for walking around. Also, my D750 just got shipped back to me, so I should have it this week.)

Oops… Sorry, I messed up. I guess I was reading all the wrong places about the Leica M8 over the years, and how Leica made a mistake in the design. Well, apparently it was not a mistake, it was deliberate. The following is a discussion that started in 2006, which mentions the issues that arose from the M8, and how and why Leica and Leica users dealt with them:

http://www.outbackphoto.com/reviews/equipment/leica_m8/Leica_M8_review.html

The article explains things better than I can. Sorry, I’ve been repeating things that I shouldn’t have accepted as facts. …none of this has anything to do with the faults Joanna found in my images, but I suspect those were my fault, not the camera.