@GIBF4 & all-- about Control lines
Hi Jeroen,
as you have been working on this pic your ‘old’ way, you might be interested how to in PL5 …
_MJM9746 2021-11-16.nef.dop (57,2 KB)
M = masterfile (from post #303 / with optical corrections)
VC1 = Mike Myers
VC2 = Wolfgang (2nd Control line to extend sampling range)
VC3 = Wolfgang (2 Control lines to extend sampling range)
Choose the COMPARE MODE
- to compare different versions instantly
(w/o recalculating; also not side by side …) - and keep the pic ‘in position’ with Local Adjustments activated
(w/o jumping around because of crop)
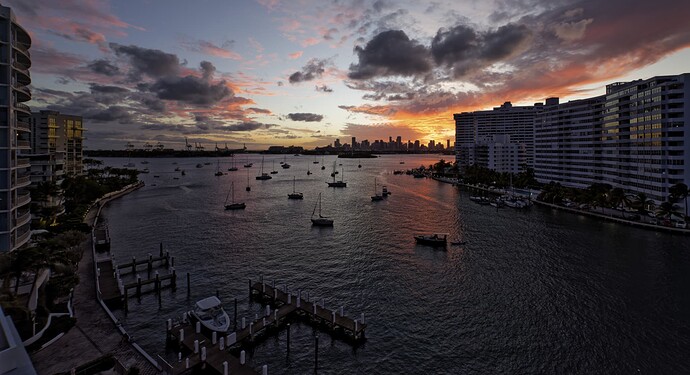
While I wanted the big block on the right to ‘get out’ of the pic, I decided to crop the sky down
to about 1/3 and let the water mirror its beautiful colour, enhancing the strong perspective.
After correcting perspective (temporarily lighten to …) I set the Spot Weighted box here right onto the sun and the second one somewhere at the bottom right, cropped to taste, moved the second Spot Weighted box around to get the ‘right’ amount of visibility in the water and played with global Contrast / Shadows.
Control the range of the Local Adjustments with MASK VIEW [M]
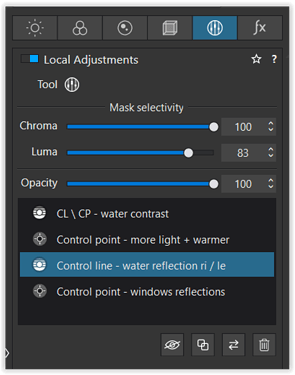
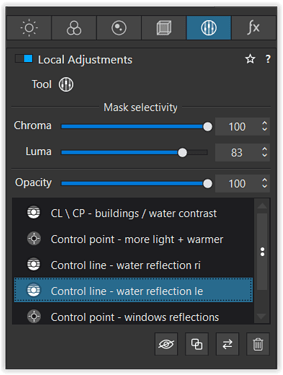
To bring more attention to the buildings and the water I used a Control line / ClearViewPlus (excluding the sky w/ CPs). A big Control point on the main reflection with a little light and a tiny bit of warmth helped to guide the viewers eye. Then I brought up the reddish reflection on the right and with a 2nd Control line the one on the left.
- in VC2 both CLs use the same settings, but different pipettes to extend the sampled range
- in VC3 I simply duplicated the CL and only moved the new pipette as in VC2
Lastly I enhanced the vibrancy in the reflecting windows on both sides.
To finalize (balance out) the pic, I revisited several steps ( and experimented with VC3 ). 
have fun


