DNG Export vs sidecars or database

  • Surely you are not keeping every single shot that you ever took? Don’t you ever cull the shots that didn’t catch the subject perfectly?
  • With such a large number of files, how do you ever keep track and find useful shots amidst all the junk?
  • Why are you shooting RAW+JPEG, when you can extract the JPEG from the RAW at any time?

And what is going to happen to them? How do you know which drive which images are on?

Then you’ve presumably got clones of all those drives!?

It seems to me that you are creating a great deal of unnecessary work for yourself, not to mention the cost of all those drives that are languishing in a cupboard.

When you say “processed files”, do you mean the original RAW+DOP pairs, or do you mean the exported JPEG and TIFF versions?

And I see that you mean exported files. In fact, these exported files are not “processed”, they are files that are created by PL combining the RAW with the DOP.

In that case, why would you want to move the RAW and DOP files from a location where they are already indexed?


So, I guess you folders for original files must contain…

  • the RAW file
  • the DOP for the RAW file
  • the JPEG file
  • the DOP for the JPEG file

Wow! what a mess!


Allow me to suggest a more streamlined and efficient workflow.

  1. Do not record RAW+JPEG on your camera unless you have an immediate need to send or share JPEG files. The RAW already contains a JPEG version, which you can extract using specialist software but, more importantly, you can easily export a JPEG from within PL only for those images you need them for.
  2. If you do not have immediate need for either JPEG or TIFF copies, don’t export them straightaway. You can export them at any time and delete them once you have used them, thus saving masses of disk space.
  3. macOS contains the Spotlight database, whereby you can index and mark files with Finder Tags, so you don’t need to invest in an external DAM if all you need is keywords and/or coloured tags.
  4. Once you have used exported files, delete them - you can easily re-export them at any time.
  5. My RAW files (with their DOPs) are stored in a folder hierarchy of Location|Year|Month|Day - Finder Tags allow searching across those hierarchies.

Totally ignore the DNG option, unless you want to pass files on to another third party app. DNG files are massive and I have never found a use for them. They used to be useful for previewing noise-reduced files but now that PL8 has the new loupe that lets you see a larger de-noised preview, they have become redundant.


There are only really two file formats that you require for exporting…

  • JPEG for immediate sending to folks or posting to websites.
  • TIFF for sizing and sharpening for printing.

Do not export unless you have an immediate need for the exported file, which can then be deleted after use. The only exception I make to this rule is when I am assembling an exhibition, when I create correctly sized TIFFs and assemble them in a project folder for repeat printing for customers.
2 Likes

I have to agree with everything that @Joanna has said and I will add to that. All the external discs that you have. I would suggest buying a NAS and putting all the contents of those discs onto the NAS. I do suggest reading up and getting familiar with the advantages of a NAS. It would certainly make your work a lot easier.

1 Like

Not really the topic here, but I do that on holidays. RAW plus 1/2 size jpeg for e-mail.
Back home, I dump the jpegs.

1 Like

Your question was not directed at me but I’ll answer it anyway.

In a word, effort.

It is just so much less hassle to let the camera capture RAW+JPEG than have to extract the JPEG from the RAW if it turns out I need the SOOC JPEG. I use 128GB SD cards in my camera and my data disk is a 10 TB HDD, storage space is not an issue. For me, that embodies ‘simple’, and ‘keep it simple’ is usually the best advice.

1 Like

yes, thanks, that’s what I do now.
And sometimes also a third case which is a scaled down jpeg for web use.
Jay

I saw someone mention iMatch… thanks for pointing out photosupreme with its MacOS option.

I appreciate your suggestion about NAS.

I kind of arrived where I am gradually from more humble amounts of photography, and sticking to doing what I knew how to do.

I’ll learn about those NAS. I am setting up a new computer, hence all the questions as I make an effort to get better organized.

Thank you for sharing all this. I have read every word, twice.

Its enlightening to hear how others approach these issues.

I won’t reply to every comment, but a few things:

JPEG evolved to JPEG plus RAW, and I never dropped the JPEG, though I thought about it. However, sometimes I like to see the Olympus in-camera JPEG result. I learn and sometimes Olympus does better, or their JPEG is a better starting point.

by original I always meant the RAW from the camera, and the camera-generated JPEG. the JPEG and TIFF created using Photolab I always meant to call “processed”, meaning file created by processing of the RAW.

RAW and DOP are together on the external drive and dont move so I am OK there as long as I can find the correct drive and files. I can do the by dates, and by the first several characters/digits of the filenames, which are retained on all the processed JPEG and TIFF filenames.

I do not normally have separate DOPs of the JPEGs created by processing RAW files using PhotoLab. But they do arise if I happen to open those JPEGs in PhotoLab for some trivial task like cropping differently for some specific use.

I do delete some of my frames, in camera, or later. But I dont delete down to only retaining the RAW that I initially selected and processed. During certain seasons here I am out more shooting than I can keep up with for processing or pruning.

Its true I have reached a point of needing to be more efficient, and I appreciate all the feedback I am getting.

I need to find a middle way between being totally efficient and frugal – at the cost of being a slave to managing files and drives-- and the other extreme of letting total photographic freedom lead to bloat and chaos.

So my workflow needs to evolve.

My endpoints, using the JPEGs I developed from the RAWs, include:

  • printing at wall art size for myself or as gifts
  • entry in juried art shows, and if accepted, printing for show
  • entry in photo contests
  • create a photobook, for myself or to share, of a wilderness trip, or a specific selection of birds by location or time or type of bird.
  • showing on my smugmug photo site

So my “processed” photos become a resource for more activities, they are not the ends in themselves.

Jay

What criteria do you want to index and search by? If you only need keywords and/or colour tags, you don’t need anything other than Finder.

Your workflow is really strange to me.
Taking RAW + JPG.
IMHO one does that if one is happy with at least some the JPGs of the cam and one doesn’t need to do any editing. If you systematically edit your shots don’t burden your storage with JPGs or toss them: once you edited a RAW there is no point keeping its unedited JPG sibling.
Exporting DNGs
These files are about 3 times as big as the RAWs. They are used in Adobe softs such as Lightroom. If you don’t do that you don’t need DNGs. Toss them.
Exporting TIFFs
What do you do with TIFFs?
I make TIFFs when I make panoramas so the pano soft works with the best image quality. Then it exports its file as a TIFF so I can do the final geometrical editing with PL and I reexport it as a TIFF. Finally I trash the TIFFs I used for the panos.
OTOH some publishers prefer TIFF files for printing.
There is no point editing an exported TIFF: do all the edits on the original RAW. If you need different versions use the Virtual Copies. You can make as many as you want.
Exporting JPGs
I make JPGs when I need to post or share them. Usually I trash them when it’s done. If I need them again I reexport them from the original RAW. So I keep very few JPGs.
Storing and saving
Keep the RAWs and their .dop files together in the same folder at all times. Otherwise you may lose all your edits.
What to edit?
Do all your edits on the original RAW file.
Never edit JPGs that were exported from your RAWs (sometimes I need to JPGs coming from other sources but it’s a different story).
Ditto with TIFFs: I do geometry corrections on the panoramas exported from my stitching soft. I did all the main corrections on the RAWs prior to stitching.
PL creates a .dop file as soon as it displays an image whather its format. So if a .dop was created for a JPG that you did not edit you can trash it.
Keeping all shots
When I make burst shootings, whether of animals or of humans, in a series of about 50 shots there are are at most half a dozen keepers if any. I trash the rest.
As a rule of thumb I trash at least half of the shots from each session.
If you follow those advices you can save a lot of space and your collection will be easier to manage.
Nick

2 Likes

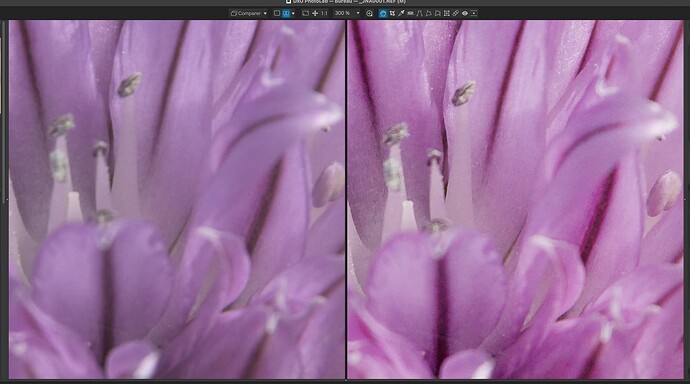
Assuming your Olympus ORF files are 14-bit, that means that they are capable of recording 16,384 different levels of each of the three colours. Whereas 8-bit JPEG files are only capable of recording 256 levels.

This means that slightly differing shades of any colour can end up being coalesced into one “average” colour.

Here’s a screenshot of a zoomed in section of the JPEG from a Nikon D200 image (on the left) compared with the NEF file…

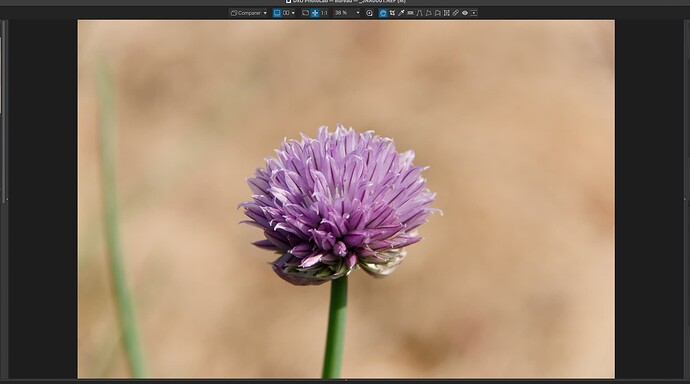
Here is a screenshot of the full NEF image…

I always set my in-camera JPEGs to be as flat as possible, so I get the nearest impression of what the RAW will look like on the back of the camera. But you can see just how much more detail is available in the NEF image.

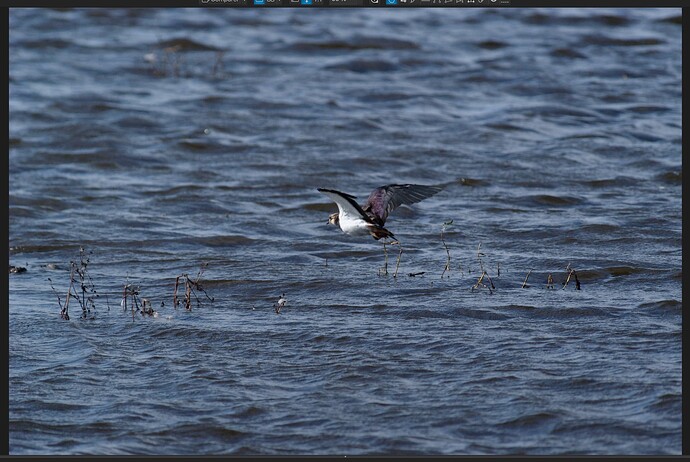
Now, I know only too well that birders tend to shoot at ridiculously long distances with lenses that are never long enough, so they end up having to crop in order get a reasonable sized bird to frame ratio. This comparison goes to show just how much more detail you get on things like plumage when you shoot RAW.


And here is a screenshot of a Nikon D100 (APS-C, 6Mpx, taken at 400mm, NEF) bird image before treatment…

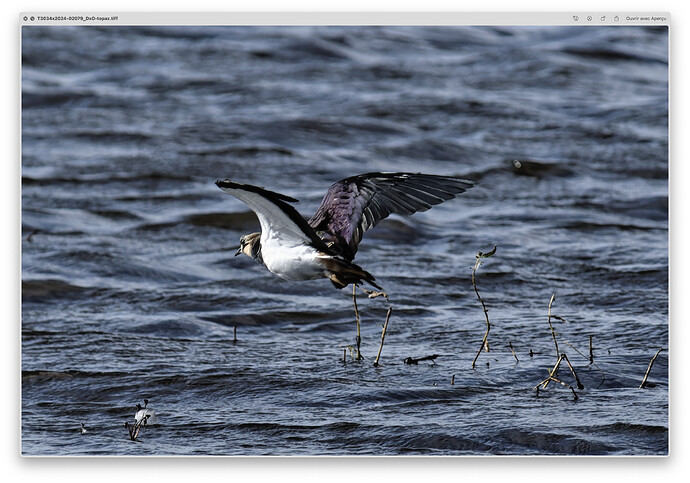
After minor adjustments to contrast, I then passed it through Topaz Photo AI for a 4x enlargement and print sharpening…

It’s not perfect due to a bit of movement blur that requires a bit more attention in Topaz but, the key is that the more detail, even in a lo-res image, the better it will enlarge.

All the same, the end result isn’t too shabby when you consider the cropped part of the original 6Mpx image was only 1.3Mpx (1398px x 929px).


Not a good idea for the same reason. The JPEG simply doesn’t have as much detail, even at the same size, as you will find in a TIFF file, due to the lack of levels of colour.

Exporting the RAW to TIFF means you are getting the 14-bit detail and putting it into a 16-bit file, thus no loss. And when it comes to resizing, the detail can be further enhanced.

Apart from printing, I guess all these should give reasonable results but, still, not as detailed as a RAW that has been processed to a JPEG.

You assume that the differences are caused by the difference of bit depth and not by the jpg compression? I’m using a laptop now and I don’t believe this screen has more then 8 bit, most likely less.
I think bit depth is valuable during editing, not during showing.

George

1 Like

He means jpegs developed from the raws.

George

Example:

External Harddrive
Folders by year, month, and day
RAW files in the folders.
(also the camera-generated JPEGs)
DOP files, for RAWs processed by DXO PL, are also in the folders.

Other Drive or Volume
my ‘library’ of selected and processed photos
in JPEG and/or TIFF formats
**Folders may be named by **
e.g. Raptor_Eagle_Golden
Duck_Mallard
Wildlife_Deer_MuleDeer_FogDec14
or by TripLocation, usually for landscapes

Specific Example from Drive containing the volume with my exported photos
Folder: **
** Wildlife_Deer_MuleDeer_FogDec14

in this folder, Photographic files exported from DXO PL:
PC140436_DXO_XD10.jpg
PC140436_DXO_XD10.tif
the suffix tells me it was processed in DXO and something about the noise reduction (XD) parameters I used.

to find the original RAW, I can go to an external drive for the appropriate year, and search PC140436.
Its DOP will be there with it.

To your question, some RAW files may be have star ratings applied in camera.

I import from the SD Card to an external drive using OM Workspace, and I may browse there and add star ratings. It’s actually a more efficient tool than Photolab for looking at alot of photos, and has tools for example, to find focus, which help.

In DXO PL, I may search by star rating before processing, to simplify the numbers I am dealing with.

I add color labels in DXO PL sometimes to note images that are the very best. and make sure I process them.

I dont add color labels in OM Workspace because I have found that they dont transfer to DXO.

On volume containing all my processed photos(JPEGs and TIFFs), in folders, I can search for text related to bird type or species or locations or trips, because those are in the folder names

I will NOT be adding DNG to this mix, now that I know what a DNG really is, a container that may or may not contain the RAW-type data before demosaicing.

My background is as a research scientist and we always kept all our original and intermediate processing of scientific data so every step could be checked at later dates, by ourselves or scrutinized by others for validity.

Organized by Workflow:

Take pictures.
Camera saves RAW+JPEG
Sometimes I apply star ratings in camera for noteworthy frames or best focused frames
delete, in-camera, some bad sequences

OM Workspace
Import camera-generated RAW+JPEG from SD card onto an external hardrive.
Folders by Year, Month, and Date.
OM Workspace creates the Date folders automatically and places image files in them.
I first create the Year and the Month folders to contain those date folders and refer OM Workspace to the right month folder before importing.

OM Workspace (sometimes)
further initial review, to delete bad sequences or shots.
Or apply more star ratings.
I do not apply color ratings in OM Workspace because I have found that they do not transfer to DXO

DXO Photolab
perhaps sort on star rating
Examine and possibly add more color ratings to alert me to images I must look at and likely process.
At some point, begin processing.
DOP sidecars are saved to the external drive next to the corresponding RAW by DXO PL.
Export processed photos as JPEG at 100, and as TIFF, both checked for exporting at the same time.

My filenames for exported JPEGs and TIFFs contain the original RAW filename at the beginning plus suffixes I add for _DXO or _TPZ depending on which software I have used.

some photos may be processed in sequence by multiple tools

  1. RAW to TIFF by DXO
  2. TIFF operated on by TPZ, if so desired for subject-selective final sharpening or overall upscaling.
  3. Use Filmpack as a final step to put on an analog film style, or to add an analog-film-style grain

Expecially with bird photos, now move the exported TIFFs and JPEGs into subfolders named by bird type and species and sometimes the location or time or event. Such as: folder name: Raptor _Eagle_Golden_TuleNWR.

MUCH LATER, to search for original RAW files, assuming I have the JPEGor TIFF located and know its filename, I use the beginning letters and numbers of the filename, which is the same across all file formats of the image everywhere.

to find an exported JPEG or TIFF, I can sort alphabetically to find the appropriate folders and browse their folder names, and/or search on words to get to likely folders, i.e. searching the bird type or species names

On my smugmug site, for the birds, I use similar notation for bird type and species in captions so I can search accordingly on smugmug. I can find specific filenames myself from my smugmug site although they are not revealed to the public.

This has evolved into this system over time. It was not created all at once by a design in advance. It’s interesting to me to write it all down now and scrutinize it. Thanks for your comments and questions.

this is really helpful, as well as your subsequent comment on exporting 14 bit RAW to 16 bit TIFF.

So I think RAW to TIFF, and using the TIFF for minor further processing with other tools is OK, such as cropping or slightly tweaking brightness or contrast after seeing the first actual print. Upscaling in TPZ from the TIFF seems like it should still be OK if I understand correctly.

thank you.

Jay

Thanks for pointing this out, along with all the other information. I just picked up this point today while rereading your posts again.

I’ll need to pay attention to which printers accept TIFF files. some printers only take JPEGs.

when I upscale using Topaz, I have always started from the TIFF file. Now I know why I should do that always.

Jay

I did not know this about Spotlight. Thanks.
Jay

Thank you for sharing all this detailed information.
I have read through it carefully and I am still digesting all the good comments I have received here.
Jay