Now for using the Soft Proofing tools on the same image.
- for monitor, turn on Soft Proofing, set the profile to sRGB and activate the little monitor button…
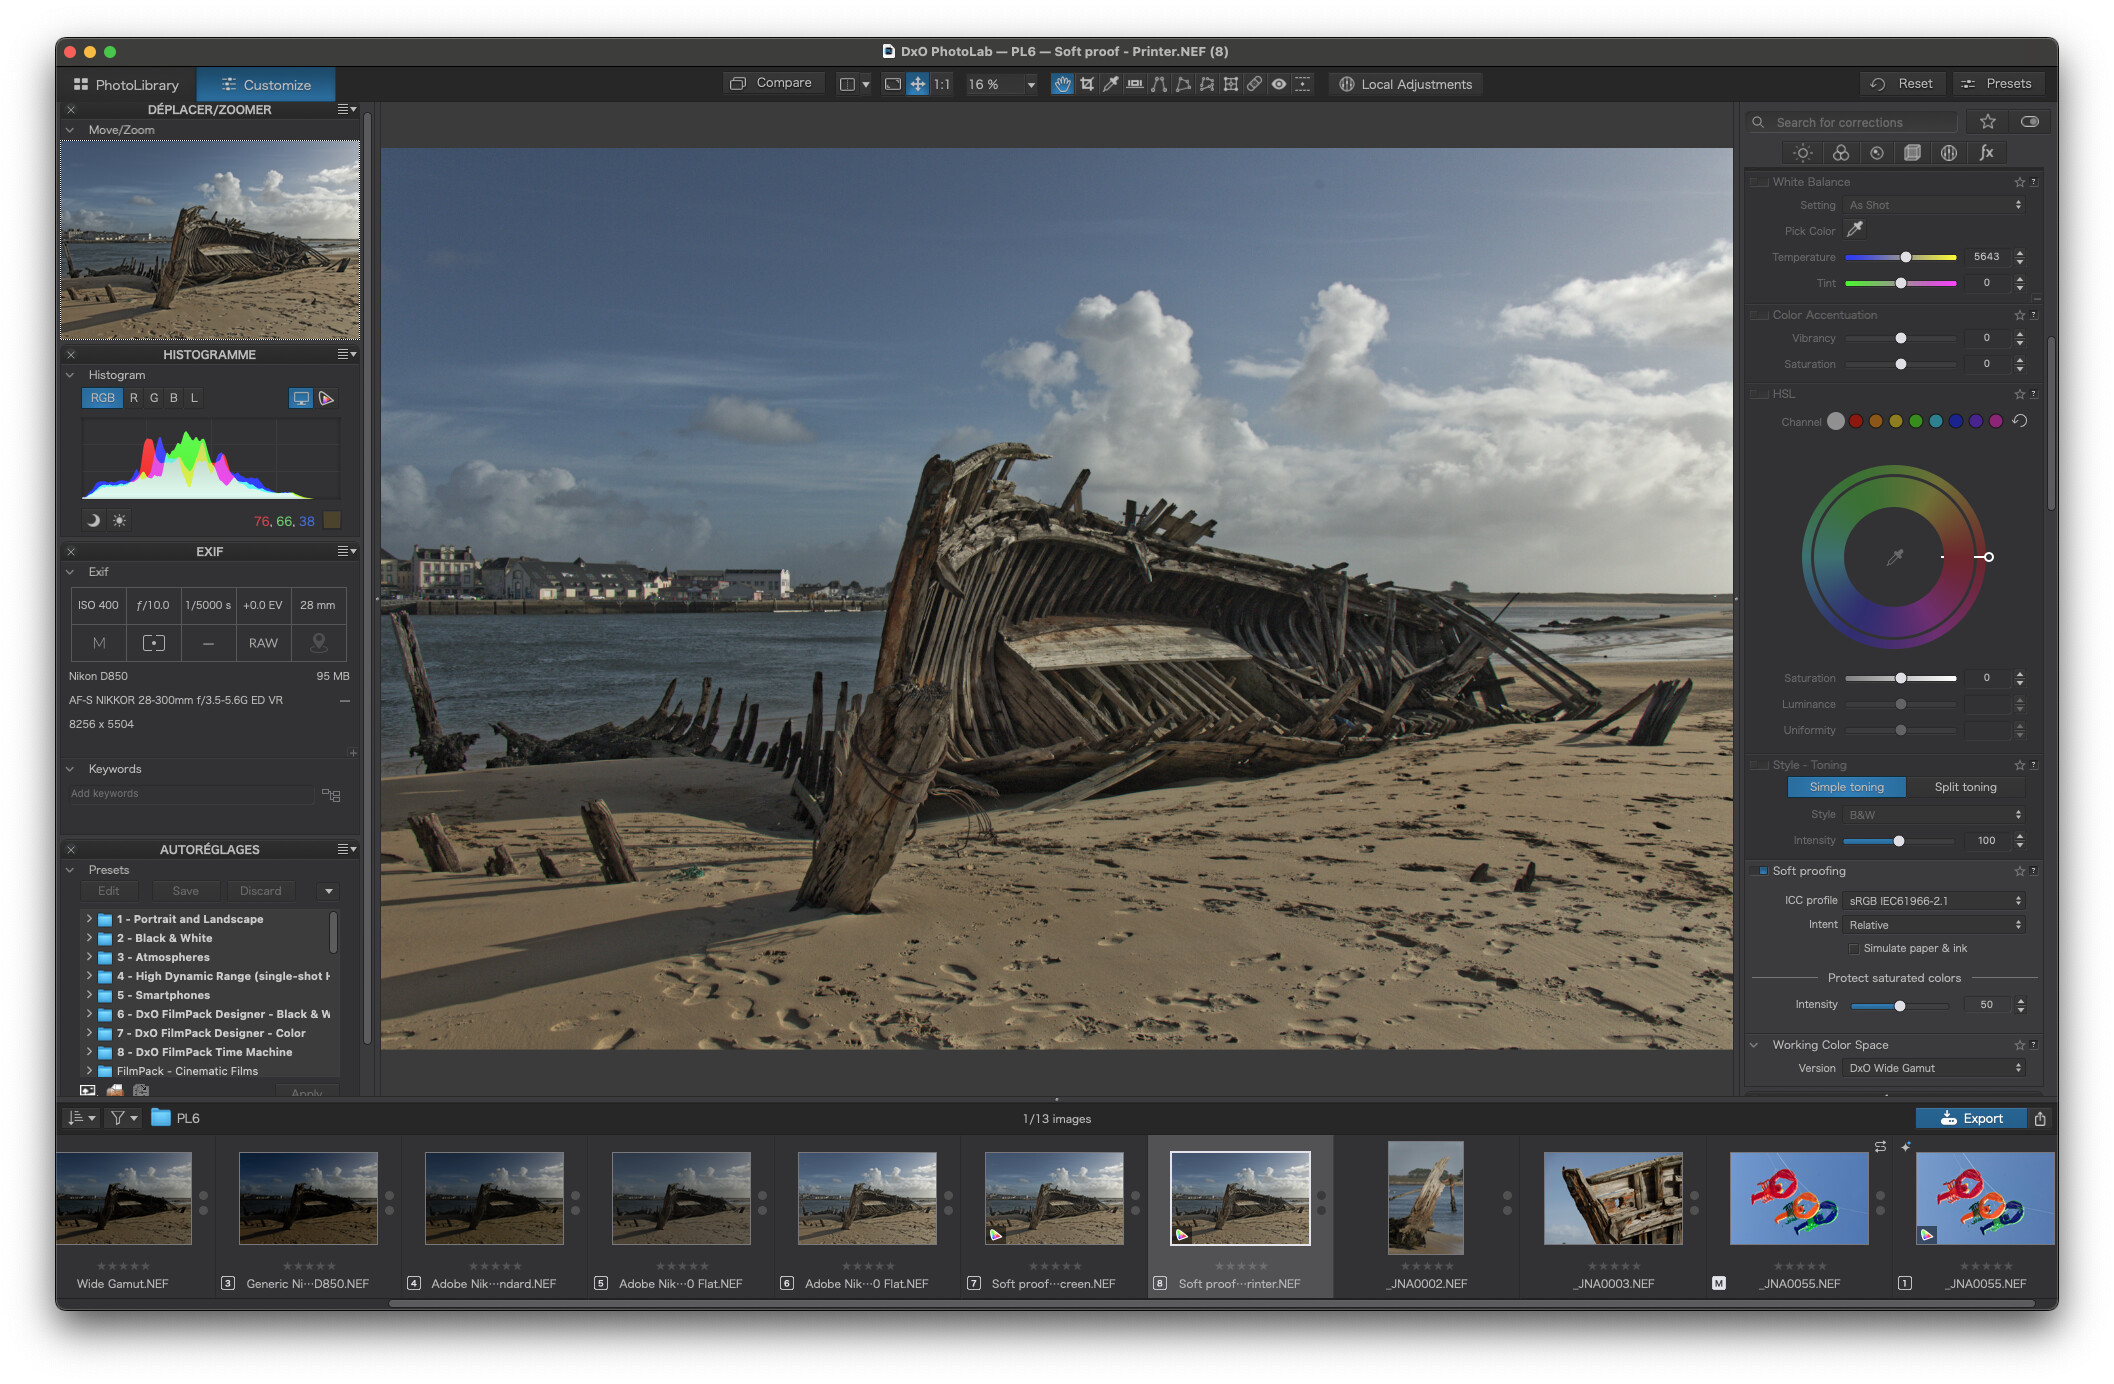
We have a winner! Apparently, no adjustments required.
- for printer, set the profile to my custom Canon profile, activate Simulate paper & ink and activate the little gamut button…
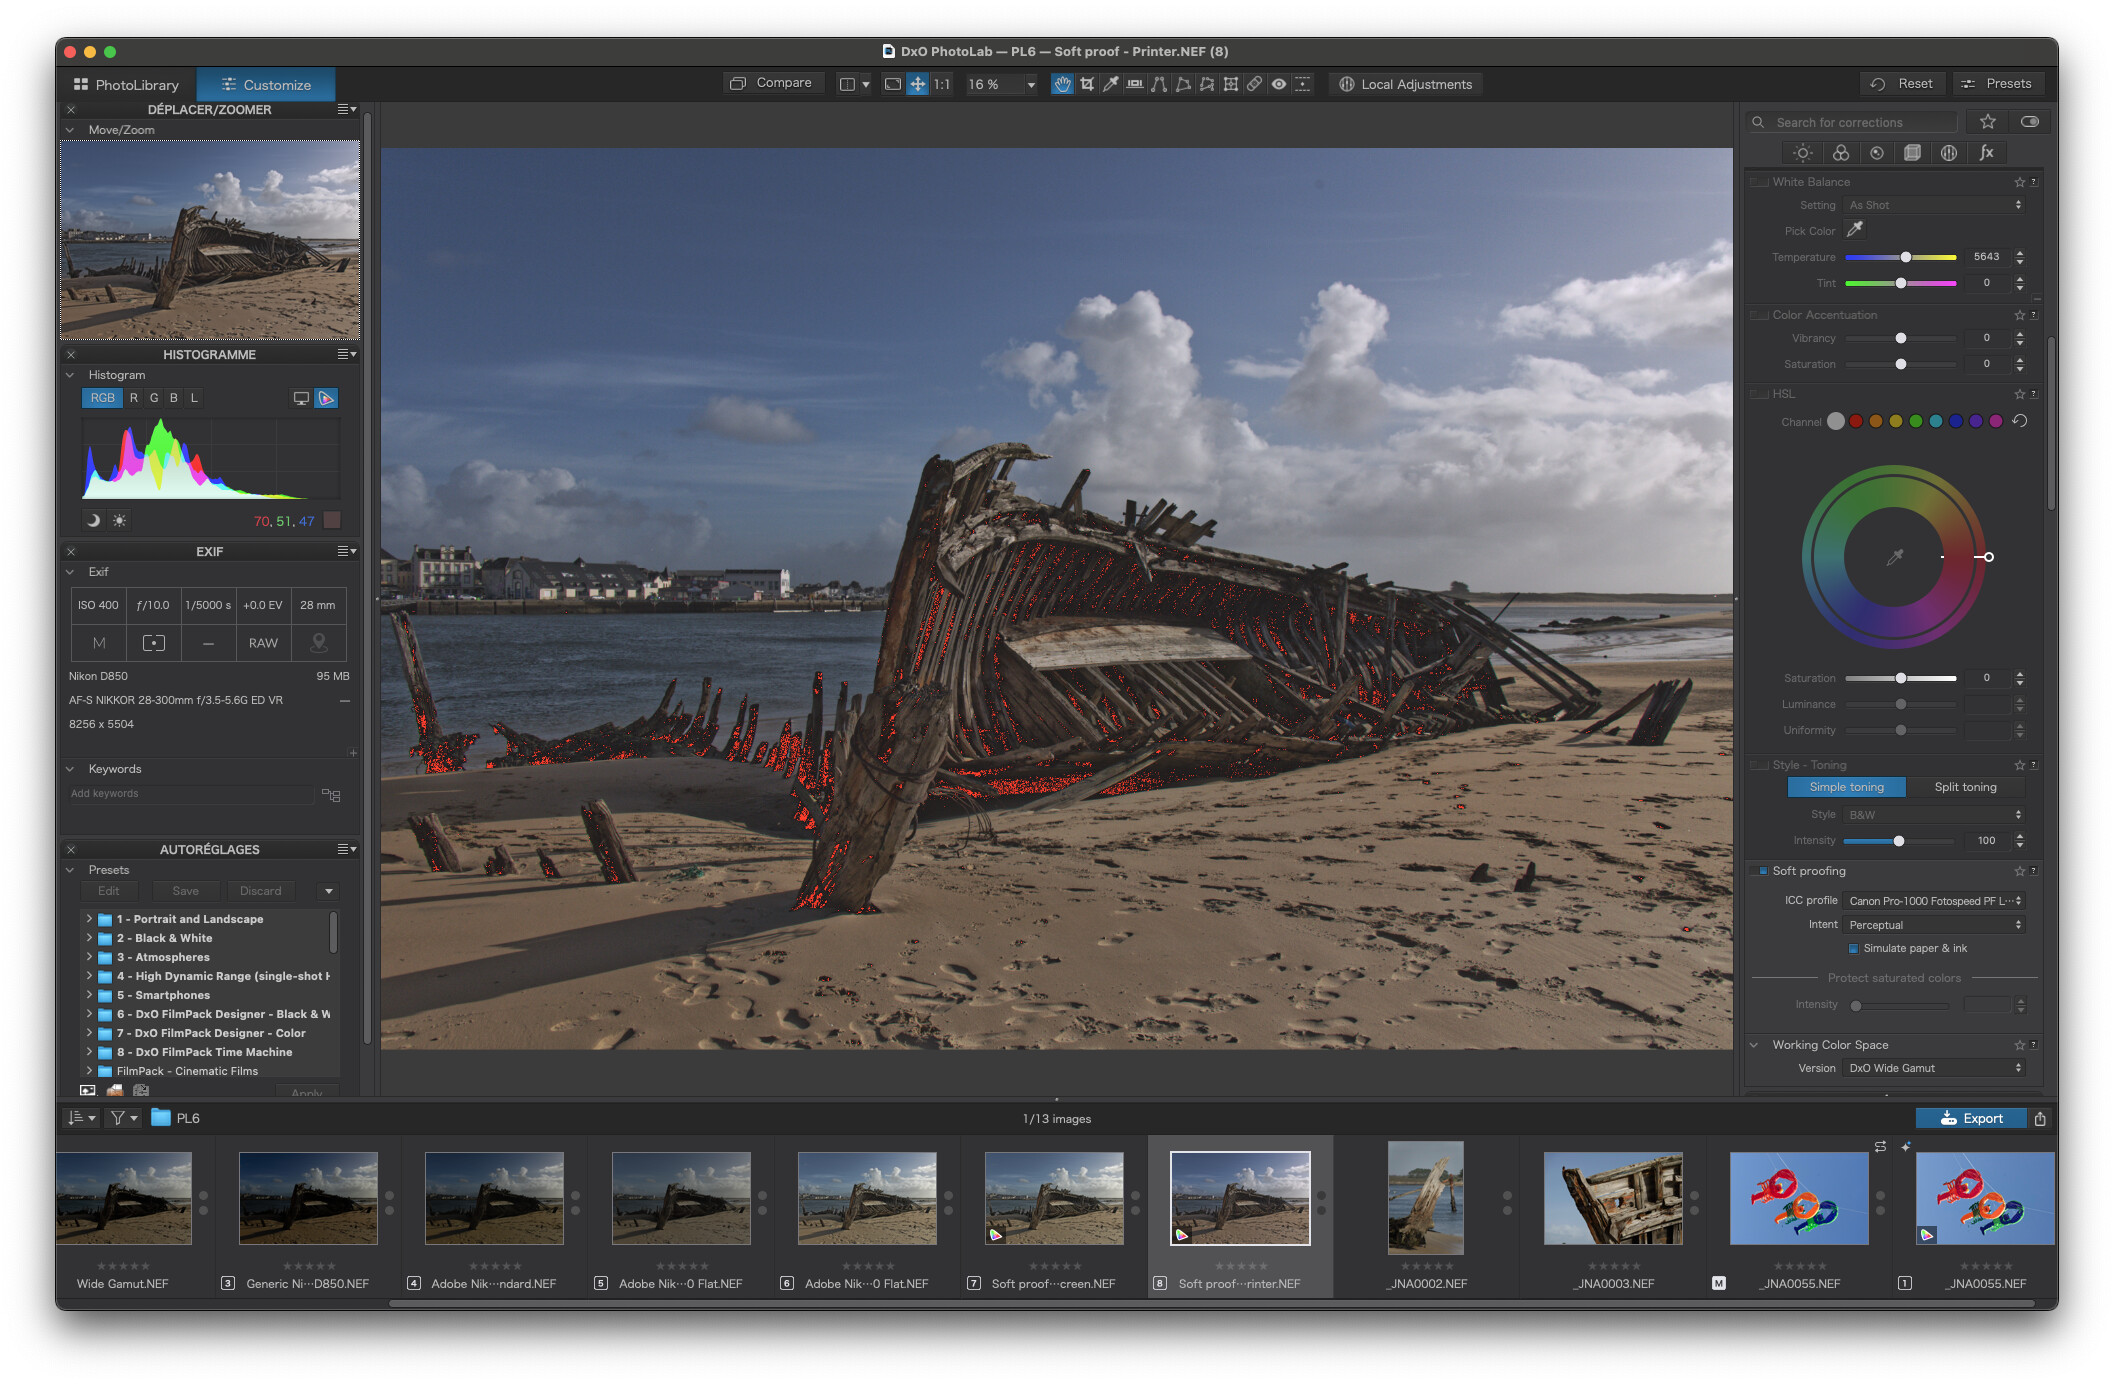
Two things to notice:
- There is a light colour change to a more magenta cast and a slightly flatter tonality…
- The OOG indicators are visible in the deepest shadows.
So, I try to use the Colour Wheel to adjust, what I assume is a colour gamut problem, but which cannot be cured by selecting the area with the pipette, no matter what colour, saturation, luminance or uniformity is selected.
However, going back to the Tone Curve and raising the lower end by about 10 points, does, finally, almost, remove the indicators…
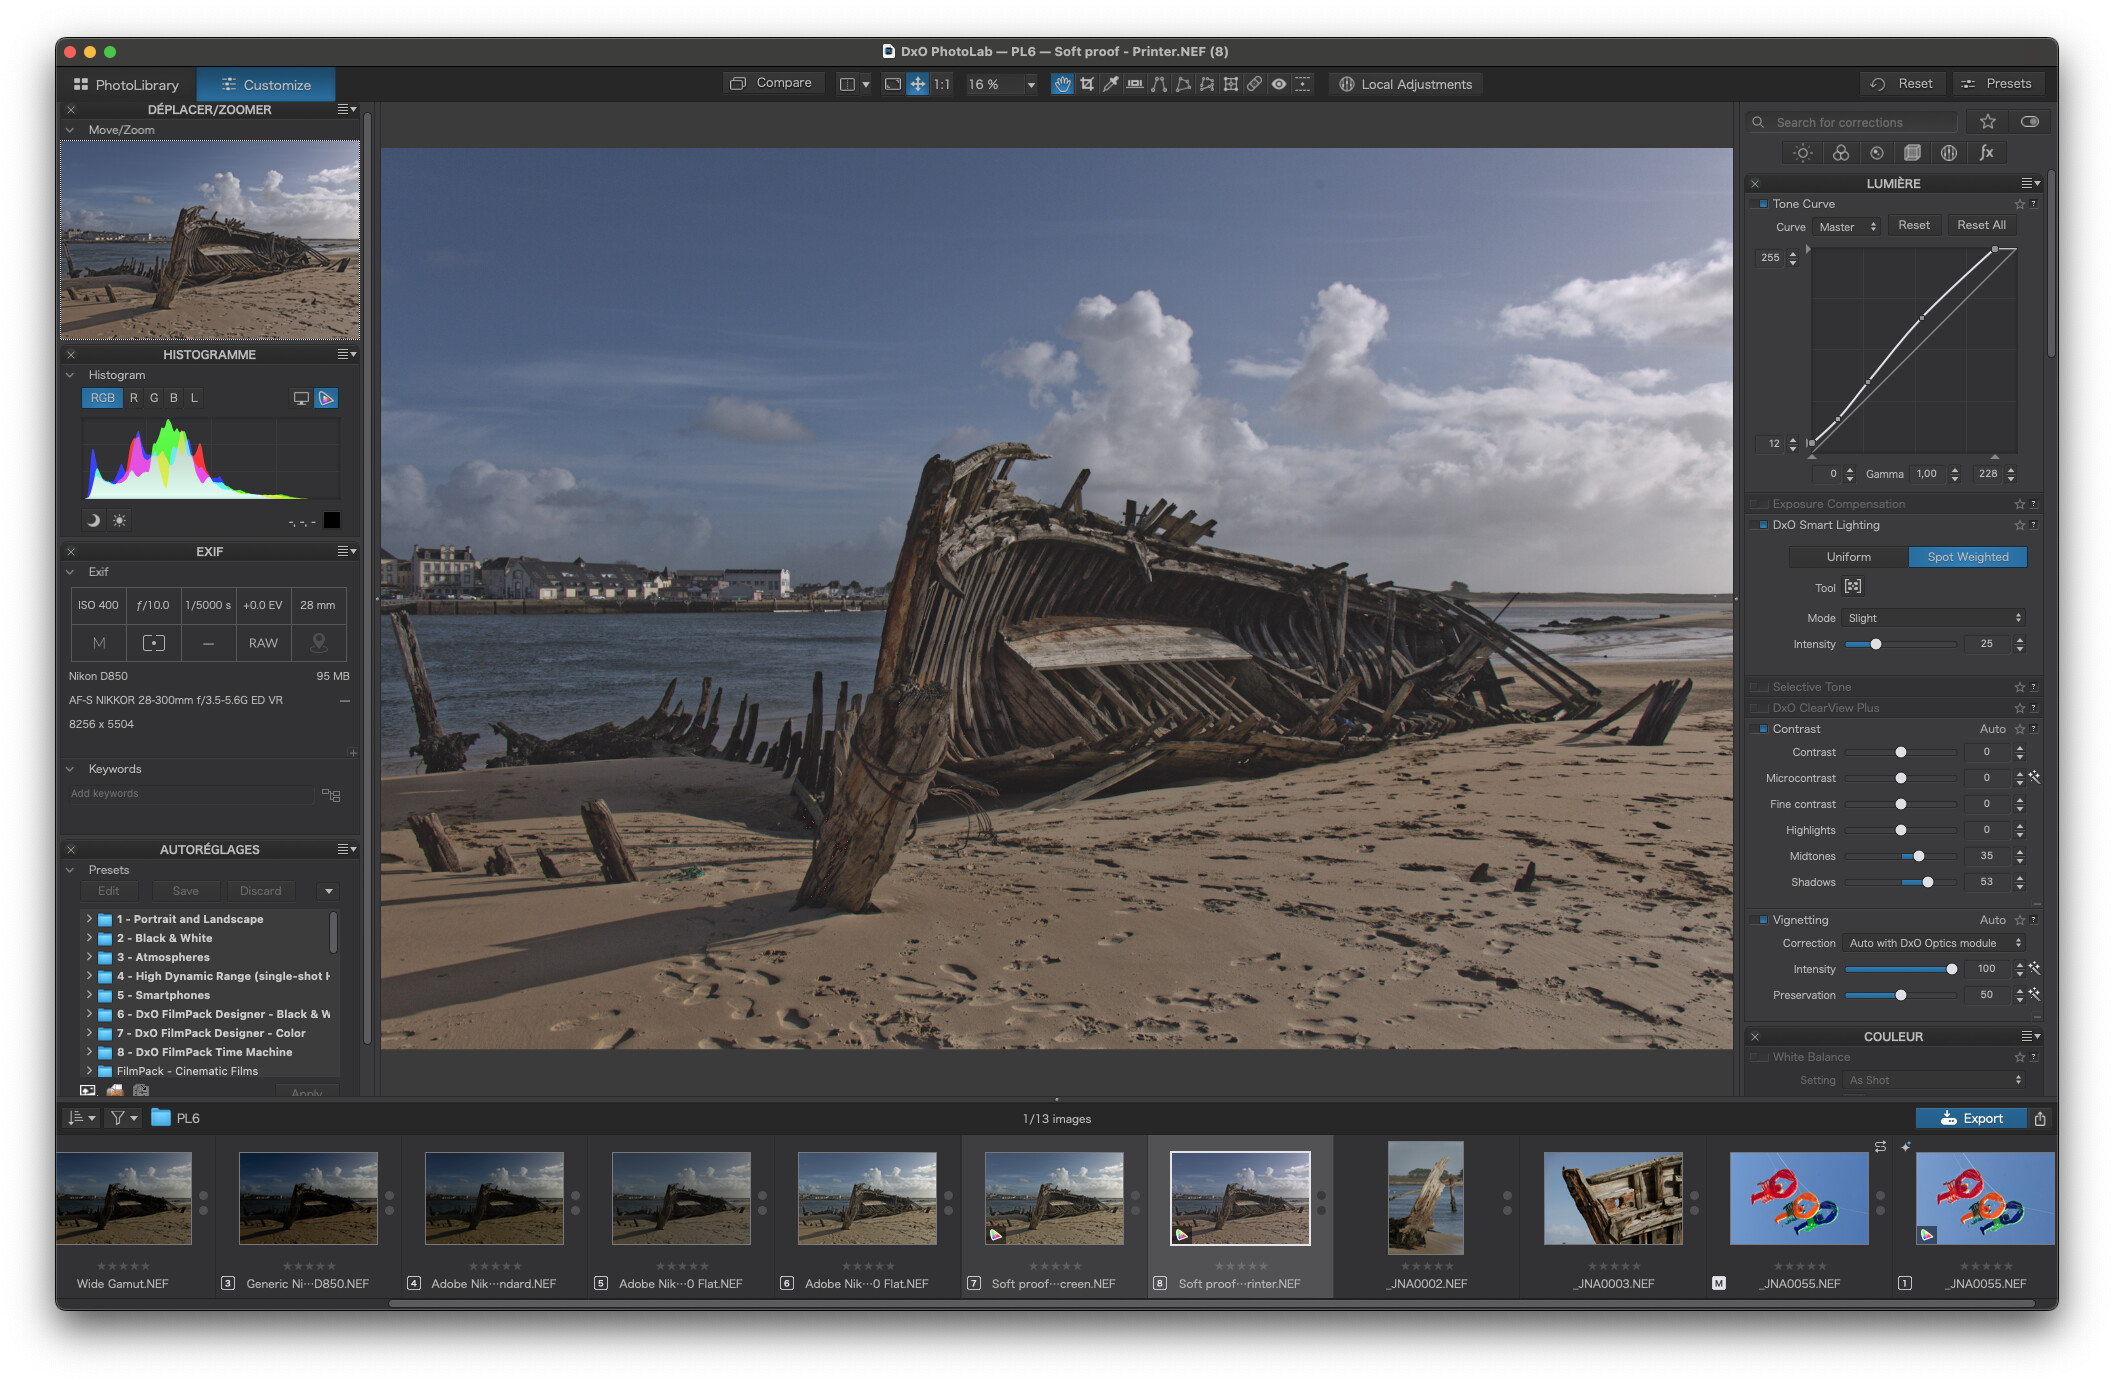
I suppose, for me, the colour gamut indicators were meant to show saturation and not luminance. So I was surprised to find I had to use the Tone Curve instead of the Colour Wheel.