One step at a time.
Can you see this…
… or this…
One step at a time.
Can you see this…
… or this…
Not quite…
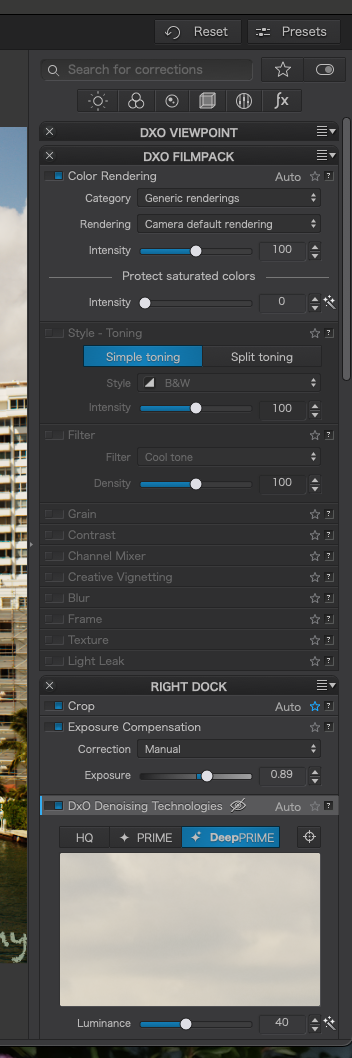
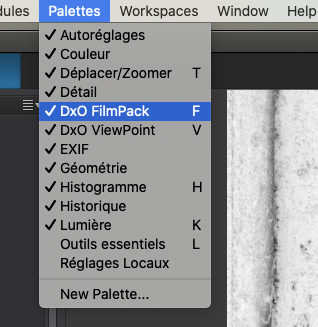
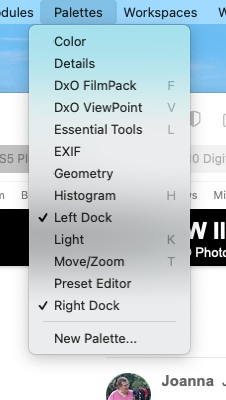
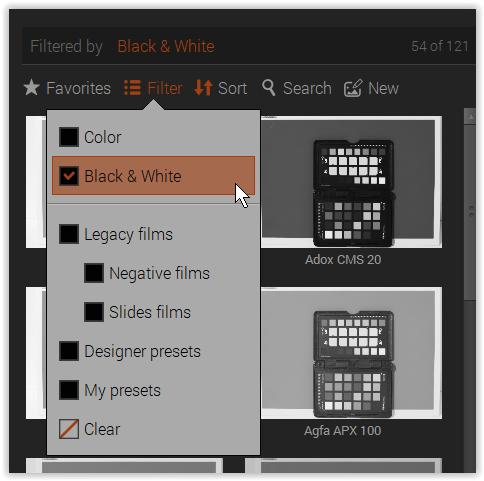
Here’s what I see for Palettes:
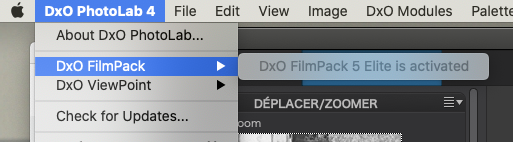
When I click on DxO PhotoLab 4 I can see that DxO FilmPack is activated.
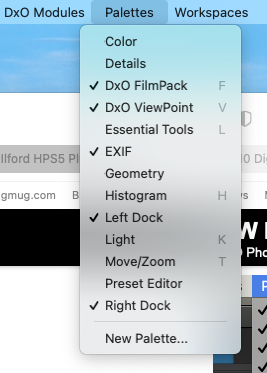
Now that I’ve selected DxO FilmPack, I do see all the selections I thought I was looking for, so I think you answered my original question - not sure how I would have known to do that without your help. I think DxO should have added this detail someplace, but maybe everyone is expected to have their own Joanna to tell them this.
I added a few more that seemed useful - should I add all the ones that you have selected?
Hmm, added later, some of those tools were already included in the Workspace I downloaded, so they now show up in two places. Maybe instead of adding the entire palette, I should simply add the tools that I will be needing, if they didn’t originally show up in my palette?
If you look at my Workspace, everything above where it says “Right Dock” was not there at the top until I did this - but I know a lot of these things had been added to “Right Dock”. Maybe instead of selecting the entire palette, I should just select the tools I need, to be added under my heading of “Right Dock”?
Actually, I should have just answered your question, and done nothing until I heard back from you… I can remove my changes, and then follow your advice.
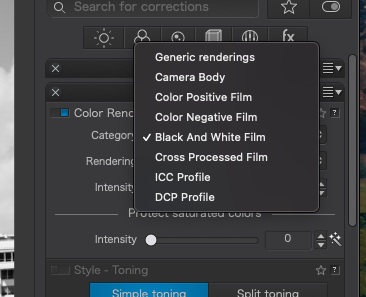
check your last screenshot
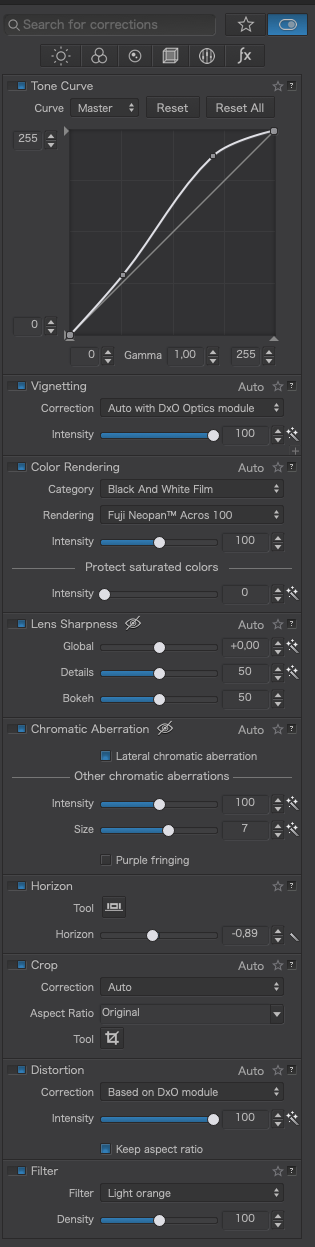
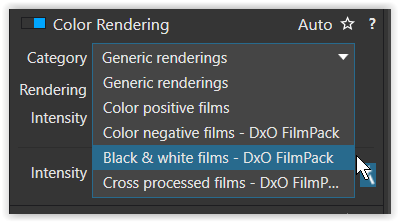
→ section Color Rendering → Category → …
FilmPack 5 Standalone
I get something close, but apparently not from DxO FilmPack???
Assuming you are using PL4 and have updated it, shouldn’t we see the identical thing (other than for language differences)?
After changing the category to B&W, click on the “rendering” box (just below the category box) to get this selection. Then, select any of the proposed renderings.
My configuration: DPL4 and FP5 (both Elite) on macOS Mojave.
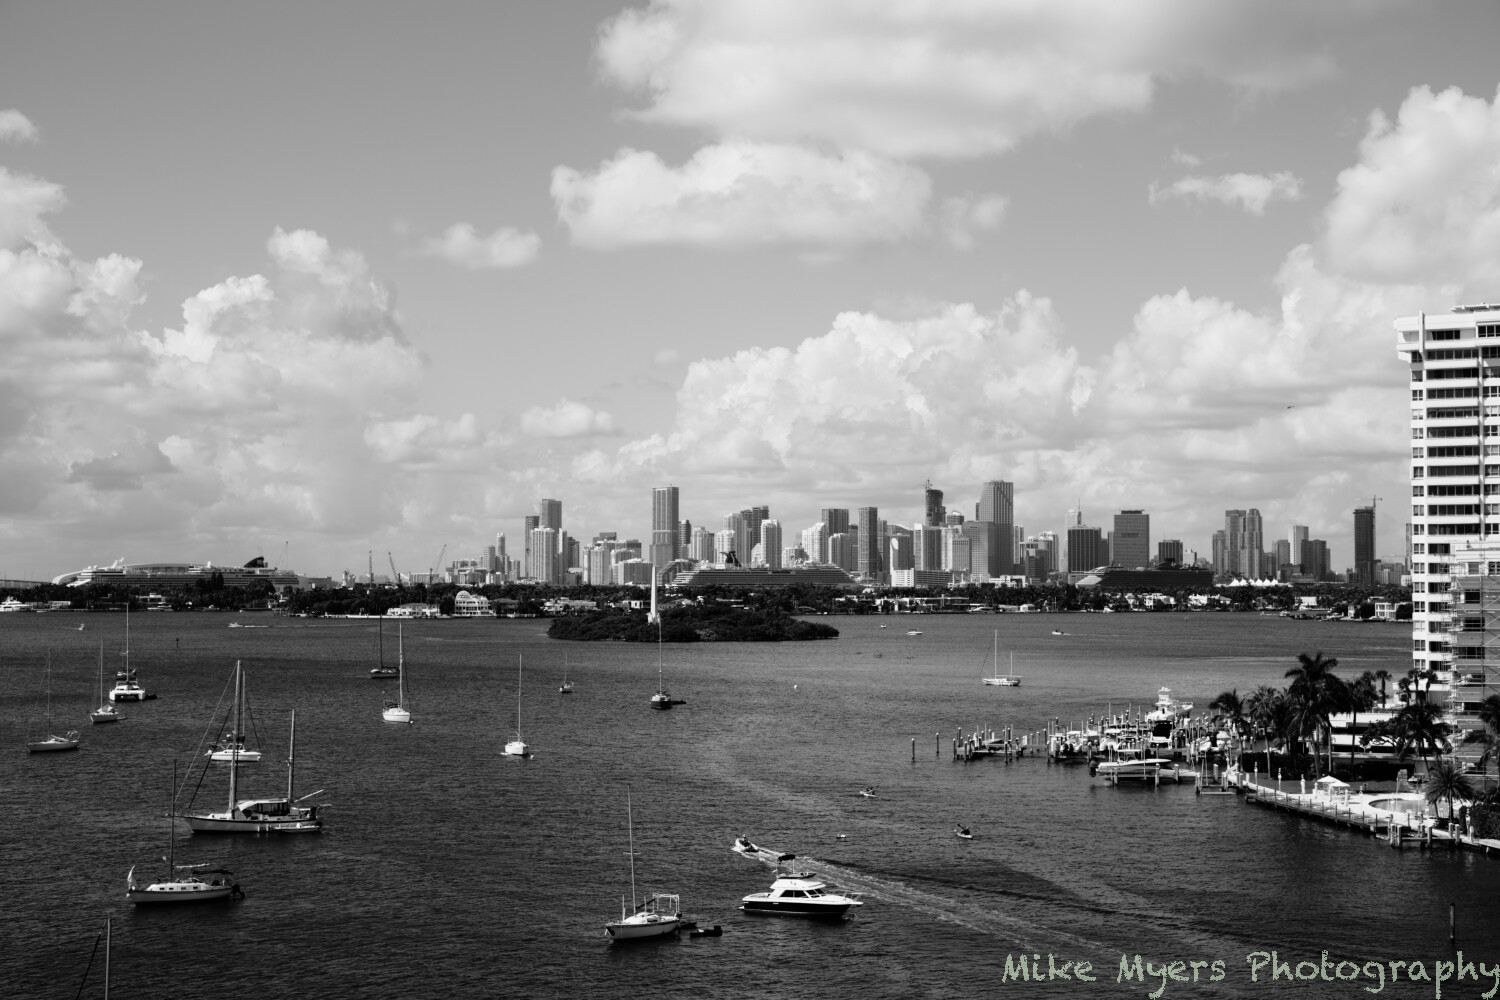
I haven’t done much to the image, but when I select “Fuji Neon Acros 100” I get an interesting result, and when I enlarge to 100% I get something I have doubts that I could get on film. My Fuji Neon Acros 100 film just arrived, and I will take a similar photo at a similar time in the day, but I have doubts that 100% it will look like what I’ve got from my M10…
L1003030 | 2021-09-26-Skyline, sunny and stormy.dng (26.9 MB)
L1003030 | 2021-09-26-Skyline, sunny and stormy.dng.dop (11.9 KB)
I need to clean the sensor - will do that once the battery is fully charged.
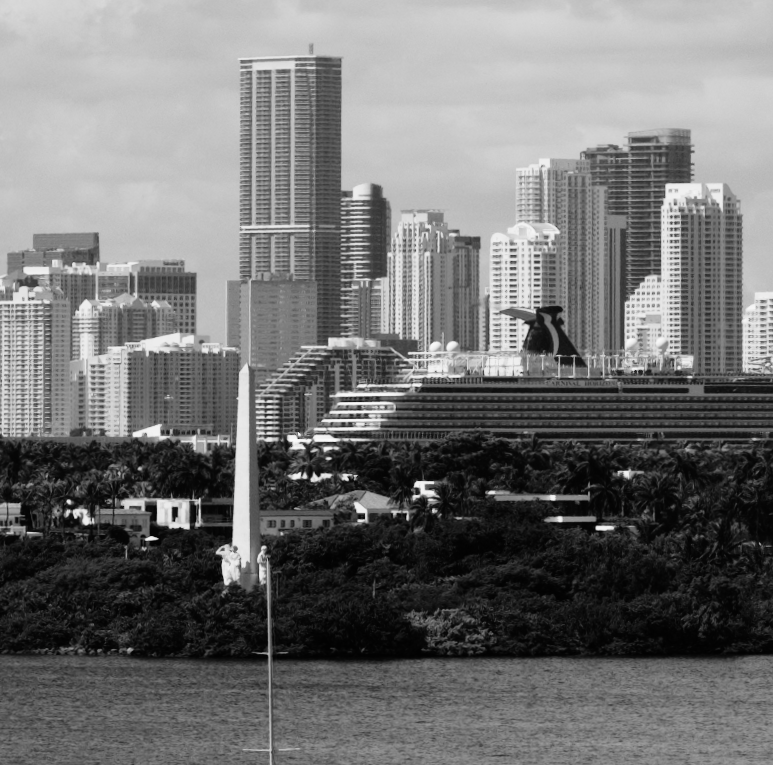
I have my doubts if my film scan will have all this detail at 100% crop. And while I very much like what I see here, it is better than I could ever accomplish in the 60’s and 70’s, in my darkroom.
(Once again, you are going to get me going just fine, as before, but just “reading the instructions” didn’t even get me to the first step…)
We are using the same software, but I am running macOS Big Sur version 11.6.
I think I just did what you suggest, and I select the same film that I just bought, but haven’t tried yet.
Let me start by saying Wow! That is one impressive B&W!
Just an aside, it’s “Neopan” not Neon ![]()
This is so typical of Fuji Acros 100 and is why I love it so much. You see, it really doesn’t take much to transform a good digital capture, taken with great glass, into a stunning B&W image.
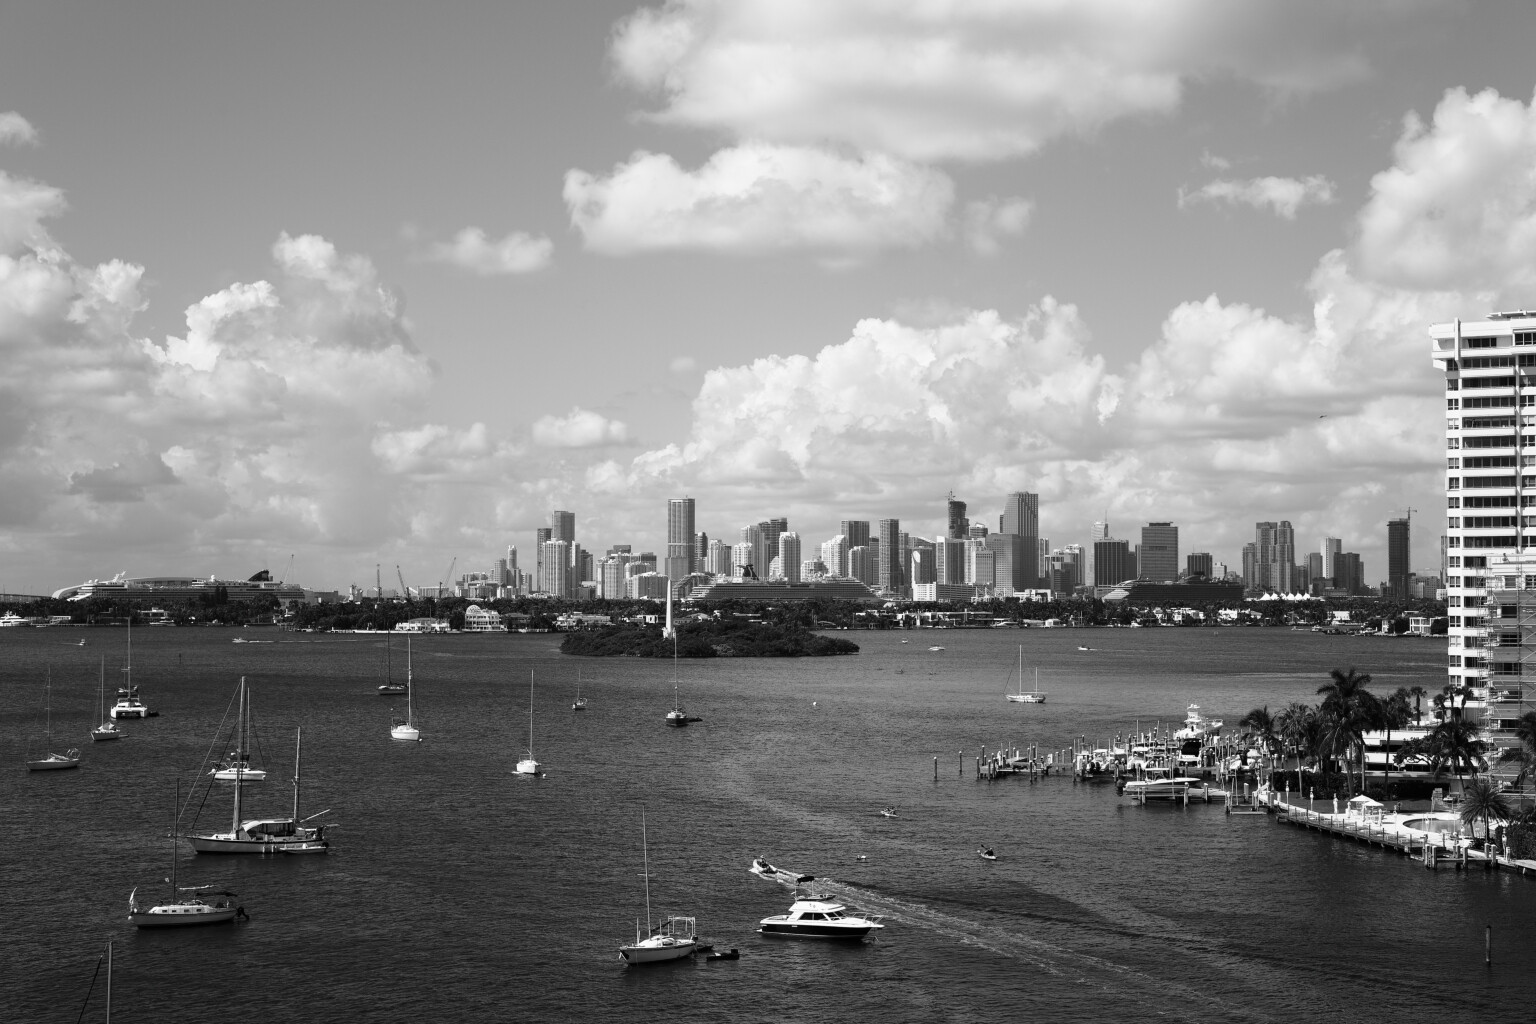
I have reworked it from scratch, not because it needed it, but just to see if my way of working made it any different… and it really didn’t. I will let you judge whether it is better or not, I wouldn’t like to call it.
Here are the adjustments I made…
And here is the DOP file, with your colour original as master, your edit as VC1 and my edit as VC2.
L1003030 | 2021-09-26-Skyline, sunny and stormy.dng.dop (33,6 Ko)
Please note, the majority of what I have done, I wouldn’t consider “more right” than what you have done, but there are one or two little things that I would definitely have changed…
Don’t change the colour balance in the colour original before applying the B&W preset. If the WB was set to 5600°K ±0 on the camera, leave it at that. After all, with film, you don’t get that option, it has its own sensitivity to various colours and you don’t want to change that unless you are going to use “B&W film” techniques like filters.
You should always apply the default optical module corrections: Vignetting, Lens Sharpness, Chromatic Aberration and Distortion. These will correct and make the most of your lens and are automatic in their levels when applied.
At 200 ISO, with a beautifully exposed shot like this, you really don’t need noise reduction at all.
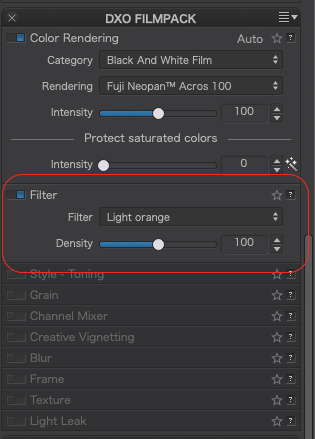
As you can see, I didn’t up the exposure like you did, choosing instead to adjust the tone curve. And I added a Light Orange filter to better (but subtly) separate the clouds in the sky.
My personal feeling is that the sea texture was too “crisp” in your version and doing things my way has softened it a bit. But that is purely down to opinion and I stand to be corrected.
In any case, my version will give you possible alternatives to play with when the time comes for comparison with film.
This I am really looking forwards to. I have always wanted to see what kind of differences a 24mm x 36mm film shot and a 24mm x 36mm digital shot exhibit and you are ideally placed to get as near as possible the same shot, framing, weather, etc.
It may be minor changes, but I instantly liked your version more - just from the sky!
I will check everything else once I download your .dop file - which I’m doing right now!
OK, start with tone curve before changing everything by changing exposure. Sounds reasonable, even with the small amount I already know.
Apply default optical modules - I thought they were already “on”, but yeah, I was doing film images before. I will check from now on.
Light orange filter? Hmm, I’ll have to figure how to do that I was thinking of a red filter, but it would have been too much, and at that time, I didn’t know how. I’ll figure that out after dinner.
Sea texture - I dunno - I liked it the way I had it, but I like your setting too. Need to think about it.
Sky - your sky is much more effective than the “nothing” that I did. Now I need to figure out how you did that, since it wasn’t a graduated filter in local adjustments.
The photo wasn’t anything special - I wanted a test photo, so went out on my balcony, waited for the small boat to move away from the stationery boats, and CLICK. The skyline looks best right after sunrise, but I didn’t want to wait until tomorrow.
Update - at 100%, your water looks better!
I too tried a red filter and it was away too much.
It was by using the Filter tool on the FilmPack palette
Right, I’m off to bed ![]()
![]()
![]()
Hmm, now it seems obvious. It certainly wasn’t this morning! So I can test filters until I find one I like.
I bought FilmPack and ViewPoint, but haven’t gotten around to using them much - actually, until earlier today!
I’ve got an hour until I’m off to sleep. Maybe I’ll get an early morning photo of Miami, just as the sun is coming up. If it’s a clear day, that is the best time.
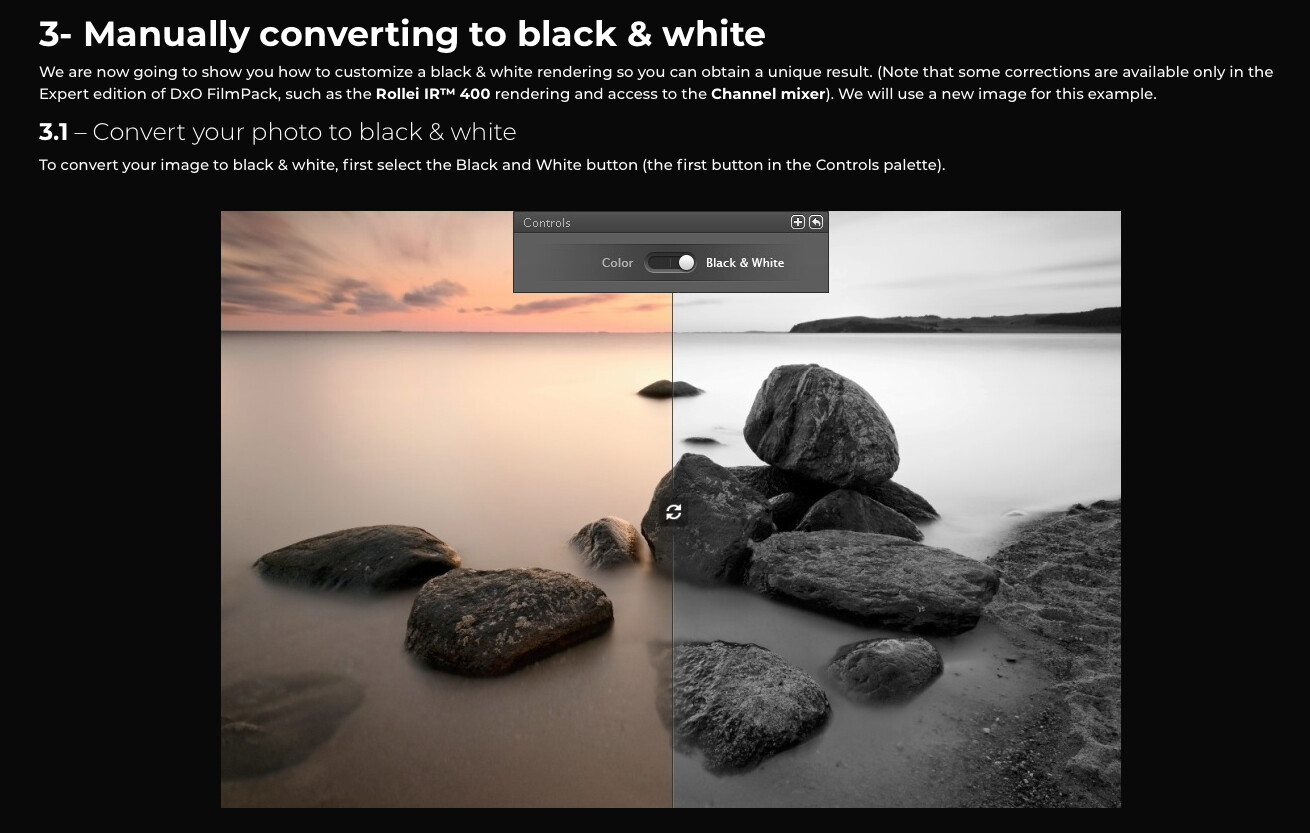
Before I forget - this page is from DxO:
https://www.dxo.com/project/convert-your-black-white-photos-with-dxo-filmpack-4/
How do I access the comparison video and other information as shown in step #3.1, where I can use the slider to compare my color image with the B&W image I am creating?
That “Control” tool is missing, or maybe I haven’t selected it?
First, that is FilmPack 4 which is not the current version. It was replaced by Filmpack 5 more than 6 years ago. The color to black and white control is actually near the top of the right control panel under the histogram as explained in the text of your link. In the Windows version that control does not actually appear overlaying the image as indicated in your screenshot, Perhaps it does in the Mac version. See the screen image directly below Converting to black & white in a few clicks The split screen is the side by side preview which shows before and after.versions of your image. There should be an icon on the top of the screen to invoke it. SInce the control layout of FP4 on a Mac may be a bit different than FilmPack 5 on Windows, I’m not sure exactly where that button is in that version. I assume you realize that this is the standalone version of FP4 and not the version embedded into PhotoLab.
Mark .
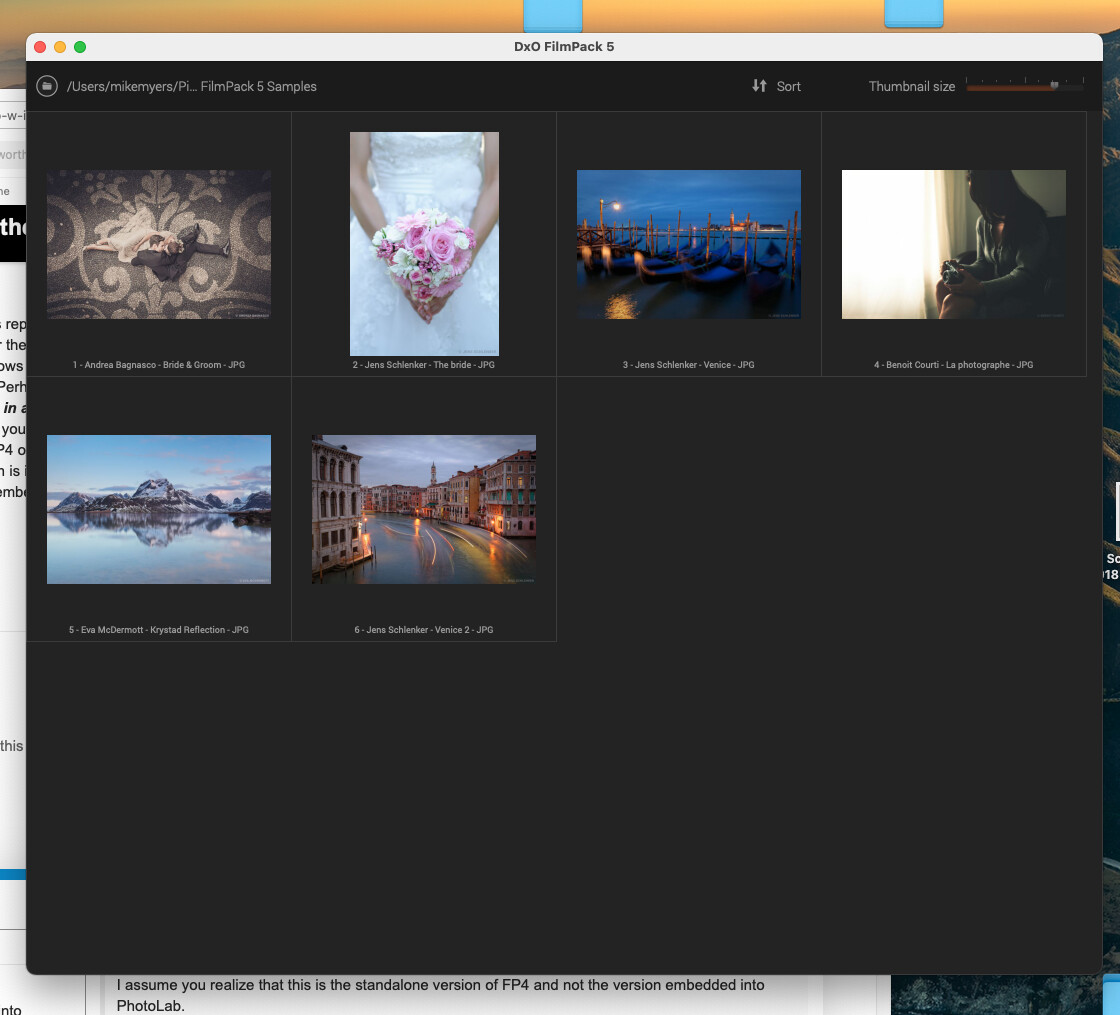
Thank you Mark - I didn’t know those things. I know nothing of previous versions of FilmPack, and yesterday I think was the first time I opened the standalone version. But when I do so, I get the following screen.
All I see is samples - isn’t there more that should show up on the opening screen, more or less like the PL4 user interface? I’m probably missing something right in front of me, but I have no idea how to start using the program once I am at this screen. (I don’t expect to ever use it as a standalone program, but I’m still curious as to what I did wrong, as in how to start using the program, and not review the examples.)
(At the top of my Mac screen, I clicked on the magnifying glass that finds programs, and it found “DxO FilmPack 5.app” . I assumed this was a link to the standalone program? I quit looking after a few minutes, but I assume there is a way to start the standalone version of FilmPack 5.)
The first thing you need to do is to go to the circle top-left and choose the folder you want to browse. Only when you double-click on a thumbnail, does the “toolbox” appear on the right.
But be aware this is an application for processing non-RAW files. As your workflow is 100% PL, just close it and forget it. It is only there because it was installed along with the plugin for PL.
The standalone app should be in your Applications folder.
Ouch. OK, I will close the app and forget it. I didn’t know any of what you wrote, as I never used the app until yesterday. I never even considered that the tools wouldn’t show up until I selected an image.
You get a few dozen “bonus points”, and the guys who wrote these “how-to” articles get demoted for leaving out all the information you just posted.
EOF. The app is closed, and forgotten.
yes – in the ‘basic’ version ![]()
Joanna,
The standalone Elite version of FilmPack 5 supports raw files.
Mark
Thanks Mark. I use your excellent FilmPack presets Updated FilmPack 5 Elite Color Negative Partial Presets and have never used the standalone version as its UI is far from ideal in my mind.