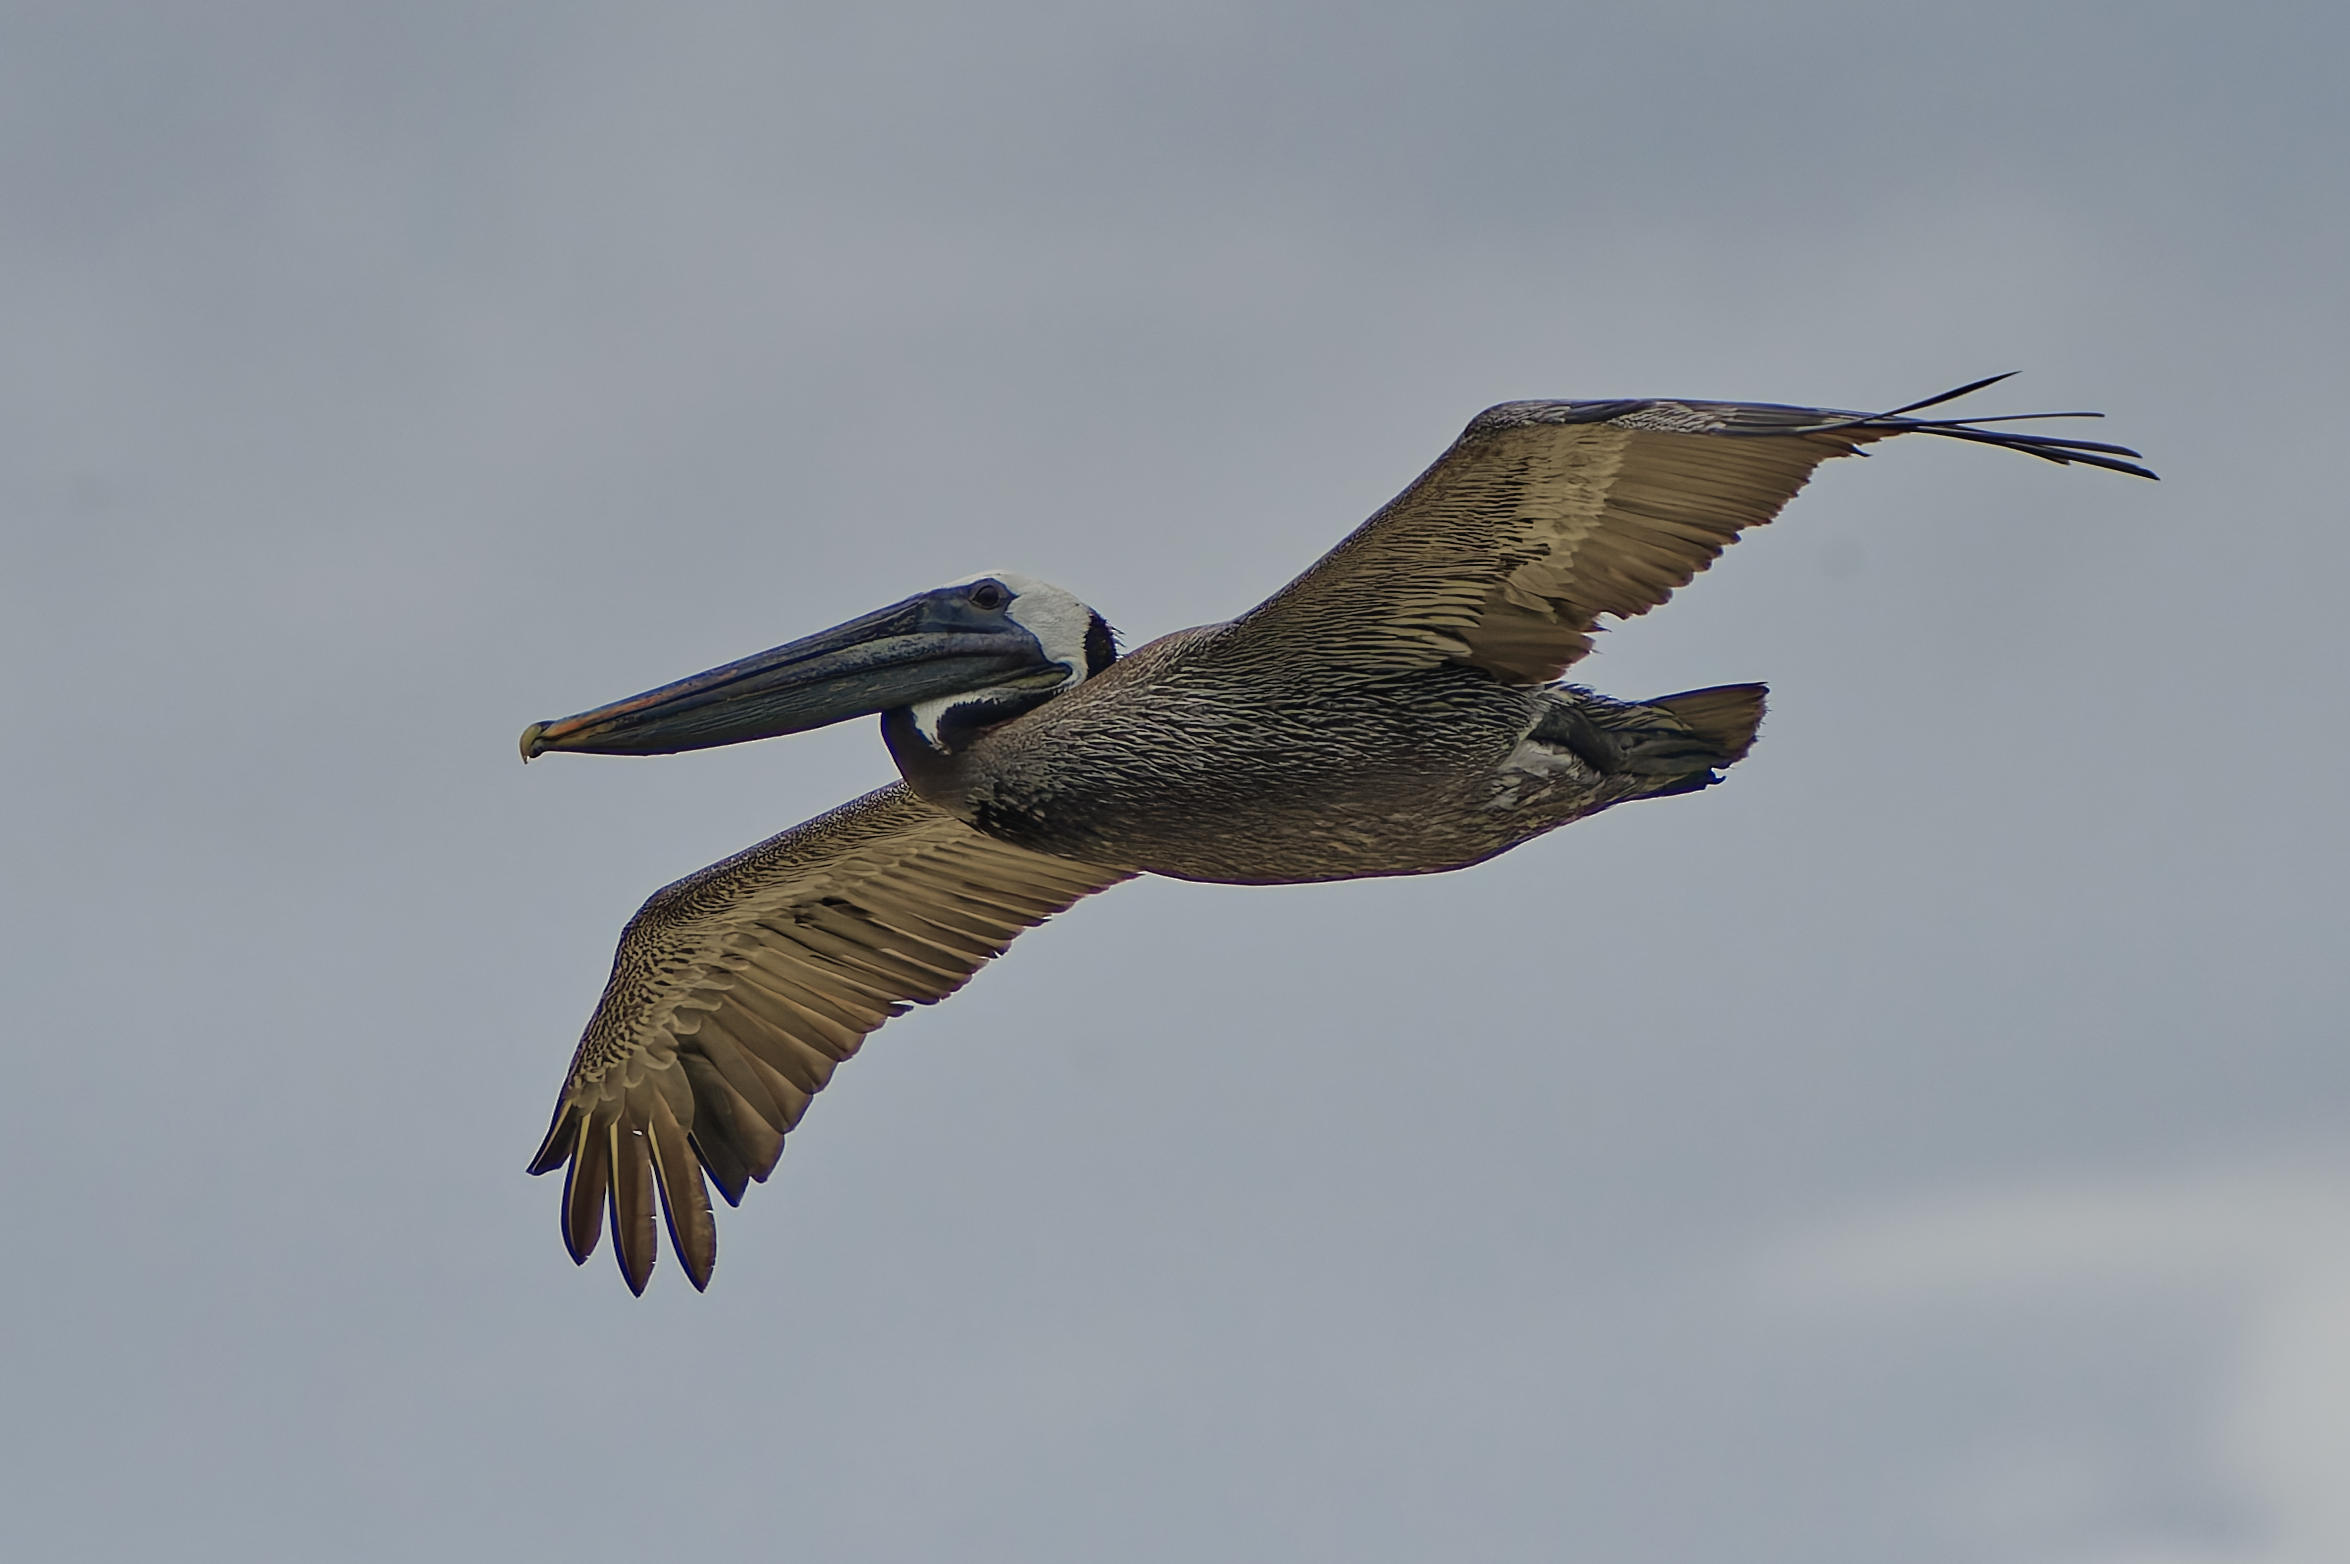
PL9 has been stable and reasonably performant on my M4 Mac Studio (as it should be on new hardware). But AI masks will sometimes leave a bright fringe around a selection, especially when trying to darken a background.
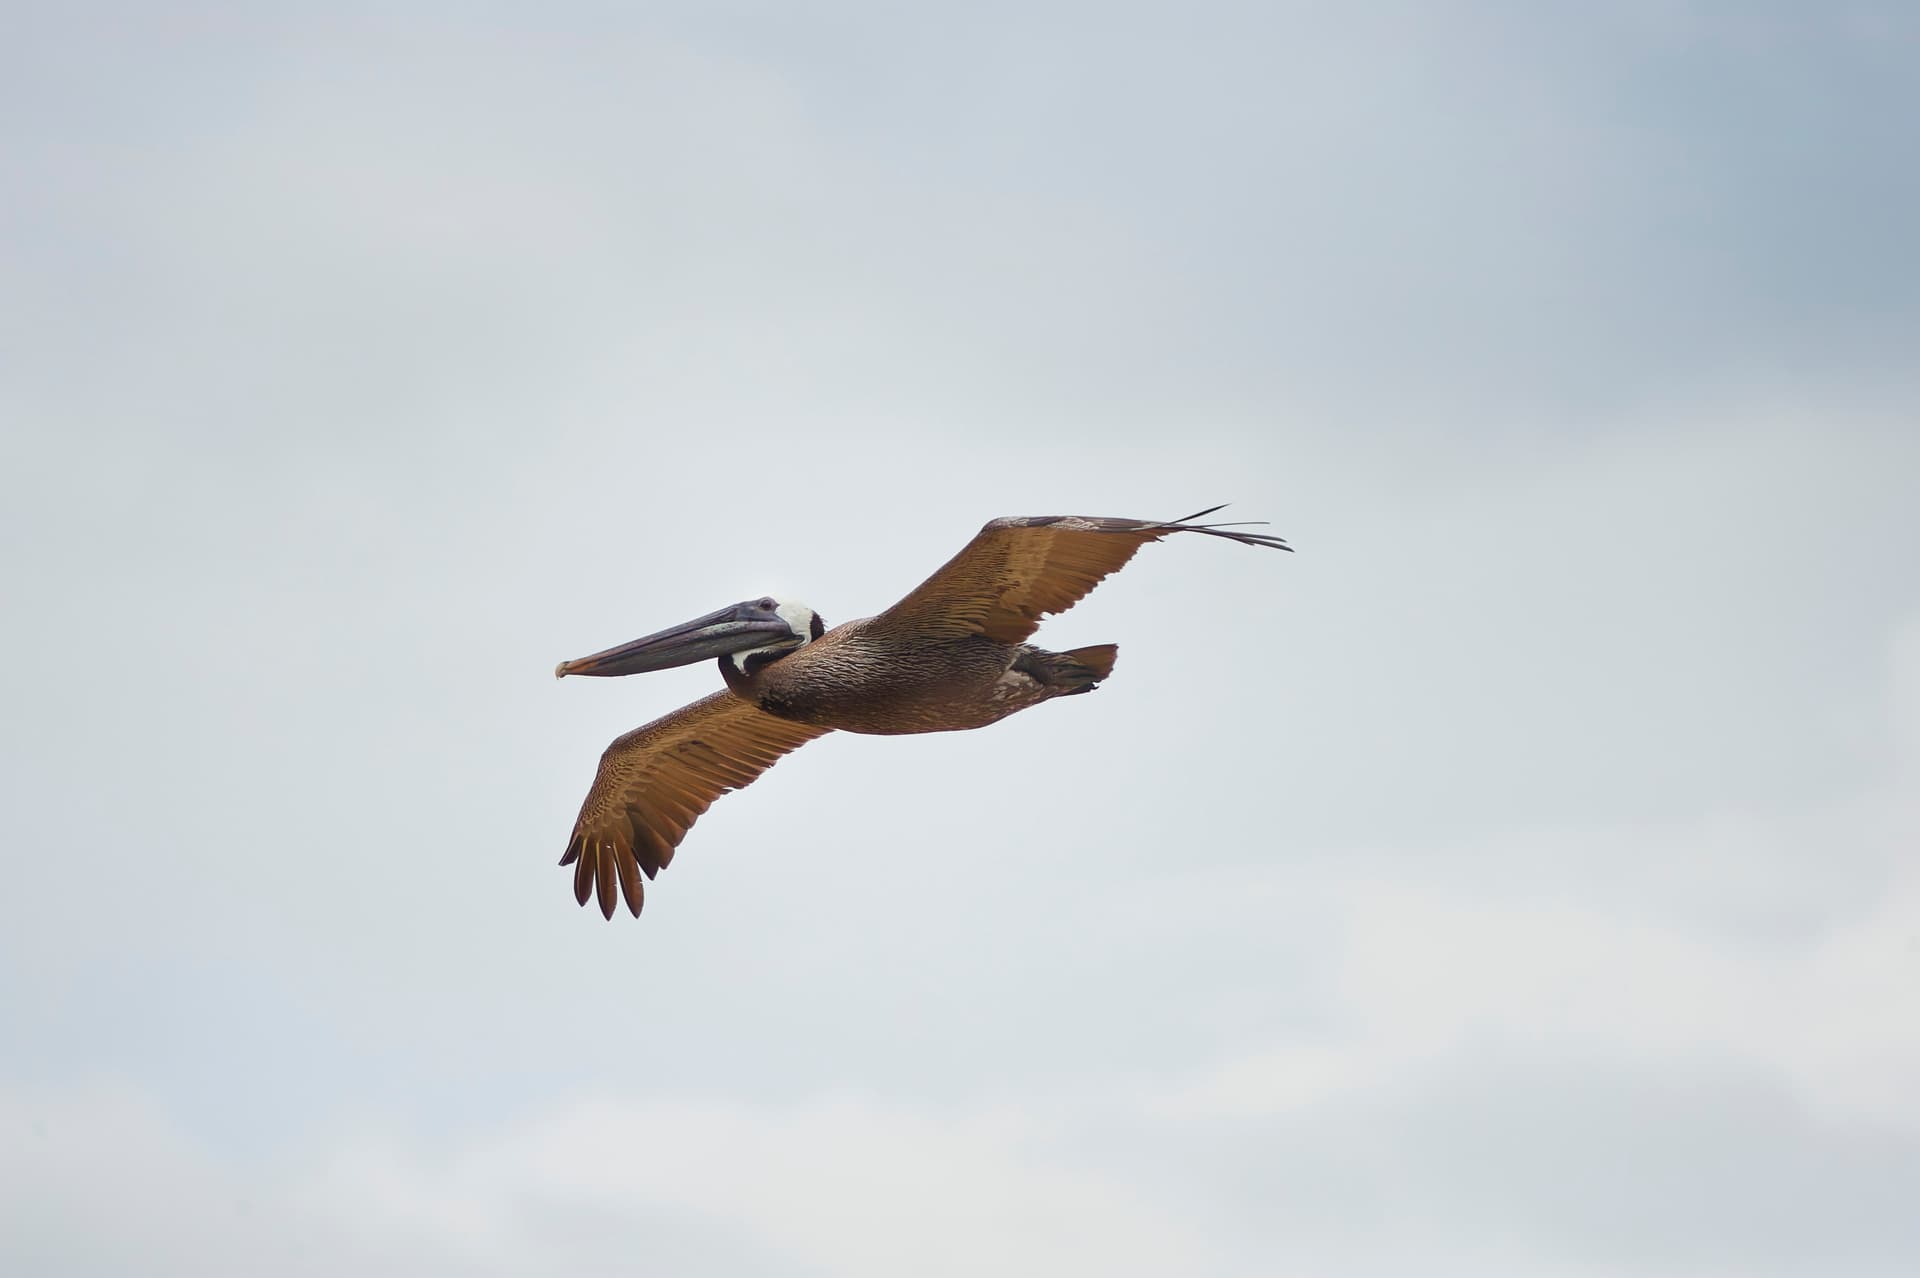
In this example, it’s easy to see the fringe on the belly of this bird:
What you have provided is a Linear DNG exported by PL from the Nikon D3 NEF raw file. Impossible to tell what corrections were made, perhaps too much ClearView , microcontrast, or CA corrections, or AI Sky mask way of doing things on a high DR photo. BTW, one has to rename your DOP file to get the corrections you made to the DNG file readable in PL9.
To possibly get some useful feedback, please provide a link to the original NEF file.
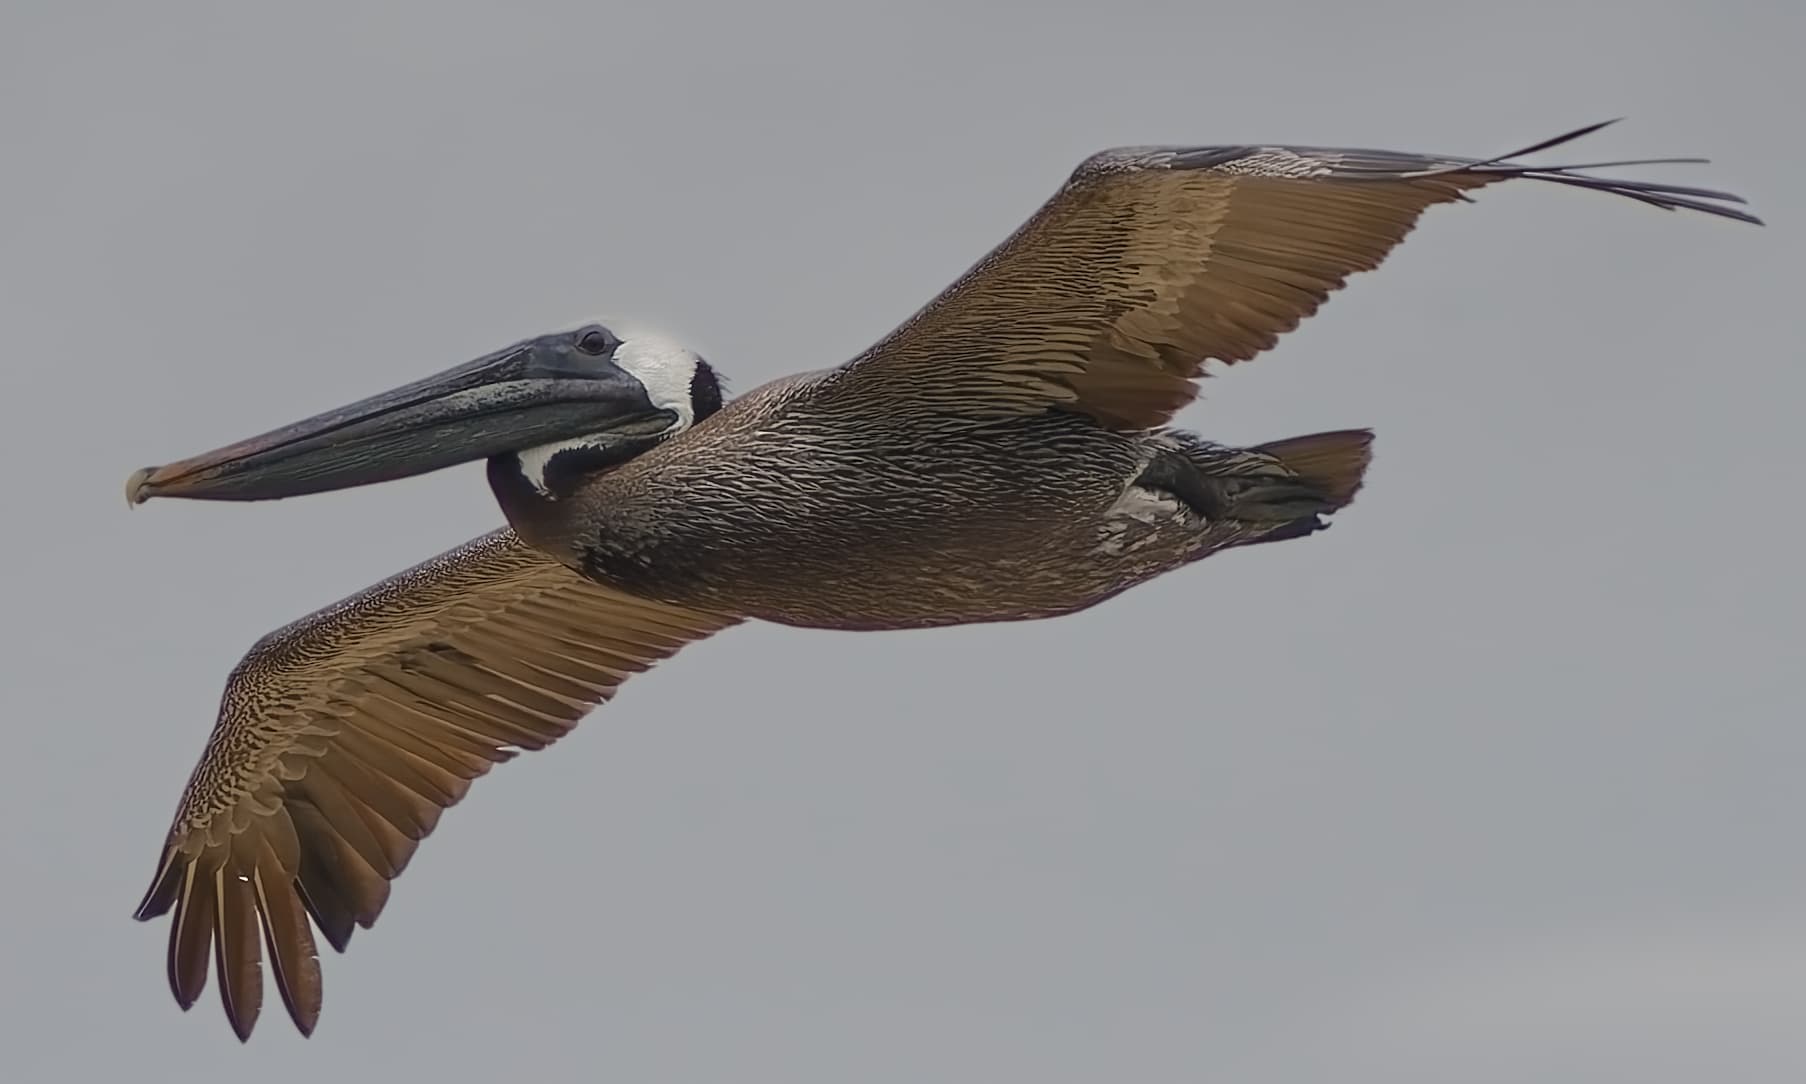
Here’s my quick and rather conservative try on the DNG supplied, NO local adjustments. The halos are still there but possibly due to some edits made before Linear DNG export. Full resolution crop, 2350 x 1564 out of 4257 x 2832.
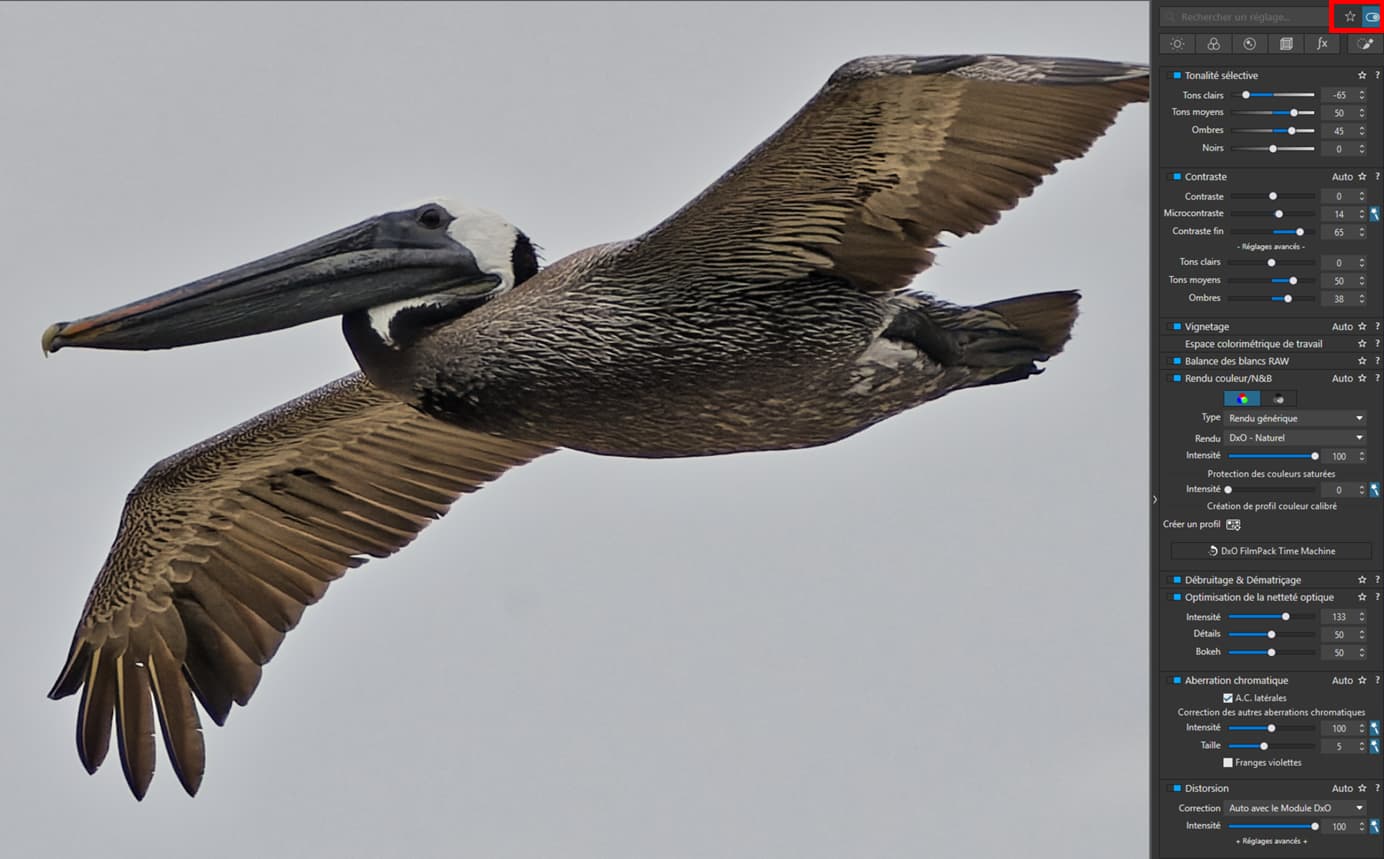
Strangely enough, it seems that most halos came not only from AI mask but also from Lens Sharpness Optimization set to 133 (+1.0 in PL8 language, default in PL8, while default in PL9 is 100). The exported version used PL9 75 setting, but maybe 100 will be also OK for you. Maybe it’s surprising for me because I try not too to shoot things with too much contrast. In PL8 I’ve used LSO setting of +1.0 only for poor lenses or when I used strongly negative microcontrast for other reasons, mainly bokeh (you can also try Unsharp Mask with negative Intensity setting for that).
In the attached example, AI mask was used only for the whites on the birds head. I don’t have any experience with that, so it can probably be done much better.
I’ve used FilmPack fine-contrast +50 for midtones and blacks. If you don’t have a FP license, you may increase Microcontrast a bit instead. Never seen the bird in real life, so maybe colors/saturation/brightness is bad. Tune to your taste.
I’m not an expert, so I would like some possibly harsh feedback too, especially from birdwatchers.
The DOP file, my edits are in the last VC: _RJR9934.NEF.dop (35.7 KB)
EDIT: I’ve chosen Nikkor AFS 70-200/2.8 VR + TC2.0 III profile, one out of 6 offered by PL. Was I right? On a 12mpx D3 with any 70-200/2.8 + TC2.0 and heavy crop you can’t expect too much detail…
I’m not sure why PL gave me such a wide choice of profiles to choose, including Sigma lenses (sic !), while exiftool shows ‘LensID : AF-S Nikkor 70-200mm f/2.8G ED VR II’ (btw, I know this lens quite well). Focal length was reported as 570mm, so clearly some TC2.0 was used, not sure why PL came with TC2.0 III - maybe they don’t support it with earlier versions. With large parts of Nikon makernotes remaining secret it’s hard to tell, based on the metadata alone, what was actually used. Anyway DxO (and Nikon) should look into it.
Having a second look, I’m dissatisfied – now it looks a bit artificial to me. Maybe the wings are too bright and the beak is slightly too dark. There’s something wrong, still hard to define for me. As said, I’ve never seen the bird myself, but I suspect the true colors are a bit different. With what I call ‘dirty light’ and shadow recovery it’s always hard to get it right.
Looks like a common problem with AI masks. I did try AI masks in Capture One 16.6 for faces and spent a lot of time feathering the edges, especially at hair boundary. Finally I gave up, using just their Face Retouch tools, which work much better. For most cases PL Control points, Control Lines, or other masks are a better choice. Standard test is for trees across the sky.
As others have said, consider “old school”.
Use a CL to select the entire sky. Use the eyedropper and reduce the chroma/Luma sliders to tune out as much of the halo as possible. This draws some /most of the bird into the mask.
Then, subtract the bird (subject). For this case, and others I’ve tried the negative CPs seem to do a better job than the new negative AI masks for halos and missed areas.
For stubborn edges, such as the subtle difference of the white head from the sky luma, consider a negative brush or improved auto-brush (old eraser mode).
Agree, not as fast as 'AI" and cannot be copy/pasted to a sequence of photos.
On the photos I’ve tried, the AI masks often leave a “halo-like” edge. This is ok when the adjustments are very minor, or when the surrounding is low contrast, but a high contrast sky adjustment is the most obvious.
Admittedly illogical, or in my head, but negative selections seem often easier, then inverting. Way too much time have I spent trying to get a perfect mask for a dark bird against a high contrast sky.
Perhaps version 10 will add a “refine edge” option for AI masks.
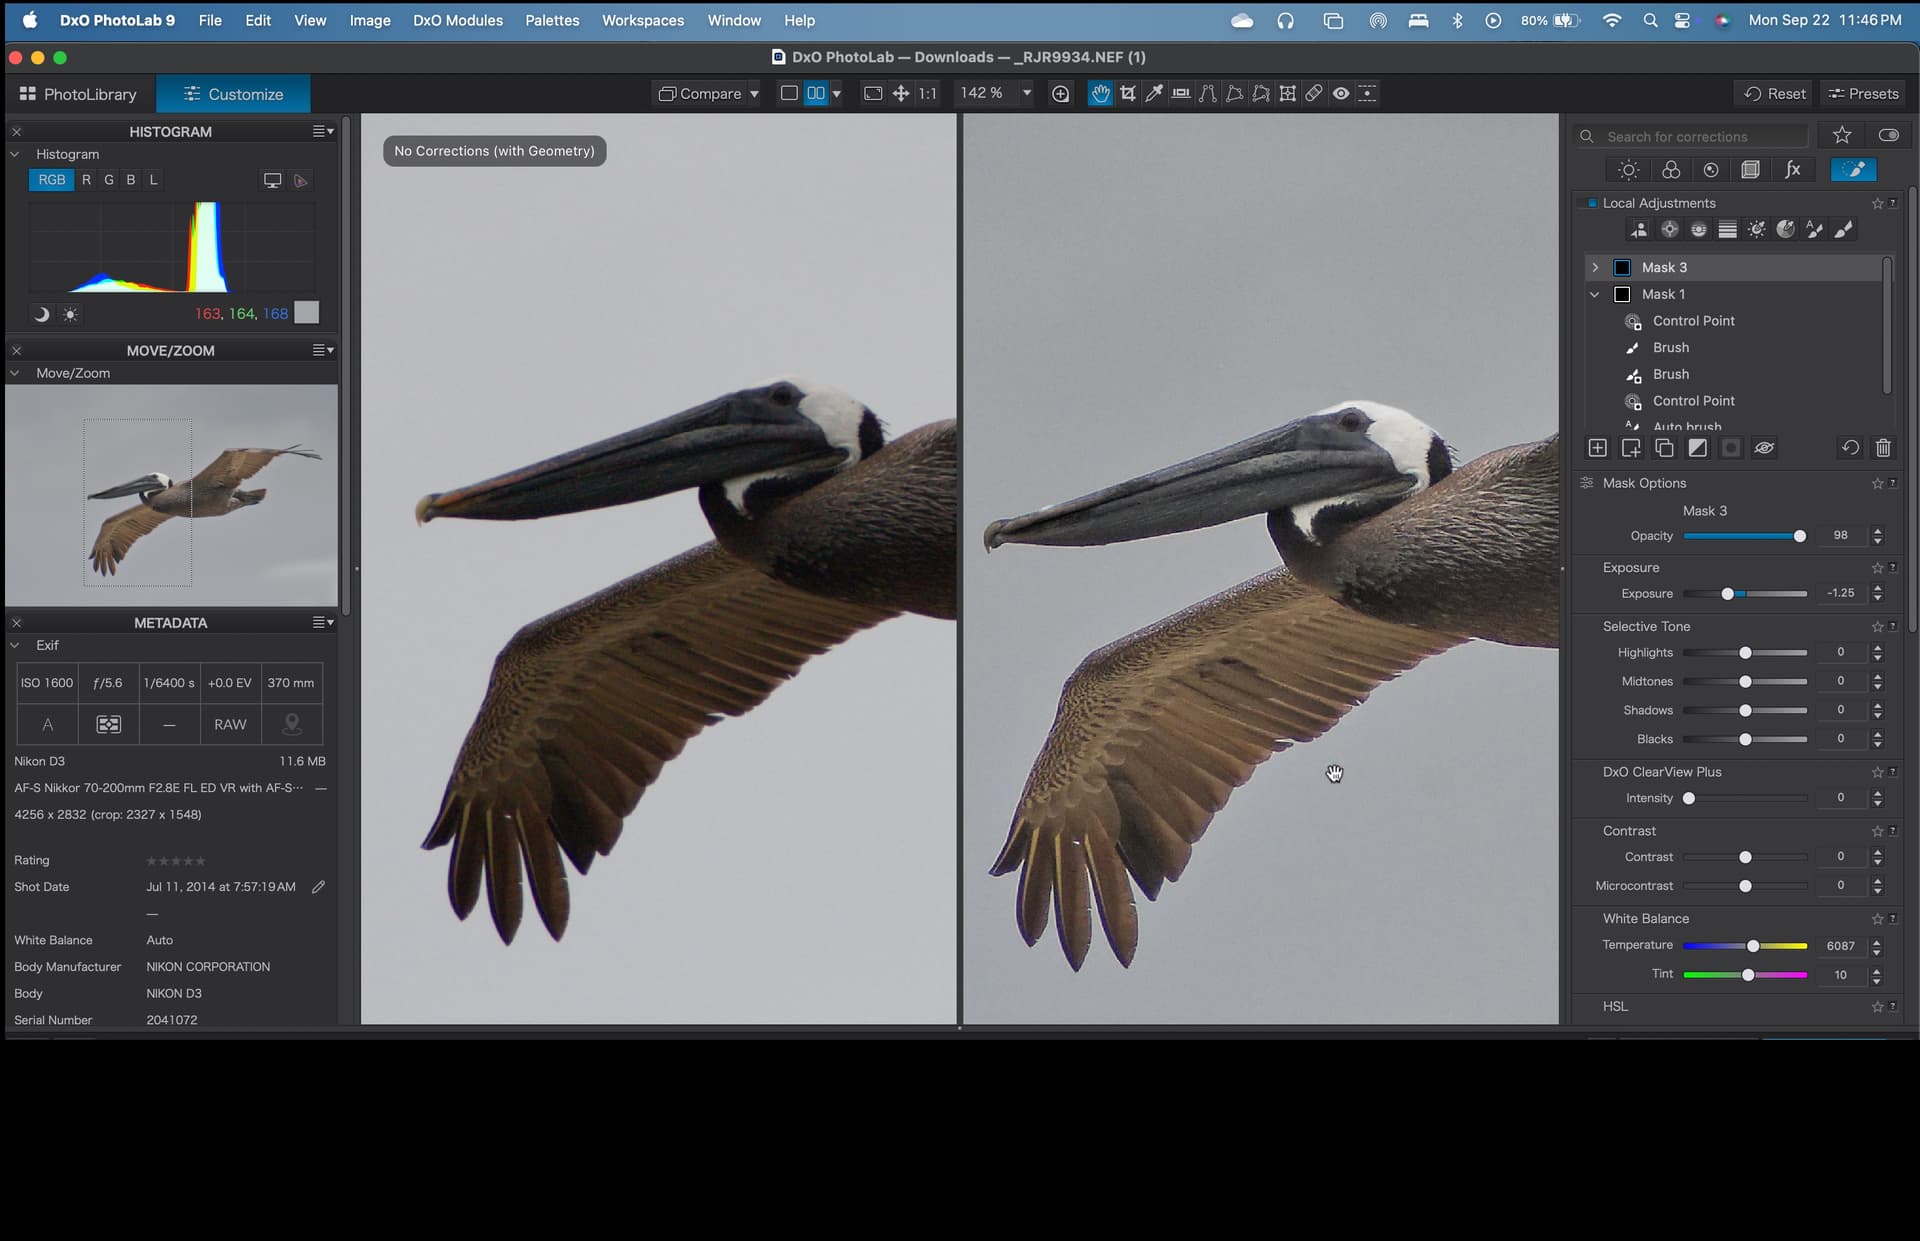
Bird at +0.4 exposure, sky at -1.75 to push it. Original left, edit right to darken sky
Actually, even AI mask may not perfect, you can try a few thing:
Decrease the GLOBAL Lens sharpness (not the MASK lens sharp) or turn it off. Global LS can raise similar issues. I realize in special cases 2 weeks ago (very small bright lines vs dark background). I’m sure its helps a lot.
Turn on the Moiré and change to to 100% (its in the Detail). It’s may also helps
Try to add with ad (to the Bird mask) with Auto Brush / Brush a bit in the edges manually (in the bird)
May worth to add a bit Blur to the sky mask. Just a bit. Its may helps to smooth out the edges.
P.s.: i try to find time to check in more details.
I think the result is the difference between AI Bird + AI Bird invert mask.
Not so much difference, but seems exist. May is also raise some some issues, may in higher contrast areas. But just may.
Add-on: as i try, the difference mask like: add exposure, zero down the saturation seems near negligible difference (in my opinion), may the WB change is visible.
Halo’s on AI masks isn’t an uncommon thing, and I say this in general rather than specific to PL, it happens in LR for example. Some of what you are experiencing might be due to the bird being set against the sky which is always going to be tricky in trying to make it look natural and not stand out.
In LR there are “hacks” in masking where you can essentially create masks of the fringing to help eliminate the halo, there might be one in PL as well, in LR it involves creating and subtracting masks from one another, or it might be a case of getting out the brush tool and running it round the edge to remove halo.